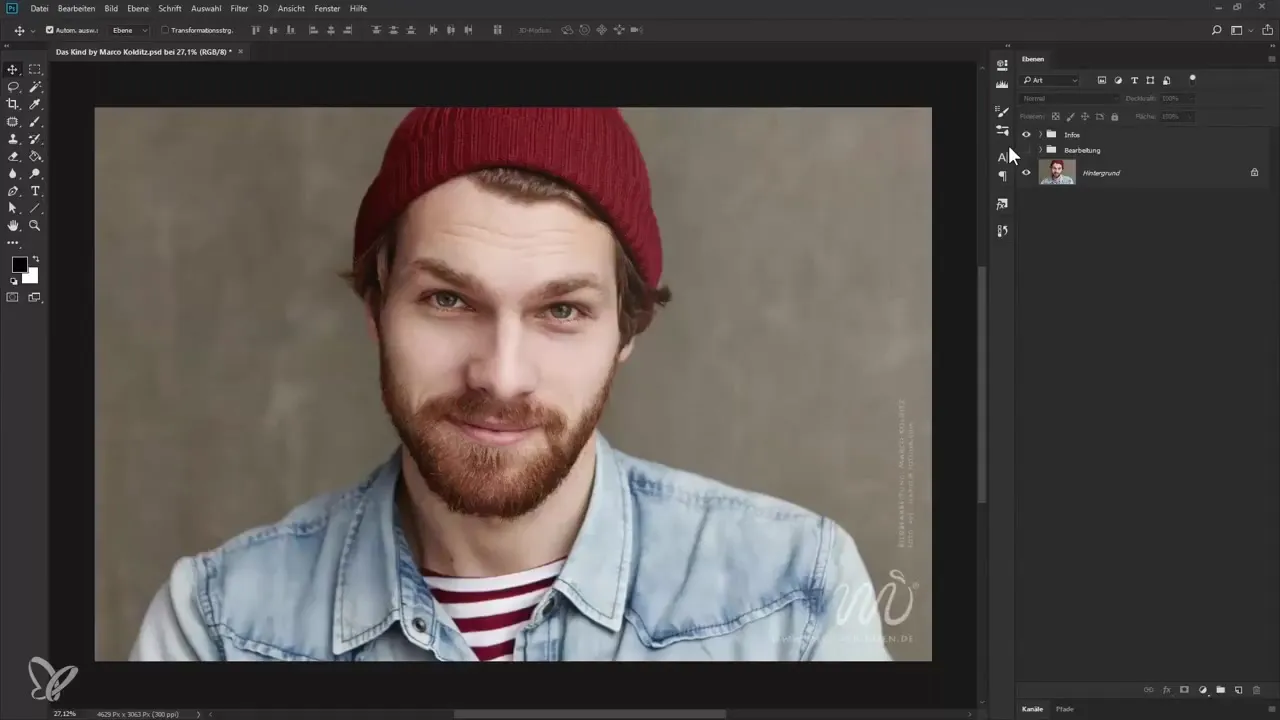
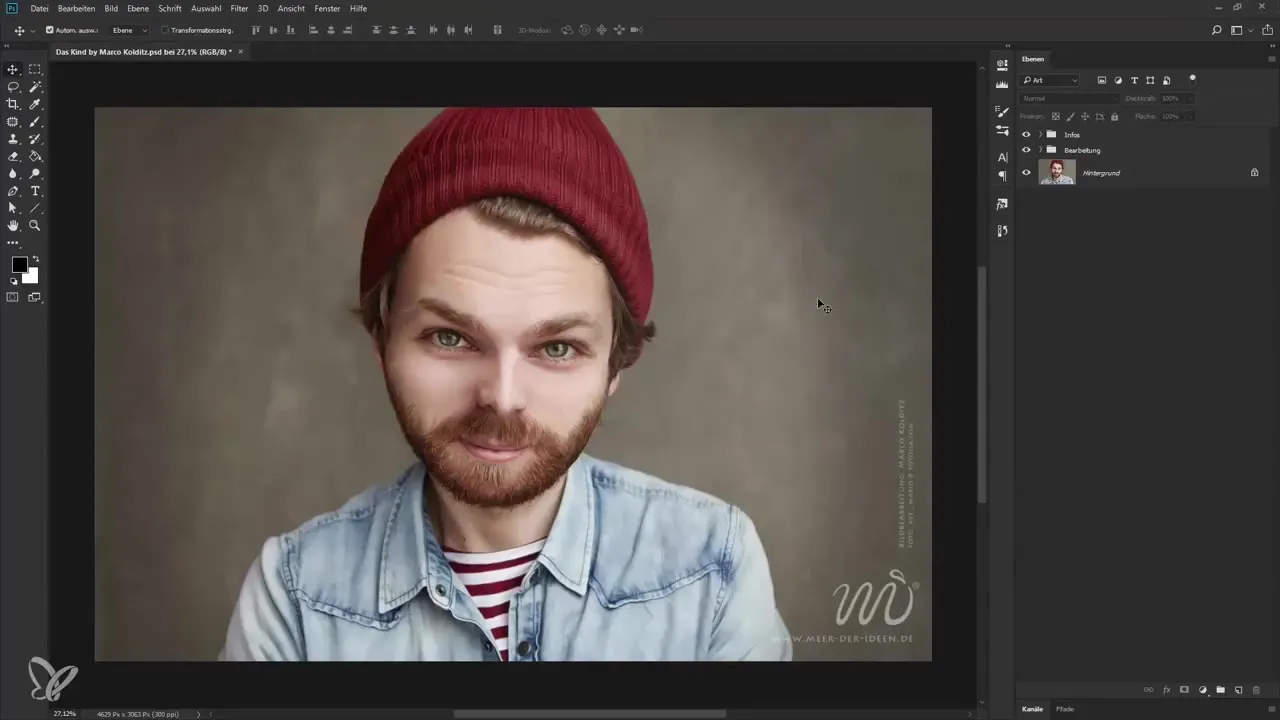
Welcome to your journey into the creative world of Photoshop, where you will learn how to make an adult man look cuter using the baby schema. This technique allows you to emphasize certain facial features without completely altering the image. Be ready to expand your Photoshop skills and achieve impressive results.
Main Insights You will learn how to effectively apply the baby schema through subtle adjustments of image components, while preserving the appealing naturalness of the person. You will also learn which characteristics are crucial for the baby schema.
Step-by-Step Guide
Start by selecting a suitable image for your editing. Make sure that the person is photographed against a solid color or minimally structured background to facilitate later editing. An optimal image makes it easier to apply the baby schema, as distractions are minimized.

Once you have selected your image, open it in Photoshop. You can do this by clicking on "File" in the main menu and then selecting "Open". Choose your image and click on "Open". This prepares the canvas for the upcoming adjustments.

The next step is to bring out the visual features that make up the baby schema. These features include a large head, a high forehead, a round face, big eyes, and a small chin. Start with the big eyes; you can use Photoshop's selection tools to isolate and focus on these specific areas for editing.

After editing the eyes, it’s time to shape the face. You can use the "Liquify" function for this. You can find it under "Filter". Make targeted adjustments to the cheeks and chin area to create a rounder face, which is another typical feature of the baby schema.

Once you are satisfied with the face shape, move on to the forehead. A high forehead contributes to the childlike effect. Again, you can apply the "Liquify" function to permanently adjust the shape of the forehead.

An essential element of the baby schema is the harmonious combination of portrait features. Regularly check the overall image to ensure that all adjustments harmonize well together. You can also play with the transparency of individual layers to gently implement the desired effects.

Don't forget to adjust the exposure and contrast of the image to the new facial features. A cohesive composition of the image is crucial to achieve the cuteness and overall appearance.
In the end, you should save the image. Go to "File" and click on "Save As". Choose the desired format before saving the image to ensure that your edits are preserved.
Summary – Guide to Applying the Baby Schema in Photoshop
You have now learned the essential steps to apply the baby schema in Photoshop. From image preparation to selecting the correct tools and specific adjustments, you can now enhance and creatively design your own images.
Frequently Asked Questions
Which image features are important for the baby schema?A large head, a high forehead, a round face, big eyes, and a small chin are critical.
How can I adjust the face shape in Photoshop?Use the "Liquify" function for targeted adjustments of facial parts.
How do I save my edited image in Photoshop?Go to "File" and click on "Save As" to secure the image.
What should the background of the image be like?A solid color or minimally structured background makes editing easier.
How can I ensure that the adjustments look harmonious?Regularly check the overall image and play with the transparency of the layers.

