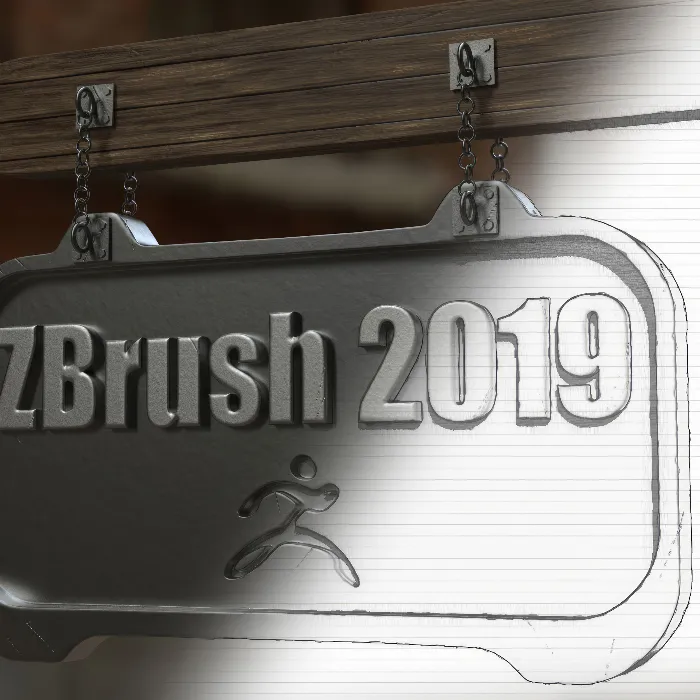
With ZBrush2019, you can effectively turn creative ideas into 3D models. This guide shows you how to create an engaging door signmodel by utilizing the new features of ZBrush. Special highlights include the Snapshot 3D tool, as well as Live Booleans and the ZRemesher v3.0, which make modeling even easier to design.
Key insights
- Effective use of the Snapshot 3D tool.
- Creation of 3D objects with Live Booleans.
- Optimization of models with ZRemesher v3.0.
- Working with subtools for better model organization.
Step-by-step guide
Step1: Preparations and start First, open ZBrush and load the project. You can start with the geometry of a star by clicking on "Edit". Activate the ground fora clear view and make sure you have a clean view from the front.
Step 2: Create the base shape Go to the Lightbox and select the "hard surface set". Enlarge the rounded square you want to use as the base. Duplicate it to make your changes and place it in the center. You can adjust the size as needed so that it forms a wider plaque.
Step 3: Add mounts Add mounts by duplicating another object and positioning it accordingly. Use the "Mirror" function to place the mounts symmetrically. This creates a clean and professional design.

Step 4: Cutting geometry To perfect the inner part of your model, duplicate the square again and stretch it so that it has the right shape. Use the "Boolean" function to subtract unwanted areas. Make sure that Live Booleans are activated for immediate feedback.

Step 5: Create the letters To create the text for the door sign, go to "Plugin > 3D Text" and select a suitable font like Impact. Place the text in the middle of your plate and adjust the depth. Make sure the text is clearly readable.

Step 6: Refine geometry Use the "ZRemesher" function to optimize your geometry. This will give you a clean topology. It not only improves the quality of your model but also enables better rendering. Adjust the polygon count to find the best balance between detail and performance.
Step 7: Apply surface noise Add "Surface Noise" to give your model character. Select the suitable texture and adjust the strength and size so that it looks good and fits the material choice. This gives your model a more realistic appearance.
Step 8: Finalize the mounts Model the mounts by using the "Insert Curve Brushes". Place them at the desired points of the model and make sure everything is centered. This function allows you to add additional details without affecting the base shape.

Step 9: Final touches Make sure all parts fit well together and delete any unnecessary subtools. The objects for your mounts can be synchronized using "Mirror and Weld" to ensure symmetry.

Step 10: Rendering Before finalizing your model, render it within ZBrush and in Keyshot. Adding deformations and playing with light sources can significantly enhance the image. Once the lighting conditions are optimal, export the final image.

Summary – Door sign modeling with ZBrush 2019
This guideshows you how to create an engaging door sign model with ZBrush 2019. You have learned how to effectively use the new features to bring your ideas into reality, and have gained an overview of the key steps in modeling.
FAQ
How do I activate Live Booleans?Go to the tool palette and activate the feature under the "Live Booleans" menu item.
What is the ZRemesher?The ZRemesher is a new tool in ZBrush that simplifies the geometry for an optimal model and adjusts the polycount.
How can I cut geometry?Use the Booleans function to subtract specific parts of your geometry. Make sure to select the correct subtool.

