Create a twist toy out of paper: DIY with video tutorial
Are you in the mood for a craft project that not only looks great but also spins excitingly? Then you will love this Paper Twist Toy! It looks fantastic, is super easy to make, and provides endless fun. With each turn, a fascinating pattern unfolds – almost magical! While crafting, you playfully train your concentration and fine motor skills, all without pressure. And the best part: You can create this colorful creation together with friends or your children – a lovely opportunity to be creative together, laugh, and be proud of the result.
You will find many more creative projects with us that will inspire you and invite you to join in. Our crafting instructions are structured in a way that you can easily follow them step by step – with clear photos and videos showing every move. We have also created a dedicated video tutorial for this project – lovingly designed and produced directly by us. On our YouTube channel, you will find this and many more original craft ideas and DIY projects – perhaps there’s something exciting for you too! Check it out:
This is how you can learn to fold, glue, and bring your spinning toy to life in a relaxed way. Discover how diverse and exciting Origami games folding can be – and how much joy DIY really brings!
This is how you craft your Paper Twist Toy
Before you begin: Don't worry, this craft idea is super easy! Everything you need is probably already at home. With a bit of patience and joy in folding, step by step, you will create your very own spinning toy – unique and colorful!
Materials:
- Colored paper (two contrasting colors work best)
- Scissors
- Glue stick
- Ruler
- Pencil
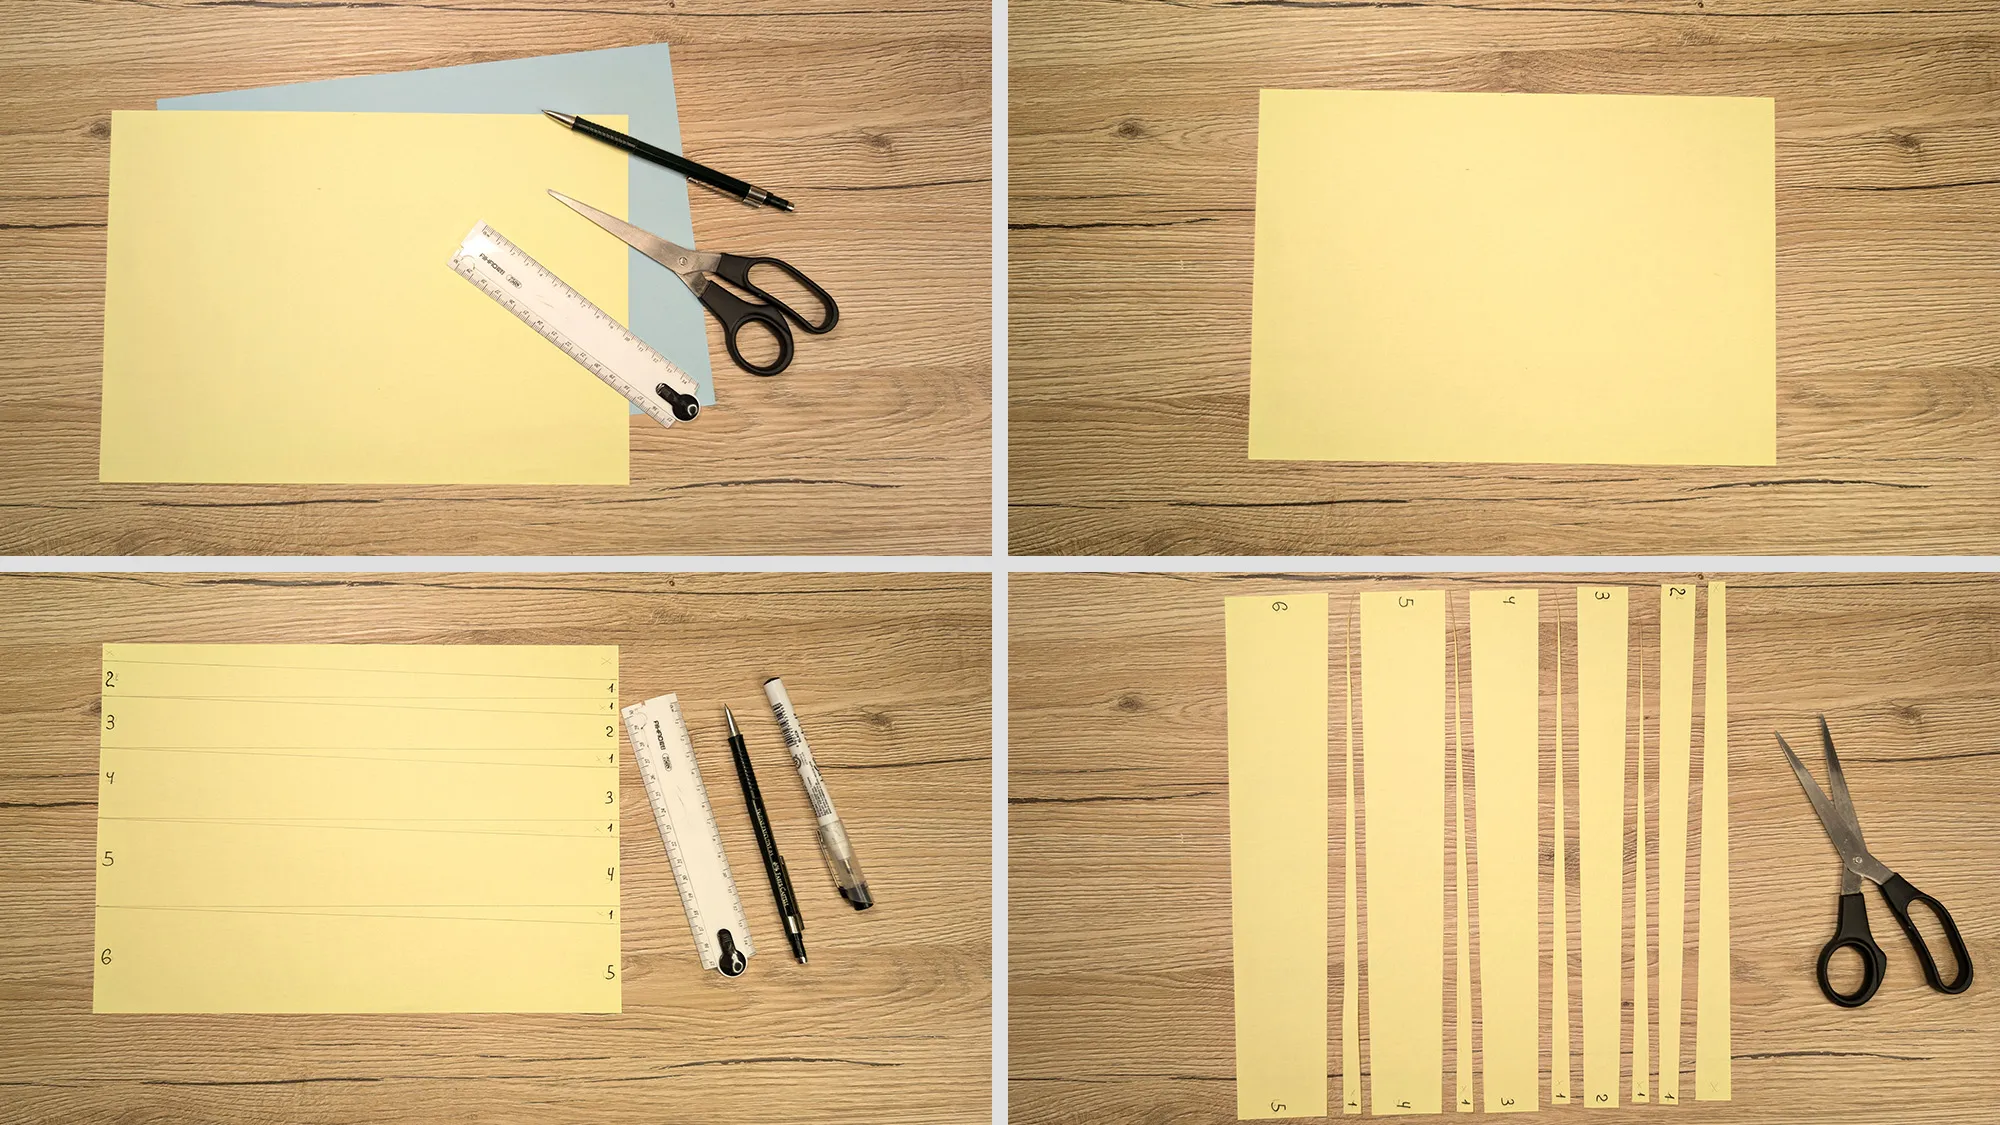
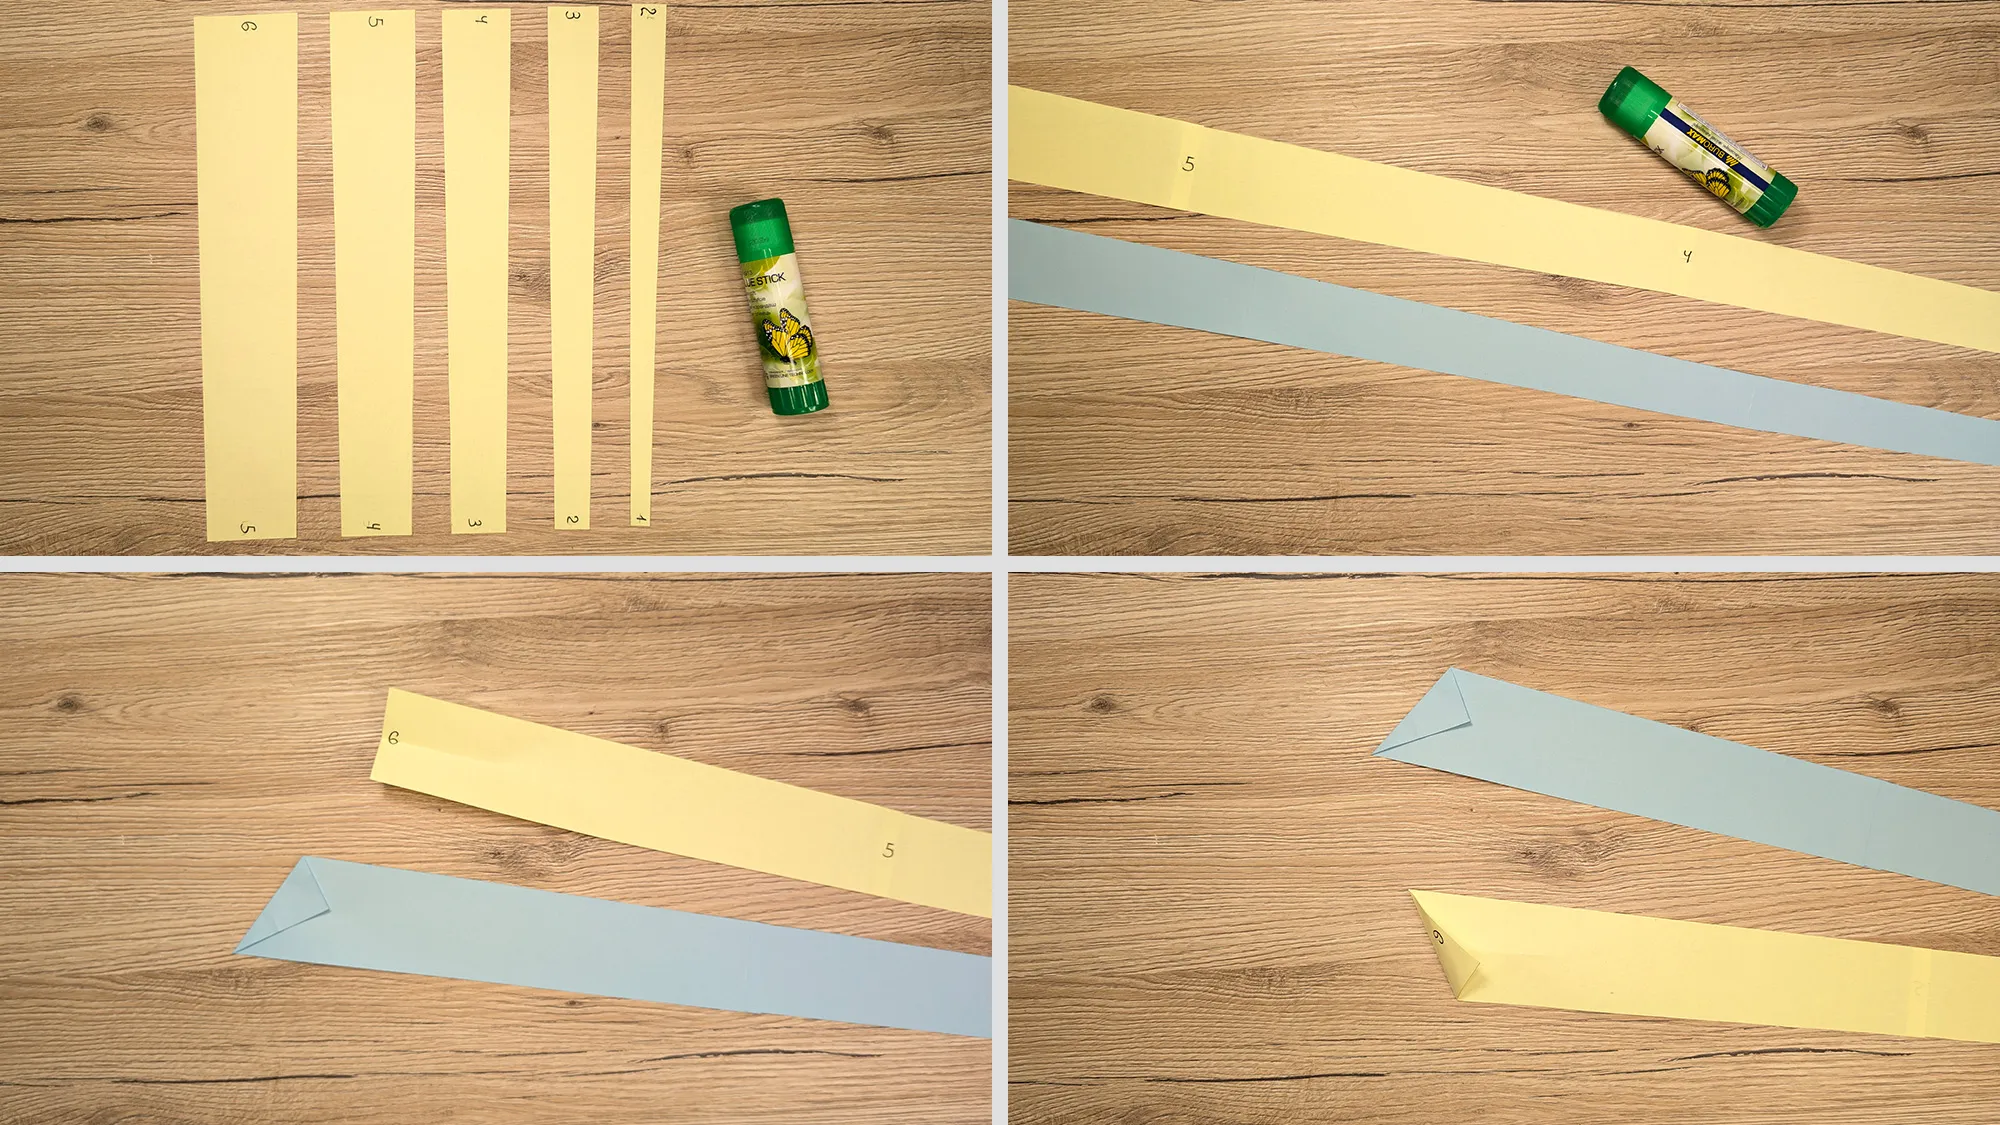
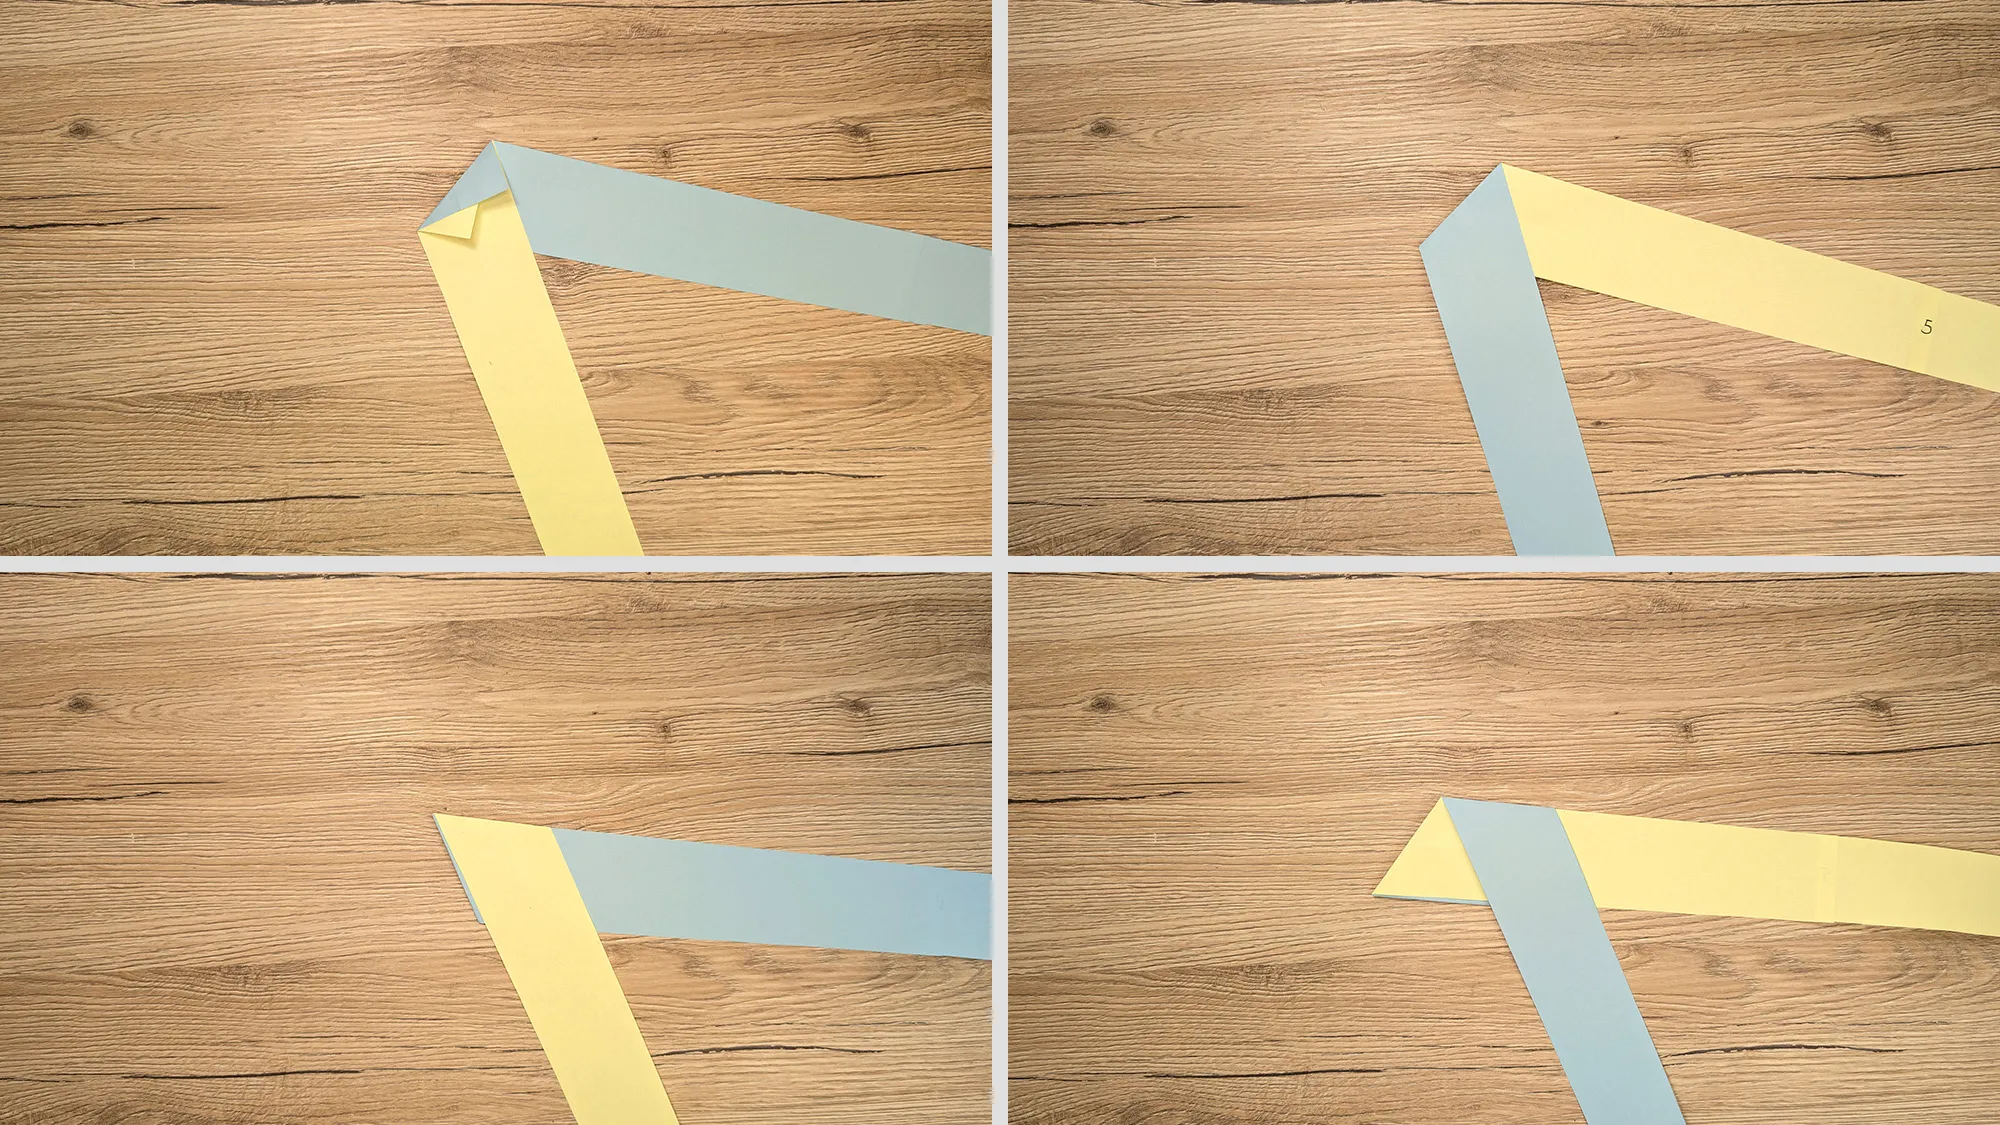
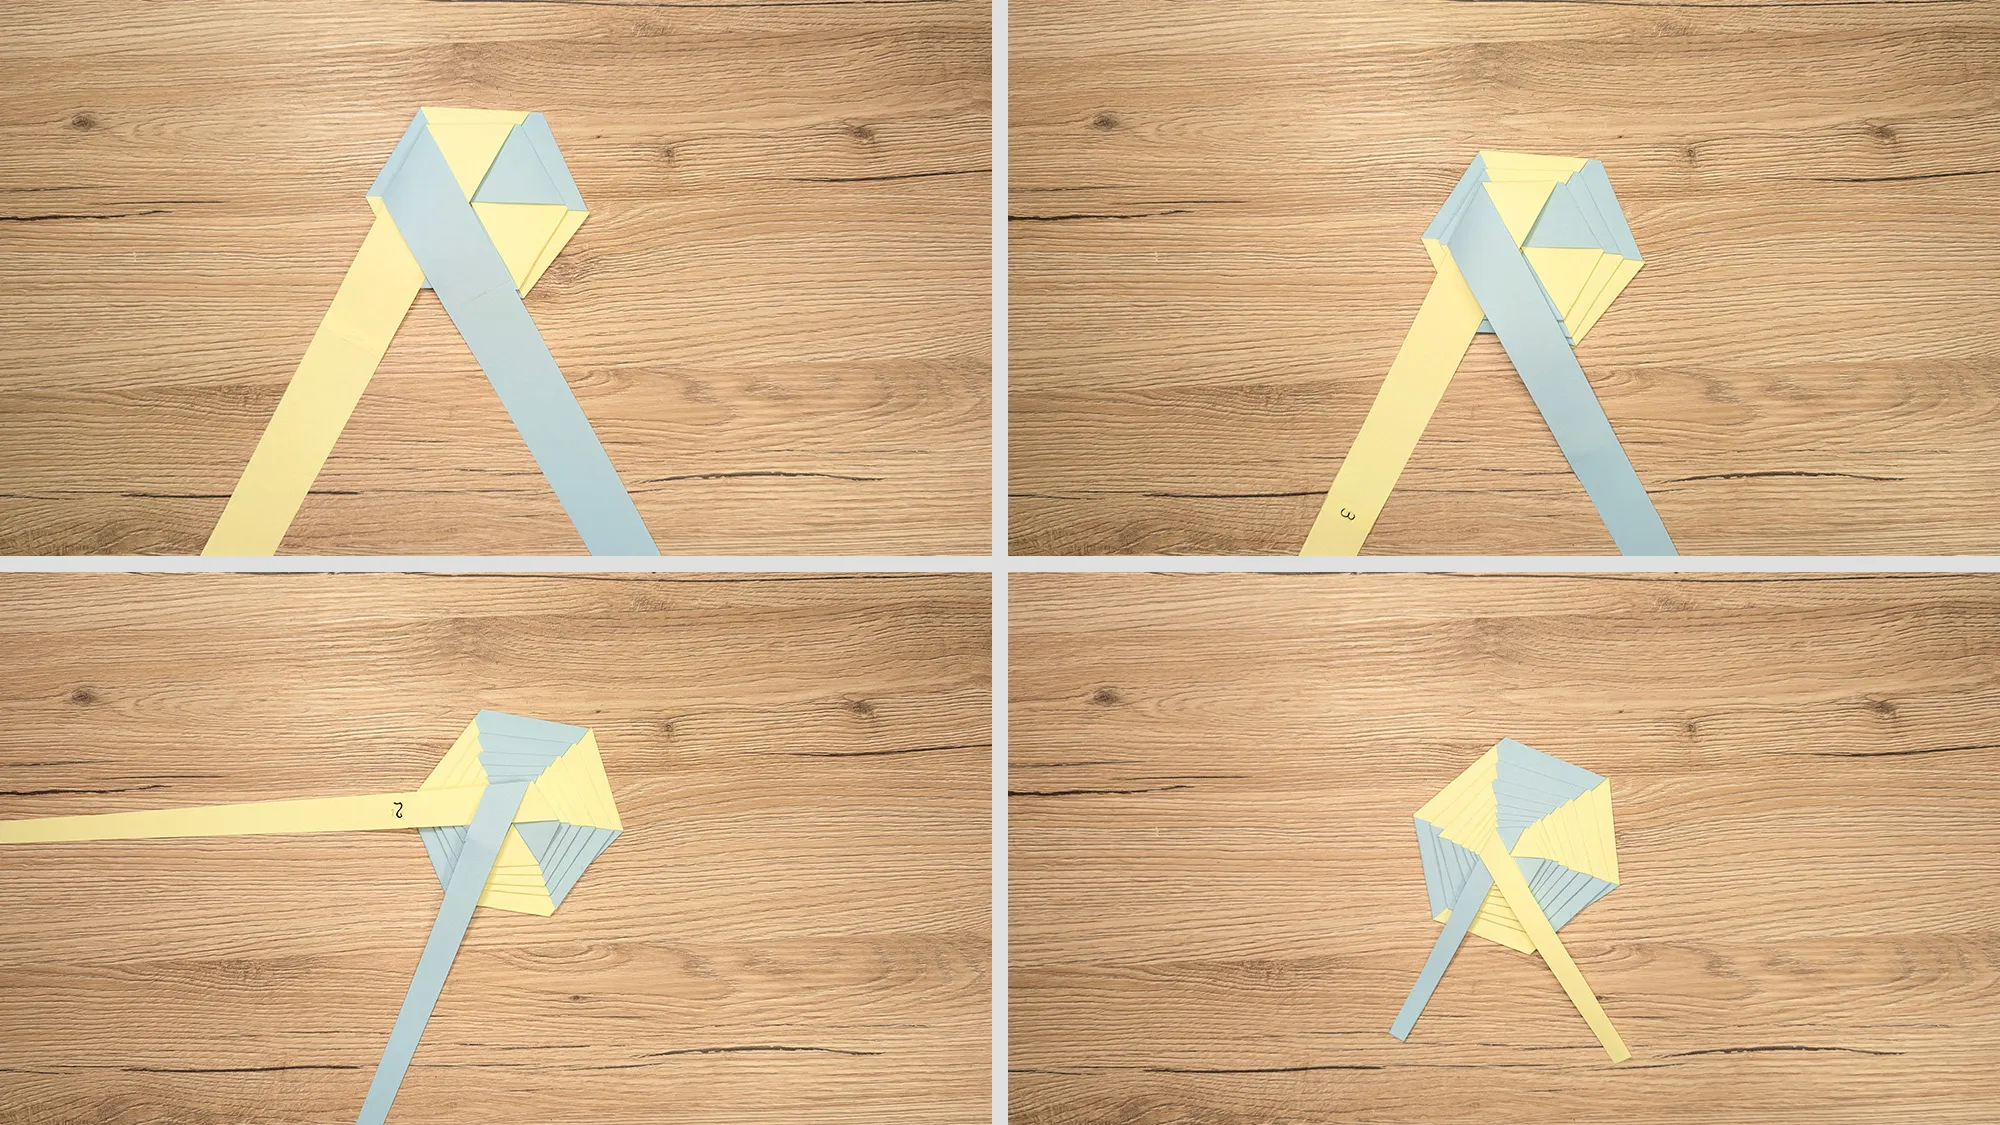
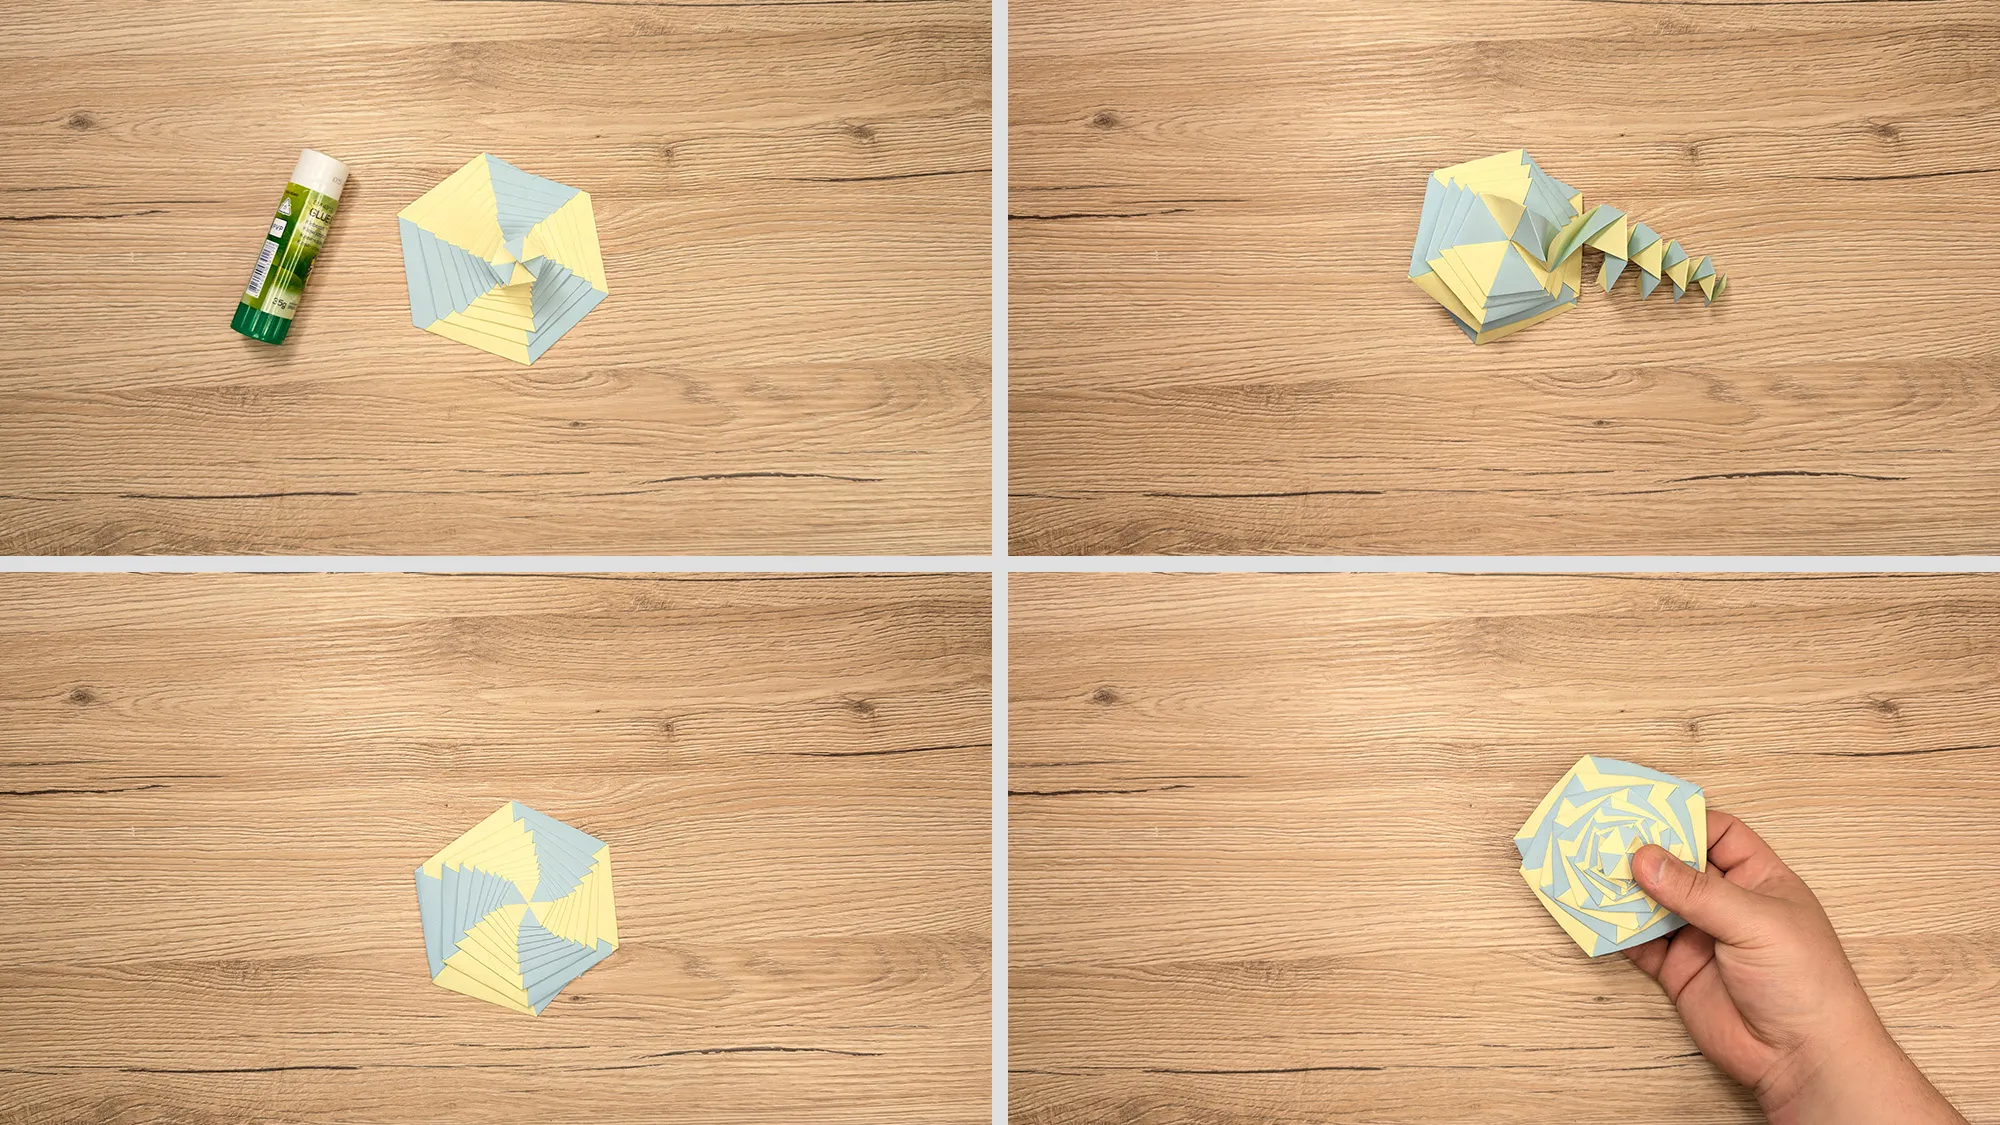
Spin and be proud!
Bravo! You have built your own Paper Twist Toy – all without much effort, but with plenty of creativity. We are glad you took the time to try out this guide. It means a lot to us when our crafting ideas bring you joy and inspire you. Maybe you're in the mood for more? Then check out our section with more origami and crafting instructions! There you will find many more projects that are just as colorful and fascinating. Have fun trying, playing, and being amazed!
From Vitalii Shynakov
