Make a Shrek door sign - Creative crafting idea for children
Hello! Are you looking for an original DIY idea that you can implement together with your child? Then we are glad that you found us. In this article, I will show you how you can create a great Shrek door card - a project that brings great joy to children!
All the videos and photos you find here have been specially created by us for you. Each of our instructions consists of a video tutorial, photos, and a detailed description of the individual steps. This way, you have no chance of not understanding what to do. It’s best to watch our video first to get an overview before you start crafting.
If you like how we present this crafting idea, feel free to visit our channel and subscribe. We add new tutorials for interesting DIY ideas daily.
Shrek Door Card: Step-by-Step Instructions with Photos and Descriptions
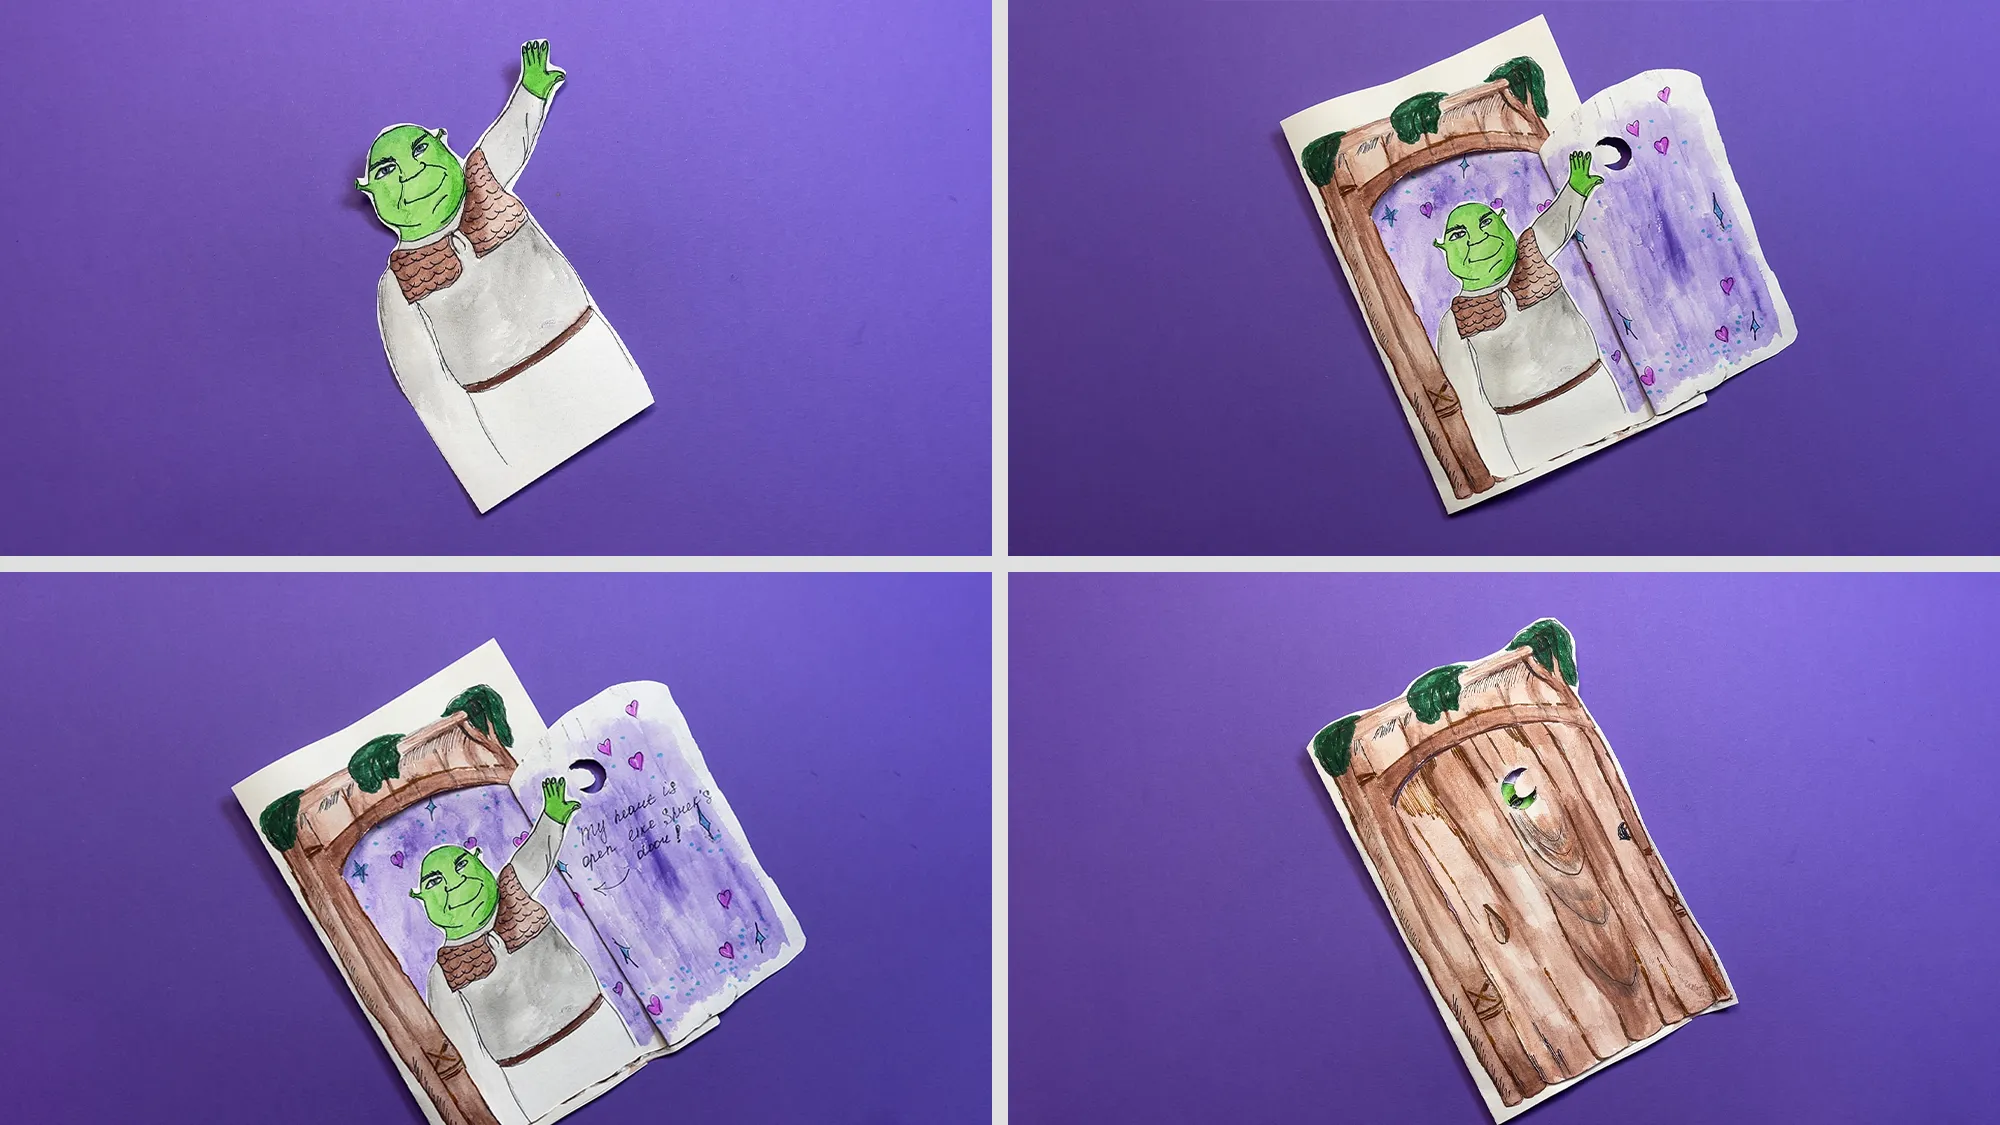
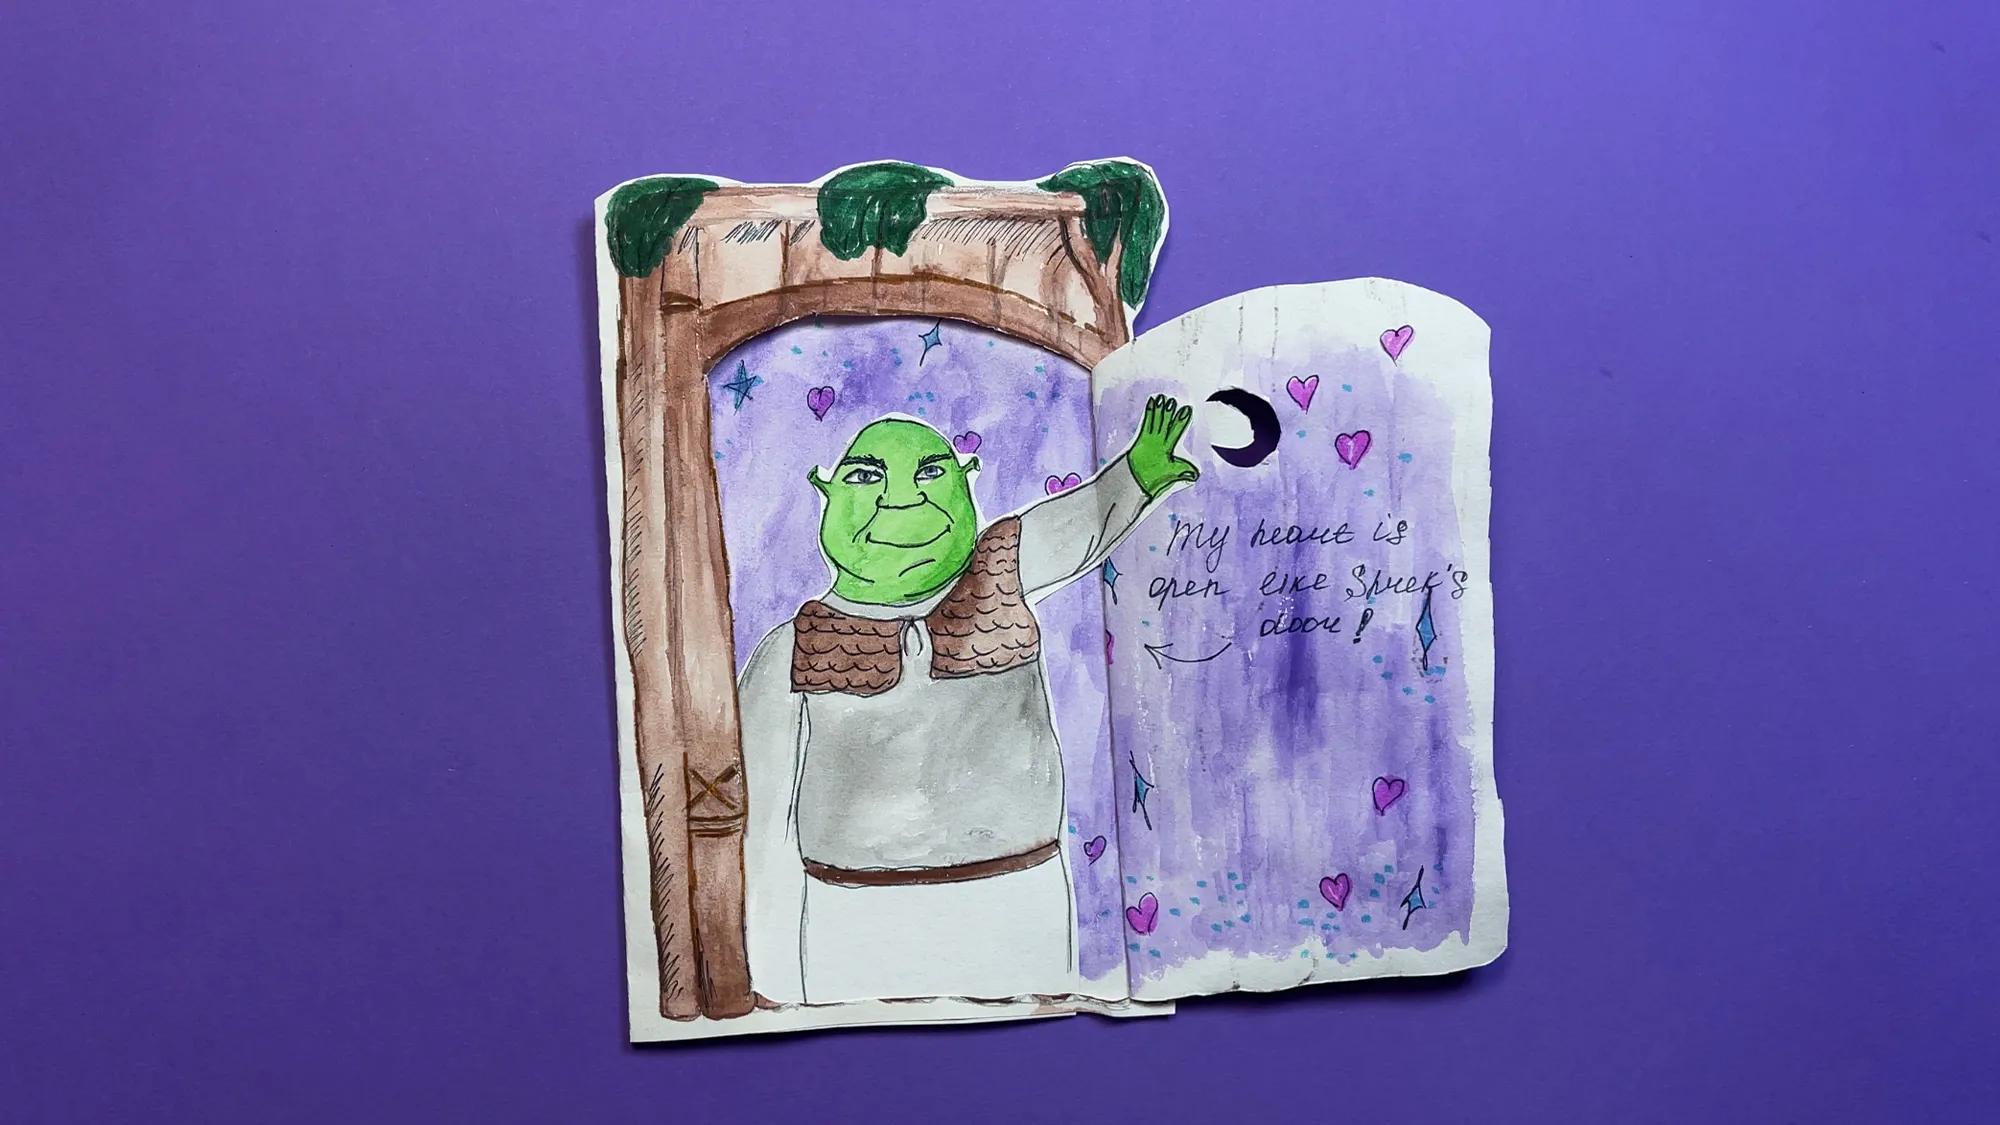
This funny card featuring Shrek and his door is not only a great crafting project but can also be used as a greeting card or decoration. The door can be opened, revealing Shrek with a message behind it!
Materials You Will Need:
- White paper or cardboard
- Pencil
- Colored felt-tip pen (black)
- Watercolors or watercolor paints
- Brush
- Scissors
- Glue stick
- Optional: Fineliner for details and text
Step 1: Prepare Materials
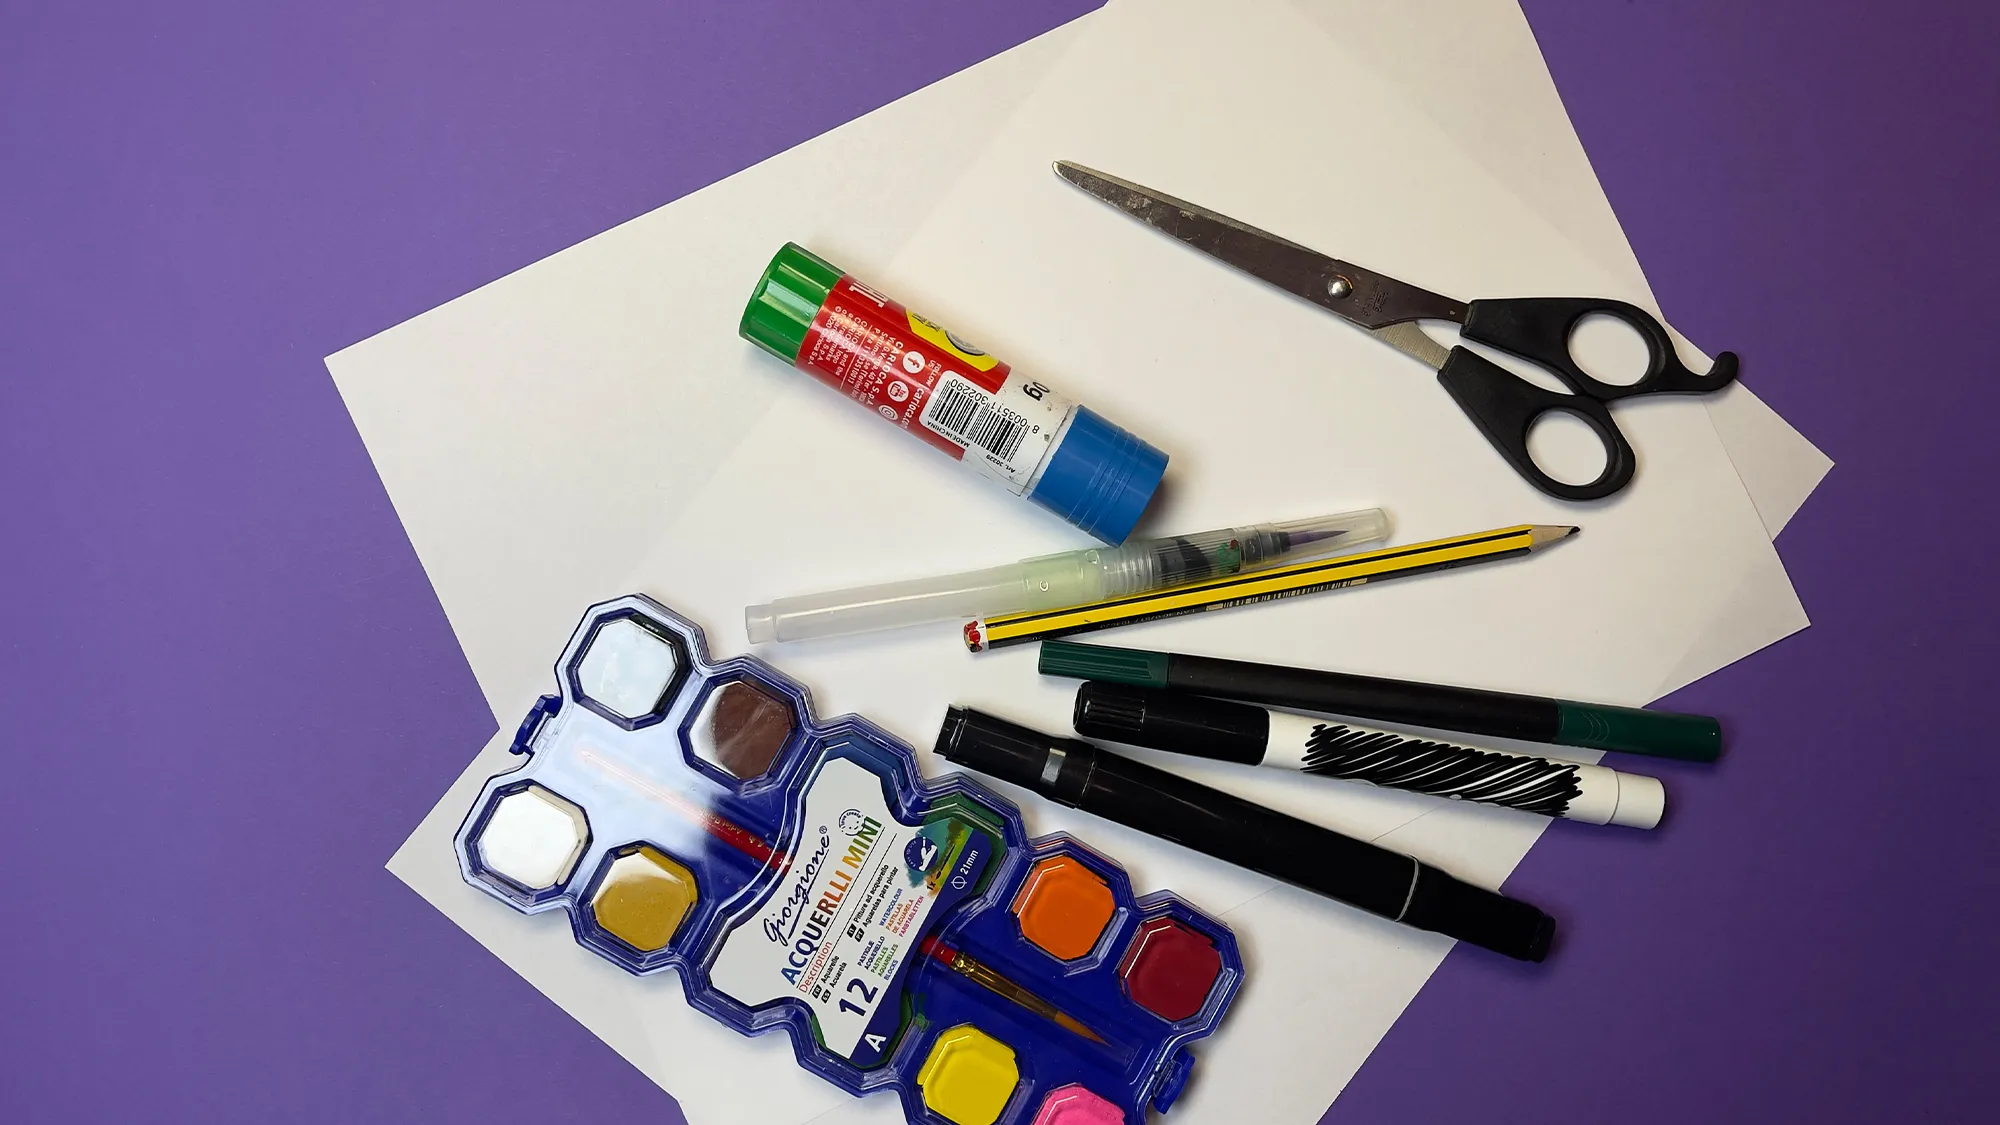
Step 1: Gather all the materials you need for the project. In the photo, you can see paper, scissors, pencil, felt-tip pens, glue, and watercolors. Make sure you have everything ready before you start crafting.
Step 2: Draw and Design the Door
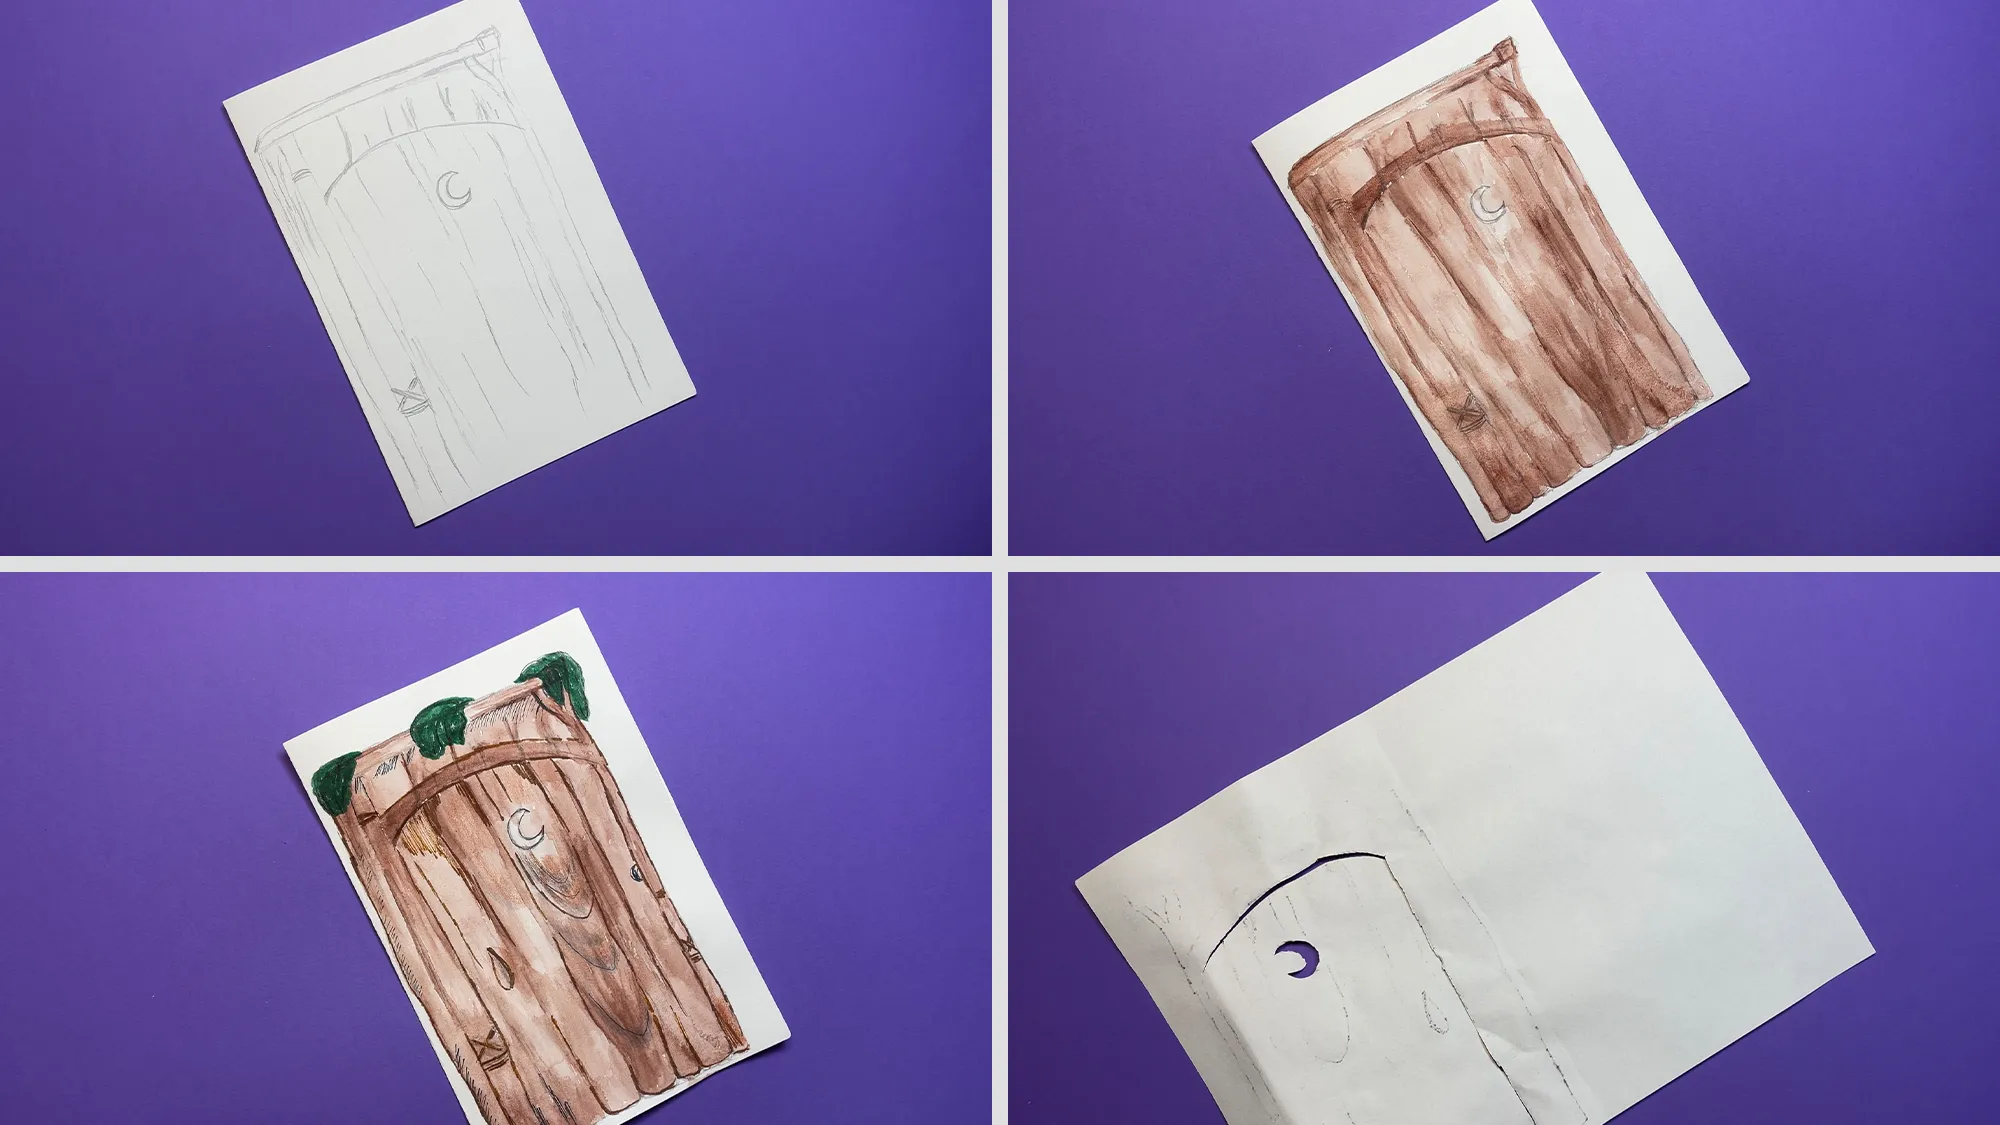
Step 2: Using a pencil, draw the outline of a wooden door on white paper. Add details like wood grain, a door handle, and perhaps a small moon-shaped window. Then, paint the door with brown watercolor to give it a wood-like appearance. Don’t forget to paint a few green leaves or small bushes at the top of the door.
Step 3: Design the Inside of the Card
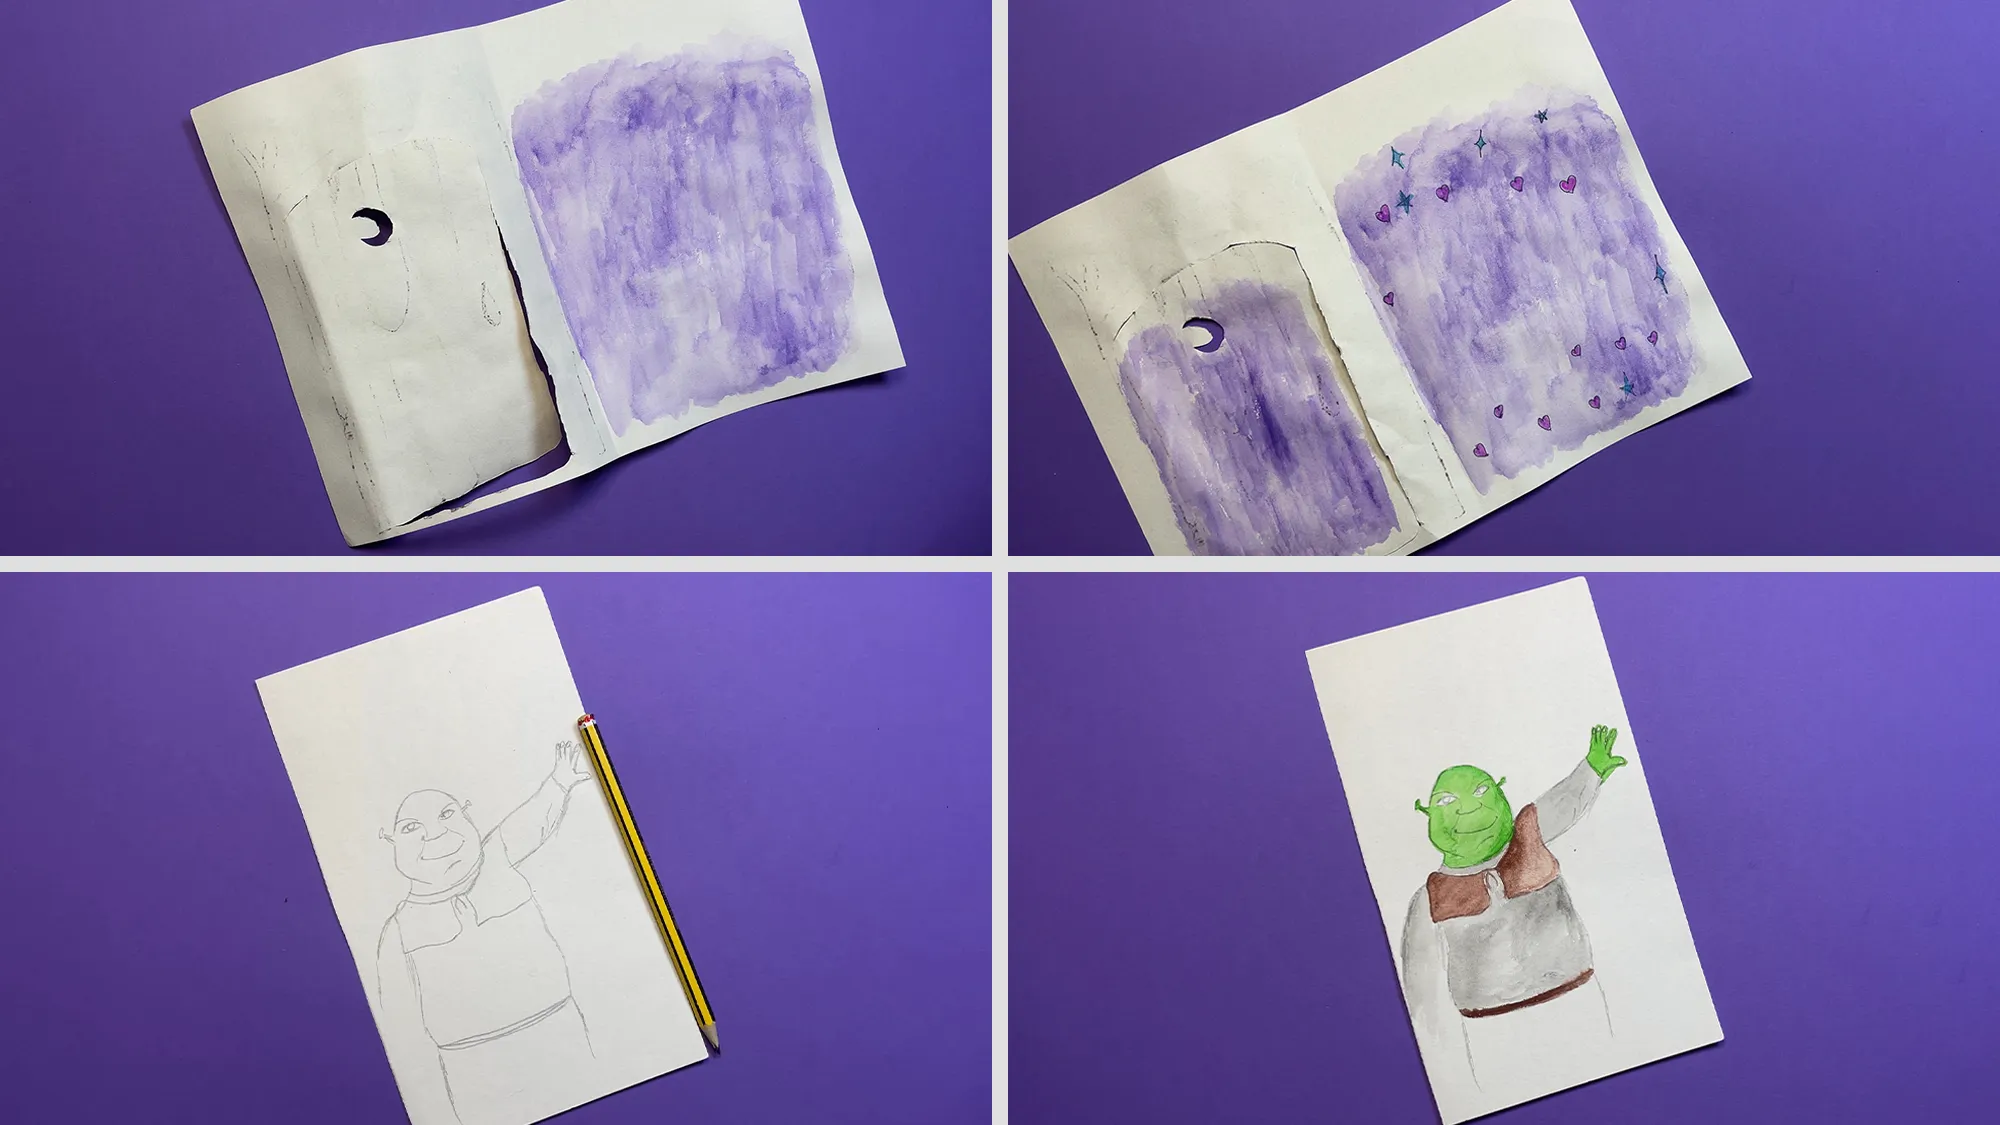
Step 3: Paint the background with purple watercolor. This will be the inside of the card that becomes visible when the door is opened. Decorate the background with small stars, hearts, or other motifs of your choice.
Step 4: Draw and Color Shrek
Step 4: On a separate sheet of paper, draw the figure of Shrek. Start with a simple outline and then add details like facial features, clothing, and his characteristic pose. Use green for his face and hands, brown for his vest, and gray for his clothes. Carefully cut out the finished Shrek figure.
Step 5: Assemble the Card
Step 5: Now put all the pieces together! Glue the purple background page onto a base sheet. You can also write a message on the inside, for example, "My heart is open like Shrek's door!" or another funny saying. Finally, you can cut the entire card again to give it the final shape.
Creative Variations of This Craft Idea
There are many ways to vary this craft:
- Instead of Shrek, you could use other popular characters
- The door could be replaced with a window, a treasure chest, or something else
- Add glittery elements or 3D details
- Create a whole series of "door-opening" cards with different characters
- Use the card as an invitation for a birthday party or a special event
The Importance of Creative Activities for Children
Craft projects like this Shrek door card not only promote your child's creativity but also their fine motor skills and patience. Drawing, coloring, and cutting train various motor skills that are important for development.
Furthermore, crafting together provides a wonderful opportunity for conversation and quality time. While you craft together, you can talk to your child about their interests, tell stories, or simply enjoy the moment.
The joy and pride children feel when they have completed a handmade artwork boosts their self-esteem and motivates them to try more creative projects. The finished card can serve as decoration in the child’s room or as a personal gift for friends or family members.
Thank You for Your Interest!
We would like to sincerely thank you for taking the time to read our tutorial. Creating crafting instructions, videos, photos, and writing this article takes a lot of time, and we really hope that you enjoyed this crafting idea.
Perhaps you would like to check out our other tutorials as well? We have great instructions for various age groups, or just take a look at our section DIY Ideas and Craft Ideas for Children. You might find more inspiring projects there.
Overall, we already have over 400 different tutorials on our portal, and new ones are added every week. We look forward to accompanying you on your creative journey with your child!
From Vitalii Shynakov
