Folding an origami butterfly: Simple step-by-step guide with photos and video
Hello! Are you looking for a cool idea on how to turn a simple piece of paper into something beautiful? Then our guide on folding an Origami butterfly is just right for you! This charming paper figure is perfect as a decoration, gift tag, or as a fun craft project for kids. All our guides consist of videos and photographs with detailed text comments and tips. This makes it easy for you to fold this cute butterfly.
All the videos and photos you find here are recorded by us. They are also all available on our YouTube channel. If you click on the link of the video title, you can go directly to our channel and subscribe to us. That would be great!
Folding an Origami Butterfly: Step-by-Step Guide with Photos and Comments
In this Origami guide and all our other guides, we strive to use only materials that are commonly found in every household or easily available at the nearest store. For our butterfly, you only need a square piece of paper - that's all! The more colorful and vibrant the paper, the more beautiful your butterfly will look in the end.
What you need for the Origami butterfly:
- A square piece of paper (in our example, red paper)
- Possibly a pair of scissors for final adjustments
Step 1:
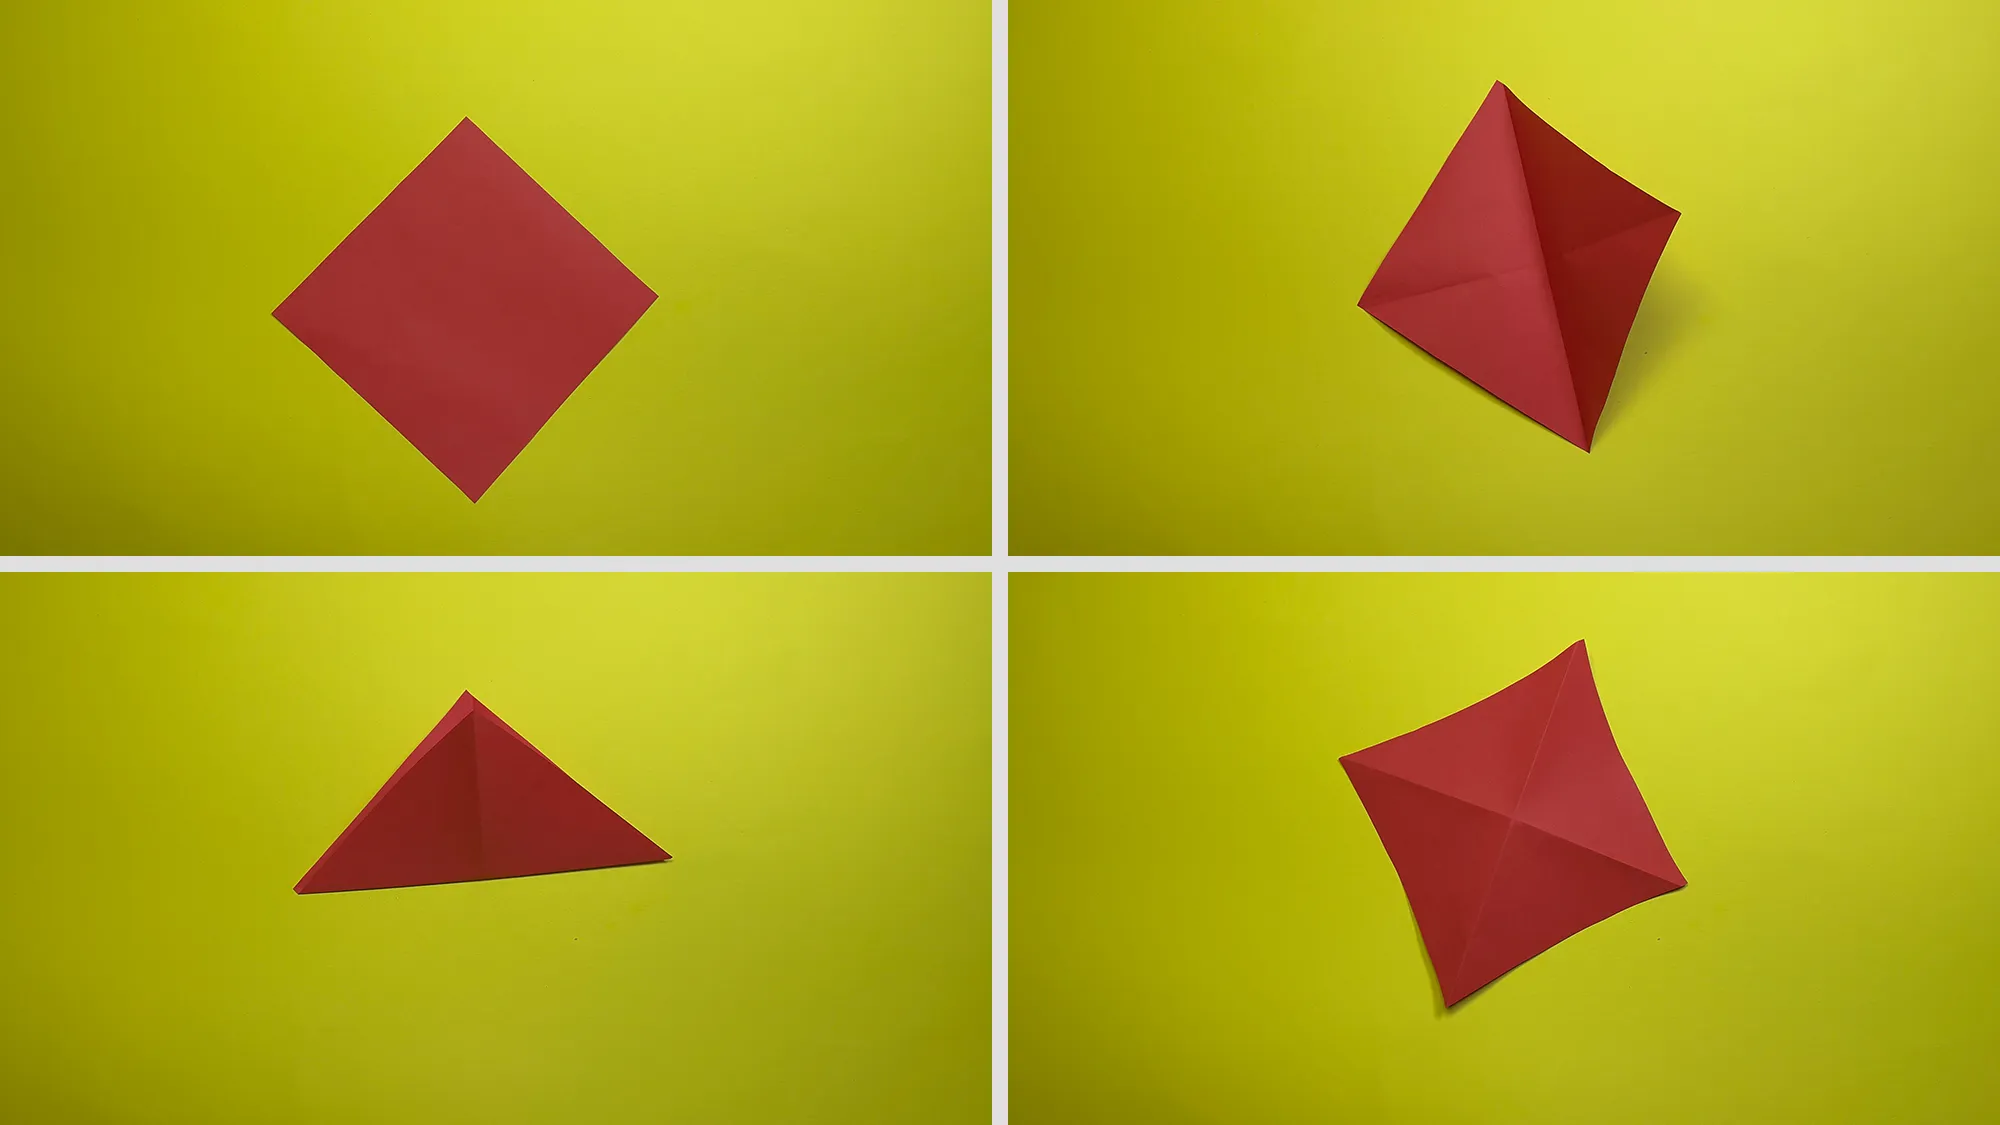
Start with a square piece of paper and fold it diagonally into a triangle. Unfold it and fold it along the other diagonal, creating crease lines in the shape of an X. Then fold the paper into a three-dimensional shape by bringing the corners to the center to form a pyramid-like shape.

Step 2:
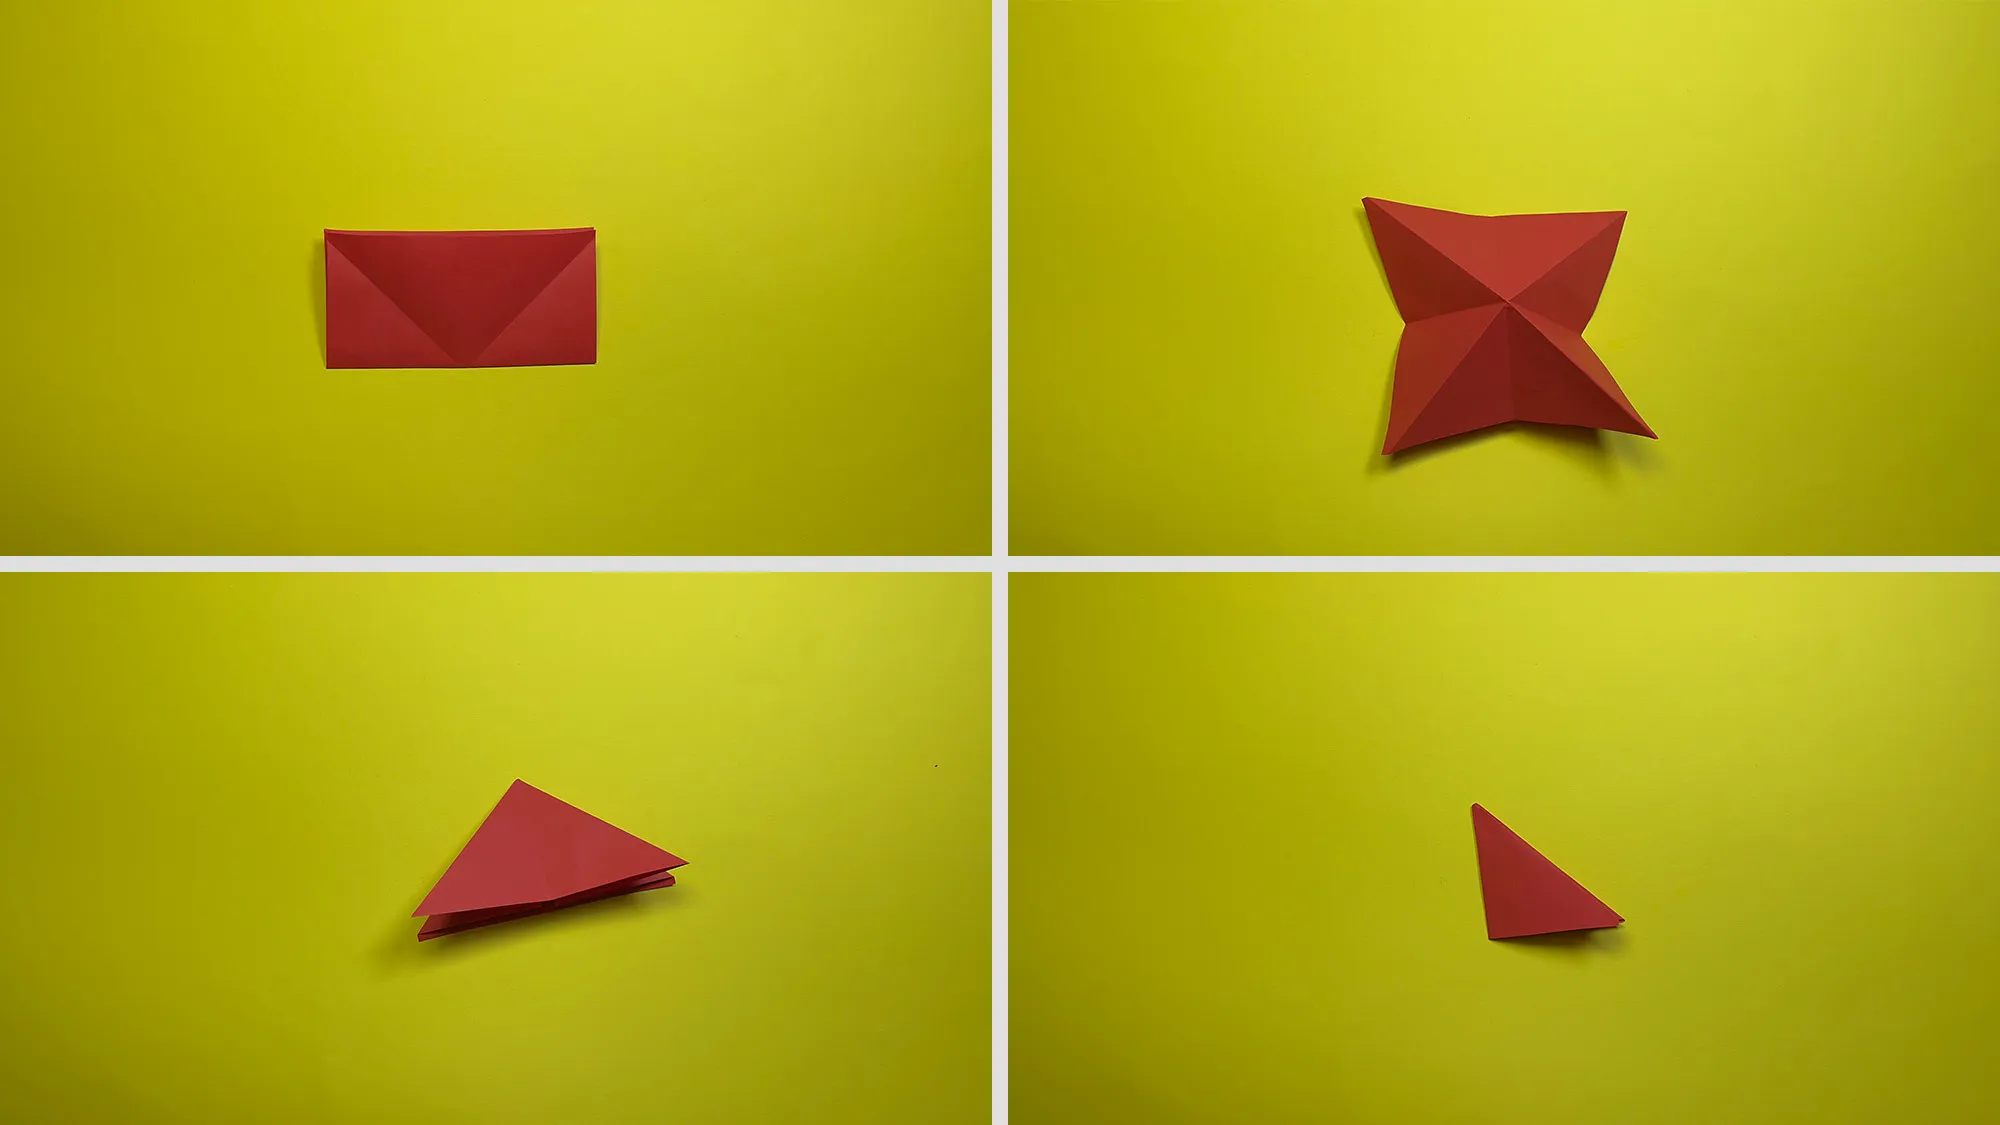
Press the shape flat so that a rectangle is formed. Fold the two ends of the rectangle inward to create a sort of star shape. The center should be raised while the four points point in different directions.

Step 3:
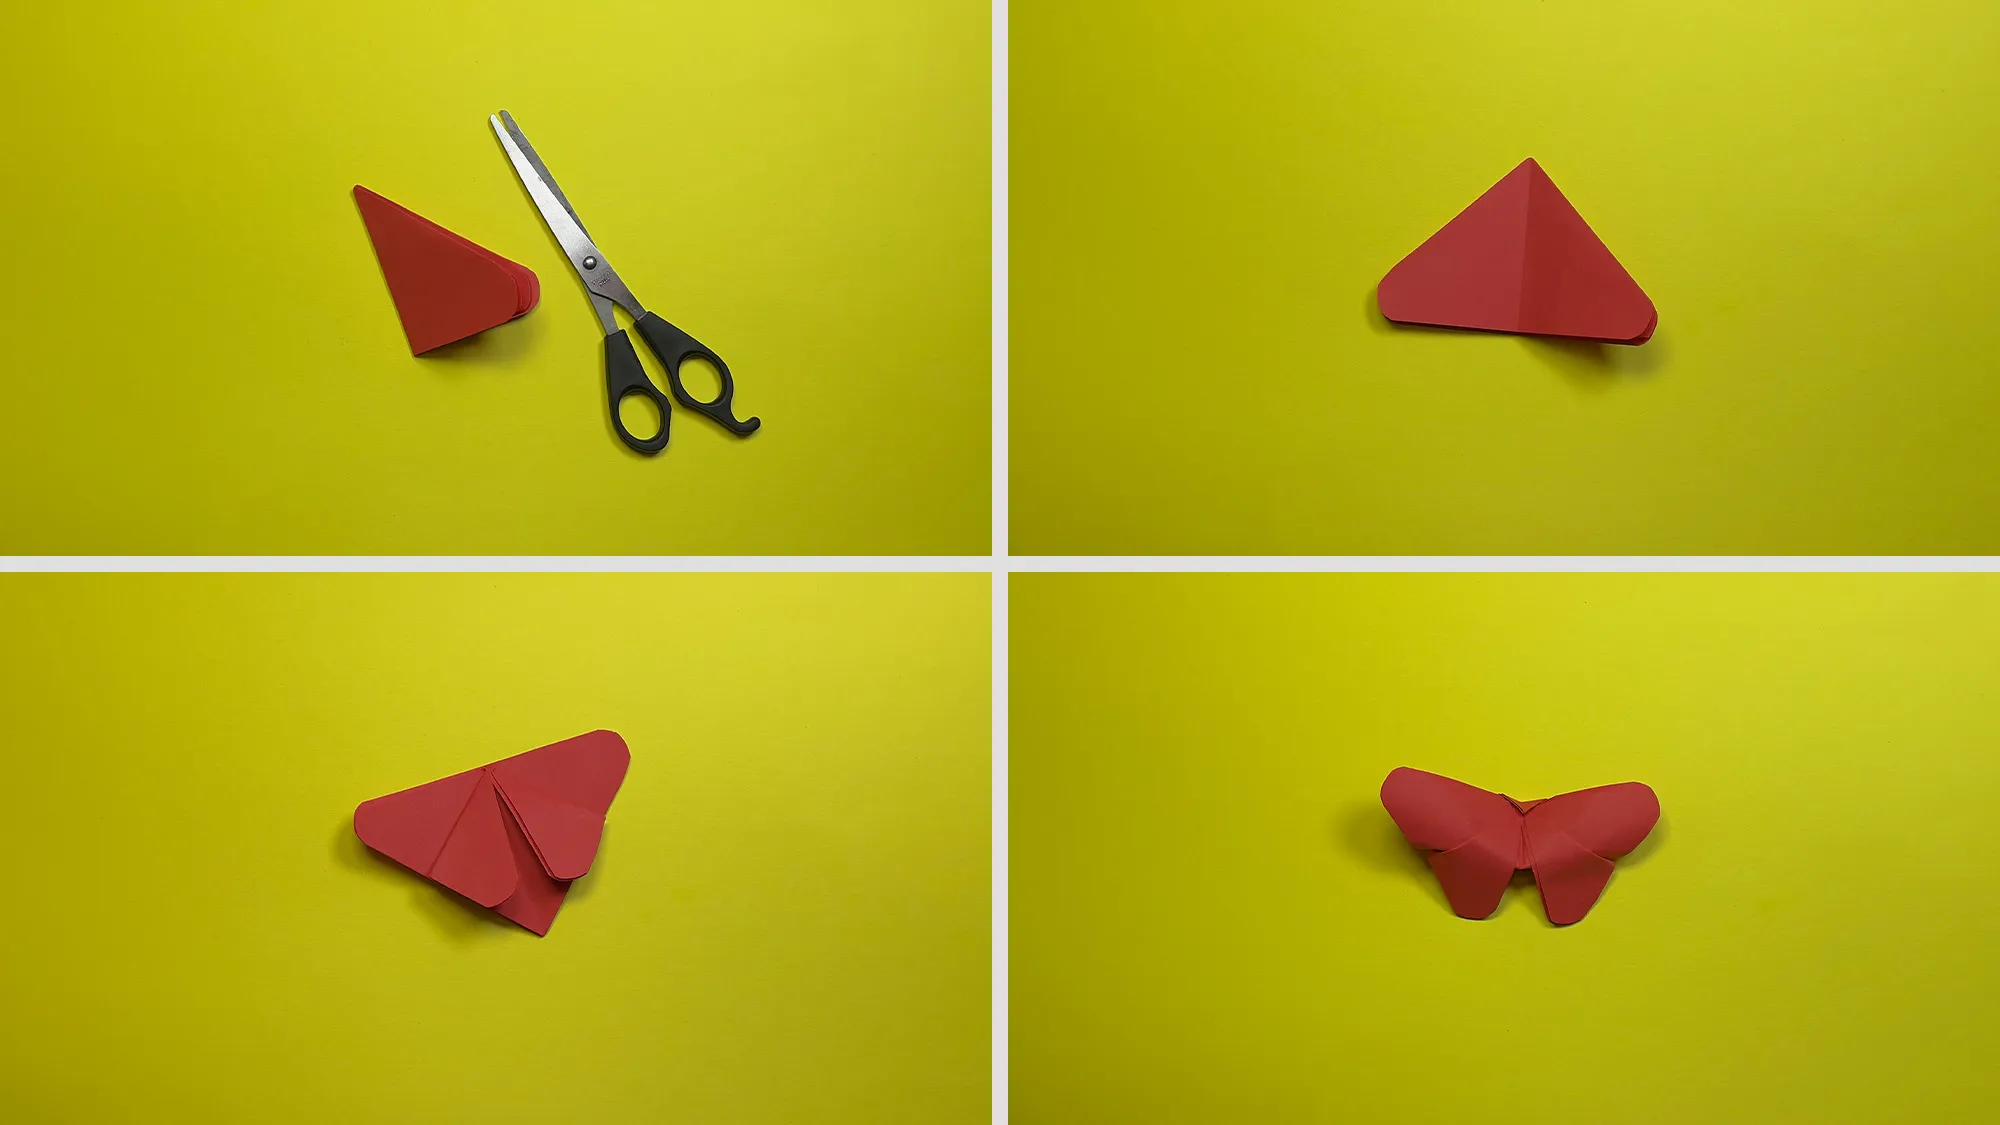
Cut off excess paper with scissors to shape the butterfly wings. Then make 2 folds towards the center. Fold the bottom corner back away from you. Done! If this is not clear from the photos, check how I did it in the video!

Origami Butterfly and Creative Decoration
The folded Origami butterfly is not only a nice craft project but also a versatile decoration. You can fold several butterflies in different sizes and colors and hang them as a mobile, use them as table decoration, or utilize them as cute gift tags. Especially for children's birthdays or spring celebrations, these colorful paper artworks are a wonderful decoration idea.
Engaging with Origami promotes not only fine motor skills in children but also concentration and spatial thinking. It is a relaxing and creative activity that brings a lot of joy.
In Conclusion
We have invested a lot of time and effort to make our area with Origami tutorials and DIY ideas as comprehensive as possible. If this guide was even a little interesting to you, that is already a reward for us. If you enjoyed this type of creative project, take a look at our other Origami sections and DIY ideas for children. You might find even more inspiring projects there for yourself.
We wish you much success in folding your own Origami butterfly and a lot of joy with your creative decoration!
From Vitalii Shynakov
