Folding a paper gift bag – simple DIY idea with video
Hey! You are looking for a quick but special idea for gift wrapping? Then try this cute paper gift bag – perfect for small gifts like sweets, vouchers, or jewelry. All you need is a square sheet of wrapping paper and a small clip or clothespin to close it.
This guide shows you how to create a stable and decorative bag without any glue using just a few folds. Ideal if you want to give something personal – made quickly, but with plenty of charm!
As always, you’ll find a video, step-by-step photos, and practical tips with us, so you can get started right away.
All images and videos are created by us, so you can easily follow each step. You can also find them on our YouTube channel – feel free to stop by and subscribe if you like creative ideas!
✂️ Gift Bag: Step-by-Step Instructions with Photos and Comments
This foldable gift bag works particularly well with wrapping paper that has a nice pattern. It works best with square paper – you can either buy it that way or cut a rectangle accordingly.
Tip: The thinner the paper, the easier it is to fold – but make sure it is still sturdy enough so that the bag doesn’t tear later. A small clip or clothespin keeps the top edge together perfectly.
🧾 You need:
- 1 square sheet of wrapping paper (e.g. 20 × 20 cm)
- 1 small clip or clothespin
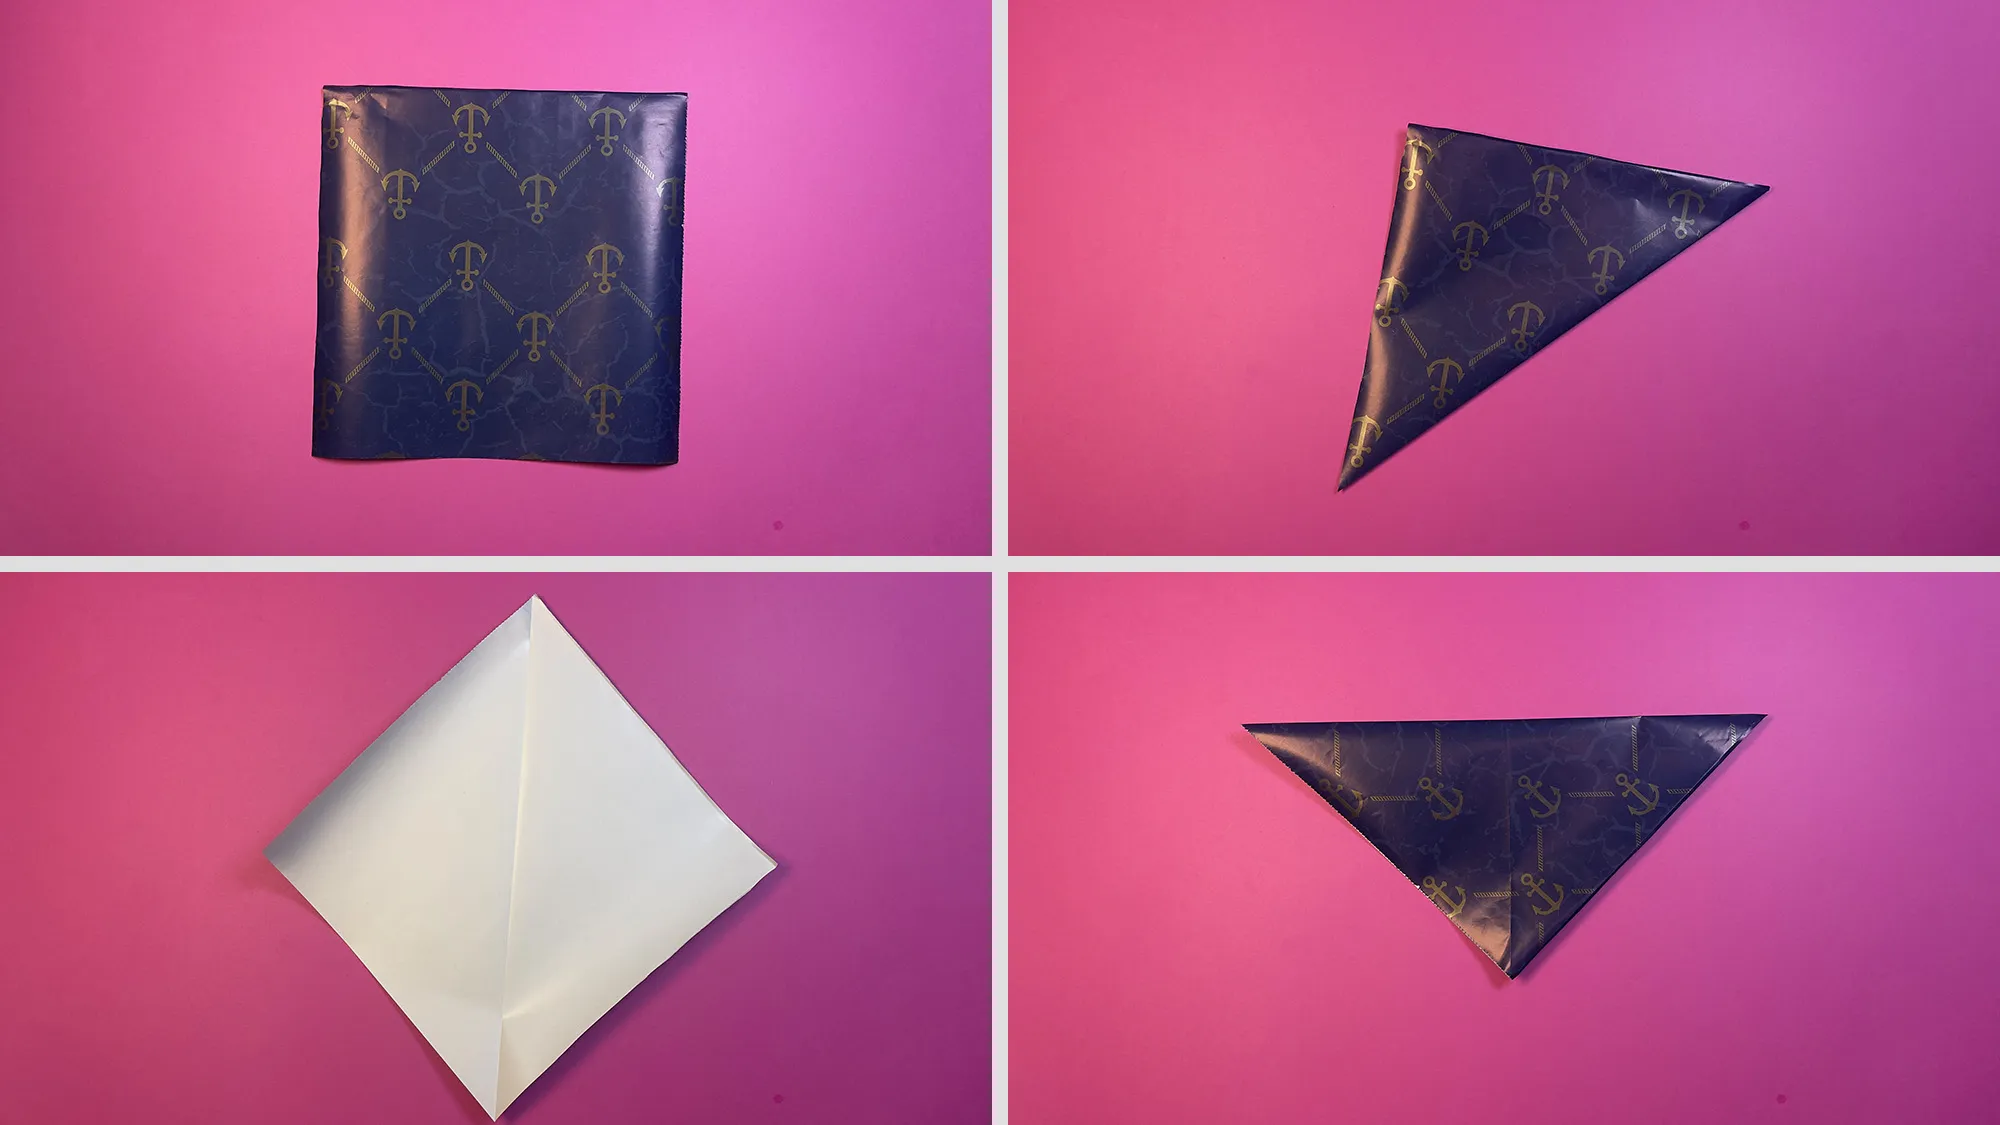
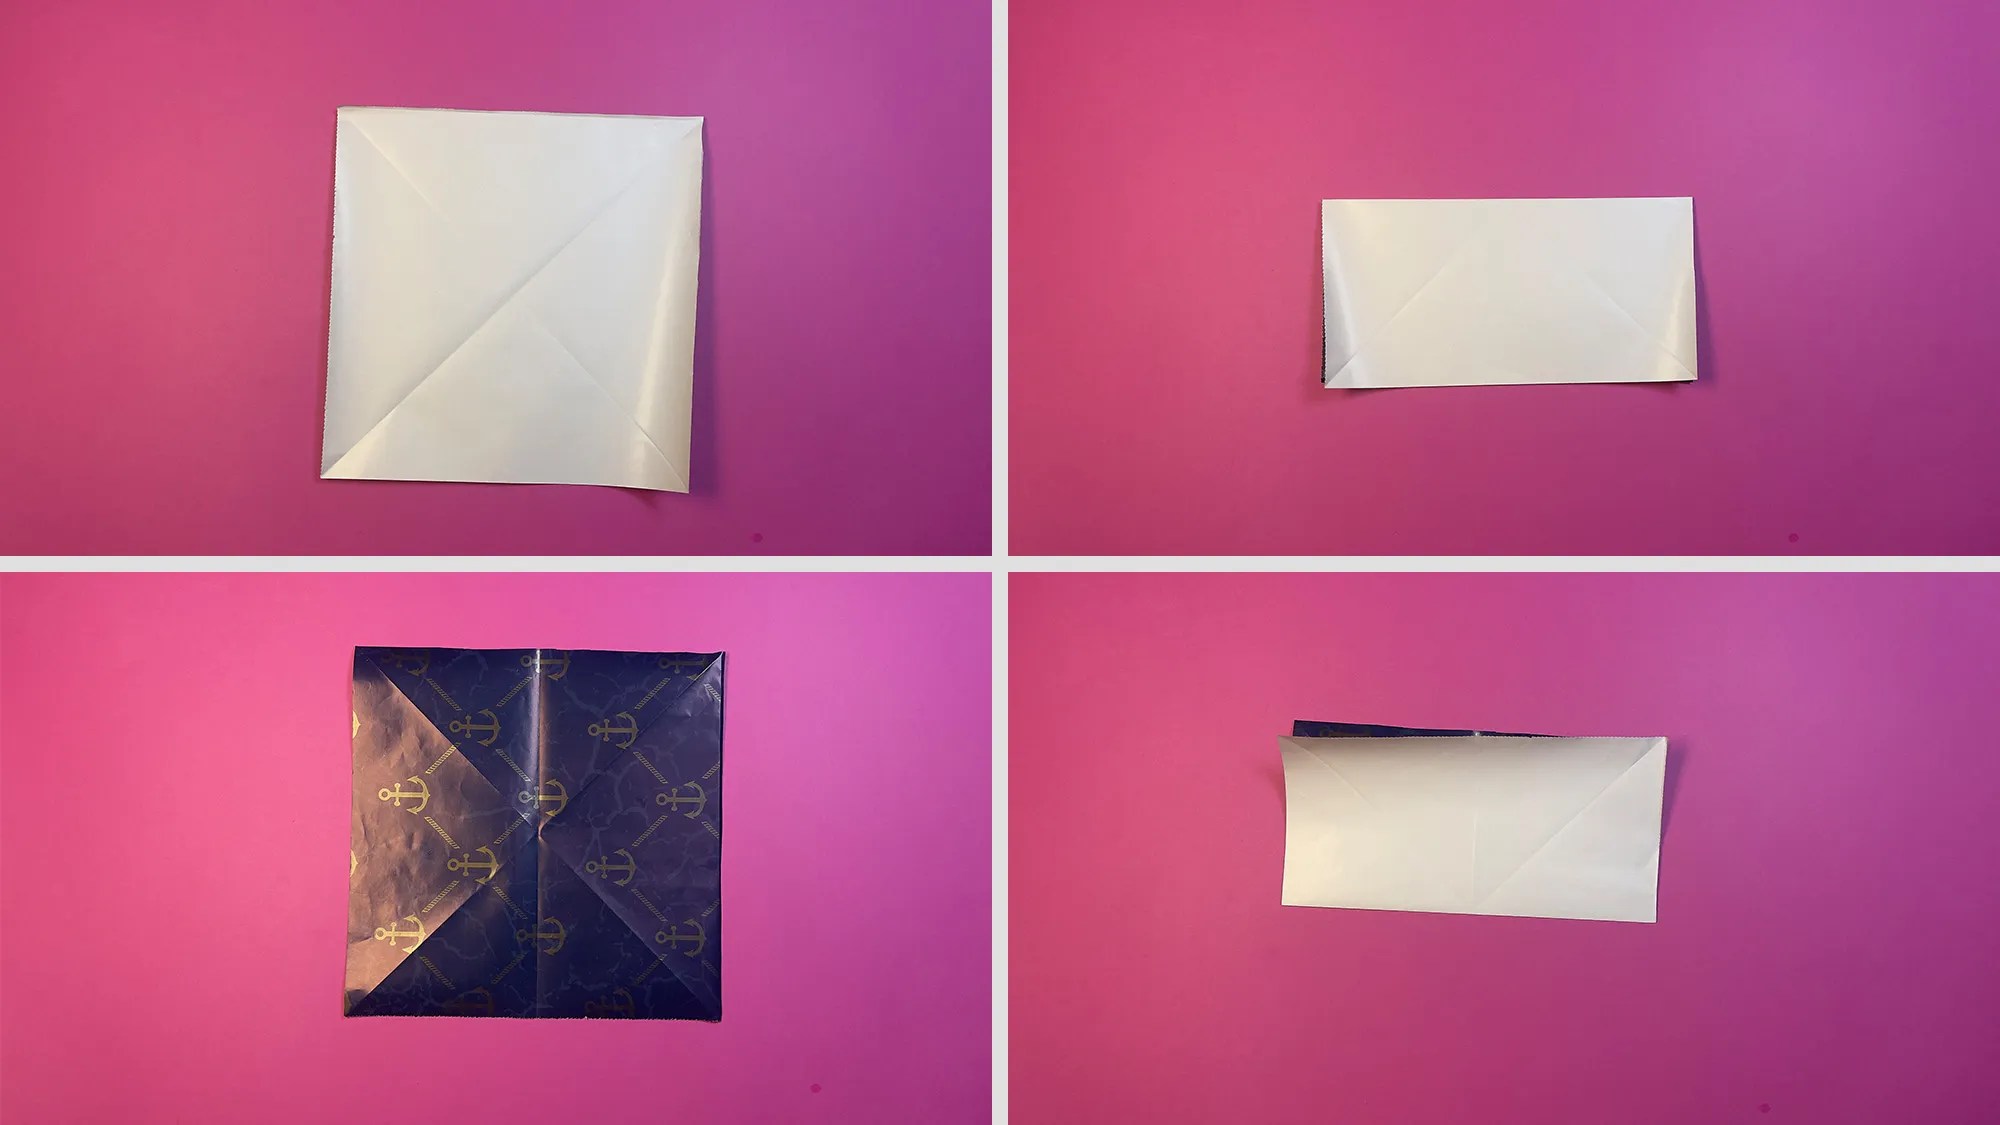





🎁 Paper Gift Bag – Practical and Personal
The self-folded paper gift bag is more than just a wrapping – it is part of the gift. With the beautiful pattern of the paper and the careful folds, your present instantly has a loving, handmade appeal. Especially for small gifts or thank-you gifts, such packaging makes a difference. It shows the recipient that you put in the effort and thought – and that is always well received.
You can easily adjust the size of the bag depending on how big your gift is: you only need a larger or smaller square sheet. With a little practice, you can even fold several bags in different sizes – ideal for Advent calendars, small guest gifts, or table decorations at celebrations. In the category Creating Gift Wrap, you will find many more instructions for creative, quick, and personal wrapping ideas. Whether made of paper, with ribbons, or natural materials – there is something for every occasion.
🙏 Thank you for being here!
Thank you for taking the time to read our instructions for the paper gift bag – it means a lot to us! We invest a lot of heart and energy into each individual crafting idea so that you can achieve great results with little effort. We are thrilled if you get inspired by our guides and maybe feel like crafting even more.
If you liked this project, we definitely recommend checking out our categories Paper Crafting for Kids or Crafting with Wrapping Paper. There, more creative ideas are waiting for you – from very simple instructions to small projects with a wow effect. All with step-by-step explanations, photos, and videos – so you can see exactly how it’s done. Whether alone, with children, or as a last-minute idea: you will find the right DIY project for every occasion with us.
We wish you a lot of joy in crafting – and even more in gifting your beautifully wrapped little things! 🎁💛
From Vitalii Shynakov
