
Looks & Styles with Photoshop

- Fashion and beauty looks: fashion and painting looks, bokeh and flares, cream and pastel looks, warm and cold looks, cross-toning and gradient looks ...
- High-speed looks every minute: Raw converter, sharpening and blurring, aging, dodge & burn, film grain, high contrast look ...
- For optimum traceability, including the working files, source material and image components for effects/composings
This training will make your pictures stand out from the crowd. Stand out enormously. For the best image quality.
55 Videos, 451 minutes
Overview
Looks & Styles with Photoshop - Looks and Styles at a glance
This chapter of the "Looks & Styles with Photoshop" training gives you an overview of what awaits you in the next 8 hours: a firework of fantastic looks that will put the finishing touches to your workflow.
Looks & Styles with Photoshop - Why certain looks are used
Here you can find out what looks & styles are actually good for, how they work and how you can easily create recognition value with a look.
Fashion and beauty looks
Looks & Styles with Photoshop - Painting look with oil filter
The lightness of the oil filter in Photoshop looks almost painted. I'll show you how easy it is to use this powerful filter. The easiest way to create a painted look is with just a few clicks using the oil filter. Unfortunately, the filter was not included in the CC 2014 version, but let's see what the future brings. The Photoshop community is clamoring to have the Photoshop oil filter back, and I'm curious to see if Adobe will respond or perhaps offer us something similar. We'll see.
Looks & Styles with Photoshop - Fashionlook
You've already seen this fashion look in many magazines, albeit perhaps unknowingly. Motion blur is the key to this effective look.
Looks & Styles with Photoshop - Depth effect through artifacts
With artifacts, you can add depth and life to your pictures in minutes. Artifacts are the salt in the soup when your image is lacking pepper!
Looks & Styles with Photoshop - Artificial bokeh
Your lens or the lighting situation didn't give you nice bokeh? Here you will learn how easy it is to enhance your photo with artificial bokeh.
Looks & Styles with Photoshop - Backlighting and flares
The more beautiful lens flares and backlighting effects you show, the more impressive your backlit shots will look. They are easy to integrate, as you will see!
Looks & Styles with Photoshop - Lightleaks
In the past, light leaks - small openings in the camera - were hated because they ruined the image. Today, we recreate them artificially to achieve that analog look. Crazy, isn't it?
Looks & Styles with Photoshop - Cream look
People always look 99.9% positive with warm colors. This creamy style will help you achieve the remaining 0.1% for a perfect look.
Looks & Styles with Photoshop - Pastel look
Light, airy, weightless, relaxed ... the attributes of the pastel look could go on almost indefinitely. A style that doesn't just go down well in summer!
Looks & Styles with Photoshop - Cross-toning
Cross colors can be created with just a few clicks and are easy to control. Fashion almost lives from these cross styles.
Looks & styles with Photoshop - gradient looks
You can use gradients to influence an image in very different directions. You can also combine the resulting styles wonderfully with all other looks.
Looks & Styles with Photoshop - Split toning
Split toning is a classic look. Coloring shadows and highlights separately has never been easier than with this upbeat technique.
Looks & Styles with Photoshop - Warm and cold mood changes
The crucial question in Photoshop: do I go for a warm or cold mood? I'll show you ways and looks to help you decide.
Looks & Styles with Photoshop - Newspaper look
Everyone knows the newspaper look or has certainly held one in their hands. Contrastless, light and rough are the characteristics of the newspaper look that I'm introducing you to here.
Looks & Styles with Photoshop - Create your own look by mixing
Which looks make sense in combination? How do I turn several looks into a new, unique style? We eagerly mix different looks & styles together and you'll find out: Creating your own look has never been so easy!
Highspeed
Looks & Styles with Photoshop - Looks in the raw converter
In this video training I will show you how powerful Adobe Camera Raw is in terms of Looks & Styles. A wide range of setting options allow you to create a variety of looks.
Looks & Styles with Photoshop - Quick looks with adjustment layers
Adjustment layers are the first choice if you want to create a concise look quickly and easily. Non-destructive working method guaranteed!
Looks & Styles with Photoshop - Styles through sharpening
Sharpening filters can also be used to create, enhance or modify a style. In this video training, you will learn about the possibilities of sharpening filters.
Looks & styles with Photoshop - blurring as a look
With blur filters, you can direct the viewer's gaze in no time at all, but also create recognition value.
Looks & Styles with Photoshop - Aging: A picture ages
Aging describes a look in which you apply aging effects to your image. We all know old photos, the look is familiar. Learn how it works in this video training.
Looks & Styles with Photoshop - Highspeed-Dodge&Burn
D&B on one level with special calculation mode. Quick & dirty alternative to the layer stack with sometimes even better results.
Looks & Styles with Photoshop - artificial film grain
I'll show you how to add artificial grain to your photo in a non-destructive way. You'll learn how to simulate and adjust film grain.
Looks & Styles with Photoshop - High contrast look
This video training shows you the high-contrast look when things need to be a little "harder". Vivid and concise, can be used for many things.
Looks & Styles with Photoshop - Fantasy Style
Magical, mystical, soft and foggy - the fantasy look. Create fog and haze in Photoshop.
Looks & Styles with Photoshop - Ortoneffect
The Ortone effect, how it works and how to create it as an action. This look creates a warm glow that instantly makes any image more appealing.
Composing
Looks & Styles with Photoshop - Image composition
In this composing example, I'll show you some basic rules of image composition and how you can implement them with simple means in Photoshop.
Looks & Styles with Photoshop - Sharpening gradient
In this video training course, you will learn how to integrate a focus gradient into a composition and also how important it is for the functionality of an image montage.
Looks & Styles with Photoshop - Particles
The smallest particles skillfully distract from inconsistencies in composings and create image density. The atmosphere becomes more compact and tangible.
Looks & Styles with Photoshop - movie looks
We all know movie looks. If you analyze them skillfully, you can usually also create them in Photoshop and thus create a high recognition value for your images.
Looks & Styles with Photoshop - High pass look
The high-pass filter is not only suitable for sharpening. You can also use it to generate two different looks that couldn't be simpler, but also more concise!
Looks & Styles with Photoshop - Color Lookups
Color Lookups is a powerful adjustment layer that can be used in combination with the calculation modes to create quick and good color looks.
Looks & Styles with Photoshop - Painting light
Ideally, the lighting mood of a compositing fits, but what can I do if I have to relight with Photoshop? You will learn how to create a spotlight as a background and how to paint the necessary lightspill on the model.
Looks & Styles with Photoshop - Contours with color shine
In this video training, I'll show you how to adjust the contours of your model to the required color mood.
Looks & Styles with Photoshop - Fire
Nothing is easier to incorporate into composings than fire - provided you have the right source material.
High-End Beauty
Looks & Styles with Photoshop - HighEnd vs. LowEnd
What is the difference between a high-end retouch and a normal retouch? I'll show you here what you need to look out for if you want to create a natural or high-end retouch.
Looks & Styles with Photoshop - Skin texture and retouching
The quality of your retouching stands and falls with the appearance of your skin. Here you will get to know and love the current skin technique of frequency separation in detail.
Looks & Styles with Photoshop - Lip retouching
Alongside skin and eyes, lips are an important part of beauty retouching. Lip contours play the biggest role here alongside color and shape.
Looks & Styles with Photoshop - Eye retouching
As a viewer, I usually spend the longest time looking at eyes, which is why it is important to pay a lot of attention to the eyes when retouching images.
Looks & Styles with Photoshop - Optimize face shape
Techniques for deformation - liquefy, transform.
Looks & Styles with Photoshop - Replacing large areas
If normal techniques are no longer sufficient, you can help yourself by swapping certain things on a large scale. Swapping eyes, mirroring ears, lips upside down and other useful tips & tricks.
Looks & styles with Photoshop - perfecting your hair
In this video training, I explain many techniques that you should know for good hair retouching.
Looks & styles with Photoshop - light emphasizes the figure
You can emphasize a face with light or D&B. Which areas do I need to darken or lighten to achieve perfection? A universal roadmap.
Looks & Styles with Photoshop - painting over mistakes
Some beauty retouching requires a lot of effort. What and how can I save or improve by simply painting over with layer modes and how do I do it?
Looks & Styles with Photoshop - Final touches
Finished with retouching? Tips & tricks for the final polish that gets the most out of your pictures.
tools
Looks & Styles with Photoshop - Non-destructive vs. destructive working methods
I'll explain a non-destructive workflow and show you how to build your layer stack logically.
Looks & Styles with Photoshop - Smart objects
Smart objects are perfect for guaranteeing a non-destructive workflow. Learn how to use them correctly here.
Looks & Styles with Photoshop - Dodge & Burn
Dodge and Burn - 5 ways, 5 results. A comparison.
Looks & Styles with Photoshop - Contrast
High contrast vs. flat - in this video training you will learn how much contrast an image needs and what techniques you need to achieve it.
Looks & Styles with Photoshop - Exposure
Exposure doesn't have to be witchcraft, there is more than just one slider that can be used to create light and shadow. From ACR to adjustment layers, everything to light and dark ...
Looks & Styles with Photoshop - layer modes and how they work
Layer modes are time savers. How do I recognize when I can save a lot of time? Which modes for which purpose?
Looks & Styles with Photoshop - Tonal value correction
Tonal value correction can be used to do more than just change the contrast. Adjusting colors, clipping, textures ...
Looks & Styles with Photoshop - Image calculation
In this video training, I'll show you how to conjure up excellent micro details in every image using image and channel calculations.
Looks & Styles with Photoshop - Retouching tools
Tips & tricks for the common retouching tools.
Looks & Styles with Photoshop - Summary
At the end of "Looks & Styles", we'll go through a non-destructive grading workflow together. I'll summarize for you what should characterize your personal look and what you need to pay attention to.
Looks & Styles with Photoshop - Non-destructive vs. destructive working methods
18 min OpenExamples of use
-
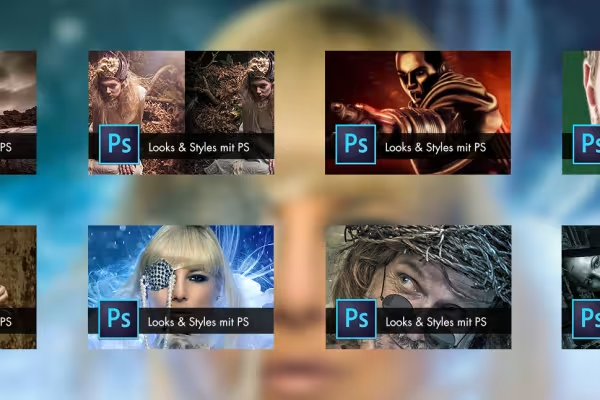 Learn how to create special looks and styles in Photoshop.
You might also like

Save time with artificial intelligence

Full power, more inspirations, maximum WOW effect!

Photo editing & image composition

More style, more power, more templates!
Comment now „Looks & Styles with Photoshop“