
Photoshop workshop DVD - Effects for type, layout & photo - Vol. 1 (for free)

- Apply typography, layout, and photo effects purposefully
- Additionally 85 tutorials as PDF version (2,300 PDF pages)
- Contains working files, styles, and actions for various effects and tutorials
- Free: Just watch the video training and get started right away! (below are the individual free videos for streaming)
Catches the eye, stays in the mind! With the expertise of the professionals, you create stunning effects for your flyers, photos, websites, and many other media yourself!
77 Videos, 1399 minutes
Typo effects (free)
Five quick tips for classic typo effects
In this part of the Quicky series, there are five typon applications that are essential when working with Photoshop.
I explain:
- Formsatz: Placing text in shapes
- Konturenführung: Let text flow around objects
- Text on a path
- Grouping texts with images via a clipping mask
Contour filling with brush presets over work paths
Download now for free - a thank you from our trainers to the many viewers of their videos in recent years.
Five quick tips for cool typo effects
In this tutorial, I want to show you some quick typo tricks by creating five creative text effects with Photoshop very quickly.
Here's what we'll cover:
1. Retro contour effect for headlines,
2. Frayed contour effect for headlines,
3. Simple mirroring effect in 3D look,
4. Gradient reflection effects in text and shapes,
5. Slanted text with border.
Download now for free - a thank you from our trainers to the many viewers of their videos over the past years.
Create a glass effect for typography and layout.
In this video training, I would like to show how a transparent glass effect text can be created that reflects the background in a broken manner and remains adjustable in placement at all times. I will present two ways to create the glass effect text.
Now download for free - a thank you from our trainers to the many viewers of their videos over the past years.
Engraving effect in wood for typography and layout
In this tutorial, I want to show an engraving/carving effect where a text is pressed into the wood.
Download now for free - a thank you from our trainers to the many viewers of their videos over the past years.
Grunge effect for typo and layout
There are numerous ways to create a frayed and torn typographic style under the term Grunge. In this tutorial, I would like to show several variations and approaches to grunge effects for texts.
Download now for free - a thank you from our trainers to the many viewers of their videos over the past years.
Create glitter text
In this video tutorial, I will show you how to create a text made entirely of glitter. This will allow us to create a path from a text which we will fill with different brush settings.
Download now for free - a thank you from our trainers to the many viewers of their videos over the past years.
Create plastic text - Five different variations
This video training will show how various plastic text effects can be created in different ways and approaches.
Download now for free - a thank you from our trainers to the many viewers of their videos in recent years.
Candy effect classic and illustrative
The candy effect can be especially well used typographically for children's themes, sweets, bakeries, etc. I want to show in this tutorial how to create a classic and illustrative candy cane font.
Download now for free - a thank you from our trainers to the many viewers of their videos over the past years.
Logo with various flashy effects
This video training shows how with a little path work, letters can be transformed individually, so that with more effects, a flashy logo is created.
Download now for free - a thank you from our trainers to the many viewers of their videos over the past years.
Text shadow effect
This video training will show how to create a cool text shine effect with just a few clicks. As a bonus, it will also demonstrate how the Radial Blur can be used effectively.
Download for free now - a thank you from our trainers to the many viewers of their videos over the past years.
Grass text with just a few clicks - 2 variants
This video training shows how to create a grass text using just one brush. It also explains how to make the grass look photorealistic. Additionally, it demonstrates how the effect can be quickly applied to hay or even used to create a monster fur text.
Download for free now - a thank you from our trainers to the many viewers of their videos over the past years.
Clouds on text and shapes
This video tutorial demonstrates how to create a cloud brush and apply it to text and various shapes. Bonus: It also shows how to create a starry sky.
Download now for free - a thank you from our trainers to the many viewers of their videos over the last few years.
Text effects using the Paths panel and various brushes
This video training shows how very individual text effects are created using the brush and working with paths. It also explains how to quickly create your own brushes and then use them effectively for the text effect.
Download now for free - a thank you from our trainers to the many viewers of their videos over the past years.
Ice text realistic and ice text & icicles in comic style
This video training shows how to convert a text into an ice text with a few steps and how to appropriately break the background. In addition, a second method is demonstrated on how to create a comic ice text with icicles and quickly insert snowflakes into the image.
Download now for free - a thank you from our trainers to the many viewers of their videos over the past years.
Typography cut effect for flyers and wallpapers
Cut effects are very popular. They can exert their special charm especially with logos. In this video tutorial, I explain how a typography cut effect can be created with Adobe Photoshop.
Download for free now - a thank you from our trainers to the many viewers of their videos over the past years.
Transparent glass text
This video training demonstrates how to achieve a realistic translucent glass effect using various layer effects. The tutorial also includes several techniques for creating highlights, reflections, and depth.
Download for free now - a thank you from our trainers to the many viewers of their videos over the past years.
Create flame texture text and fire text
In this video training, I would like to show how fire in general and a fire text in particular can be created. To create a simple fire look, many paths lead to the goal using brush tools like the smudge tool and the liquefy filter. In the tutorial, you will learn how to create a flame texture text and a fire text using Photoshop.
Download now for free - a thank you from our trainers to the many viewers of their videos over the past years.
Metal and chrome effects for text and textures
In this tutorial, I would like to show several ways to create metallic effects for texts and textures. I will show how metal can be created in a shiny and brushed structure, and how a reflection of the surrounding colors can be added as a color shimmer to the metal.
Download now for free - a thank you from our trainers to the many viewers of their videos over the past years.
Create chrome text - three examples with just a few clicks
In this video training, I would like to show another way to create a chrome text, which can also be expanded for glass effects, among other things.
Now download for free - a thank you from our trainers to the many viewers of their videos over the past years.
Rust - 6 variations to create a rust texture/a rust text
In this video training, 6 different variations are shown on how to create a rust texture and then apply it to a text. Each variation has a different approach. Tips on using actions and styles are also provided.
Download now for free - a thank you from our trainers to the many viewers of their videos over the past years.
Create 3D text - an old-fashioned and clever method
In this video training, the focus is on creating a 3D text in two different ways. In the first part, the 3D text is created in a rather cumbersome way without using Photoshop's 3D functions. In the second part, all 3D functions from Photoshop CS5 onwards are used.
Download now for free - a thank you from our trainers to the many viewers of their videos over the past years.
Break effect for typography and layout
For flyers and wallpapers, creative typography arrangements are recommended. In this video training, I want to show an approach on how text can be broken. With this technique, a variety of creative typo designs can be created!
Download for free now - a thank you from our trainers to the many viewers of their videos over the past years.
3D typo splatter effect
This video training shows how to create a great 3D typography effect using only two textures + splatter brushes with the 3D features starting from Photoshop CS5 Extended. Video length: 25 minutes.
Download now for free - a thank you from our trainers to the many viewers of their videos over the past years.
3D type composing
This video training demonstrates how a very elaborate 3D compositing is created using Adobe Photoshop CS5 in the Extended version. It provides many tips on handling light and textures. At the end of the workshop, it also shows how easily a beam effect can be created and how to insert elements using just one floral brush. Additionally, there are tips on how to further optimize the colors of the 3D letters themselves.
Download now for free - a thank you from our trainers to the many viewers of their videos over the past years.

3D text light effect with just a few clicks
Layout effects (free)
Five quick tips for popular flyer backgrounds
In this video training, I would like to show five quick recipes for creating simple but popular flyer backgrounds. It's about diagonal, vertical, and horizontal scanlines, dot patterns and pixel reliefs, circle mosaics and grid effects, grids and line patterns, as well as endless patterns and seamless tiles.
Download now for free - a thank you from our trainers to the many viewers of their videos over the past years.
Create bokeh effect easily using brush
In this video training, it is shown how brilliant circular light effects for e.g. flyer backgrounds or desktop backgrounds can be created using just a brush. This English website served as the source of inspiration:
Download now for free - a thank you from our trainers to the many viewers of their videos over the past years.
Excitement progression effect with animation
This video training shows how a great background effect can be created using only one gradient + distortion. It also explains how an animation enhances this effect even further.
Download now for free - a thank you from our trainers to the many viewers of their videos over the past few years.
Capture the light flare effect as an action
This video training explains how a light beam effect can be created with just a few filter commands. It also shows how the effect can be efficiently recorded as an action and played back. In addition, a second effect is briefly created. Video length: 10 minutes.
Download now for free - a thank you from our trainers to the many viewers of their videos over the past years.
Background with offset line logo effect
This video training will show how to create a cool background that can be easily customized with just a few clicks, especially in terms of color. It will also explain how elements like logos or text can be creatively inserted with color. Bonus: It will demonstrate how to create a line effect as a pattern and how to enhance it with the Offset filter.
Download for free now - a thank you from our trainers to the many viewers of their videos over the past years.
Bring lines to glow
This video training will show how to easily make lines glow. It also explains how to create a starry sky with a few clouds in the foreground!
Download now for free - a thank you from our trainers to the many viewers of their videos over the past few years.
Party light effect for flyers and wallpapers
A popular effect for party flyers and wallpapers are the party lights inspired by bokeh lights. In this tutorial, I want to show how easy it is to create this effect in Photoshop. A working file in PSD format is included with the video training.
Download now for free - a thank you from our trainers to the many viewers of their videos in recent years.
Stripe effect for flyers and wallpapers
Popular effects in flyers and wallpapers are currently design elements based on vectors. A simple effect can be created very quickly with Photoshop. In this video tutorial, I explain how five stripes flow into the image with a spatial effect.
Now download for free - a thank you from our trainers to the many viewers of their videos over the past years.
Glowing light streak effect for flyers and wallpapers
Shine effects on lines and stripes are very popular. They can exert their special charm especially in combination with graphics and texts. In this video tutorial I explain how a subtle stripe shine effect can be created with Adobe Photoshop.
Download now for free - a thank you from our trainers to the many viewers of their videos over the past years.
Light shine effect for backgrounds in flyers, websites, and wallpapers
One very popular effect are shining light rays, which are often found as design elements in backgrounds. In this tutorial, I want to show how quickly such a light glow can be created and varied in color and shape.
Download now for free – a thank you from our trainers to the many viewers of their videos over the past years.
Matrix effect with animation
This tutorial will show how to easily create a matrix effect and animate it. In addition, it will be explained how to incorporate a face into the characters in such a way that it can be recognized through glowing characters.
Download for free now – a thank you from our trainers to the many viewers of their videos over the past years.
Stripes with glowing stars + star glitter text
This video training will show how to create a cool stripe effect with just one brush and its special settings, and enhance it colorfully with just one filter + gradient. The second part of the video training covers the creation of various star type effects including the creation of a custom star brush.
Download now for free - a thank you from our trainers to the many viewers of their videos over the past years.
Create realistic clouds
This video training will show you how to create realistic clouds with just one brush and a few settings in the brush panel.
Download now for free - a thank you from our trainers to the many viewers of their videos over the past years.
Water splashes and water drops created quickly
In this video training, two techniques are shown for creating water drops or splashes. In addition, there are tips on using actions and layer styles.
Download now for free - a thank you from our trainers to the many viewers of their videos over the past years.
Explosion with fire and rays
Here it is explained how to create an explosion with fire and radiation! Additionally, I will show how this effect can be recorded as an action and played back sensibly.
Download now for free - a thank you from our trainers to the many viewers of their videos over the past years.
Create four different planets including asteroid belt + explosion
This video training shows how to create four different planets. The first and second planet are modeled after the sun. The third planet is a blue planet with an asteroid belt. The focus of the last planet is on how to make it explode and at the same time record an action to achieve different explosion effects at the touch of a button.
Download now for free - a thank you from our trainers to the many viewers of their videos over the past years.
Create a 3D Earth with just a few clicks
In this video training, it is shown how thanks to Photoshop in the Extended version with its 3D functions a realistic Earth is quickly created. Although the video is short, here many tips and tricks are given for handling 3D objects in Photoshop and thus further improving the result.
Download now for free – a thank you from our trainers to the many viewers of their videos in recent years.
Creating stamps with a stamp - two different approaches
This tutorial explains how to create a stamp in a very simple way. Because it is so easy, two different approaches are shown. Additionally, two variations are demonstrated on how to create a stamp effect.
Download now for free - a thank you from our trainers to the many viewers of their videos over the past years.
Create filmstrip with reflection and transformation
A photo filmstrip is a popular way to present images. It is even more effective when the image exchange is made as simple as possible despite effects and transformations. In this video tutorial, I want to show several things - creating a filmstrip template using shape layers - mirroring the filmstrip template - placing the images in the template and mirror - transforming the photo filmstrip and replacing images.
Download for free now - a thank you from our trainers to the many viewers of their videos over the past years.
Retro reflection effect for flyers and wallpapers
A very popular effect are retro stripes in the style of sun rays. These are often used as background for flyers and wallpapers. In this video tutorial, I want to show the creation of the classic retro ray effect, but also possible variations that develop this effect in a creative way.
Download now for free - a thank you from our trainers to the many viewers of their videos in recent years.
Illustrative disco ball for flyers and wallpapers
To add some spice to a party flyer, it is a good idea to include a disco ball as a design element. In this tutorial, I want to show how to create an illustrative disco ball in Photoshop, both with and without the use of the 3D tools, in a very simple way.
Download for free now - a thank you from our trainers to the many viewers of their videos over the past few years.
Sound Peg Effects for Flyers and Wallpapers
In this tutorial, I would like to show several ways to create sound level/equalizer effects. These are very suitable as graphic elements in flyers for parties.
Now download for free - a thank you from our trainers to the many viewers of their videos over the past years.
Create a business card with a 3D light shadow effect in Photoshop
Creating a business card sounds easier than it actually is. Limited space is supposed to reflect a part of the personality and leave a lasting impression on the recipient. A minimal style can help avoid giving the wrong impression. In this tutorial, I want to create a 3D light-shadow effect for a business card, which can also be used optimally in flyers, exclusively in Photoshop. The effect is particularly suitable for logos and initials of a person. The front of the business card is simple, yet beautiful, not too playful, yet modern in a pleasant way. The background is used for contact and address data. Normally, business cards are laid out in Adobe InDesign and 3D effects are primarily created in 3D programs. In this tutorial, I will show how to do both in Photoshop CS4 using the 3D functionalities.
Download now for free - a thank you from our trainers to the many viewers of their videos over the past years.
Flyer design in a retro-grungy look: Flower-Power vintage car meeting - from design to print
Using the example of a Flower Power vintage car meeting, I want to show how quickly and easily a retro-grungy look can be implemented in a flyer. I will demonstrate how the individual elements are designed in the flyer and what to consider when printing. Afterwards, we will proceed to an online printing company such as flyerpilot for printing handover. Normally, background graphics are created in Photoshop, placed in an InDesign document, and the flyer is laid out in InDesign until the PDF export. Flyers created in a vector style can sometimes even be created entirely in InDesign without any preliminary work in Photoshop or Illustrator. As not everyone has access to InDesign, I will show here the editing exclusively in Photoshop - even if that should not always be the preferred way.
Download now for free - a thank you from our trainers to the many viewers of their videos over the past years.
Outline effects for flyer and wallpaper designs
Shadow silhouettes and contour images are constantly suitable as design elements for flyers and wallpapers. A contour image effect can be quickly generated using tonal separation.
Download now for free - a thank you from our trainers to the many viewers of their videos over the past years.
Illustrative propaganda look for flyers and wallpaper
With the election of Barack Obama as president, the Hope poster by graphic designer Shepard Fairey also gained prominence. I want to show an adaptation of this illustrative "propaganda" look in this video training. The illustrative look can be easily transferred to other themes and motifs. I will show how to do it in this video training. I am using the theme "Global Warming" for this.
Download for free now - a thank you from our trainers to the many viewers of their videos over the past years.
Flyer design in a retro-grungy look: Flower-Power vintage car meeting - from design to print
23 min OpenPhoto effects (free)
Creating the cover design - creating wavy lines & sine dots and quickly cutting out the model
In this video training, it is shown in detail how a wavy line is created using the pen tool. Additionally, it is demonstrated how the sinedots in the background were created. As a bonus, there are tips for quickly cutting out the model.
Download now for free - a thank you from our trainers to the many viewers of their videos over the past years.
Apply tilt-shift effect to photos
This tutorial will show how to create a tilt-shift effect very easily. In doing so, the photo gets a certain depth of field or parts of the photo are blurred to create the feeling that you are looking at a model landscape. I will replicate a tilt-and-shift lens through Photoshop, which is a special lens for photography that allows the lens system to be shifted and tilted relative to the film plane.
Download for free now - a thank you from our trainers to the many viewers of their videos over the past years.
Create a typo portrait effect
Creating an image from text lines can be quite simple. It is important that the image has enough contrasts. It gets more challenging when a typo portrait effect should be created from the text line image. In this video training, I want to show how it is done.
Download now for free - a thank you from our trainers to the many viewers of their videos from the past years.
Reflection effects for objects and water
In this video training, I would like to show in two examples how objects can be mirrored. In the third example of this video training, I will show how a forest meadow turns into a forest lake, where the forest panorama is realistically reflected.
Download now for free - a thank you from our trainers to the many viewers of their videos over the past years.
Create a color contrast look for flyer and wallpaper
Flyers featuring a person silhouette or a model in color contrast look are often and gladly seen. In this tutorial, I will show how such a color contrast look is created in combination with a gradient. This allows you to quickly generate great designs for flyers and more.
Download now for free – a thank you from our trainers to the many viewers of their videos over the past years.
Create circular mosaic effect for photos, flyers, and wallpapers
A creative photo effect with a circular mosaic can be achieved very quickly by superimposing patterns of previously appropriately placed transparent circles. In this video tutorial, I will show how this effect is created.
Download now for free – a thank you from our trainers to the many viewers of their videos over the past years.
Exploding fragments from a photo
This video training will show you how to create exploding fragments in a very simple way - just using a layer mask.
Download now for free - a thank you from our trainers to the many viewers of their videos over the past years.
Composition in photographs
With a colored gradient, images can be enhanced in a special way and achieve the desired image effect.
Download now for free - a thank you from our trainers to the many viewers of their videos over the past years.
Vignetting - Six different approaches to creating a vignette
This video training shows how to create a vignette (shading towards the edge of the image) in various ways to enhance photos or to direct the viewer's focus on the essential.
Download for free now - a thank you from our trainers to the many viewers of their videos over the past years.
Create sepia effect in three ways
In this video tutorial, I will explain how a sepia effect can be achieved on a photo in three different ways. At the end of the video tutorial, there is a special tip on how to round off the image with a deckle edge with just one click.
Download now for free - a thank you from our trainers to the many viewers of their videos over the past years.
Let pictures age
In this video tutorial, I will explain how an image can be aged using the effects: sepia toning, signs of aging through scratch texture, and vignetting (edge shading).
Download now for free – a thank you from our trainers to the many viewers of their videos over the past years.
Image with depth through crack and fold effects
Video training by Tom Krieger: Separation - the statement lies in the image! Here we transform a rather inconspicuous photo into a meaningful image with depth. How does a photo look when it is torn, crumpled, and opened again in the right place? Does it then make a new sense? I definitely say: yes! Here, not only techniques are taught that can be applied to any image, but also always the view "behind".
Download for free now - a thank you from our trainers to the many viewers of their videos over the past years.
Create a glowing special effect
A popular light effect in pictures are glowing paths, illuminated areas or backlit persons. In this video tutorial, I explain how a model is cut out from a white background and placed on a black background with a glowing halo effect.
Download for free now - a thank you from our trainers to the many viewers of their videos over the past years.
Digital cross development - Back to the 80s
Cross development is a technique from the era of analog photography. Especially in the 1980s, cross development was used to artificially manipulate photos. Color negative films were developed as positives or color positive films were developed as negatives. This effect can be quickly and easily recreated in Adobe Photoshop. I will show you how in this video tutorial.
Download for free now - a thank you from our trainers to the many viewers of their videos over the past few years.
Bad Girl Silhouette - Silhouette with spotlight effect
A creative picture effect can be a silhouette that is brought into the right light. Here I want to show how this spotlight effect combined with the shadow profile can be created from a photo.
Now download for free - a thank you from our trainers to the many viewers of their videos over the past few years.
Page peel/picture flipping effect in three variations
This video training demonstrates how to easily create a page flip effect. Three different methods are shown. In addition, tips are provided on how a page peel can also be saved as its own form, serving as a basis for further page peels in all sizes.
Download for free now - a thank you from our trainers to the many viewers of their videos over the past years.
Negative effect: Painting photos with watercolors
Although Adobe Photoshop has sufficient filters for generating art and painting effects, watercolors cannot really be achieved with just one filter. Combining multiple filters in Photoshop achieves a painting effect that gives the impression that the image was painted with watercolors. In this video tutorial, I will show you how to do it.
Download now for free - a thank you from our trainers to the many viewers of their videos over the past years.
Create a realistic rainbow and mount it in a picture
Bad weather and gloom are enough for some photo shoots. But the eye-catcher is achieved when natural phenomena such as lightning or rainbows appear in the picture. In this video tutorial, I explain how to create a rainbow with a radial gradient and realistically integrate it into an image.
Download now for free - a thank you from our trainers to the many viewers of their videos over the past years.
Effectively use image outlines and frames to enhance the impact of the image
In this video tutorial I explain how to enhance an image in a simple and effective way using an image outline and a frame.
Now download for free – a thank you from our trainers to the many viewers of their videos over the past years.
Letting a picture jump out of a frame
In this video training, it is shown how to easily extract an object from an image. The effect is vividly explained with two examples. In addition, there are tips and tricks for cutting out.
Download now for free - a thank you from our trainers to the many viewers of their videos over the past years.
From color to black and white - the athlete portrait
Black and white contrasts give a special drama to an image - even if it is just a somewhat boring landscape or architectural shot. Black and white photography is particularly popular in portrait shots. If it's a portrait of an athlete, aesthetic body shapes can combine with light-dark contrasts to create a graceful and powerful composition. In this video tutorial, I will demonstrate a combination of the black and white adjustment layers and the channel mixer to convert color to grayscale with subsequent fine-tuning of the high-contrast light-dark areas.
Download now for free - a thank you from our instructors to the many viewers of their videos over the past years.
Color toning of a black and white image
Color tonings are popular, and with good reason. Black and white images often appear too cold and expressionless in many respects. To control the expressiveness of an image, black and white images can be tinted, that is, toned. In analog picture development, chemicals were used for tinting. Photoshop has numerous tools available for this. In this video training, I explain the toning of black and white images using the following techniques: - Hue/Saturation adjustment layer - Black & White adjustment layer - Photo Filter adjustment layer - Color Balance adjustment layer - Channel Mixer adjustment layer - Solid Color adjustment layer - Variations correction - Duplex Mode
Download now for free - a thank you from our trainers to the many viewers of their videos over the past years.
Heavenly design - deep blue, cloudier, more romantic
If the sky is too pale, too monotonous, or too cloudless, Photoshop can help to liven up the image. In this workshop, I would like to demonstrate using four examples how playing with the sky blue can enhance the impact of the image. Specifically, it's about intensifying the blue, creating gradients in the sky, and adding clouds to a blue sky. The video tutorial was recorded with CS4 but can also be applied almost entirely with previous versions.
Download now for free - a thank you from our trainers to the many viewers of their videos in recent years.
Gilding metals
Photoshop and the Philosopher's Stone actually go together. To do this, simply make a few curve adjustments in the gradation curves and quickly transform base metals and even precious silver into a golden look.
Download now for free - a thank you from our trainers to the many viewers of their videos over the past years.
Puzzle made from a photo with removed puzzle pieces in two variations
In this video training, it is demonstrated how to create a puzzle from a photo in a very simple way and how to remove a few puzzle pieces from it. In addition, in a second variation, it is shown how to quickly create a puzzle structure based on a photo.
Download now for free - a thank you from our trainers to the many viewers of their videos over the past years.
Portrait in the style of Roy Lichtenstein
One of the most famous representatives of Pop Art is Roy Lichtenstein. His works, which look like comic images, have made a lasting impression on our memory. Not only that - the advertising industry has long since discovered Roy Lichtenstein for itself. Many advertising messages are known to bear the artist's signature, even though they do not actually feature Lichtenstein's paintings. The artist's style is perfect for impactful, compelling messages. Of course, the level of recognition also plays an important role. The viewer is immediately reminded of Lichtenstein and the message is better received - a popular psychological trick of the advertising industry. Alongside Andy Warhol, Roy Lichtenstein is an artist whose style is very easy to imitate. You do not need outstanding skills for this - just a little technique, and any portrait photo can be transformed into a Lichtenstein "painting." In this video training, you will learn how to convert a studio photo into a "Lichtenstein" within just a few minutes. All you need is Photoshop and, if available, a graphics tablet.
Download for free now - a thank you from our trainers to the many viewers of their videos over the past years.
Vexel Art
Vexel is actually not a new invention. Actually, Vexel is an abbreviation of vector and pixel - quite simple. Lately, the method of image editing, in which the pixels are traced with vectors, has been very trendy. Hardly any magazine today comes without vector-based illustrations. In this video training, I want to show you a few techniques with which you can turn a photo into a vector illustration in Photoshop. It is advisable to use a graphics tablet for this, thus saving a lot of time and working more precisely. I intentionally didn't choose a portrait of a beautiful young lady as an example, because such Vexel-style images are something you should do when you have mastered the Vexel technique. Of course, the technique shown here is not the only way to create vector images, but, I think, one of the simplest. Besides Photoshop, you can also create Vexel art in Illustrator. There is even a tracing function that can partially automate your work, but that's a different story and not the subject of this video. And one more thing: In addition to the trend factor, Vexel images have a very useful property. They can be enlarged as much as you want, without the outlines becoming blurry - logically. We are not working with pixels, but with shapes that are outlined with vectors, and these can be scaled easily. And now, I wish you a lot of fun with this video training. The sample file is available for download.
Download for free now - a thank you from our trainers to the many viewers of their videos over the past years.
Creating the cover design - creating wavy lines & sine dots and quickly cutting out the model
18 min Open
Create cross-hatching without filter

Evening gown - a midsummer night's dream
Examples of use
-
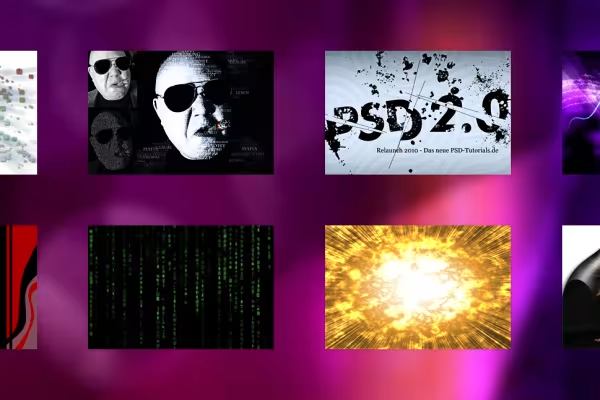 Photoshop Effects Vol. 1
You might also like

Save time with artificial intelligence

Photo editing & image composition
Live your layout now!

More style, more power, more templates!
Comment now „Photoshop workshop DVD - Effects for type, layout & photo - Vol. 1 (for free)“