Boris FX Primatte Studio is a powerful plug-in for MAGIX VEGAS Pro 19 that helps you take keying to a new level. Whether you're creating professional productions or just working on personal projects, the possibilities this tool offers are impressive. This guide will show you how to effectively use the features of Primatte Studio to achieve outstanding results.
Main Insights
- The plug-in provides an easy way to automate keying.
- Adjustments like Spill Removal, Edge Cleaner, and Color Correction allow you to significantly improve the quality of your scenes.
- Presets can be saved and reused to optimize your workflow.
Step-by-Step Guide
To start working with Boris FX Primatte Studio, follow these step-by-step instructions:
Begin by preparing your scene in MAGIX VEGAS Pro 19. First, you need to import your video in green screen format. Ideally, the video should be clear and easy to edit, allowing the keying function to work effectively. Ensure the lighting is even to achieve the best results.
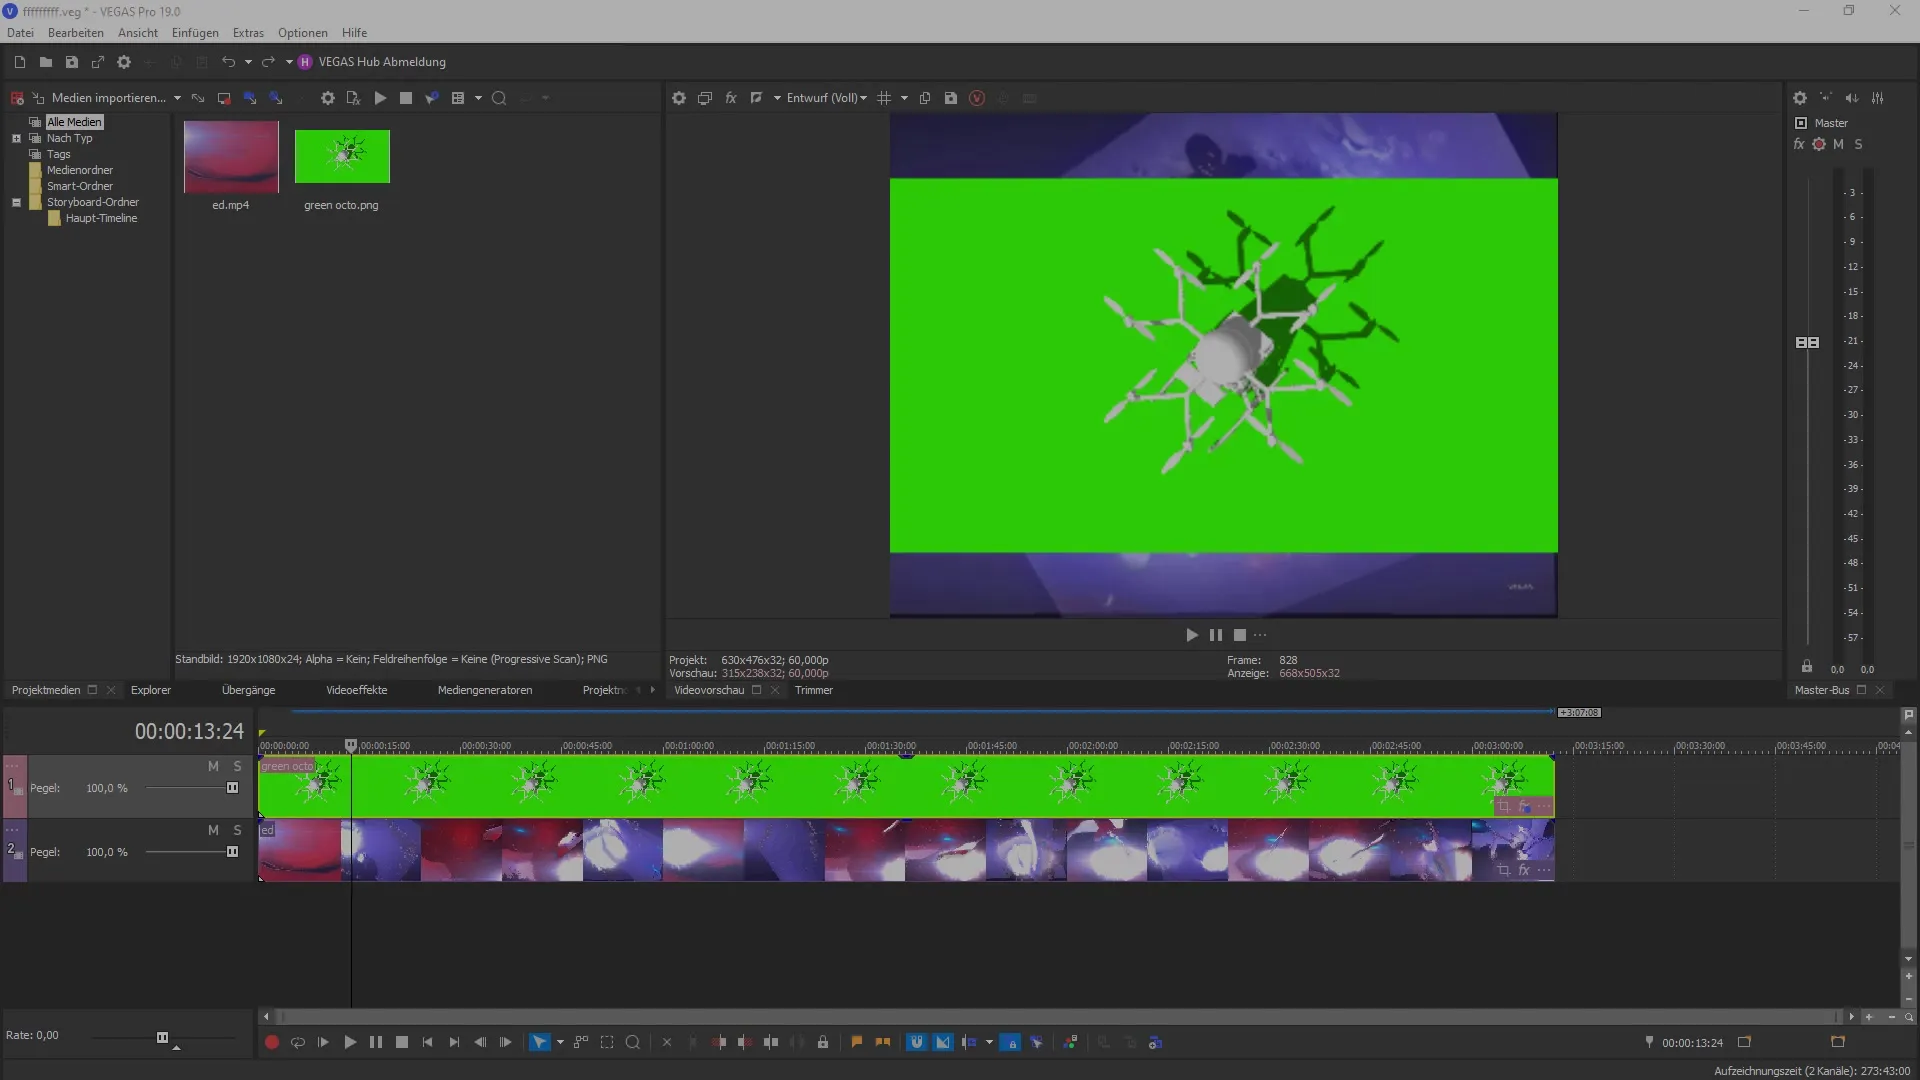
After loading your green screen scene, select the clip layer to which you want to apply the plug-in. Then go to the Event FX for the selected video. There, you should select Boris FX Primatte Studio from the list of available plug-ins.
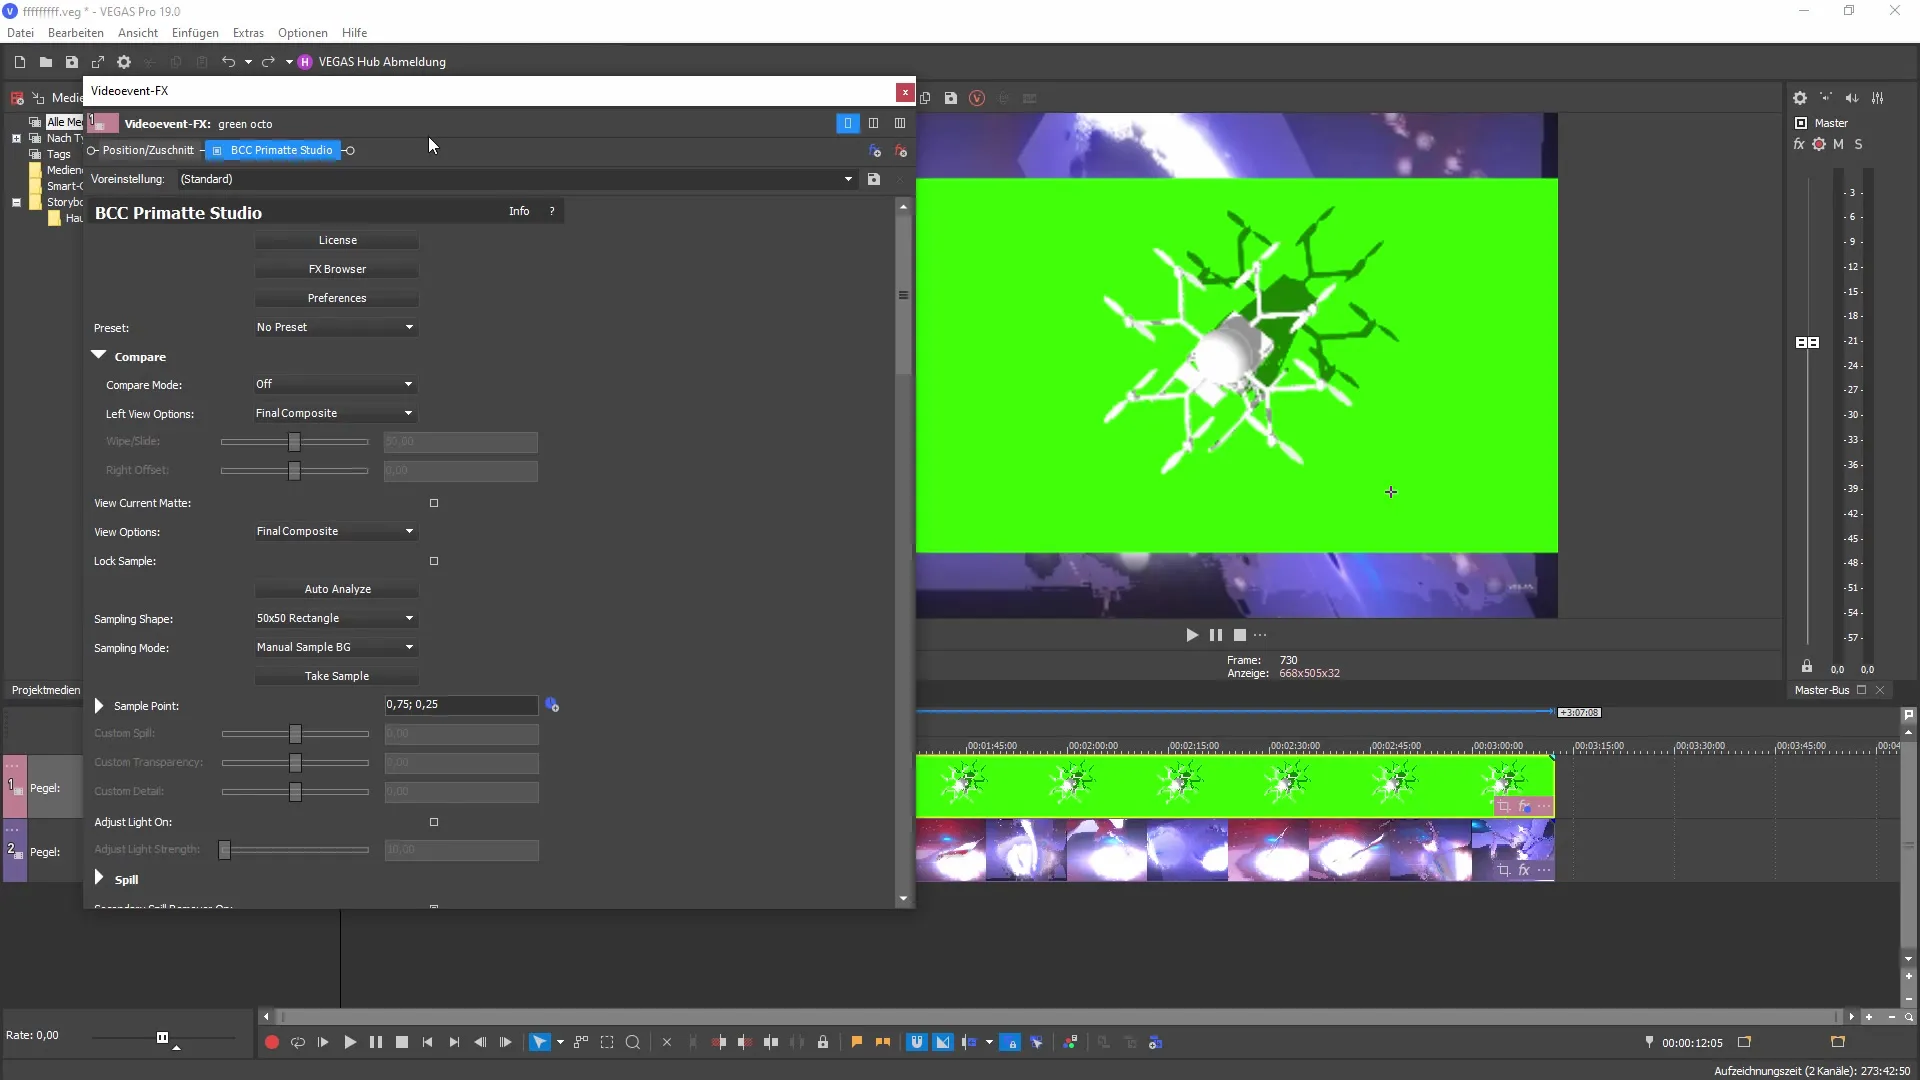
Now you are in the Primatte Studio interface. Here, you have a variety of features that help you achieve the best possible results. One of the first options you should adjust is the Spill Removal function, which allows you to remove excess colors caused by the green background.
An important feature in Primatte Studio is the Edge Cleaner. With this setting, you can adjust any rough edges and pixels that may have occurred during filming. These adjustments improve the edges and help your keying look more natural.
In addition to the Edge Cleaner, you also have the option to make other adjustments, such as color corrections and light adjustments. These settings help you further optimize the scene and create the desired light and color effect.
If you are satisfied with the results, it is a good idea to save your adjustments as a preset. Click the floppy disk icon to secure your settings. This makes it easy to reuse them for future projects without having to set everything up from scratch again.
To see a comparison between the original image and the edited version, activate the comparison mode. This mode helps you decide whether your adjustments are effective and if you want to make any changes.
To initiate the keying, use the Auto-Analyze function. This will automatically detect the appropriate color for keying and process all relevant areas accordingly. However, be prepared that some manual adjustments may be necessary to achieve the best results, especially in shadowy areas.
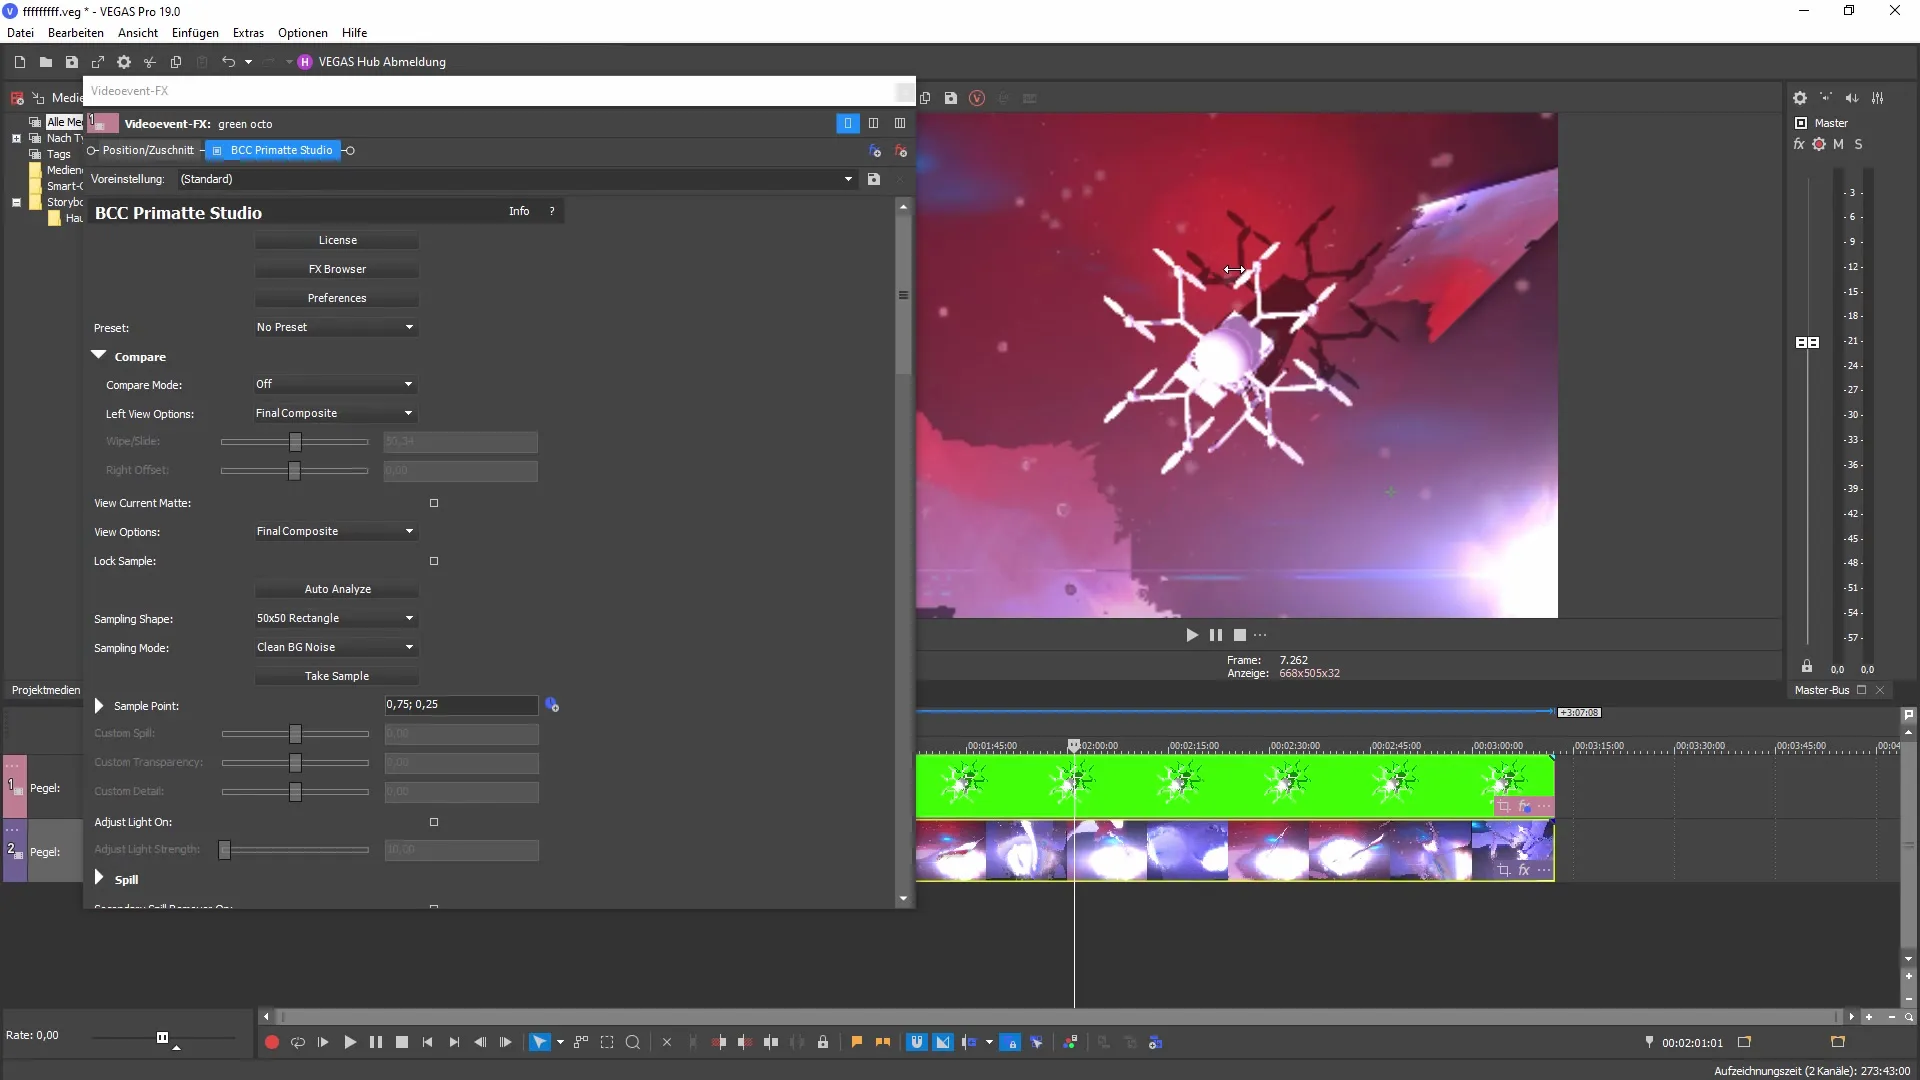
A common pitfall in keying is unwanted color components caused by shadows. To fix this, you can activate the Secondary Spill Remover and adjust specific areas. This allows you to effectively remove red tones or other discolorations caused by shadows.
Moreover, there is the option to further refine the edges to achieve a better and more natural result. With the Mat Refinement tool, you can finely tune sharp edges and soft transitions. This helps ensure that your compositing elements are integrated into the scene more seamlessly.
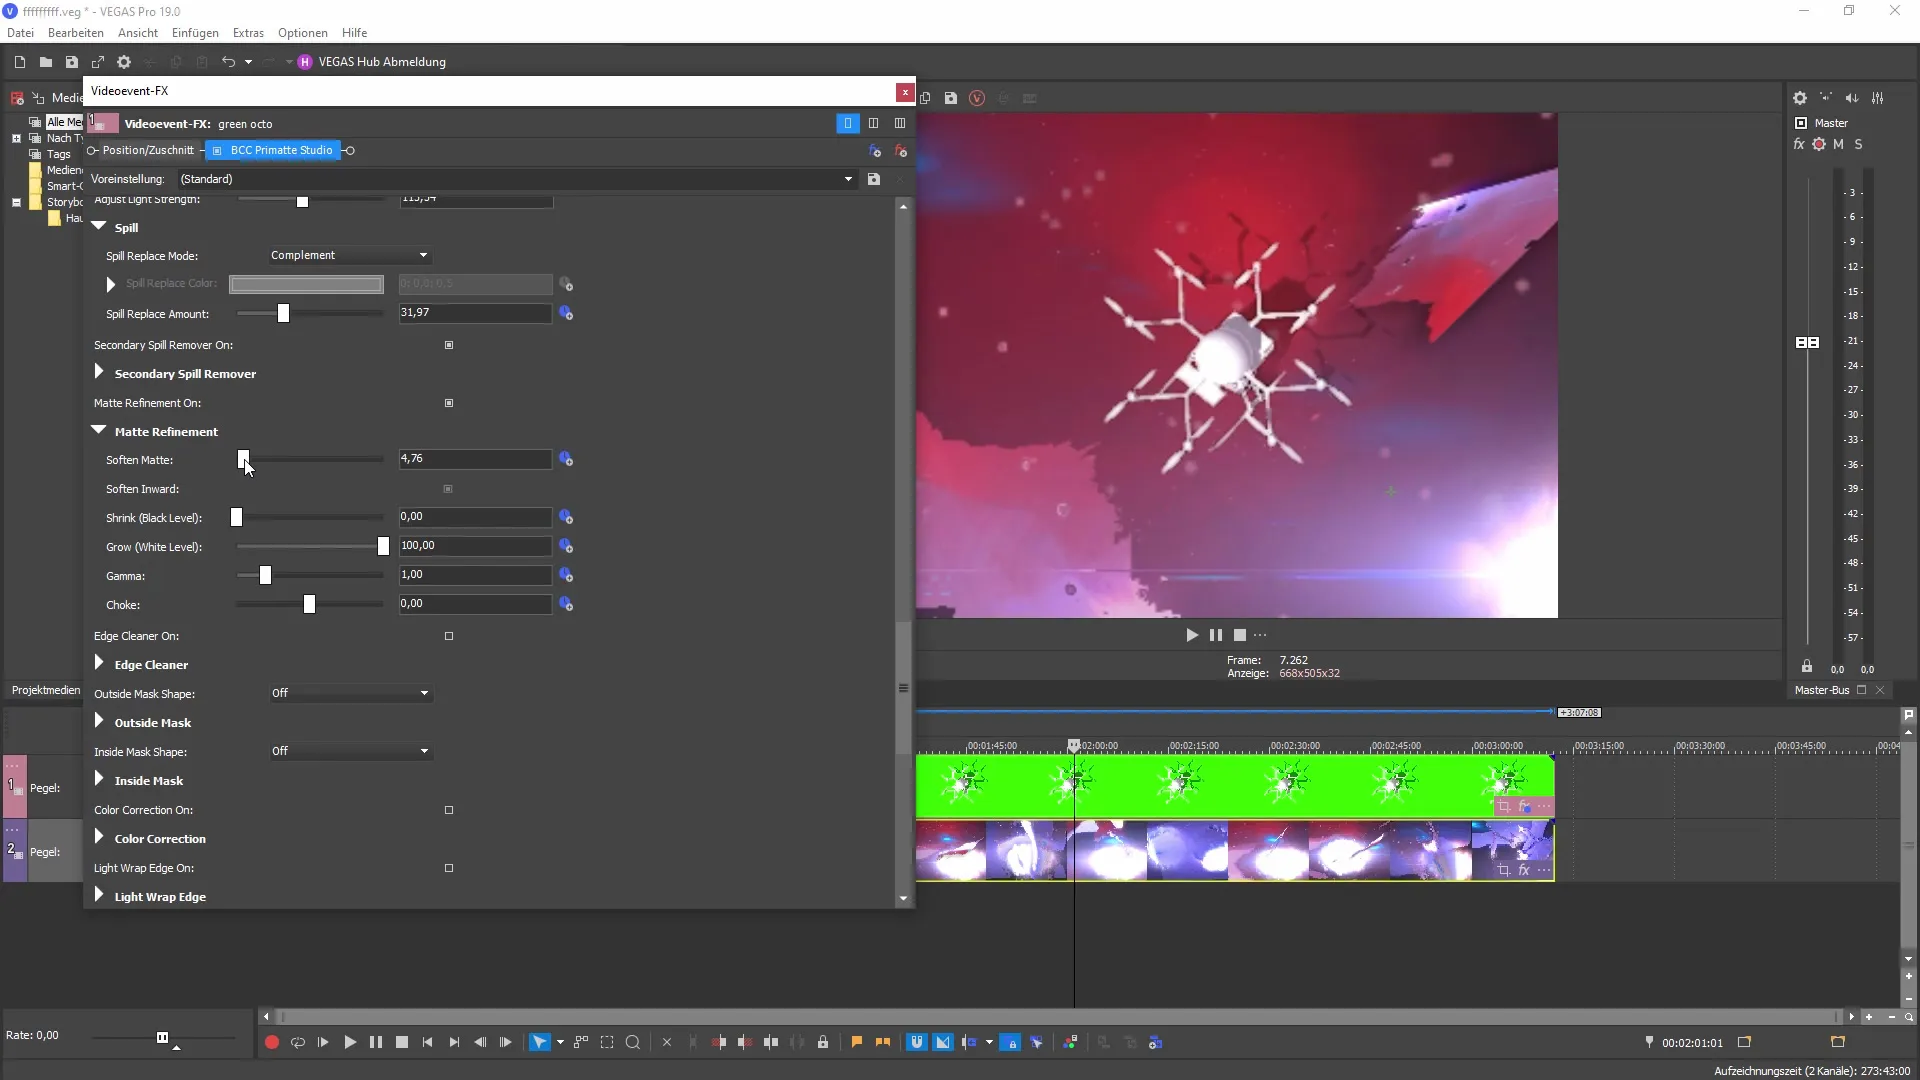
To further optimize the overall image, you can make color corrections. Adjust the temperature, color saturation, and contrast to achieve the perfect result. These adjustments are crucial to ensure that the keying fits stylistically and visually with your scene.
Once you've completed all adjustments, you are well-equipped to change or modify the background. That was the original purpose of keying, and with these tools, you can ensure that your result looks both appealing and professional.
Summary - Guide to Using Boris FX Primatte Studio in MAGIX VEGAS Pro 19
With Boris FX Primatte Studio, you have a powerful tool at hand to make your keying quick and effective. The adjustment options this plug-in offers allow you to significantly enhance your scenes, making them look professional and appealing.
