

A photo of yourself as an action figure in a blister pack, a movie poster with your own title, or an invitation card that is ready in a few seconds: all of this can be done with Google Nano Banana. The model is part of Google Gemini, and since the update to Gemini 3, it has made a big leap. Text in images is now hardly a problem anymore.
The video is only loaded from YouTube when you play it – data (including your IP address) is then transmitted to YouTube/Google. More in the privacy policy
In this tutorial, you will go step by step through the practical examples I used to show the strengths and weaknesses of the free and the paid version. You will learn how to upload photos of yourself, which prompts deliver reliable results, and how to improve the resolution with an image upscaler.
Key Takeaways
- Nano Banana Pro generally delivers more realistic images, a higher resolution, and more reliable text than the free version.
- The free version is sufficient for many tasks, but it makes spelling mistakes more often and produces smaller files.
- With your own photo, you can insert people into new scenes, create action figures, design covers, or remove image content in a targeted way.
- Explicitly state in the prompt that an image should be created, otherwise the AI may generate text instead.
- A free AI image upscaler makes small images significantly larger and sharper afterward.
- Failed results can usually be improved with a follow-up prompt.
Step-by-Step Guide
Step 1: Upload a photo and compare variants
Open Google Gemini and select Nano Banana. Before you get started, you should know that with the paid version, i.e. with an AI Pro subscription, you can create significantly more images. For the comparison, I opened two tabs, one with the free version and one with the Pro version. Drag and drop your photo into the input field or use the upload function. The first time, you have to agree to the terms of use.

Step 2: Formulate the prompt correctly
The prompt determines whether you get an image or a text. Therefore, always state clearly that an image should be created, for example "Create an image in which I, as the person in the photo, am cut out and standing in a scene." Gemini usually recognizes the intention on its own, but with a clear sentence you are on the safe side. There is also a selection in the interface such as "Create image" that you can use. If you forget it, the AI may deliver only text. With the "Create image" button, you start the generation.

Step 3: Compare the results and download
First look at the result from the Pro version. The cutout was very good in my example; the image did not look perfectly realistic, but convincing. It is important that you save the image in its original size via the download button. In the preview you cannot zoom in, and the preview says nothing about the actual quality. In addition, the interface does not always show which model was used. The free version sometimes uses Nano Banana and not the Pro version, which is slightly better still.

Step 4: Check the resolution in the file manager
The difference only becomes apparent when you look in the file manager. In my test, the file from the free version was significantly smaller, while the Pro version had roughly twice the dimensions. The download also took noticeably longer with the Pro version, presumably because the image is upscaled internally there. For important projects, therefore, be sure to check the file size before you continue using the image.

Step 5: Enlarge small images with an AI upscaler
If you are working with the free version or need an image to be even larger than the Pro version provides, an AI image upscaler helps. In the video, I presented a free program that you load with your image. There you choose the desired enlargement factor, such as four or five times, and start the process. The duration depends on your graphics card and your processor. The result from a blurry image is not perfect, but in quality it often looks comparable to the Pro result.

Step 6: Designing Text in Images
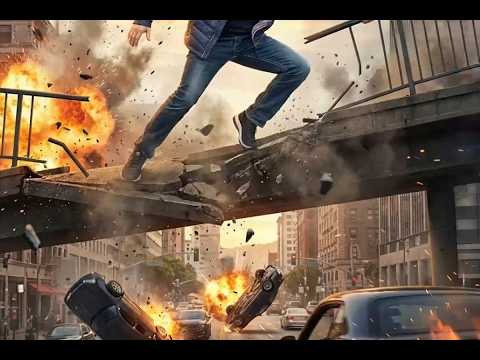
Gemini can also incorporate text into an image. I ordered my photo as a movie poster with a creative title, such as "Die letzte Brücke" with the tagline "Kein Weg zurück, nur vorwärts". In the Pro version, the text not only didn't look tacked on, but was also integrated into the background of the scene. The spelling was correct, so the result was almost usable as is. If you want text in an image, state the exact wording in the prompt and describe the desired style.

Step 7: Creating an Action Figure in a Blister Pack
A popular trend is the action figure. Upload your photo and ask Gemini to depict you as an action figure in a blister pack. Create the image in both versions to compare the quality directly. The Pro version usually delivers finer details in the packaging and the figure here. The results can also be judged well in the enlarged view before you download them.

Step 8: Creating a Cover Without Text
For video title images or thumbnails, you can generate the image directly. I wanted a cover for a Windows tuning training course, described it, and got the result. Since I wanted to add the text myself later with a text tool, I asked the AI to create the image without text. This worked reliably, and I didn't have to open Photoshop. To do this, clearly state "without text" in the prompt.

Step 9: Inserting People into New Scenes
You can also combine two images or place a person in a different scene. I used a photo of a trainer who was supposed to appear in an interview situation. My first attempt went wrong because Gemini inserted the wrong head. Only after a more precise prompt, in which I described exactly which person should stand where, was the result usable. So describe position, line of sight, and background as precisely as possible. Hairstyles and clothing are then often preserved as well, and the new scene looks credible.

Step 10: Correcting Errors in the Image and Removing Elements
An example shows well how you can refine results. I wrote a prompt for an invitation card but forgot that an image, not text, was supposed to be produced. The result was a text document. On the second attempt, I explicitly wrote the word "image" in the prompt, and Gemini created the card. Afterwards, I had unwanted elements removed via prompt and told the image to leave space at the bottom for a handwritten time. That way you could enter the text yourself later. This is faster than any image editing with a tool.

Step 11: Testing the Free Version with the Same Prompt
Next, enter the same prompt in the free version, this time directly with the addition "create as an image". The result was less reliable in my test. There were spelling errors in the address and date, and the invitation wasn't quite correct. This is because Gemini partly doesn't use the Pro version in the background. The solution is to follow up the prompt with specific corrections, such as "Please only one date at the top". Often this works on the second or third attempt.

Step 12: Experimenting with the Time Machine in AI Studio
Finally, it's worth taking a look at Google's AI Studio. There is a prebuilt script there, the "Time Machine", with which you upload your photo and generate images from different decades. You'll find the link to the Time Machine in the video description; it leads directly to the app in AI Studio. Generation takes only a few seconds. The results impressively show how well Nano Banana recognizes faces, even if the likeness isn't always perfect.


Summary – Google Nano Banana: Creating Images in the Free and Pro Test
Google Nano Banana makes image generation via Gemini simple and versatile. The Pro variant stands out with higher resolution, more realistic results, and more reliable text. The free variant is enough for many ideas, but more often requires a second prompt. If you take care to explicitly ask for an image when phrasing your prompt, and follow up with corrections, you'll quickly get usable graphics, covers, or invitations. With an AI image upscaler and the time machine in AI Studio, you can expand your possibilities even further.
FAQ
Do I need a paid subscription to use Google Nano Banana?No, the free variant works as well, but offers fewer images and generally a lower resolution.
Why does Gemini create only text instead of an image?Often the prompt lacks an explicit instruction that an image should be created. So write it directly into the prompt or select the "Create image" option.
How can I tell whether the Pro variant was used?The interface doesn't always show this clearly. One indication is the file size of the downloaded image, which is usually significantly larger with the Pro version.
How can I enlarge a small image afterwards?Use an AI image upscaler, upload your image, choose the desired factor, and start the calculation. The duration depends on your computer.
Can I have spelling mistakes in text within the image corrected?Yes, state the exact wording in the prompt and ask for a correction. With the free variant, a second attempt may be necessary.
Can I remove or replace people in an image?Yes, describe in the prompt exactly which person should be replaced or removed and where they should stand. The more precise the details, the better the result.
Where can I find Google's time machine?The link to the time machine in AI Studio is in the video description. There you upload a photo and receive images from different decades.
