
Fresh print layouts in InDesign - how to create print data as a PDF!

- Nine refreshing and pleasantly designed print products comprehensively explained in the workflow
- Idea, concept and final artwork in Adobe InDesign
- Use of finishing techniques such as partial relief varnish, cellophane wrapping, black light ink and much more.
- Creation of professional and printable PDF files
- Incl. unboxing - all products were actually printed and unpacked for you in front of the camera
- Bonus: All video tutorials also available as an e-book with over 650 PDF pages
Expressive learning content with unprecedented practical relevance. This is your creative refueling for fresh print layouts in InDesign.
15 Videos, 408 minutes
Introduction to the video training
What to expect in the video training "Fresh print layouts in InDesign - how to create print data as a PDF!"
6 minYou can expect a video tutorial on how to create a printable PDF in InDesign.
Fresh print layouts in InDesign
General print preparation and designing envelopes with a business look
39 minIn this first part of our big InDesign series, we'll start by looking at correct color management and the differences between RGB and CMYK colors. I would also like to make you aware of the importance of color fidelity. In addition, I will show you where to get the right color profile for the other video training courses in this series and what other features are important when creating a printable template. We will then design an envelope and submit it as a print job according to the print-compliant parameters. We will go through the export dialog in InDesign in detail.
Print details: DIN long, straight flap, adhesive strip, 80g/m² offset paper with window on the left
Have elegant, high-quality stationery prepared and printed according to DIN specifications
47 minBusiness stationery represents the company. In this video training, we take on the task of creating professional and aesthetic stationery. The example relates to a winegrower who deals in wine and wants to present himself in the best possible light. You will learn where to get the dimensions and how to prepare the layout according to the DIN 5008 standard so that the text and spacing are correct. You will also find out what is important when choosing the right font and why recycled paper is a very good choice. Another special feature is the 4/4 color printing on both sides. The video training is spiced up with numerous design tips and takes you on a creative path from the initial considerations to the final submission of the print job. In the subsequent unboxing in front of the camera, you can take a look at the end product yourself.
Print details: DIN A4 4/4-color, 80g/m² recycled paper white, no perforation, no folding, no corner rounding
Folding flyer DIN A5 - portrait format with 4 pages design and print part 1
26 minPart one of two. In this video training we will create a 1-fold flyer in DIN A5 format together. The procedure describes a tidy, simple and colorful design. We will work with clear shapes, axes and a design grid. The example is based on a regional school. I'll show you step by step where I got the necessary data from, how I proceeded with the design, right up to the final export of the printable file. I submit this to the print shop so that we can see during the subsequent unboxing whether the result is also convincing as a final print product.
Print data: DIN-A5, portrait format, 4-sided, 170g/m² art paper
Folding flyer DIN A5 - portrait format with 4 pages design and print part 2
21 minPart two of two. In this video training, we will create a 1-fold flyer in DIN A5 format together. The procedure describes a tidy, simple and colorful design. We will work with clear shapes, axes and a design grid. The example is based on a regional school. I'll show you step by step where I got the necessary data from, how I proceeded with the design, right up to the final export of the printable file. I submit this to the print shop so that we can see during the subsequent unboxing whether the result is also convincing as a final print product.
Print data: DIN-A5, portrait format, 4-sided, 170g/m² art paper
Create a print-compliant rollup
39 minIn this video training from our series of fresh print layouts, we will design a rollup from start to finish. Rollups are the perfect way to present your company in the right light. They are cheaper than exhibition stands and can be used in many ways thanks to their small format. In this video training course, you will find out where you can find the right templates, what you need to consider in terms of bleed, size and layout and how to create an appealing design. I will also show you how important striking design is in this case. A design branded on PSD-Tutorials.de is shown. You can see the print result for yourself in the final unboxing.
Print details: Exclusive version, black 85x215, 260g/m² polyester fabric, durable, antistatic and non-flammable (fire protection class B1) 4/0-color
Design of a poster DIN A2 printed on one side - Après-Ski-Party
40 minIn this video training, I show you the complete design workflow of a poster and explain the considerations that had to be made before the actual design. I will show you where to get the necessary information, how to ideally divide up the poster, how the target group was defined and which print-relevant parameters are important. After finalizing the poster in InDesign, we will send the generated PDF to our partner print shop and submit the print order so that we can check afterwards during the unboxing whether the product is convincing in the way we created it on the desktop.
Print details: DIN A2, portrait format, printed on one side, 135g/m² picture printing paper, glossy coated, no folding
Modern door hangers printed on both sides for every purpose Part 1
19 minPart one of two. You see door hangers in abundance. Usually with the standard slogan: "Please do not disturb." An old hat that we reinvent in this video training, because the strange product (and format!) of a door hanger is suitable for all kinds of other purposes, as you can see from our chimney sweep. I'll show you how to properly tackle this strange product with a punched outline and where we can get the template for such a door hanger, and we'll go through the design of the front and back together step by step so that the individual stations can be copied 1:1.
Printing details: 4/4-color, 300g/m² picture printing paper, matt cellophane on both sides, die-cut contour #61.
Modern door hangers printed on both sides for every purpose Part 2
18 minPart two of two. You see door hangers in abundance. Usually with the standard slogan: "Please do not disturb." An old hat that we reinvent in this video training, because the strange product (and format!) of a door hanger is suitable for all kinds of other purposes, as you can see from our chimney sweep. I'll show you how to properly tackle this product with a die-cut contour and where we can get the template for such a door hanger, and we'll go through the design of the front and back together step by step so that the individual stations can be copied 1:1.
Printing details: 4/4-color, 300g/m² picture printing paper, matt cellophane on both sides, die-cut contour #61.
Elegant invitation card DIN long with black light ink part 1
17 minPart one of two. In this comprehensive video training, we will focus on the design of an invitation card in DIN long format. The topic is a dinner-in-the-dark event. I'll show you how to design the front and back in InDesign and what tricks we can use to achieve plasticity for the gold tone. I will also use a printed sheet to explain why it makes sense, is economical and environmentally friendly to choose predefined formats. As a special highlight, this exclusive invitation card is provided with a forgery-proof black light ink that is only visible under UV light. You can find out how to create and implement the whole thing perfectly in this video training! The printable PDF created was also sent to our partner print shop so that you can find out in the last few minutes during the unboxing whether everything actually worked out as planned. Printing details: DIN long 4/4-color, portrait format, use of black light ink, 300g/m² picture printing paper
Elegant invitation card DIN long with black light ink part 2
20 minPart two of two. In this comprehensive tutorial, we will focus on the design of an invitation card in DIN long format. The theme is a dinner-in-the-dark event. I'll show you how to design the front and back in InDesign and what tricks we can use to achieve plasticity for the gold tone. I will also use a printed sheet to explain why it makes sense, is economical and environmentally friendly to choose predefined formats. As a special highlight, this exclusive invitation card is provided with a forgery-proof black light ink that is only visible under UV light. You can find out how to create and implement the whole thing perfectly in this tutorial! The printable PDF was also sent to our partner print shop so that you can find out in the last few minutes during the unboxing whether everything actually worked out as planned.
Printing details: DIN long 4/4-color, portrait format, use of black light ink, 300g/m² picture printing paper
Creating an exclusive presentation folder with relief varnish Part 1
29 minPart one of two. How can color be used as a brand ambassador? This is the question we will address in the following video training. We will create an extremely interesting print product: we will design a DIN A4 presentation folder, which is created in an individual die-cut contour and printed on both sides. This design process requires "thinking outside the box", but with a few simple tools this is quite easy.
As a highlight, we will apply a high-quality relief varnish to the outside of the folder. I'll show you how to use solid colors correctly and how you can display these colors in the separation preview. Be impressed by an engaging design and look forward to the final print result, which I will unpack for you in front of the camera.
Print details: DIN A4 portrait format, 4/4-color, 300g/m² image printing paper, one-sided with relief varnish on the outer sides, die-cut contour #14
Creating an exclusive presentation folder with relief varnish Part 2
23 minPart two of two. How can color be used as a brand ambassador? This is the question we will address in the following video training. We will create an extremely interesting print product: we will design a DIN A4 presentation folder, which is created in an individual die-cut contour and printed on both sides. This design process requires "thinking outside the box", but with a few simple tools this is quite easy.
As a highlight, we will apply a high-quality relief varnish to the outside of the folder. I'll show you how to use solid colors correctly and how you can display these colors in the separation preview. Be impressed by an engaging design and look forward to the final print result, which I will unpack for you in front of the camera.
Print details: DIN A4 portrait format, 4/4-color, 300g/m² image printing paper, one-sided with relief varnish on the outer sides, die-cut contour #14
Have a folding card professionally designed, finished and printed Part 1
37 minPart one of two. In this video training, we'll be looking at the design of a glamorous folded card for the opening of a trendy hairdresser in the city. I'll show you how to tackle your working file and the design correctly, where to get supplies of fonts, why the right side is more important than the left and how to bring all the elements together beautifully and harmoniously. In addition, I will explain what types of finishing are available and will finally examine the print result together with you in front of the camera.
Print details: DIN long landscape format, 4-sided, 4/4-color, 280g/m² chromo cards, 1-fold with creasing, finishing: glossy UV varnish on one side
Have a folding card professionally designed, finished and printed Part 2
27 minPart two of two. In this video training, we'll be looking at the design of a glamorous folded card for the opening of a trendy hairdresser in the city. I'll show you how to tackle your working file and the design correctly, where to get supplies of fonts, why the right side is more important than the left and how to bring all the elements together beautifully and harmoniously. In addition, I will explain what types of finishing are available and will finally examine the print result together with you in front of the camera.
Print details: DIN long landscape format, 4-sided, 4/4-color, 280g/m² chromo cards, 1-fold with creasing, finishing: glossy UV varnish on one side
Examples of use
-
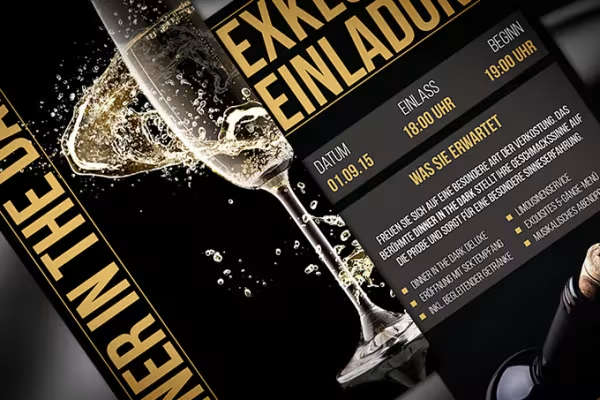 Fresh print layouts in InDesign - how to create print data as a PDF, like this double-sided flyer
 -
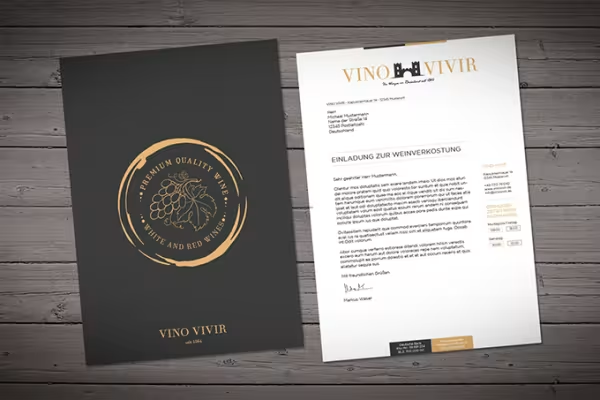 Create a printable PDF and deliver the print data online to your print shop: Example of letterhead from the Fresh print layouts series in InDesign
 -
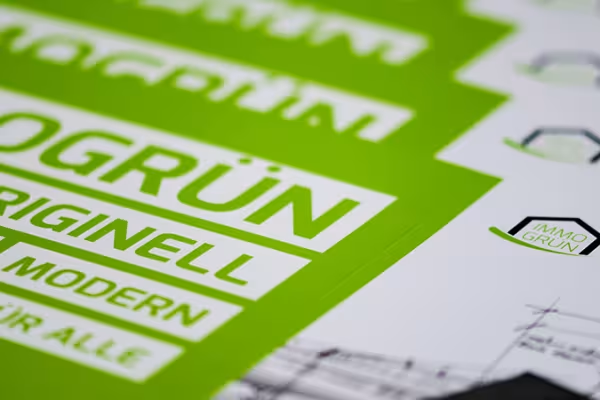 Learn how to use overprints in InDesign for finishing techniques on your print data!
 -
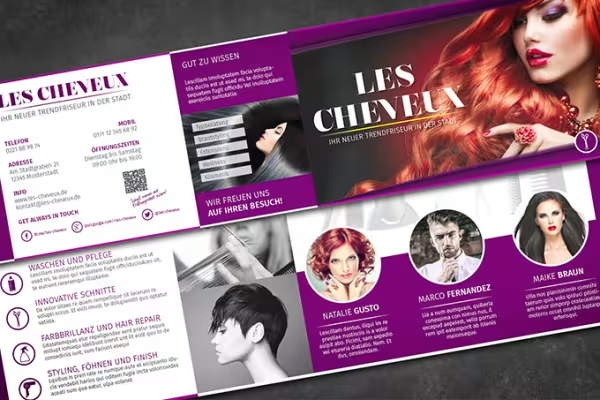 Shown here: a printable PDF for a hairdressing flyer in InDesign as a finished print file
 -
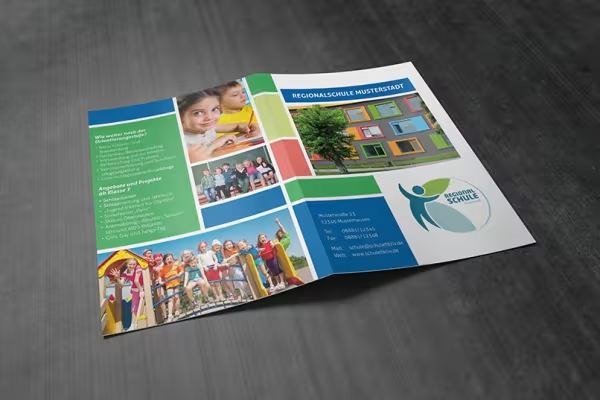 Tutorials and videos for creating print files, such as this folder
 -
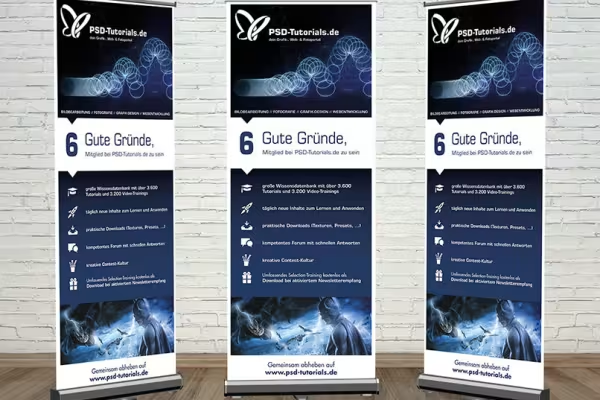 Create PDF files that are intended as print data for your online print shop - with the fresh print layouts in InDesign!
 -
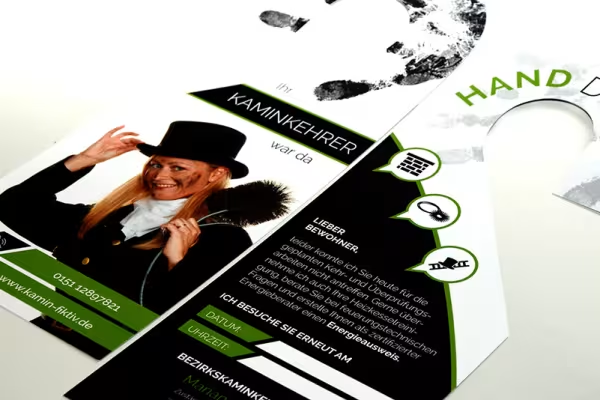 You can even design such eye-catching door hangers.
 -
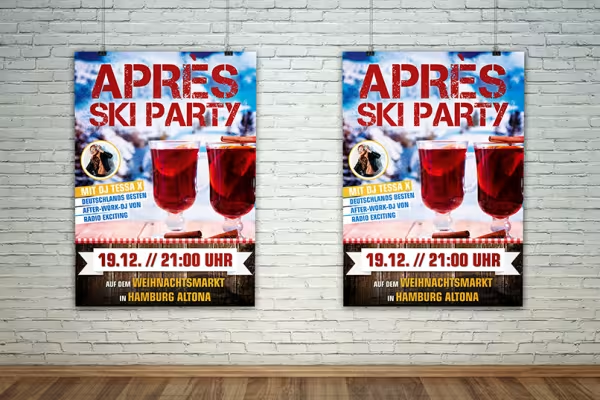 How do you design such posters? You'll soon find out.
 -
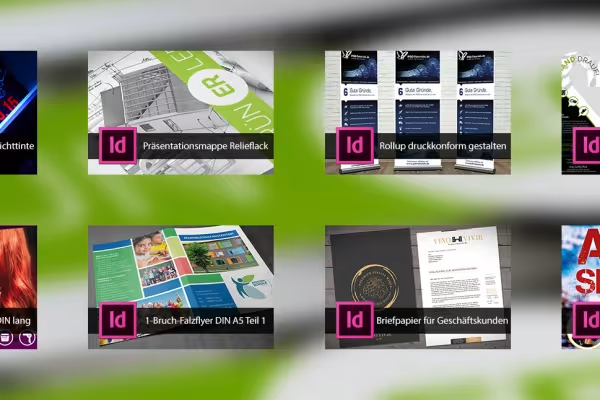 First freshen up yourself in InDesign and then your designs!
 -
 Introducing our printing partner: Onlineprinters GmbH (diedruckerei.de).
You might also like

More style, more power, more templates!

Live your layout now!

Full power, more inspirations, maximum WOW effect!
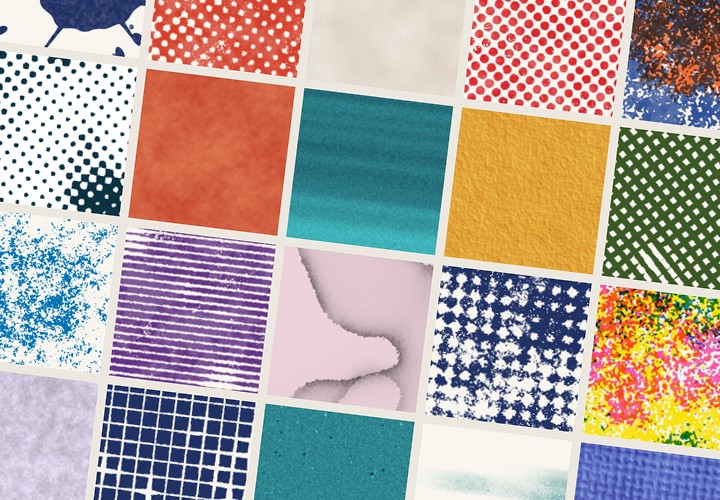
20 sets in 4K (4096 × 4096 px, 300 DPI) as JPG plus Photoshop patterns, calibrated to the fill method
Comment now „Fresh print layouts in InDesign - how to create print data as a PDF!“