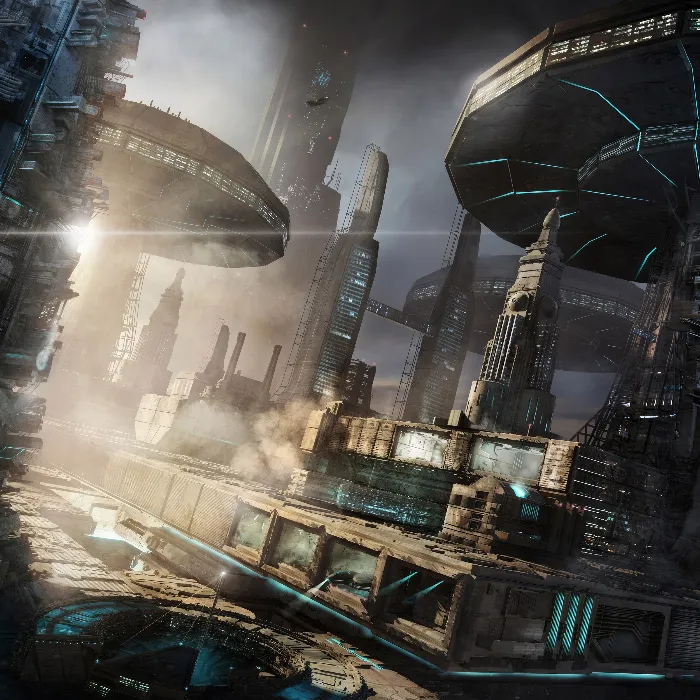
Light is one of the most crucial factors in digital art, especially when it comes to creating an atmosphere that brings your characters or scenes to life. In this guide, you will learn how to define an effective light source in Photoshop that not only enhances the basic atmosphere but also significantly upgrades your image and makes it appear more dramatic. You will be guided step by step through the process to achieve the best possible lighting effects in your designs.
Key Takeaways
- Placing the light source is crucial for the atmosphere and overall impression of an image.
- You should experiment with different light modes to achieve the desired effects.
- Structuring elements into groups helps maintain overview and make changes easier.
Step-by-Step Guide
Step 1: Basic Light Placement
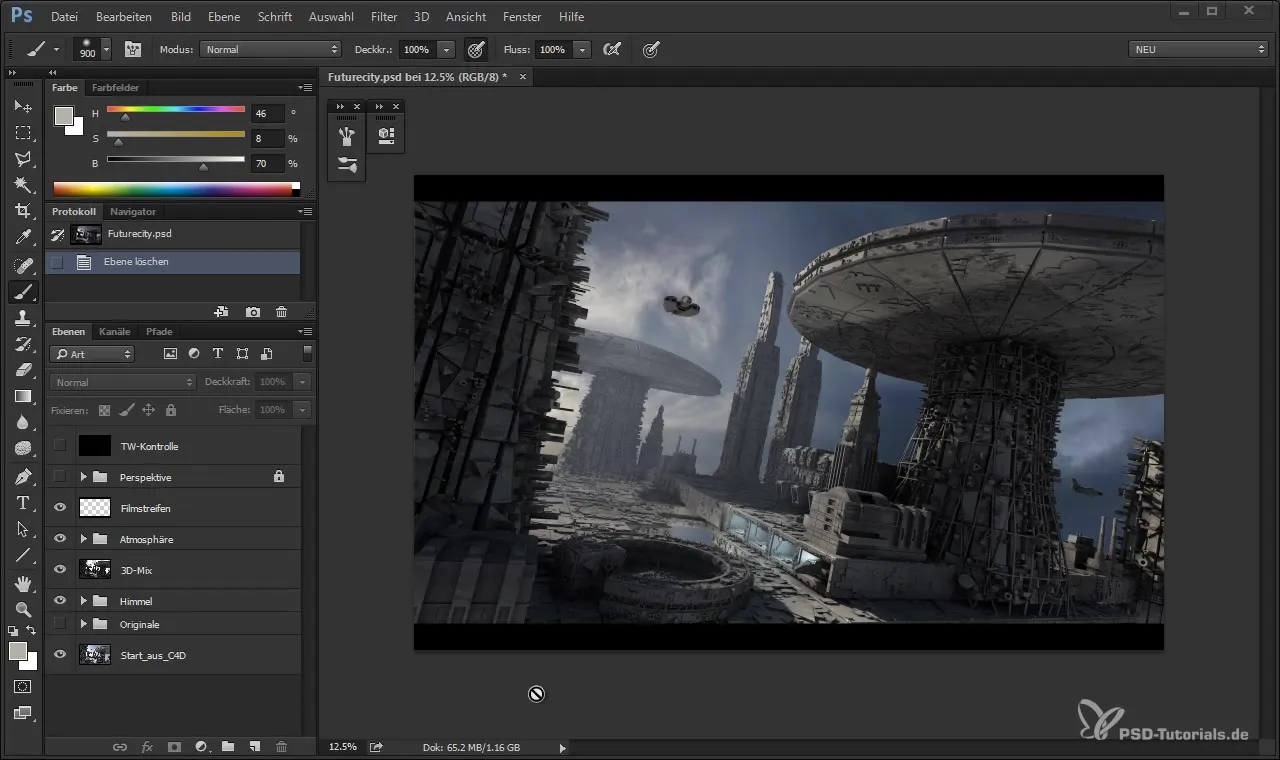
To start with the light setup, it is important to first think about the origin of the light source. Pay attention to where you want to position the sun in your image. For example, you can place the sun in an area where even light as well as beautiful shadows are created, in order to play with their contrasts.
Step 2: Create a New Layer
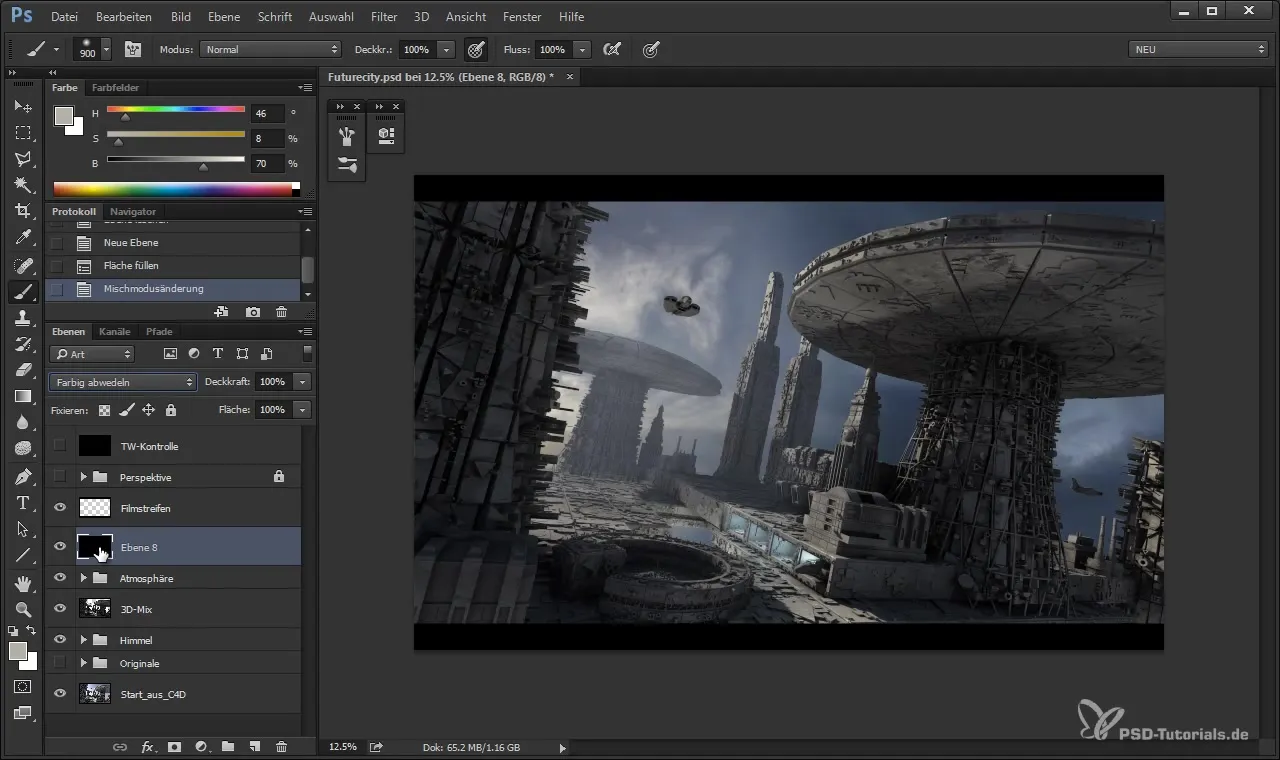
Now a new layer is created to define the base light. You should place this layer above the atmospheric layer to have full control over the light. Fill the new layer with black color to temporarily make the representation invisible.
Step 3: Apply the Dodging
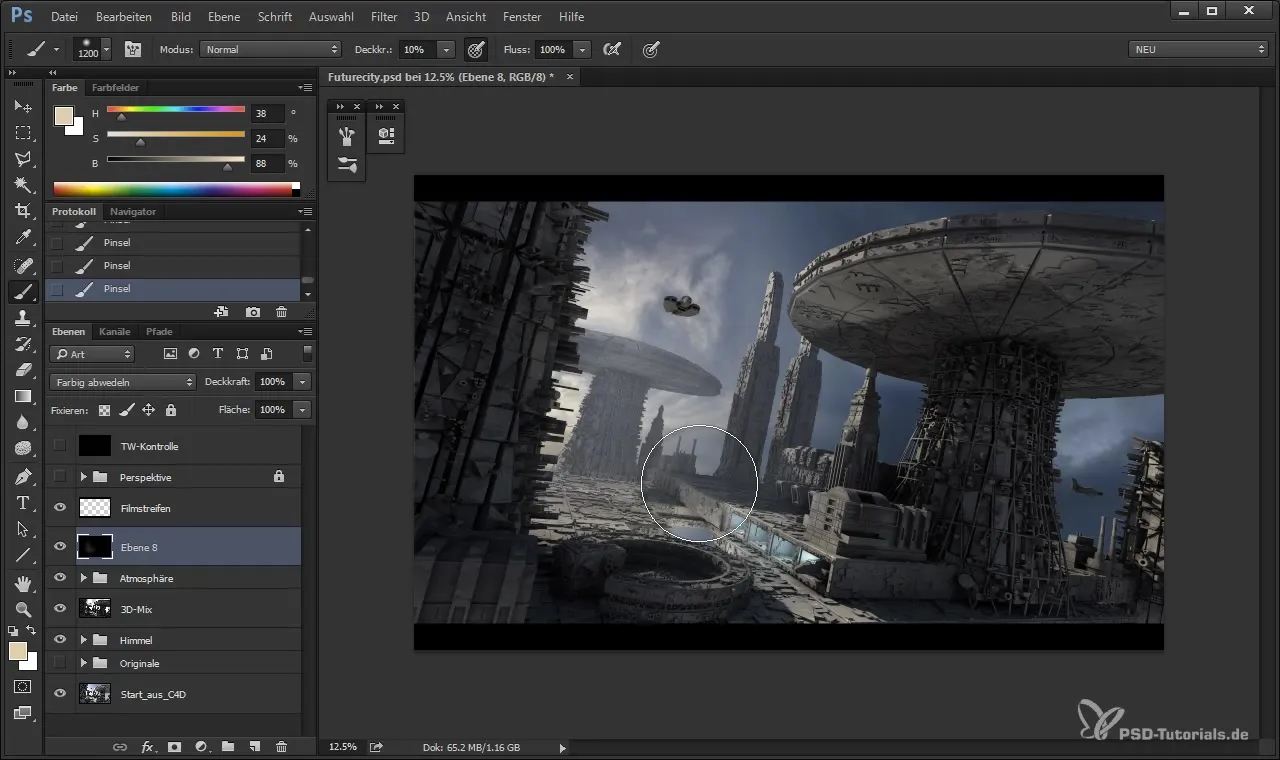
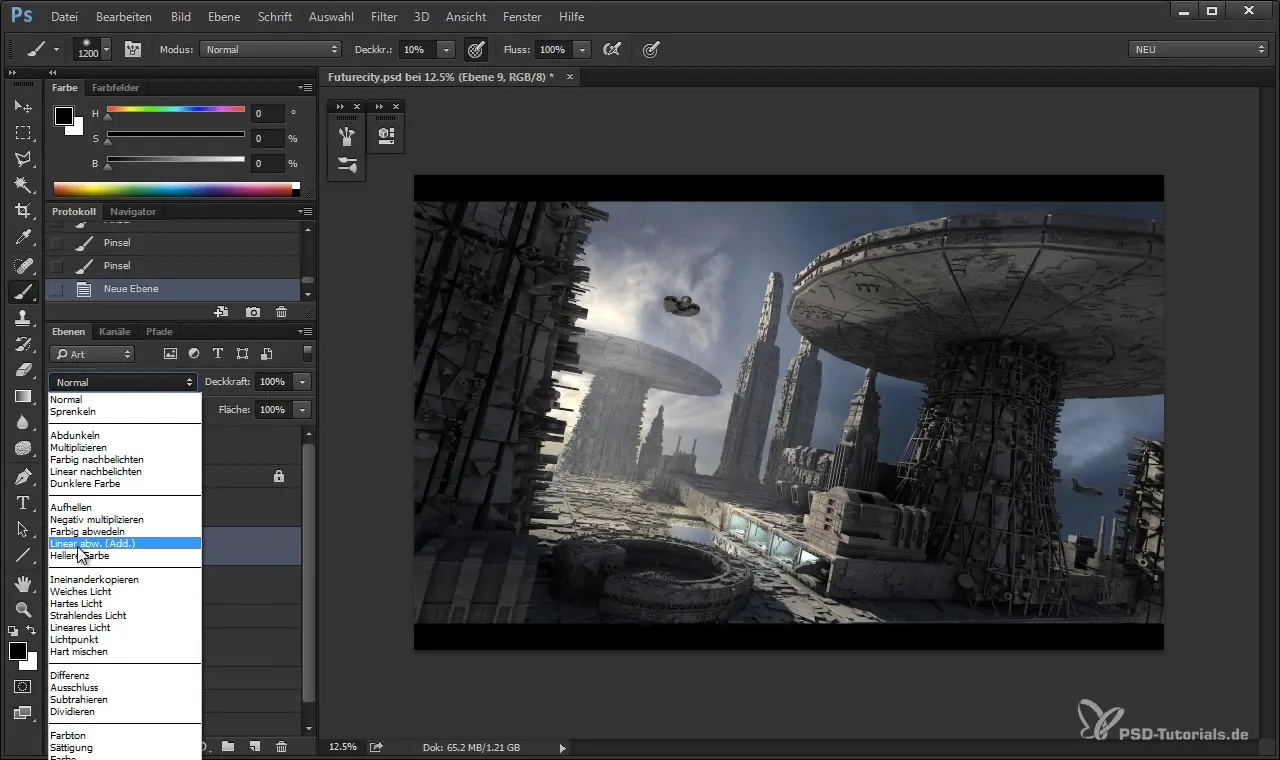
Activate the "Color Dodge" mode for your black layer. This will immediately give your image more brightness and bring the light back while keeping the rest of the image intact. You can now work with a reduced opacity of about 10% and add light color strokes. This gives your light source a natural glow.
Step 4: Choosing Light Color
For the light color, you can take colors from your background or the clouds. However, avoid focusing too much on one color. A more saturated and brighter color can also be added after application with an opacity of 10% to create finer light accents.
Step 5: Optimize Light Intensity
Once you have added the first light, check the intensity. It is important to handle the light strength gently and carefully to avoid overexposure or too drastic effects. Fine adjustments with a brush reduce the likelihood of overexposure.
Step 6: Inserting the Sun
To further optimize the light, you add the sun or the brightest light in your image. This is usually done by dodging with a smaller brush tip. Focus on ensuring the light does not appear circular but rather has a soft, radiating effect.
Step 7: Applying Backlight
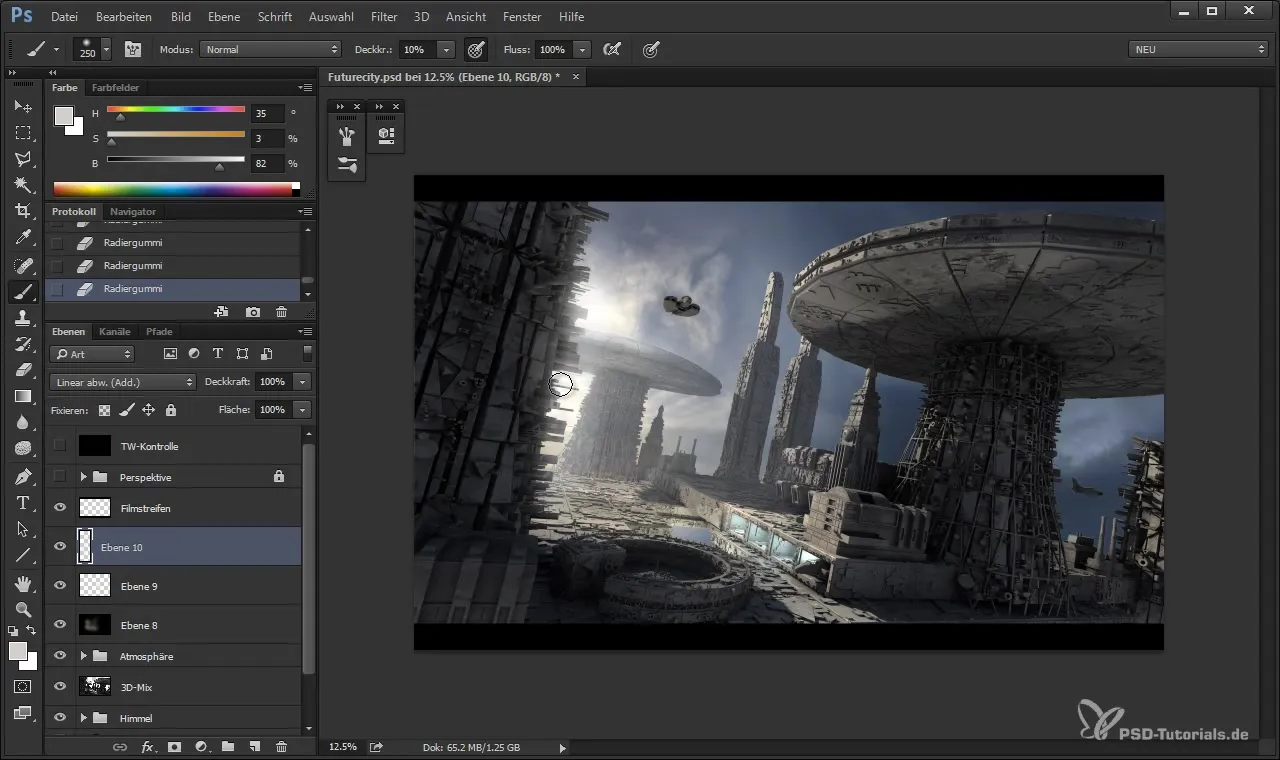
With another new layer, you can now add a strong backlight. Choose a larger brush and the color you used for the sky. This will help you give the image more three-dimensionality and liveliness.
Step 8: Adjusting Edges
If some areas in your image are too pronounced, it is advisable to soften them. You can go over the edges with the eraser to create smoother transitions without losing the entire light.
Step 9: Color and Tonal Corrections
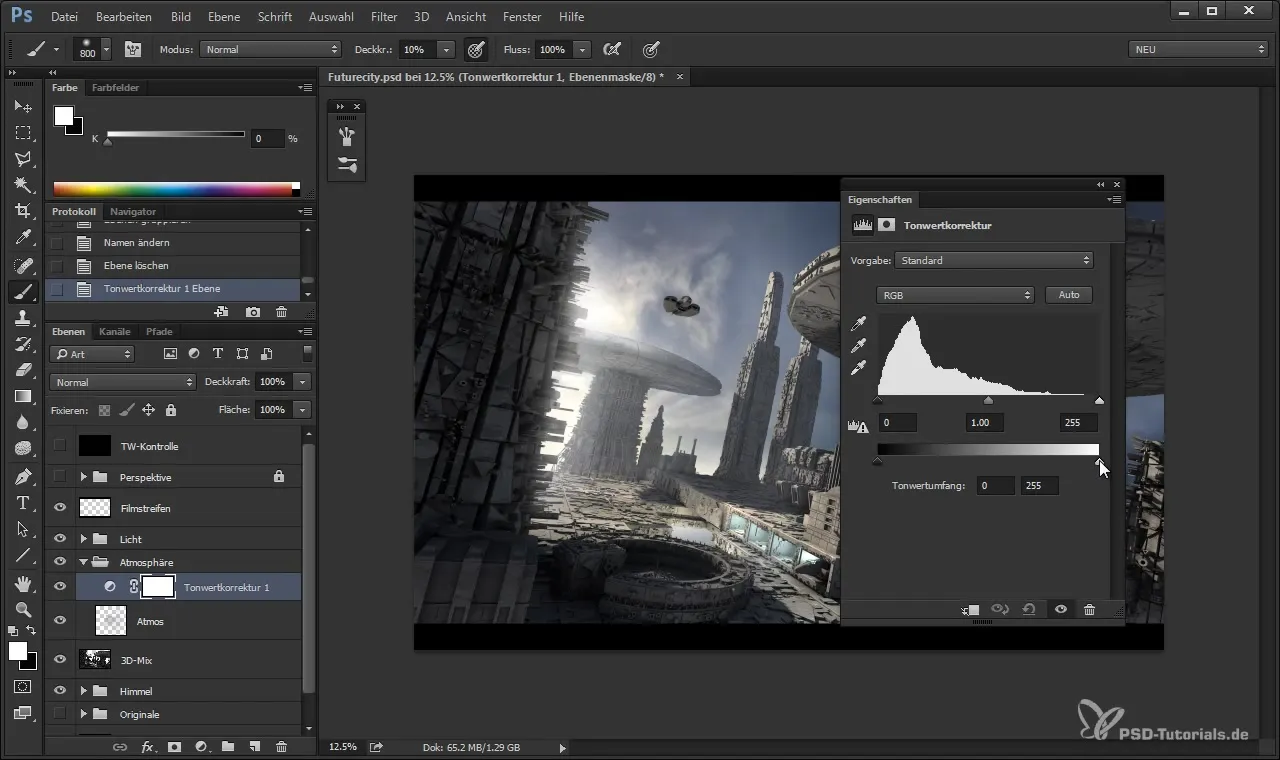
Correct the tonal values of your image using an adjustment layer. This layer allows you to selectively change the tonal values to minimize unwanted darkness and add brightness in the desired areas.
Step 10: Compiling Light Sources
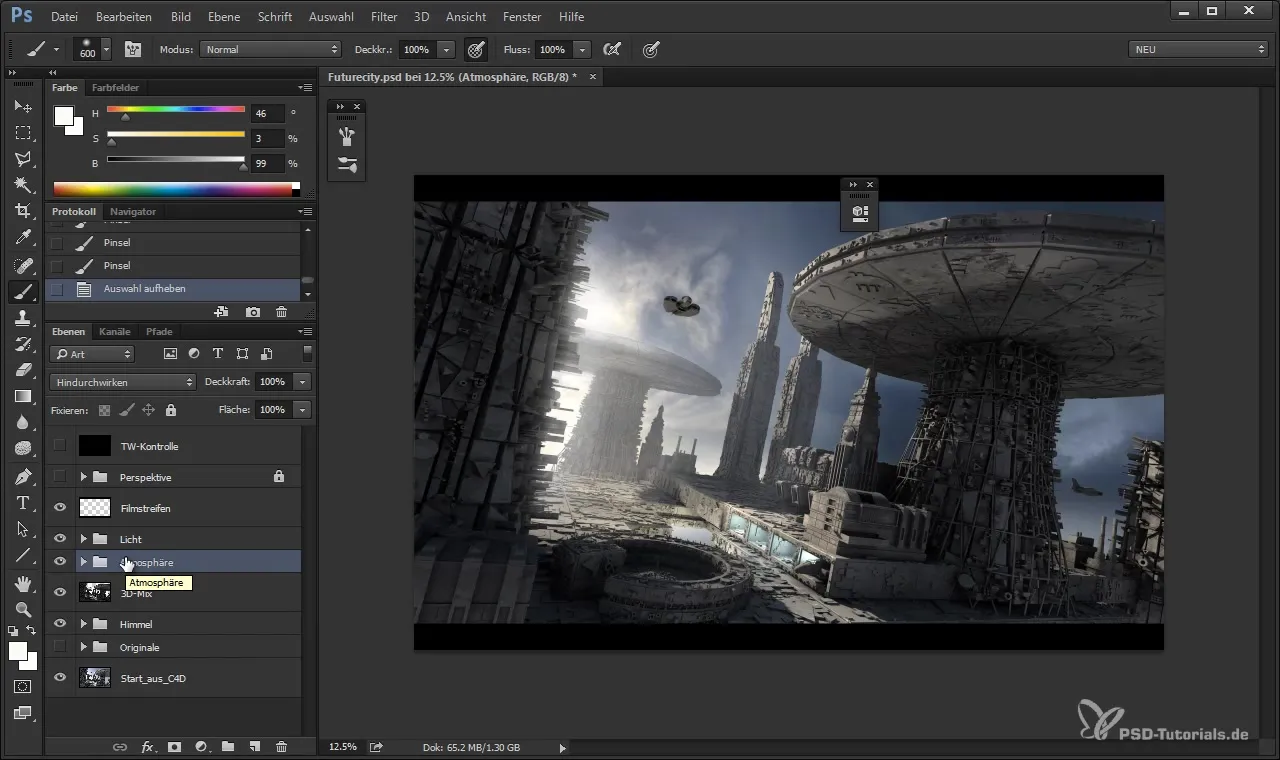
Once you have made all the adjustments, group the light sources into a folder. This makes future adjustments easier and gives you a better overview of your light sources. A well-structured project saves time and nerves.
Step 11: Final Review
Before declaring your image finished, check all light sources against the overall picture. It should appear harmonious. If necessary, make final adjustments to the opacity or color distribution.
Summary
By understanding and implementing the various steps for lighting in Photoshop, you can create dramatic lighting effects. Structuring your light sources and experimenting with different modes allows you to create creative depths and breathe life into your images.
Frequently Asked Questions
How can I ensure that my light looks realistic?Experiment with different light sources and modes, and pay attention to how the light interacts with the objects in your image.
Why should I sort light sources into groups?Grouping improves clarity and makes future adjustments easier.
What is the best mode for lighting effects?The "Color Dodge" mode is excellent for achieving effective lighting effects.
