In this tutorial, you will learn how to create a new documentin Inkscapeand navigate effectively using various functions. An empty document forms the basis for your designs, and it is crucial that you make the necessary settings to optimally designyour workspace. Let’s get started!
Key insights
- Creating a new document is straightforward and offers various templates.
- The document settings allow adjustments to format, units, and guides.
- Effective zooming and navigation methods help optimize your work.
Step 1: Create Document
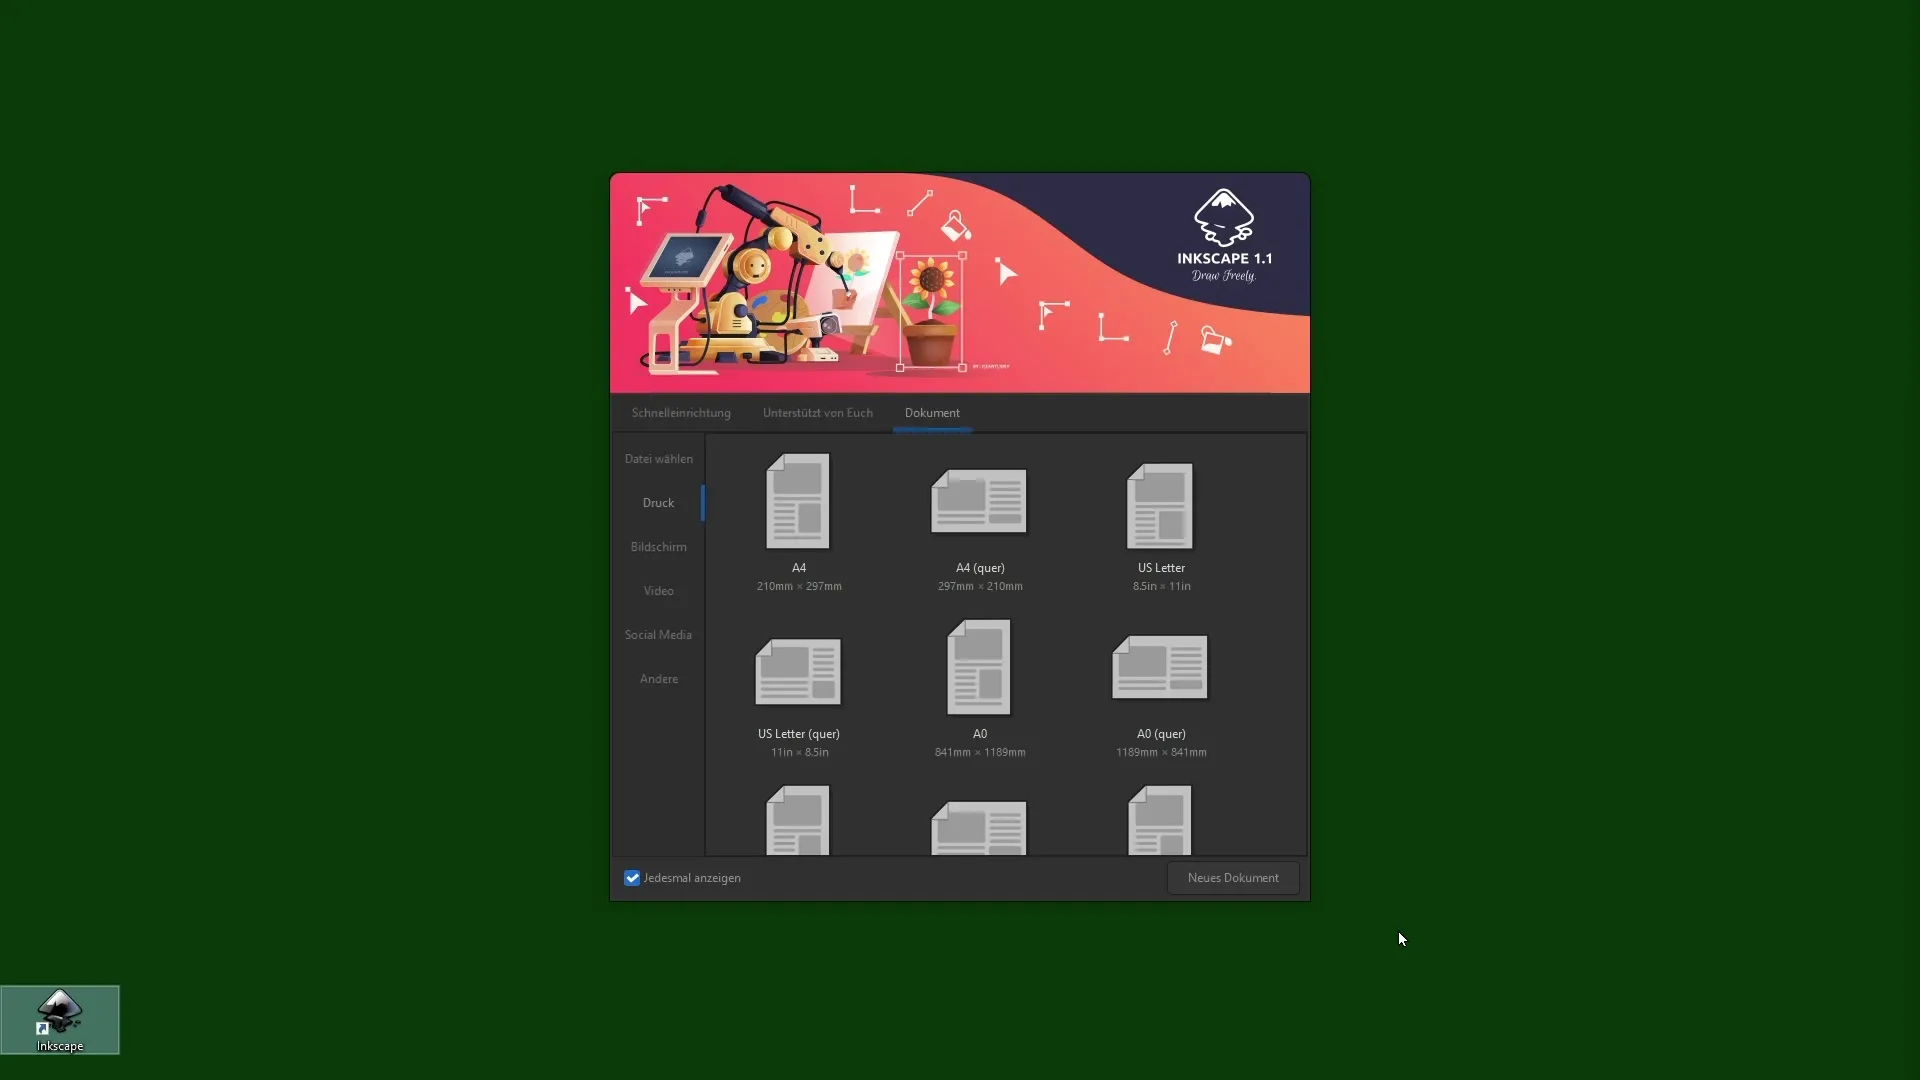
Start Inkscape and find yourself on the welcome screen. On the left side, you will find the document option. Here you have a selection of various templates, such as A4 format or digital formats like HD or 4K. These templates allow you to quickly start with a suitable document. Alternatively, you can simply click on “New Document” to select a blank template. The default template will be displayed according to your previous settings so that you can start designing right away.
Step 2: Adjust Document Format and Settings
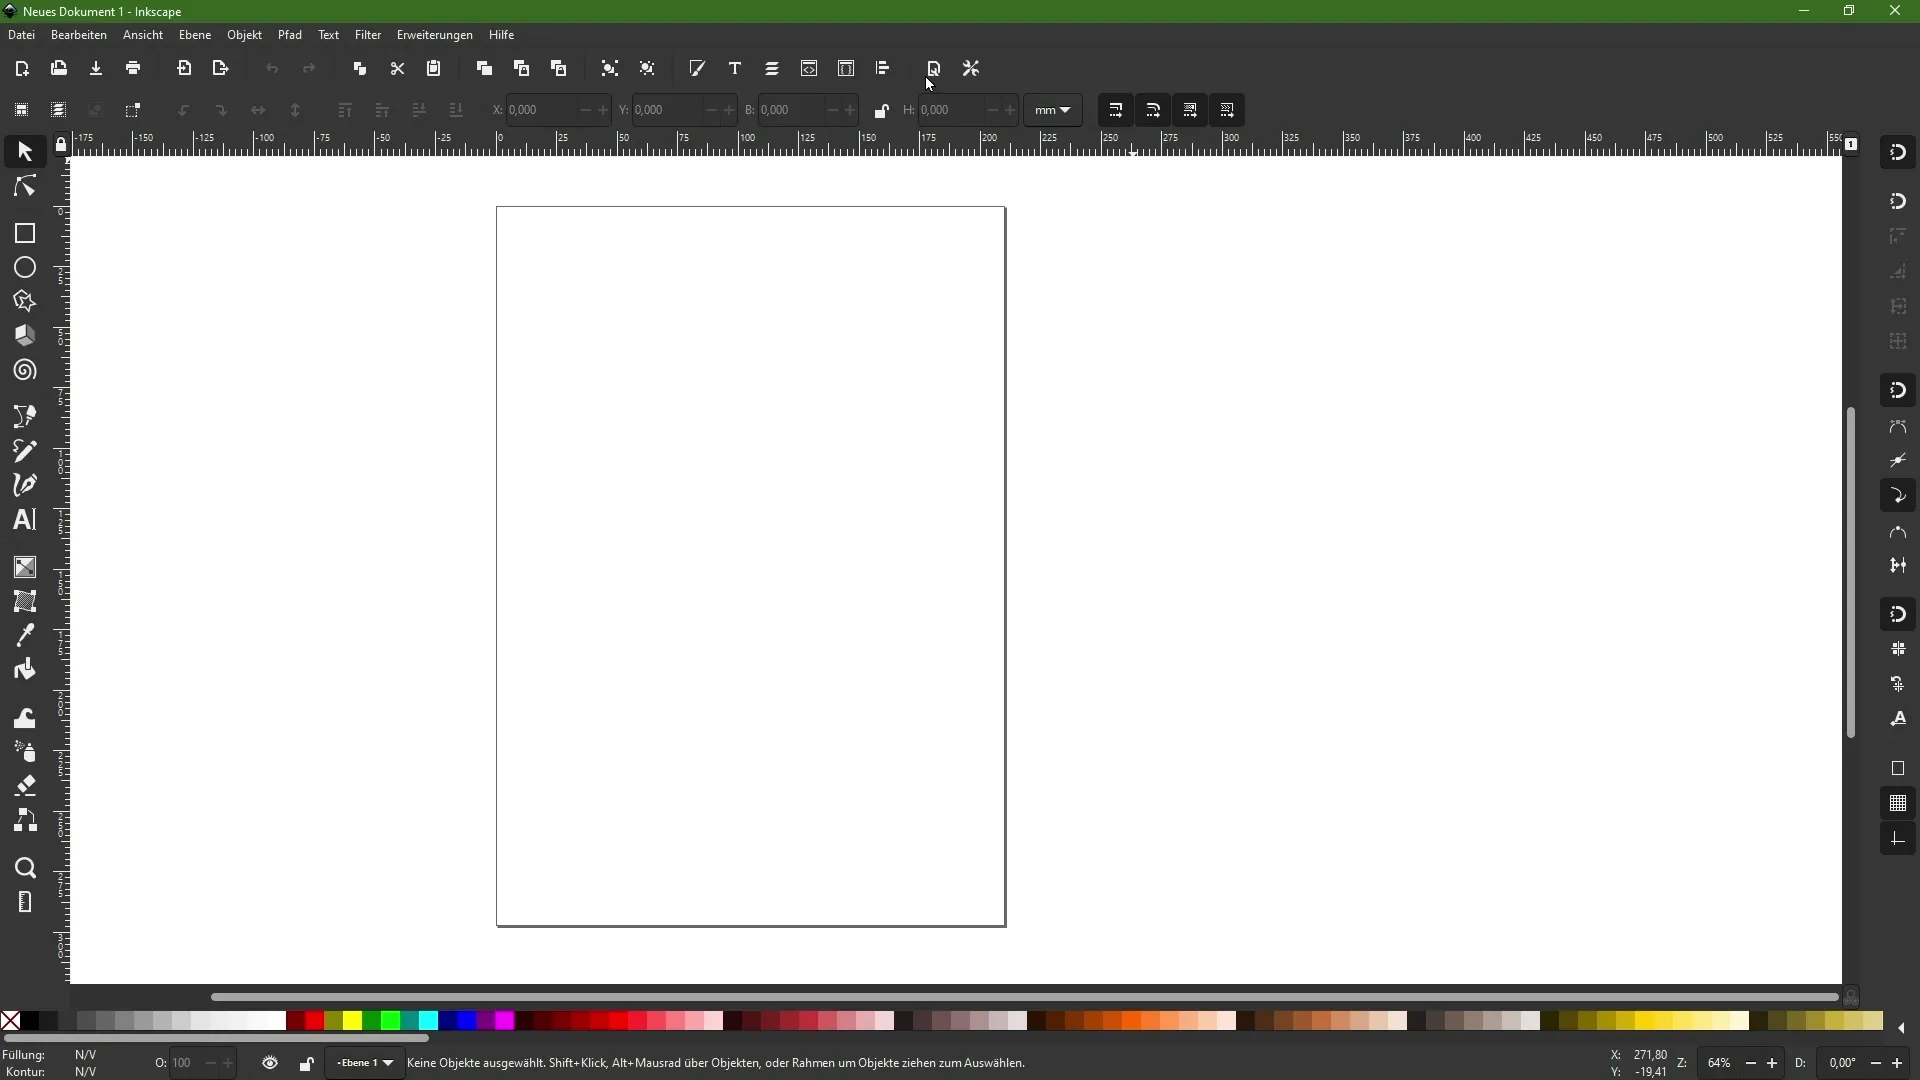
After selecting the format, let's say A4, you can go to the document settings by clicking on the corresponding icon in the command bar. Here you have the option to adjust various parameters. The display unit for your measurements can be set to show millimeters, which is useful for most work. For example, if you are working for the web, pixels would be more appropriate. These settings are essential for the precise design of your projects.
Step 3: Insert Guides
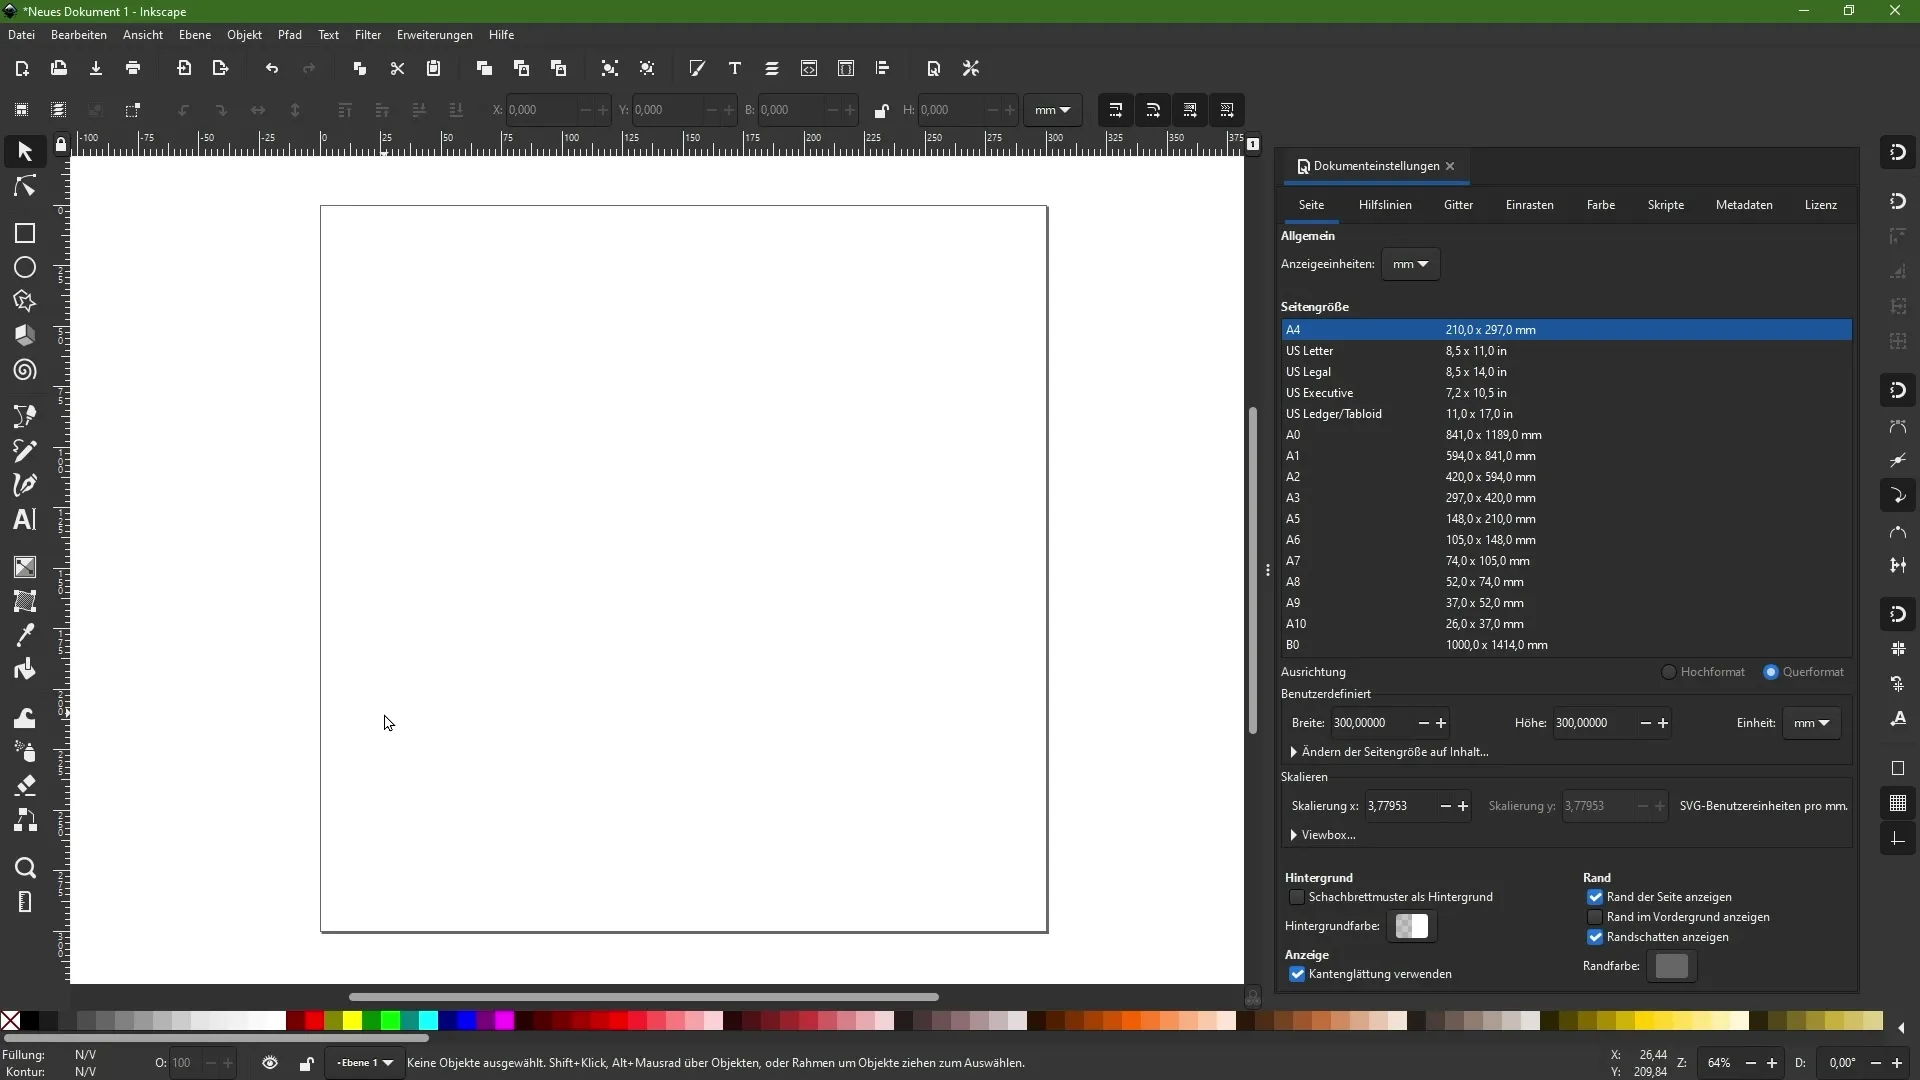
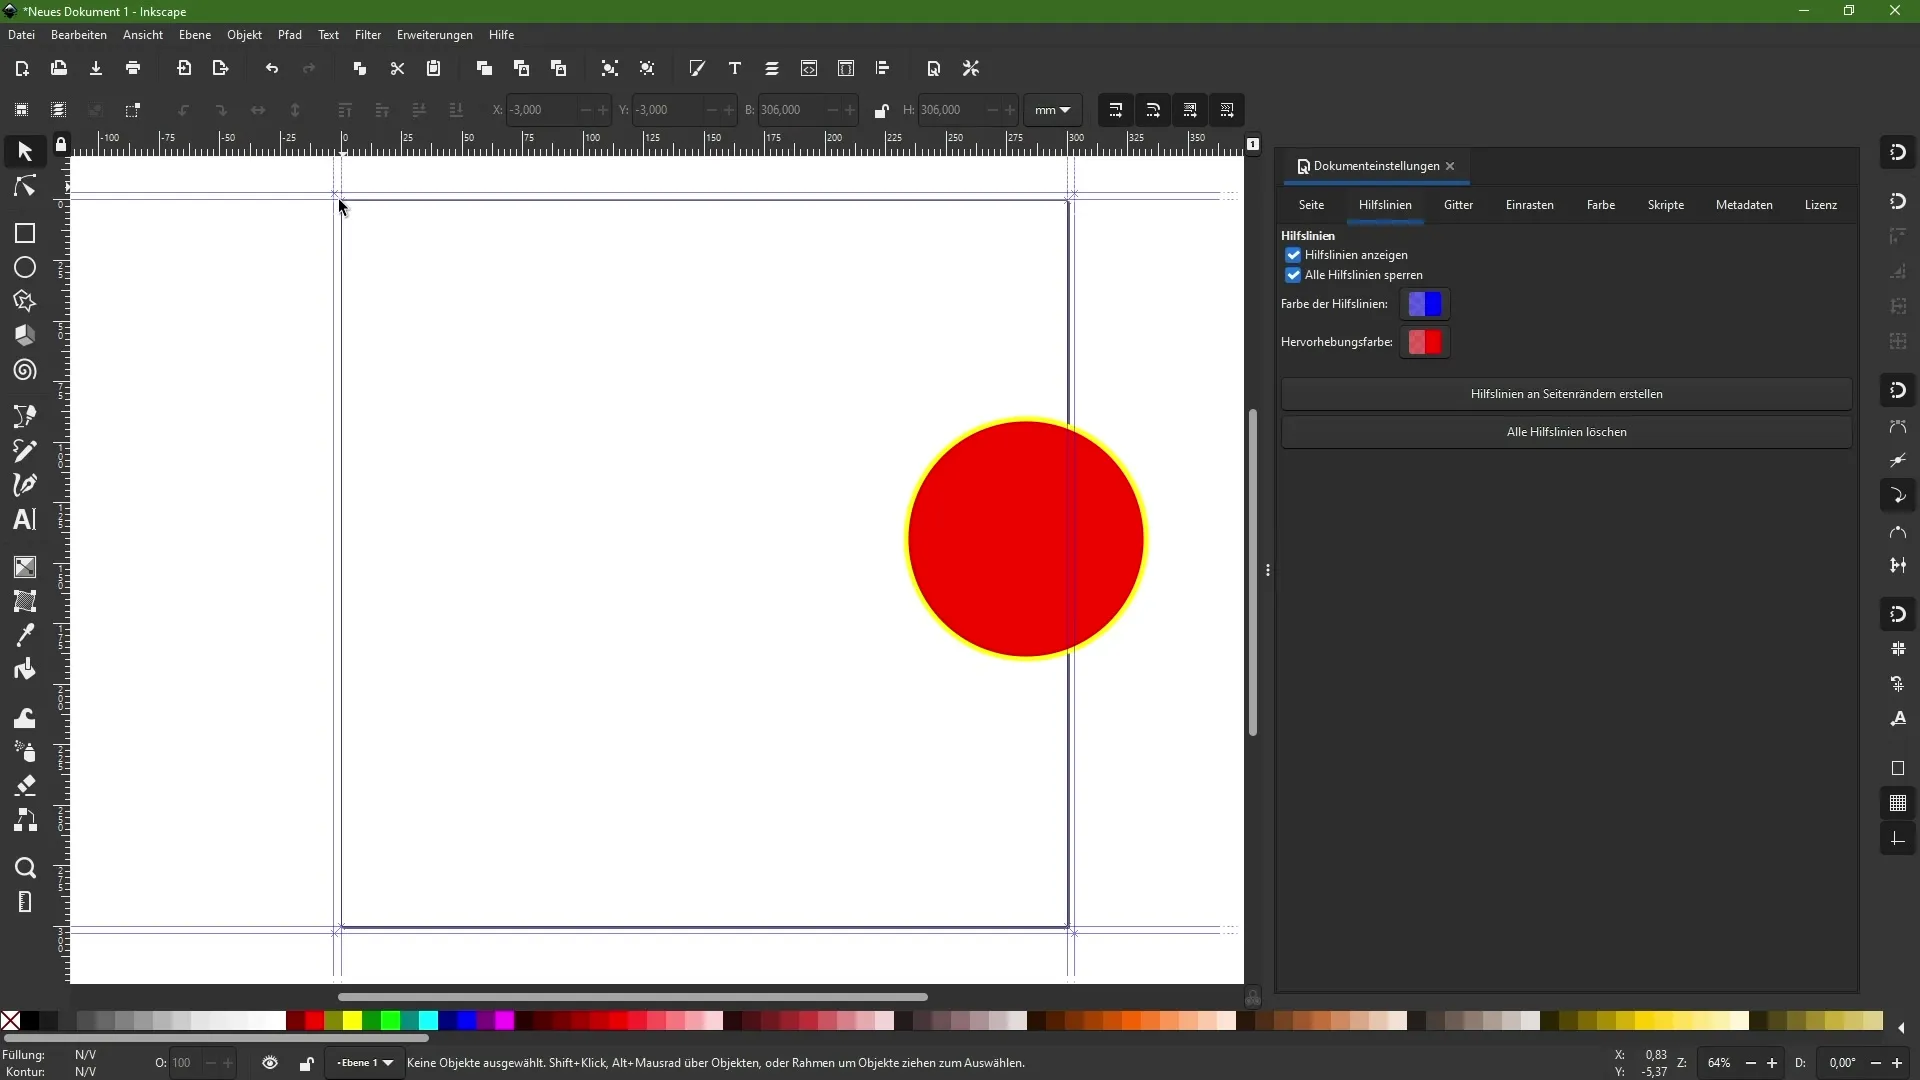
A helpful function that is often overlooked is guides. You can enable guides at the edges of your document to ensure that all elements are positioned correctly. These guides are especially important when you are designing graphics or text that extend beyond the edges of the document and want to ensure that everything is printed correctly. To activate guides, go to the "Guides" section and enable the option "Create Guidesat Page Edges”. You can also lock these guides to prevent their position from being accidentally changed while working.
Step 4: Consider Bleeds
If, for example, you are creating a 30 x 30 cm design and want to print it, you should consider bleeds. This means that your colors or design elements should extend slightly beyond the edges of the document so that no white edges are visible when trimming at the end. In this case, you can draw a rectangle and adjust its dimensions accordingly to ensure that you have a 3 mm bleed on each side.
Step 5: Centering Objects
You might want to display your design in the center of the document? In Inkscape, you can easily achieve this. Select your object and go to “Align and Distribute”. Here you can center the object relative to the page or to other objects. This is particularly helpful using the lock symbol, which allows you to work proportionally and automatically adjust the dimensions.
Step 6: Save Template
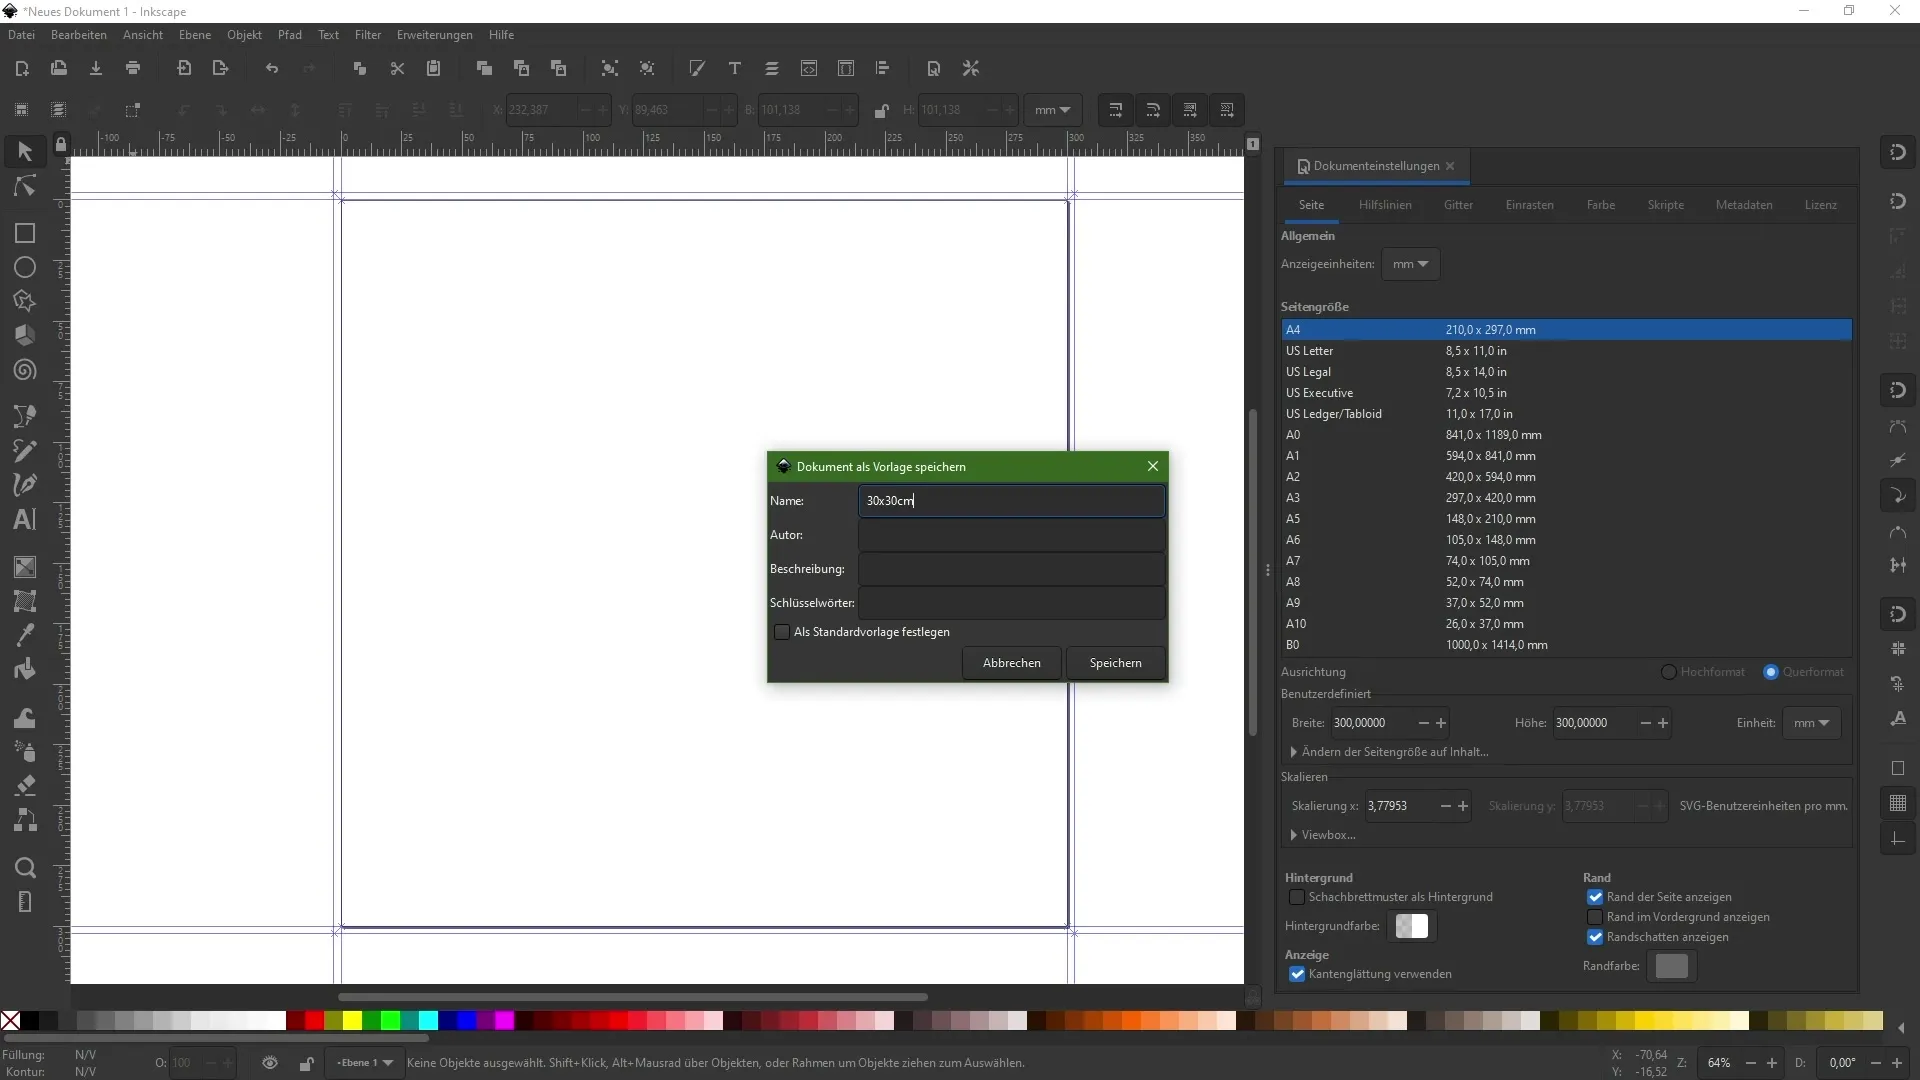
If you are satisfied with your document, you have the option to save it as a template. Click on “File” and select “Save as Template”. Give it a unique title, such as “30 x 30 cm”, and save your template. In the future, when creating a new document, you can simply select this template again.
Step 7: Document Navigation and Zoom
To navigate your document optimally, there are various methods. You can use the status bar to zoom in and out, or use the middle mouse button to move the view. Another convenient method is to hold the spacebar while moving the mouse to control the view. These options help you navigate efficiently through your workspace and focus on the necessary details.
Step 8: Adjust Page View
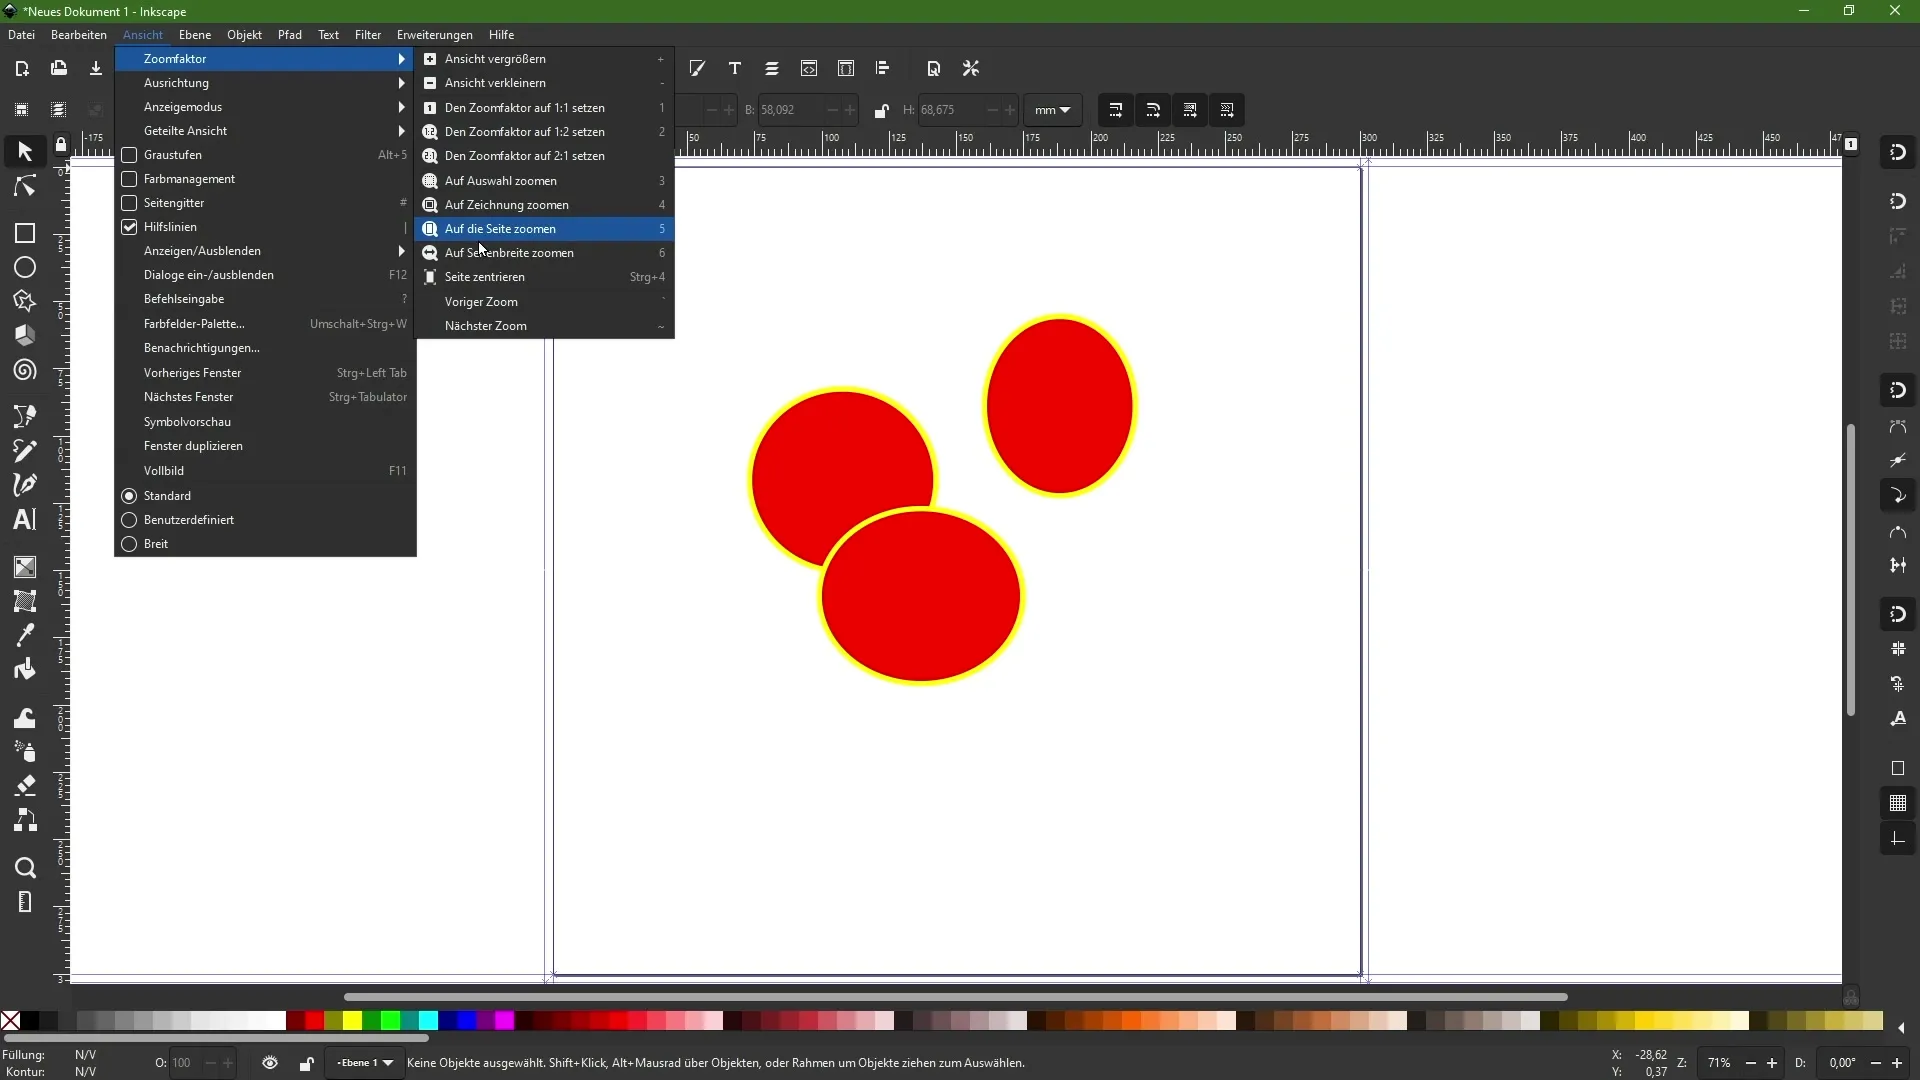
Inkscape also offers various zoom functions that help you focus on the entire page or specific objects. You can use the corresponding key assignments to zoom directly into drawings or pages. Existing keyboard shortcuts like “Ctrl + 4” to center are particularly useful for quickly getting to the desired view.
Summary – Inkscape: Creating Documents and Navigation
In this tutorial, you have learned how to create a new document in Inkscape, make important settings, and use various navigation methods. With these steps, you are well-equipped to efficiently create your creative projects.
FAQ
How do I create a new document in Inkscape?You start Inkscape and choose a template or click on "New Document".
How can I enable guides?Go to the document settings and enable the option for guides.
What are the usual bleeds?A bleed of 3 mm per side is typically recommended.
How do I save a template?Select “File”, go to “Save as Template” and give it a name.
Which keyboard shortcuts help with zooming?Use the plus and minus keys to zoom in and out.
