A single sentence can be enough to turn an idea into a finished landing page. That is exactly what this tutorial shows you. You will learn how to create a first design in Claude Design, what information your prompt needs, and how to refine the result directly. At the end, you will have a clickable prototype that you can present or share with your team.
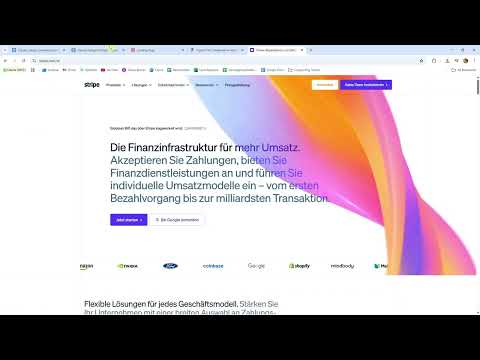
The video is only loaded from YouTube when you play it – data (including your IP address) is then transmitted to YouTube/Google. More in the privacy policy
The example is a landing page for an AI tool that creates meeting summaries. The project is deliberately manageable so that you can focus on the logic of the prompt.
Key Takeaways
- A vague request like "Create a landing page for me" rarely delivers a usable result. The more precisely you describe, the better the outcome.
- A good prompt specifies target audience, style, brand impression, layout, and visual direction.
- A reference image, such as a screenshot of a page you like, gives the AI a concrete template for the look.
- Claude asks follow-up questions when information is missing. These questions show you what information your prompt still needs.
- A smaller model uses less of your quota and is often sufficient for simple drafts.
Step-by-Step Guide
1. Create a Project
Open Claude Design and choose the option to create a new project. Give the project a meaningful name, for example "Landing Page". The design panel then opens with the Design File, in which all drafts of this project are saved. From here you can continue working at any time.

2. Understand the Interface
On the left side you will find the design system, which you can select. Here you can also insert screenshots, images, documents, code, or even a Figma file. If templates or files already exist, they are displayed above the input field. For your first attempt, you can remove the preloaded design system so that you start with an empty project.
3. Choose the Right Model
In the input area, you can select the model. The most powerful model is not always the best choice. Since your daily quota is limited, it is worth using a leaner model for simple drafts. In the video, Haiku 4.5 is used for this. For complex projects, you can deliberately switch to a larger model later.
4. Write a Prompt with a Clear Structure
This is where the quality of the result is decided. A sentence like "Create a landing page" is too general. Instead, formulate a complete request that covers these five points: target audience, style, brand impression, layout, and visual direction. An example: "Create a modern SaaS landing page for an AI tool for meeting summarization. Minimalist style with lots of white space, similar to Linear or Stripe." As soon as you formulate these building blocks, the AI knows exactly which direction to work in.

5. Add a Reference Image
A reference image shows the AI the desired look much better than words. To do this, open a website whose style appeals to you and take a screenshot of the landing page. You can either save it and upload it via the upload function or paste it directly from the clipboard with Ctrl+V (or Cmd+V). The image then appears in the project and can be reused with every further prompt.
6. Answer Claude's Follow-Up Questions
After you submit your prompt, Claude may display a short questionnaire if information is missing. Answer the questions directly in the dialog. In the example, they concern the product name, such as "Meeting AI", the target audience, namely small and medium-sized businesses, and the call to action. This includes a free trial as the main button and the three core features: automatic transcription, action items, and Slack integration. You also specify the company stage, here "early stage". By the way, the questions are a good learning tool: if you include these points in your next prompt right away, the follow-up questions are no longer necessary.

7. Make Design Decisions
Now define the color direction. In the example, a strong blue with purple is chosen, reminiscent of Stripe. Then you determine how many variants should be created. A single final version saves tokens, but multiple options are worthwhile if you want to compare alternatives. You also define the sections. For a minimalist page, a hero section and call to action are enough. You can add further sections at any time afterward. If you have adjustment requests, you can specify them directly as well; otherwise, generation starts.

8. Checking the Result
While Claude is creating the design, you can watch the progress. For simple pages, the draft is often usable after a short time, even while verification is still running. Check the results for typography, colors, layout, and atmosphere. In the example, the page contains a navigation menu, two call-to-action buttons, and a view for mobile devices. You can open the mobile view directly and check whether texts and buttons wrap cleanly. Note that not all buttons work if you deliberately chose only a header and call to action. For a prototype, that is usually sufficient.

9. Presenting and Sharing the Prototype
If you like the result, you can show it in full-screen view in presentation mode. There are also various ways to share the draft, for example via a link. This way you can pass it on to colleagues or to your development team. Further editing functions such as expanding, editing, and drawing are covered in the next chapter.

Summary – Claude Design Guide: Creating Your First Design with a Prompt
You have learned how to create a project in Claude Design, choose the right model, and write a structured prompt. A reference image and the answers to follow-up questions help you steer the result in a targeted way. The prototype can then be reviewed, presented, and shared. The more clearly your request is worded, the faster a design is created that matches your vision.
FAQ
Do I have to upload a reference image?No, it is not strictly necessary, but it makes it considerably easier for the AI to orient itself on style.
What information belongs in a good prompt?Target audience, style, brand impression, layout, and visual direction. If you mention these points, Claude usually no longer asks follow-up questions.
Can I change the model later?Yes, the model selection can be adjusted before submitting each prompt. For simple drafts, a leaner model is usually sufficient.
Why should I have multiple design variants created?Multiple variants help with comparison, but cost more tokens. For the first draft, a single final version is often sufficient.
Can I still change the design after it has been created?Yes, you can expand, edit, and adjust the result in the project with tweaks. The next chapter shows you how this works.


