Imagine you're starting a new project and have to decide again for every draft which color the buttons should have or which font applies to headings. This is exactly what the design system in Claude Design is for. In this guide, you'll learn how to build such a system from just a few specifications, fill it with brand colors, fonts, buttons, cards, and spacing, and then use it for all further designs. The example is the fictional AI Marketing Academy, which offers premium online courses for entrepreneurs, marketers, and creators.
The video is only loaded from YouTube when you play it – data (including your IP address) is then transmitted to YouTube/Google. More in the privacy policy
Key Takeaways
- You create a design system once and then apply it to every new project.
- A text-based AI tool helps you compile all specifications in a structured way.
- Colors, typography, buttons, cards, spacing, and layout belong in the system. Every specification needs a clear purpose.
- Hex and RGB codes as well as color pickers ensure that colors are adopted exactly.
- After reviewing, you publish the system and set it as the default so that new projects use it automatically.
Step 1: Preparation with a text-based AI tool
Before you type anything into Claude Design, a small preparation step is worthwhile. Ask a text-based AI tool such as ChatGPT, Gemini, or the text version of Claude to create a list of all the information a design system needs. This saves you a lot of searching later and ensures that nothing important is missing.

Step 2: Create a new design system and enter the company data
Switch to "Design System" in the right-hand tab and click "Create". The form is extensive, but you start with the basics: the company name ("Company Name") and the "Blurb", a short overview of your company. In the example, the entry reads: AI Marketing Academy, premium online courses for entrepreneurs, marketers, and creators. Additionally, you can upload links, documents, an HTML version of your website, as well as fonts, logos, and other assets.

Step 3: Define colors with their purpose
In the next section, you determine the color palette. Think about which primary color, secondary color, accent colors, and background color your brand presence should have. The decisive question, however, is what each color is used for. In the example, the following applies: The primary color (a strong purple) is intended exclusively for buttons, links, and headings. The accent colors, such as red or yellow, are used for highlights, and the background color is used for the sections. If you specify this assignment right away, the AI uses each color purposefully and not randomly.

Step 4: Define typography
Next, you set the fonts. In the example, the guide combines Poppins for headings with Inter in the Bold and Regular weights for body text and interfaces. Also add the font sizes of the individual headings in pixels. This way, the system knows exactly how large an H1 or an H2 should be. It's best to choose only a few fonts here, because the fewer variants you define, the more consistent the result looks.
Step 5: Design buttons and cards
Buttons are the most important elements when it comes to conversion. Therefore, define variants: which color the button has, what the font in the button looks like, and what goal it pursues. In the example, everything should be geared toward strong conversion. Afterwards, you define the card styles. Cards are content boxes, for example for features or testimonials. Determine which background color they have, whether they have shadows, and whether they should be used for testimonials.

Step 6: Define spacing, margins, and layout
Spacing seems inconspicuous, but it strongly shapes the overall impression. Specify how much distance elements should have from the edge, for example 8, 16, or 64 pixels. These values then apply uniformly to the entire landing page, website, and every UI. Also add the layout. In the example, large, bold headlines, two call-to-action areas, three sections, as well as an FAQ and a pricing area are on the list. You can also describe an animated style.
Step 7: Adopt colors and fonts exactly
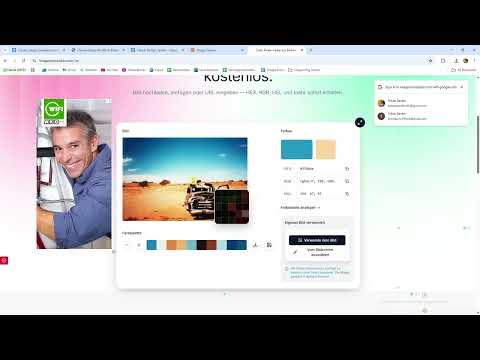
To make sure your colors end up precisely in the system, you work with color codes. Hex and RGB values reproduce each color unambiguously. If you don't know a color, use a color picker, select the color directly in the tool, and copy the displayed code. Another option: Upload your existing website and have the colors used extracted. This also works with colors you only know from the screen. You specify the fonts just as concretely, for example "Inter" in the example.

Step 8: Upload the brand document and add background information
Now create a document with your brand guidelines, as a Word or PDF file. The format doesn't matter. Then upload the document to the design system via "Browse". It will initially be named "Untitled Document". Rename it right away, for example to "Brand Guidelines", so you can find it again quickly later. Also remove any links that were only inserted for demonstration purposes and are not relevant to your system.
In the "Other Notes" field, you add the background. In the example, it says: a software service, aesthetically inspired by Stripe, Linear, and Notion. The goals are clarity, hierarchy, and conversion. The design should look modern, trustworthy, and hierarchically structured. Once everything is set, click "Continue to generate". The generation takes a few minutes and uses a fair amount of tokens, but the result is worth it.

Step 9: Review the result and give feedback
After generation, you see the design system section by section. Check each area: primary colors, typography, spacing, borders, shadows, buttons including hover state, form fields, and cards such as testimonial cards. Each step can be opened and given feedback or marked for revision. In the example, all areas receive a thumbs up. A brand font might still have been missing, but since the system was coherent overall, the current state was sufficient. Whether you upload additional files is up to you.

Step 10: Publish the design system and set it as the default
Go back to "Designs" and open the "Design Systems" section. There you will find your new system. You can remove the automatically created default system that you accidentally set up if you don't need it. Then set your design system to "Published". You can edit it again at any time if your requirements change. The note that your team's new projects will automatically use the system means that you get the same style for every future design.

Step 11: Create a landing page with the design system
Start a new design and select the desired design system from the options. Give the project a descriptive name, in the example "Website full Test". Then insert a master prompt, for example: "Create a conversion focus landing page", followed by the description of the page. It is important to add that all colors, typography, and other specifications should be retained. A banner with the name of the applied system appears at the top. Uploaded documents are additionally taken into account as attachments.

Step 12: Evaluate the result and use consistency for further designs
In the example, the generation takes around two minutes. Afterward, you see the landing page with logo, buttons, social proof, features, benefits, pricing, and testimonials. In the example, the text turned out somewhat extensive and was shortened later. You need to upload images separately, and functions such as buttons exist in the draft only as design. You can have the code output so you can host the page.
The real advantage shows up in further projects. If, for example, you have five social media ads created and select the same design system, all the graphics share the same font, color palette, and background color. This way, consistency arises completely automatically.

Summary ??? Creating a design system with Claude Design: step-by-step guide
A design system bundles colors, fonts, buttons, cards, spacing, and layout into a single template. You enter the specifications once, review the result, publish it, and then apply it to landing pages, graphics, and other projects. The more clearly you define intended uses and concrete values such as hex codes or pixel sizes, the more consistent and reliable your designs will be.
FAQ
How long does it take to generate a design system?Depending on the scope of the information, it can take a few minutes, and several tokens are used in the process.
Do I absolutely have to use hex or RGB codes?No, you can also use a color picker or have the colors read from your website. However, the codes are more precise and avoid deviations.
Can I still change a design system after publishing it?Yes, you can edit it at any time if your brand requirements change.
Why should I specify the intended use for the colors?Because the AI then uses each color purposefully, for example primary color for buttons and accent color for highlights, instead of distributing them arbitrarily.
Do I have to upload a brand font?No, a brand font is optional. In the example, the design system was fully usable even without one.
Can I also use the design system for graphics such as social media ads?Yes, as soon as you select the design system when creating, the graphics automatically adopt fonts, colors, and background colors.


