
Putting a signature on paper is quick. Passing it on cleanly as a file, on the other hand, is often tedious. If you want to send your application digitally or sign a document electronically, you quickly run into the problem that a scanned signature looks gray, messy, and far too large. That is exactly why, in this tutorial, I'll show you how to prepare your signature in Affinity Photo, isolate it, and export it as a PNG with a transparent background.
The video is only loaded from YouTube when you play it – data (including your IP address) is then transmitted to YouTube/Google. More in the privacy policy
All you need is a scan or a photo of your signature on light-colored paper, as well as Affinity Photo. A graphics tablet is helpful, but not a must.
Key Takeaways
- A scan is first cropped to the actual signature so that the file stays manageable.
- With a Levels adjustment layer, you make the writing deep black and the paper background pure white.
- With a luminosity selection and by inverting the pixel selection, you separate the writing from the background and lift it onto its own layer.
- You can close gaps in the writing with fills or the brush, and the decision about the look you want is up to you.
- Export the signature as PNG-24, because only this format saves transparency reliably.
Step-by-Step Guide
Step 1: Check the scan and assess the file size
Open your scan in Affinity Photo. In the video, the signature is available as an A4 scan, and the file is very large at around 5000 pixels wide and 7000 pixels high. This resolution is unnecessary for a signature, since you will crop the scan significantly anyway. So assume that in the next step you will remove most of the sheet.

Step 2: Narrow down the signature with the Crop Tool
Select the Crop Tool and drag a frame around your signature. At first, draw the frame only roughly, so that it is about the size of the signature. You can readjust the boundaries at any time later by dragging the edges and corners. Make sure that no edges or shadows from the scan remain, as they would be noticeable later.
Step 3: Refine the crop and apply it
With a double-click in the center of the frame, you apply the crop. Afterwards you will see that the document has become significantly smaller, in the video it is about 1500 pixels wide. This is easy to work with. If you want to crop even more tightly, repeat the process and pull the frame in a bit further at the top, bottom, right, and left. Then confirm again with a double-click.

Step 4: Create a Levels adjustment layer
Now it's time for the contrast. The signature is so far a background layer, and the writing still looks gray. In the Adjustments panel, select Levels. It is the most important helper in this tutorial, because with it you can change the tonal values of the signature without destroying the original pixels. As soon as the dialog box appears, you will see three sliders: on the left the black point, on the right the white point, and in the middle the midtones.

Step 5: Set the black point
Hold down the Alt key and drag the black slider to the right. While you hold the Alt key, Affinity Photo shows you which areas turn deep black. This is the best method for setting the black point precisely. Drag the slider until the writing appears completely black. However, make sure that the paper background does not become dark at the same time, as that would be difficult to correct in the next step.

Step 6: Set the white point and remove spots
If you hold down the Alt key again, you can drag the white slider to the left. This makes the paper background brighter. Drag the slider until all gray spots from the scan have disappeared. There is a risk that the writing will also lighten in some places. A small compromise is normal here, you just need to set the slider so that the background looks pure white and the writing still remains dark.

Step 7: Paint over the remaining gray areas with the brush
Sometimes a gray area remains, for example at the top edge of the image. You can paint over this area directly. Close the adjustment layer and select the background layer. Set the foreground color to white and pick a brush with a soft edge. Then paint over the gray spots until the background is evenly white. This way you have adjusted the contrast so that the writing appears rich black and the background pure white.

Step 8: Merge the layers
Before you isolate the writing, you should unify the layers. You can do this in two ways. With Ctrl+Alt+Shift+E (on macOS, correspondingly with Cmd instead of Ctrl) you merge all visible layers onto a new, topmost layer. The original layers are preserved, so you can still make corrections later. Alternatively, you can right-click the topmost layer and choose the command "Merge Down". This method permanently merges all the layers below into a single layer.

Step 9: Create a luminance selection
Now the actual isolating step begins. Hold Ctrl and Shift and click on the small thumbnail of the background layer. Affinity Photo then creates a selection of the bright areas. Since the background is bright, it is selected and not the writing. You can tell by the selection lines at the edge. You will use exactly this behavior in the next step, because you don't want to keep the background, but the writing.
Step 10: Invert the selection and lift the writing onto a new layer
While the selection is active, choose the command "Invert Pixel Selection" in the "Select" menu. This selects the writing, and the selection lines around the background disappear. With the background layer active, now press Ctrl+J. The writing is then copied onto a new layer and remains with a transparent background. With Ctrl+D you then deselect the selection again. Hide the background layer, and you will see only the writing on a checkered transparency grid.
Step 11: Test the isolation with a colored fill layer
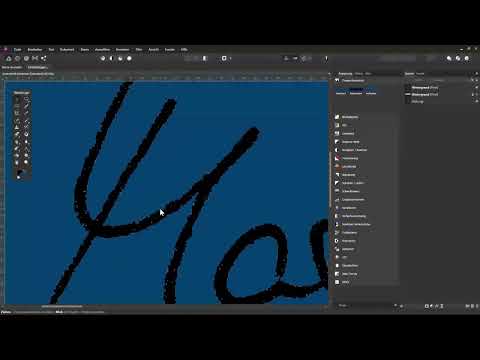
To check the transparency, create a new fill layer via "Layer" and choose a color, for example a strong blue. Then drag the fill layer all the way to the bottom so that it sits behind the signature. You now see your writing on a colored background. This is a good test, because you immediately see whether any remnants of the paper are still clinging to the writing. In the video, some white pixels inside the writing stand out. This is no cause for concern, as they are easy to fix.

Step 12: Close white gaps in the writing
To eliminate the white pixels inside the writing, hold down only the Ctrl key (without Shift) and click on the thumbnail of the signature layer. This selects all pixels of this layer, including the bright ones. Then go to "Edit" and choose "Fill", and select a black tone, for example the secondary color. Confirm with "Apply". With Ctrl+D you deselect the selection again. Afterward, you can set the background layer back to white, in case you made it visible for checking.

Step 13: Refine the writing afterward with the brush
Whether you prefer a clean or a more scribbled look is purely a matter of taste. If you want to close small gaps or smooth the edges, you can rework the writing layer with the brush tool. To do this, reduce the brush tip size and leave the hardness at about 95 percent; the opacity stays at 100 percent. If you are working with a pen on a graphics tablet, activate the option that controls the size through pressure. This way the line becomes thicker or thinner, depending on how hard you press. If a stroke turned out too smooth, you can undo it with Ctrl+Z.

Step 14: Adjust the size of the signature
The signature is now isolated, but perhaps still larger than necessary. To change the document size, choose "Document" and then "Resize Document". Enter a desired width, for example 600 pixels, and confirm with "Resize". The edges are recalculated and slightly optimized at the same time. If you don't like the size, you can simply undo the step with Ctrl+Z. For safety, also save a copy in the native Affinity Photo format so that you can make changes at any time.

Step 15: Export the signature as PNG-24
The last step determines whether your cutout will also work in other programs. To do this, don't choose "Save As," but the "Export" command. In the export dialog, select the PNG format and set the preset to PNG-24. Only this variant reliably includes transparency. Then click "Export" and choose the storage location on your hard drive. Your signature is now ready for Word documents, PDF files, email signatures, or websites. It can also be placed on colored or patterned backgrounds without a white edge becoming visible.

Summary ??? Cutting Out a Signature in Affinity Photo: Step-by-Step Guide for a Transparent Background
You have seen how to prepare a scanned signature for digital use in Affinity Photo in just a few steps. You cropped the scan, created a clear contrast with a levels adjustment, and lifted the writing onto its own layer using a luminance selection. You also now know how to close gaps, adjust the size, and export the file as PNG-24. With this file, you can use your signature in documents, emails, and on websites in the future.
FAQ
How long does it take to cut out a signature?With a bit of practice, you need about 10 to 15 minutes; the first time it may take longer.
Do I need a graphics tablet?No, a graphics tablet is not strictly necessary. However, it helps when touching up with the brush, because you can control the stroke width via pressure.
Why should I choose PNG-24 instead of PNG-8?PNG-24 supports the full color depth and reliably supports transparency, so that your signature appears cleanly on any background.
Can I also save the signature in a different color?Yes, you can color the writing in any color you like using a fill layer or by filling a selection before you export.
What do I do if the writing has become too light?Create a new levels adjustment and drag the black point further to the right while holding the Alt key until the writing appears rich black again.

