
Razor-sharp InDesign recipes

- Speed up your workflow noticeably and use shortcuts that will amaze you
- Over 70 glorious tips from the areas of layout, typography, tables, scripts and practice
- Benefit from exquisite secret recipes and become a star in layout heaven yourself
This jam-packed recipe book awaits you! Swing the creative cooking spoon with us and get the most out of your work with InDesign. Bon appetit!
72 Videos, 526 minutes
Workflow
Top 10 double clicks in InDesign
9 minIn this short video training, I would like to introduce you to the top 10 double-clicks in InDesign. A double-click is certainly only a small time-saver, but you get used to a certain workflow and can work more efficiently as a result.
Using visual aids in InDesign
11 minIn this training, I would like to introduce you to some tools that InDesign uses to make our daily work much easier. I will use examples to explain the function and benefits of the following tools:
- Align to guides
- Intelligent guides
- Show hidden characters
- Display text concatenations
- Show and hide baseline grids
- The content selection tool (donut)
- Locking specific elements
- Working on different layers
Tips & tricks for Adobe InDesign: Quickly change the document template
2 minWhenever I create a new document, it annoys me that I have to uncheck the double-page option or reset the margins. I can change these settings. I explain how to do this very easily in this mini-video training.
Tips & Tricks for Adobe InDesign: Enlarge assembly area
2 minSometimes you simply need more space to store objects for later use in the non-printable area. However, you can define the assembly area yourself. I show you how to do this in this video training.
Adobe InDesign tips & tricks: Multiple copying of objects - keyboard acrobats take note
5 minThe clever multiple duplication of objects saves a lot of work. For this to work at all, you need to be very good with the keyboard. This tip is really ingenious.
Note: Instead of the left arrow, the right arrow must be pressed to create a multiple copy. The left arrow can only be used to reduce the number again.
Tips & Tricks for Adobe InDesign: Alignment
2 minWith this trick, it is possible to align objects perfectly very quickly, even though an object is not on the far left, for example, but in the middle, and the alignment should be specified.
Adobe InDesign tips & tricks: Place images immediately with an object format - secret trick
5 minIf you insert many images into a document at once, it would be practical to assign an object format to them. But that's not possible. At least not officially. But thanks to my secret trick, it does work.
Adobe InDesign tips & tricks: Save time when repositioning objects and paths
1 minMoving paths or objects quickly is not rocket science. It's pretty easy with these two tricks.
Adobe InDesign tips & tricks: Quickly apply effects to other objects
2 minI have an object that has a certain drop shadow, for example. If I want to apply the same effect to another object, it's extremely easy. I explain exactly how in this video training. I also give tips on how to use effects more effectively.
Tips & Tricks for Adobe InDesign: Content selection tool/Hide donut circle
3 minEveryone knows it: You have a circle or rectangle with an image inside. If I then want to move the circle, I am offered a "donut" or the content selection tool when I move the mouse over it, with which I can move the image within the circle. However, you often don't want to do this and prefer to use the direct selection tool yourself. That's why in this video training I show you how to deactivate this function or how to use it cleverly.
Load / import paragraph formats
7 minIn this video training I would like to explain to you how it is possible to transport existing paragraph & character formats from one document to another.
Tips & tricks for Adobe InDesign: Set default values - this saves a hell of a lot of time
4 minHave you ever been annoyed by the fact that you always have to change the font, colors, etc. for new documents? That doesn't have to be the case. With just a few clicks, you can change these values forEVER.
Adobe InDesign tips & tricks: Get new gradients quickly
3 minSometimes it's just annoying that you always have to create new gradients in InDesign and you think with envy of the amount of ready-made gradients that Illustrator has to offer. I also use this trick to equip InDesign with lots of new gradients.
Adobe InDesign tips & tricks: Quickly add new color swatches
4 minWant to quickly add new swatches without having to open the swatches panel? Then take a look at this video training.
Tips & Tricks for Adobe InDesign: Adjust text frame height to last text line
4 minYou probably know the problem: I have various text frames and they are all different sizes, even though the text they contain may be the same height everywhere. In this video tutorial, I'll show you how you can easily make the text frames the same height as the last line of text. This requires just 3 lines of code.
Adobe InDesign tips & tricks: Replace double spaces in the document with one space
4 minDo you sometimes get annoyed that you haven't spotted double spaces in a large document? That doesn't have to be the case. With this trick, you can detect them extremely quickly and replace them with a space.
Tips & tricks for Adobe InDesign: Find lost book files quickly
3 minYou have created extensive books and in the meantime have really tidied up your hard disk, created various folders and moved your files into them? Well, then open your book files in InDesign and you will unfortunately be punished with various error messages because InDesign can no longer find your book files. Here's a great little trick that will help InDesign find everything again immediately!
Tips & tricks for Adobe InDesign: Create and apply character and paragraph styles at lightning speed
4 minIn this video training, I show you how easy it is to create and use character and paragraph styles. These tricks are really ingenious.
Tips & tricks for Adobe InDesign: Scaling graphics precisely
2 minIf I want to enlarge a graphic exactly, there is an extremely simple option that is not immediately obvious. With this mini-trick, it's no longer a problem.
Tips & tricks for Adobe InDesign: Import Photoshop files and use layer compositions cleverly
7 minOf course you can import Photoshop files into Adobe InDesign. But if you're clever, you can use Photoshop's layer compositions. Why? I'll tell you in this video training.
Adobe InDesign tips & tricks: Exporting tables and other objects as images
5 minWould you like to make a table from InDesign available for another program? No problem if you know how. Other objects can also be exported so quickly.
Adobe InDesign tips & tricks: Exporting graphics for the web with the correct resolution
5 minIn this video training, I show you how to export graphics correctly for the web. By default, the export resolution is set incorrectly.
Tips & Tricks for Adobe InDesign: Export file information of all links
3 minSometimes you want to export all link information (such as file name, color space, resolution, path, etc.). This is very easy after this video training.
Using libraries and snippets
9 minIn this video training, I will show you how you can work with recurring objects, graphics and texts in two ways. I start by explaining the advantages and benefits of the object library and then go on to explain an alternative technique, namely how to work with and use snippets.
Download and install missing color profiles
5 minWhen files are exported, many (online) print shops favor certain color profiles. It is often the case that the desired color profiles are not pre-installed by default and are therefore not available as a selection option in InDesign. In this training I will show you where you can download the missing colour profiles and in which folder they must be moved after the download so that they are subsequently recognized by InDesign.
Tips & tricks for Adobe InDesign: New contours and various gimmicks thanks to Easter Eggs
4 minEliciting new contours from Adobe InDesign is very easy. The InDesign developers have come up with something really funny. They've even added a little game. I explain how to access all the hidden functions in this video training.
Layout
Multicolor swatches in InDesign
4 minIn this training, you'll learn a really quick but effective trick for creating multicolored swatches in InDesign and where such a technique comes in handy.
Pagination - create consecutive page numbering
10 minIn this video training, I explain how to create and customize consecutive page numbering (pagination) in your InDesign document.
Continuous and double page numbering on one side
6 minIn this tutorial, I will show you a very exotic tip: how you can display both page numbers on one page in a multi-page document. The trick is that this is an automated and therefore continuous pagination, which is completely different but still extravagant. This process also makes sense if, for example, large photos or illustrations are used that should not be provided with page numbers.
Format column with just one click
21 minIn everyday life, things often have to be done quickly, which is why I created this video training. I would like to show you how you can get any text (for example from an editor) completely into shape with just a few clicks. In my example, I'm working with a recurring column. To understand how such quick formatting works, I will then set up the entire construct from scratch in a new work file and explain the key points step by step. For example, how to work with different column spans in a text field. You can then use the procedure adaptively for your own projects.
Tips & tricks for Adobe InDesign: Finding image placeholders for every conceivable resolution
4 minSometimes you have created a great layout, but the photos are still missing, and if you only use empty frames, the layout looks pretty bare. You can do better:
In this video training, I'll show you the best web addresses that you can use to quickly find free suitable image placeholders. You can find an ingenious list here, for example.
Tips & tricks for Adobe InDesign: Cool effects with the soft gradient edge
4 minDo you know the IBM logo? This dashed effect in the typography can be realized with the "soft gradient edge". It offers great possibilities to create certain transparencies; with a trick you can even achieve completely different effects.
Adobe InDesign tips & tricks: Retain contour weight even with waveforms
2 minThe problem with the waveform contour type is as follows: As soon as I increase the contour thickness, the number of waves also changes. If I want to prevent this, I need a trick. The trick is absolutely simple, and that's why the video training is so short, but still so enlightening :-)
Adobe InDesign tips & tricks: Placing multiple pages of a PDF file or InDesign file as a contact sheet
3 minIf I want to place a PDF or InDesign file as a contact sheet in InDesign (i.e. several pages at once), I have to use a few tricks. You can find out which ones in this video training.
Tips & tricks for Adobe InDesign: Create sunbeam effect by clever copying
9 minClever copying makes it super easy to create a sunbeam effect in InDesign. But that's not all. You can also use it to create other great objects and shapes. Take a look and be amazed.
Tips & tricks for Adobe InDesign: Save a lot of work with the help of gradients (example German flag)
6 minIf you skillfully use gradients that don't look like gradients, you can save yourself a lot of time. In this video tutorial, I use a German flag to show how these can be created using just a simple gradient.
Adobe InDesign tips & tricks - placing important information in a non-printable format
11 minWould you like to insert important information such as image sources or print data into an InDesign document in a meaningful way? Then I'll show you how to do this clearly with just a few clicks. I'll cover notes, non-printable objects or entire layers as well as the information area and document information.
Fun with polygons
3 minFun with polygons - three cool tricks that are fun to do.
Tips & tricks for Adobe InDesign: Create EAN/barcode/barcode from ISBN with just a few clicks
8 minDo you have a DVD or a book that you want to sell? Then you need an ISBN and a barcode/barcode/EAN code. But how do you create this yourself in Adobe InDesign? There are two fantastic and, above all, easy ways to do this.
One is to use a barcode generator or a script (see tip 6). I'll show you how easy it is to use both options.
Adobe InDesign tips & tricks: Use the page tool to place pages one below the other, e.g. for puzzles
6 minFor example, I want to create a jigsaw puzzle and therefore pages must be placed next to each other and directly below each other. I use the page tool for this. But I still need a few little tricks to make this work properly. I explain which ones in this video training. You can also use it to print large posters on a small printer, for example, and this function is also useful for calendars, business cards or posters.
Tips & Tricks for Adobe InDesign: Print DIN A3 - DIN A0 on several DIN A4 sheets
9 minDo you want to print large images or just words on DIN A1, but don't have such a large printer? Then simply print several A4 sheets and join them together. In this video training, I explain exactly how to do this and which tricks you should definitely keep in mind.
Tips & tricks for Adobe InDesign: Quickly compare photos in black and white and in color
2 minIn this video training, I give tips on how to quickly compare photos in different colors. Because the question often arises: Would you rather have all your photos in black and white or in color? With this trick, it's quick and easy.
Tips & tricks for Adobe InDesign: Convert images to vector graphics
6 minDo you have a graphic that needs to be converted into a vector graphic? This even works in InDesign. I explain exactly how in this video training. There are also a few tricks on how to optimize the graphics even better for this purpose.
Tips & tricks for Adobe InDesign: Create page turn effect or corner effect
5 minCreating a page turn effect in InDesign is not that difficult. In this video training I give you many tricks with which you can create this corner effect.
I have inserted the corner effect as an IMDL file (from CS4) as a working file.
Adobe InDesign tips & tricks: Create interlocking rings
5 minWould you like to create rings that interlock or are connected? It's easy if you know how. With this trick, it's a matter of seconds. I'll also give you more tips on how to work with "masks" in Adobe InDesign.
Tips & Tricks for Adobe InDesign: Create speech bubbles
4 minIn this training, I will show you several ways to create a speech bubble. The third option is the very best, by the way.
Tips & Tricks for Adobe InDesign: Create streets
4 minCreating streets in Adobe InDesign is very easy thanks to the effects. However, you still need a few tricks to make it look really good. After this training, creating streets will be child's play.
Typography
Create initials in InDesign
15 minA popular marker at the beginning of articles in editorial design is a larger letter, which is called an initial. In this video training, I show how initials can be created and varied in InDesign. In addition to classic initials, I show how to create hanging initials that build up before the paragraph, as well as illustrations/images that function as initials.
Justification in InDesign
14 minIn this video training, I primarily focus on justification, but I also list options that are important for many other text formatting options. Using practical examples, I explain the differences between
- Character width,
- character spacing and
- word spacing,
- the formatting in the paragraph formats
- and the overall interaction so that the appearance of a text meets expectations.
In addition, I will also go into the equalization space in InDesign. You can find out what it is, what it can do and where to use it in this video training.
Automate pricing via nested formats
9 minIn this training, I will show you how to create correctly formatted prices in different variants. The aim is to set up a display using nested formats and character and paragraph formats in order to automatically create superscript prices with and without commas in just one second.
Simply "mark up" texts in InDesign
5 minIn this quick and easy training, I would like to explain an effect in InDesign that can be used to recreate the typical colored "highlighting" known from the use of standard highlighters on paper. In addition, we will take a short trip to Adobe Acrobat Pro and look at alternative highlighting after the document has already been exported.
Colored headline effects via the formats
7 minThis training is a short workshop on highlighting headlines. It will show you how you can achieve striking illustrations and color highlighting within a single paragraph format and with the help of paragraph lines. The advantage: No matter how many characters are typed in the headline, the highlighting resonates with every letter!
Tips & tricks for Adobe InDesign: Convert texts to paths quickly and, above all, correctly
3 minIf I want to convert a certain word into a path, there is the "Convert to paths" option. However, this does not always work properly. To ensure that the text can really be converted perfectly into a path, you sometimes have to use a trick.
Colored text over nested formats
6 minIn this short training, I will show you how you can use nested formats in InDesign to change texts according to different parameters. For my example, I choose a colored text in the colors black, red and gold, which was not formatted manually and individually, but is conveniently changed via paragraph and character formats.
Addition to the error devil: I would like to point out the slip of the tongue in the video, in which I speak of "small caps" instead of capital letters. Please don't take my word for it at this point.
Tips & tricks for Adobe InDesign: Double outline on texts and still be editable at any time
4 minDo you need a double outline for a headline or normal text? No problem. In this 4-minute video tutorial, I'll show you how easy it is.
Adobe InDesign tips & tricks: Multiple text outlines - neon effect
6 minCreating a text with 4 contours is no problem thanks to the effects control panel. However, you need to know the correct settings. I show these in great detail in the video training and they are also included in the working file.
Using Google web fonts in InDesign
3 minIn this training I will show you how you can easily use the so-called Google Web Fonts, which are now only called "Google Fonts", as a font in InDesign.
Tables
Adobe InDesign tips & tricks: Creating tables with rounded corners - two approaches
6 minEveryone probably knows the problem: You want to have nice rounded corners in the tables, but that's not so easy in Adobe InDesign. That's why I'll show you two ways to create tables with rounded corners.
Tips & tricks for Adobe InDesign: Edit tables and their cells quickly
3 minTables are a nice thing ... but only if you can edit them quickly at any time. With a trick, you can always change all cells, even if no option is displayed at the top of the control panel. I also give tips on how to easily add new rows or columns or quickly change the height/width.
Tips & tricks for Adobe InDesign: Create transparent outlines in tables
5 minWould you like to create tables with transparent contours? It's easy with this trick.
Working with scripts
Create individual bullet points thanks to IndyFont
9 minWith the IndyFont script, it is possible to create your own illustrations, logos or pictograms as characters. In this video training, I will show you where to get the script and how you can use it to create your own characters, for example to create individual bullet points or initials with your logo.
Tips & tricks for Adobe InDesign: cool new functions thanks to scripts
8 minAre you missing certain functions in InDesign or do you always have a problem that annoys you? Then scripts can help. Here I'll show you how easy it is to feed InDesign with new scripts and tease out cool new functions.
Among other things, the following 4 scripts are shown:
- Start Google search for the selected word with a click
- Write all fonts used in the current document to a text file
- Fill tables with a word or character of your choice
- End everything with a click without saving
Adobe InDesign tips & tricks: Create a calendar in just 1 minute
8 minEveryone needs a calendar in Adobe InDesign at some point. But then the big search for templates begins and a year later the search starts all over again. It's better to use a script that creates a perfect calendar, regardless of the year. And you can download just such a script for free here. However, there are so many options that I will give you various tips on how to use it (especially with the German vacations).
Tips & tricks for Adobe InDesign: Importing multi-page PDFs
6 minFrom time to time you have the task of importing a multi-page PDF file into Adobe InDesign. Unfortunately, the normal import only offers page by page. It is better to use a script that is installed directly with Adobe InDesign. I explain exactly how to use it in this short video training.
Tips & tricks for Adobe InDesign: Quickly find the color used in the document
3 minSometimes you want to know where in the document a certain color occurs. There are two ingenious solutions. View and stow :-)
Tips & tricks for Adobe InDesign: Display format deviations with a click
3 minDeviations in character and paragraph formats are annoying - especially if you have to search for them individually. There is an easier way. You can display them all with a click by running a small script.
The script is available here.
Tips & tricks for Adobe InDesign: Quickly exchange images
3 minSometimes I have inserted a lot of images into my document and want to quickly exchange two of them. This is also very easy, but only with the help of a script. In this video training, I'll show you exactly how to insert and execute this startup script in InDesign.
Tips & Tricks for Adobe InDesign: Exporting image data
5 minIn this video training I show how to export all images from a document as a file with the following information using a script:
- File name, rotation, file type, output of the dimensions of the image and image frame, path, width & height, vertical and horizontal scaling, effective resolution, color space as well as an extra warning if vertical and horizontal scaling do not match).
Thanks to Martin Fischer for this wonderful script and for the extended script available here!
Practice
Developing design grids in InDesign
35 minIn this training, we will take a closer look at the workflow for a four-page folder, with the core topic revolving around the creation of a design grid. The video training covers several topics for successful and symmetrical layout:
- Why a design grid?
- What building blocks does a page consist of?
- Differentiation between various grid types
- On the road in a (fictitious) customer order
- Idea and scribble of a four-page folder
- The correct calculation of dimensions
- Creating a complex and professional design grid and dividing it into individual grid fields
- Using the created grid effectively and laying out the folder
Design and print 2-break flyer
40 minIn this video training, we will design a 2-break flyer from scratch in the form of a wraparound fold in InDesign. This is a static, but also tidy, modern design for a fictitious organic farm. I will also show you how to find the right template for print preparation and how to export the source document correctly for the (online) print shop.
The following topics are summarized in bullet points:
- Where can I find the relevant key data for my product and how to use templates?
- Designing a modern flyer in DIN long portrait format (inside and outside) in InDesign.
- Using and incorporating graphics and other elements.
- The export dialog, selecting a PDF template and other tips.
- The upload process at an online print shop and using the live view to "flip through" the flyer.
I wish you lots of fun and informative entertainment. With the kind support of viaprinto.de
I would also like to take this opportunity to refer you to the first part of this series, "Designing and printing business cards" - a comprehensively informative video training course on creating and designing business cards in InDesign, which can be found in this training course.
Design and print business cards
35 minThe training covers the key points for exporting from InDesign and uploading to an online print shop. We will use the design of a business card as an example. We then use data merging to create numerous vcards for companies with just one click. Finally, we will look at the file export and upload for the print job.
- Where can I find key data for my product and templates?
- Designing a business card (front and back) in InDesign.
- Using the Pathfinder to create a logo.
- Data merging using a source document.
- Export dialog, selecting a PDF template and taking notes into account.
- Splitting a PDF into individual documents with Adobe Acrobat.
- Using the upload process and multi-shipping of an online print shop.
With the kind support of viaprinto.de.
Designing a brochure as a handout in InDesign
37 minIn this training session, I'd like to share a little bit of our agency practice. I'll show you how I designed a handout in InDesign for a pitch and optimized it for brochure printing. What will I show?
- Download print templates and instructions for InDesign
- Designing the brochure in InDesign
- Download missing ECI color profiles
- Exporting the file and uploading to viaprinto.de
I also give a little insight into the actual presentation in Prezi on which the handout is based. So this is a real project. Have fun watching it! With the kind support of viaprinto.de.
Examples of use
-
 Razor-sharp InDesign recipes
 -
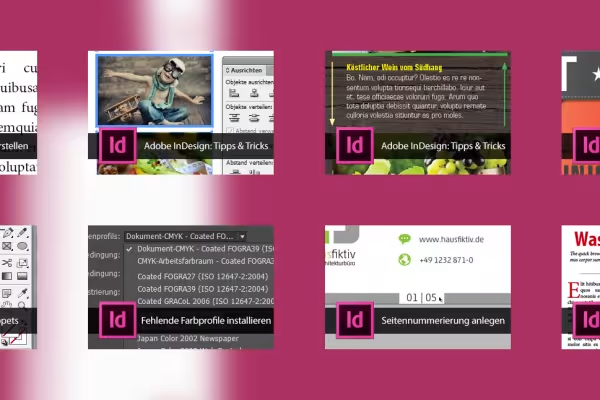 Get started with InDesign!
You might also like

More style, more power, more templates!

Full power, more inspirations, maximum WOW effect!

Live your layout now!
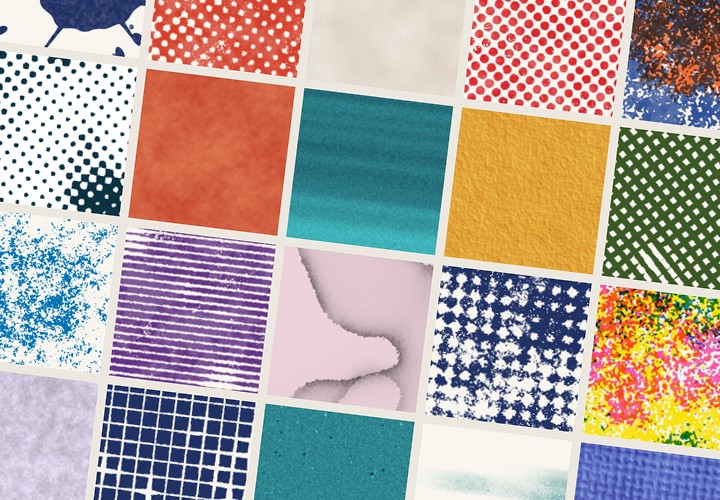
20 sets in 4K (4096 × 4096 px, 300 DPI) as JPG plus Photoshop patterns, calibrated to the fill method
Comment now „Razor-sharp InDesign recipes“