
Artworks in Photoshop

- Compositing, effects, looks, illustration and digital painting
- Anpassbar in InDesign, Photoshop, Affinity Publisher, Affinity Photo (A1) und Word (A4)
- Themen: Weihnachtsfeier, Weihnachtsmarkt, -party, -konzert und Eislaufen
A concentrated load of professional knowledge awaits ambitious photography fans. Expand your horizons now!
35 Videos, 512 minutes
Individual training in text form
The triangle mosaic
In this video training, I'll show you how amazingly easy it is to create a triangle mosaic in Photoshop. You can create a beautiful background with matching colors from any photo.
Good Tim - Video training for comic drawings in Photoshop
In this video training, I use my image to explain how you can create cartoon-like motifs in Photoshop using fairly simple means. I start with a scanned sketch, the outlines of which I trace in Illustrator.
The core of the work then consists of dividing up the individual image elements within Photoshop and filling them using clipping masks. A graphics tablet is certainly an advantage, but the steps can also be reworked with the mouse.
The two-face effect in Photoshop
Do you like optical illusions? Then you'll love this video training! I'll show you how to create a confusing image using Photoshop. The image doesn't make it clear whether you are facing the viewer head-on or sideways.
The low-poly effect in Photoshop
In this tutorial, I'll show you how easy it is to use the low-poly effect in Photoshop!
The comic effect in Photoshop
Everyone knows the comic effect, where the final image looks as if it was taken from a printed comic book. In this video tutorial, I would like to show you how the effect could look if you brought the character from the comic book to life.

Belong to you: Editing the image look

May I please?

Making-of: Little journey

Making-of: Memento Mori

Stefan & Matthias "X-Mas Special"
The eagle
Photoshop composing - The eagle: 01 - Create canvas & prepare background
In this introductory video, I present my finished painting "The Eagle" and its composition. We create a new canvas, place our background and prepare it for further processing.
Photoshop composing - The eagle: 02 - Crop eagle head and suit, refine masks and shade realistically
In this video tutorial, we will expose the eagle's head and the suit, optimize the contours of the mask, place both elements on our background and create a more three-dimensional effect with realistic shadows.
Photoshop Composing - The Eagle: 03 - Cropping, reconstructing, placing, shading and lighting wings
In this video training session, we will focus on the eagle's wings. We expose them and even partially reconstruct them, then place the wings in the composing with realistic shadows and suitable lighting.
Photoshop Composing - The Eagle: 04 - Prepare and crop car
In this video training, we prepare the police car for compositing by cropping it in various ways, decorating it with an eagle logo, applying a suitable depth of field and integrating it better into the image by adjusting the color.
Photoshop Composing - The Eagle: 05 - Final steps with color adjustments, vignette and atmospheric effects
In the last video training we create a uniform color style in the image through color adjustments, create atmosphere through interesting effects, create a vignette and finalize the image through the last steps.
Photoshop composing - The eagle: 02 - Crop eagle head and suit, refine masks and shade realistically
19 min OpenPhotoshop Composing - The Eagle: 03 - Cropping, reconstructing, placing, shading and lighting wings
11 min OpenPhotoshop Composing - The Eagle: 05 - Final steps with color adjustments, vignette and atmospheric effects
10 min OpenDigital Love
Photoshop Composing - Digital Love: 01 - Couple cropping, placement, hair removal and shadow construction
In the first video training session, we free the couple from the background, remove unsightly hair on their legs and reconstruct a realistic shadow on the floor.
Photoshop Composing - Digital Love: 02 - Sketching joints and creating important templates
Now we turn our attention to the joints of the future robots. To do this, we sketch them and create important templates for further processing.
Photoshop Composing - Digital Love: 03 - Modeling areas between joints and adjusting light and shadow
Now we turn our attention to the areas between the individual joints and model them with the look of rubber. The skillful use of masks, light and shadow helps us to do this.
Photoshop Composing - Digital Love: 04 - Prepare the glowing lines of the robot woman and optimize the remaining joints
In this video training we prepare the glowing lines of the robot woman and optimize the remaining joints in the picture.
Photoshop Composing - Digital Love: 05 - Final steps with glowing lines, light fringes and color adjustments
In the last video training session, we let the curved lines of the woman shine, give the lovers an atmospheric fringe of light and finish off the picture with final color adjustments.
Photoshop Composing - Digital Love: 01 - Couple cropping, placement, hair removal and shadow construction
14 min OpenPhotoshop Composing - Digital Love: 02 - Sketching joints and creating important templates
9 min OpenPhotoshop Composing - Digital Love: 03 - Modeling areas between joints and adjusting light and shadow
14 min OpenPhotoshop Composing - Digital Love: 04 - Prepare the glowing lines of the robot woman and optimize the remaining joints
8 min OpenPhotoshop Composing - Digital Love: 05 - Final steps with glowing lines, light fringes and color adjustments
6 min OpenAdvertising poster Lotus-Tea

Lotus Tea advertising poster - Part 01 - Brainstorming

Lotus Tea advertising poster - Part 02 - Image processing of individual objects

Lotus Tea advertising poster - Part 03 - Retouching

Lotus Tea advertising poster - Part 04 - Inserting composing objects and adapting them to the environment

Advertising poster Lotus Tea - Part 05 - Insert composing teapot with Lotus lettering
Illustration - On the fish hunt!

Illustration - On the hunt for fish! - Part 1 - Sketch - Painting a cat

Illustration - On the hunt for fish! - Part 2 - Painting background, insects and worm

Illustration - On the hunt for fish! - Part 3 - Painting fish - Final
Elfenamazone translates to "elf amazon" in English
Digital Painting Tutorial - Elven Amazon - Part 1
In this video tutorial, I explain how I created the 'Elf Amazon' motif. As this is a digital drawing, the use of a graphics tablet is of course a prerequisite. You should also already have some basic knowledge of Photoshop; this applies in particular to the use of layers (groups) and clipping masks.
Only standard brushes are used throughout the drawing, some of which are modified slightly in the palette; however, this is explained separately each time so that these tools can be easily recreated.
All picture elements are also drawn by hand. Stocker photos or similar are really only used here as template material.
Part 1 concentrates on the basic structure of the image using the outlines as well as the division of the layers into groups and the coloring of the simple basic colors. In addition to the technical aspects, the thought processes involved in drawing are also shown: The mental work in advance as well as the flexible reaction during the drawing process when unforeseen things happen.
Digital Painting Tutorial - Elven Amazon - Part 2
Part 2 focuses on the creation of the moon and clouds. The structures are realistically implemented using various tool settings in order to create an atmospheric and believable sky.
Working file in part 1
Digital Painting Tutorial - Elven Amazon - Part 3
Part 3 completes the arc and focuses on how the mountain in the background was created: rock structures, brushes, light effects & fog.
Working file in part 1
Digital Painting Tutorial - Elven Amazon - Part 4
Part 4 now involves adding structures to the two larger mountains. The first step is to work roughly before gradually adding the finer details.
Working file in part 1
Digital Painting Tutorial - Elven Amazon - Part 5
The fifth part is all about creating the fire. I start very simply with the creation of the base area, then work my way through various tonal values and structures until I end up with really fine detail work for individual flames and sparks. I don't just concentrate on the technical approach, but also on other aspects of drawing.
Digital Painting Tutorial - Elven Amazon - Part 6
Part 6 of the series focuses once again on the fire, specifically on the follow-up. The setup itself is already in place, now it's time to add more depth. To do this, several new layers are created with flames and rocks in the foreground, which are then overlaid with different opacity settings. The lighting of the mountains in the background also plays an important role here.
Digital Painting Tutorial - Elven Amazon - Part 7
In part 7, I will tackle the Amazon itself. First of all, the already created layers are provided with clipping masks and colored with rough color gradients. I will go into detail, especially with the skin and hair, but the other elements will also be explained.
I also go into how the lighting conditions of the background are picked up and reflected on the different parts of the figure's body.
Digital Painting Tutorial - Elven Amazon - Part 8
This time, for the first time in this series, a part of the Amazon will be completely designed: the hair. Starting with the basic color gradients that have already been created, in this video training I'm going to work out the structures and details. Not only the creation of the textures is important, but also the alignment of the hair and the lighting conditions. The first details for the eyes are also prepared.
Digital Painting Tutorial - Elven Amazon - Part 9
In part 9, we get to work on the Amazon's fur. We create the structures of the two-piece and work out the individual hairs down to the last detail. We again work with staggered cut masks and also focus on the illumination of the surfaces.
Digital Painting Tutorial - Elven Amazon - Part 10
In part 10, the white fur is first briefly and concisely described. However, this step will only be dealt with rudimentarily, as everything essential to the fur has already been covered in the previous part. Instead, this time we will concentrate on creating the leather straps on the clothing:
First, the rough outlines are refined, then the light reflections are incorporated, the structure is added and various effects are incorporated to create more depth. The metal rails are also worked out and illuminated in several steps.
Digital Painting Tutorial - Elven Amazon - Part 11
Part 11 involves several finishing touches: First the fangs, then a few details of the fur bikini. The bracelets are the centerpiece. The basic structure, color gradients and metal surface are shown in detail. At the end there are a few tricks with layer masks and modes to add a few engravings to the metal.
Digital Painting Tutorial - Elven Amazon - Part 12
And we continue with part 12: we already have the bracelets, this time the straps are added to them. To make this filigree part easier to accomplish, a slightly different working method is used than in the previous video tutorials: the outlines are copied into the picture elements!
Then we move on to the bow for the first time: Wood textures, color gradients, surfaces and engravings with layer effects. The fact that this also involves a lot of brain work is explained, as are the purely technical processes.
Digital Painting Tutorial - Elven Amazon - Part 13
In part 13, we take care of the rest of the bow. The first step is to capture and realize the bowstring, whereby the lighting design plays an important role.
The arrow is then worked out, with the aim of creating an appealing metal surface.
Digital Painting Tutorial - Elven Amazon - Part 14
Slowly but surely we are approaching the end: this time the skin is prepared in several layers. This means: refining shadows, managing color tones, optimizing lighting conditions. Among other things, various areas of the face are discussed in detail, which makes it a little easier to understand light-dark contrasts. The lips are already completely created and worked out in this part.
Digital Painting Tutorial - Elven Amazon - Part 15
Penultimate part: The skin is prepared for the final step. Shadows are optimized, light reflections are incorporated and the proportions of different parts of the body are optimally worked out. The individual tricks used for this and the effects that can be achieved are explained in detail, especially for the face.
The knowledge gained in this way is then transferred to the other parts of the body. The shadows are then optimized once again until the figure of the Amazon can be completed.
Digital Painting Tutorial - Elven Amazon - Part 16
Last part: Now that the skin is finished, the wounds and dirt are applied to separate cut masks to make the figure more coherent with the background. How this is done in detail is discussed step by step and the ideas behind it are also explained in more detail.
The final step is the finalization, which consists of a few lighting corrections and the addition of a few special effects, until we can finally say: The motif is finished!
Bonus: Photoshop filter
New functions in Photoshop CS6: Blur filter
This video training introduces the new features of the blur filters in Photoshop CS6. The main focus is on the field and iris blur as well as the tilt-shift and bokeh effect.
New functions in Photoshop CS6: Filters and actions
This video training is about the new features in Photoshop's filters - except for the blur filters. I introduce the new Adaptive Wide Angle Correction and Oilpaint filters and also show the improvements to the Liquify filter and the Lighting Effects render filter. I explain how a new preset in the Actions panel works, which makes it possible to create painterly looks, and also use an example to show how actions can now take tool movements into account with the CS6 version.
What's new in the Creative Cloud: Photoshop CC 14 (June 2013) - 06 Filters
This video training is about the new features in the filters of Photoshop CC. This includes:
- What's new with filters in Photoshop CC
- Improvements to the Liquify filter
- New sharpening filter Reduce blurring
- Improvements to the selective sharpener - reduce noise and improved sharpening algorithm
- New option for 'Enlarge bright areas' and 'Enlarge dark areas'
What's new in the Creative Cloud: Photoshop CC 2014 (June 2014) - 08 The circular blur tool
In this video tutorial, you will learn how to create radial motion effects quickly and easily with the new circular blur tool.
What's new in the Creative Cloud: Photoshop CC 2014 (June 2014) - 08 The circular blur tool
7 min Open
Photoshop filters: Coarsen and distort

Photoshop filters: Lens correction

Photoshop filters: Structuring and stylizing

Photoshop filter: Vanishing point

Photoshop filters: Render filters

Photoshop filter: Liquefy

Photoshop filters: Sharpening and blurring

Photoshop filters: Art, painting and drawing filters
Examples of use
-
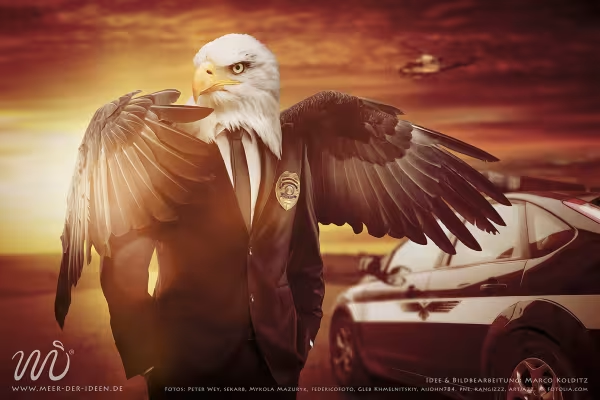 Let yourself be inspired! How to create creative artwork in Photoshop!
 -
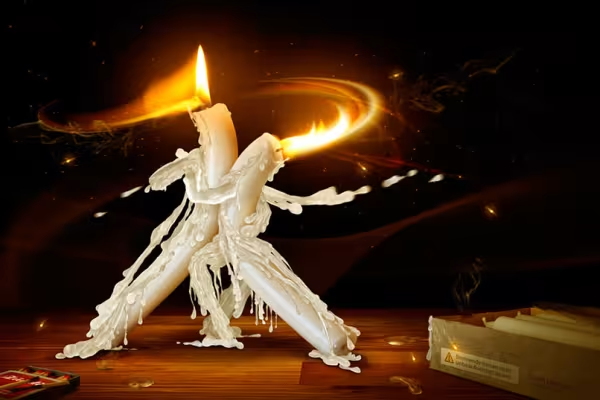 Learn Photoshop techniques to create such works of art yourself.
 -
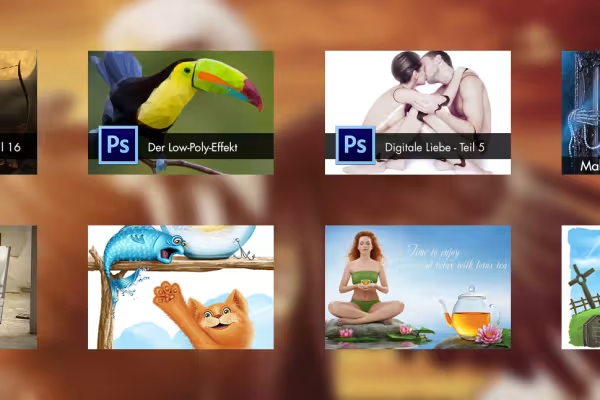 Every tutorial is a gain for your expertise in Photoshop.
You might also like

Save time with artificial intelligence
Live your layout now!

More style, more power, more templates!

Full power, more inspirations, maximum WOW effect!
Comment now „Artworks in Photoshop“