In this guide, we will show you how to enter costsin Microsoft Project. Adding costs to your project is essential for planning and monitoring the financial aspects so that you can work more efficiently. After working through this guide, you will be able to effectively assign costs to resources and activities.
Main Insights
- It is important to structure your project correctly before adding costs.
- Resources can be both people and materials associated with costs.
- The assignment of costs is done by entering specific amounts in the resource table.
- The project-wide overview allows for control over planned and actual costs.
Step-by-Step Guide
Start by creating your first project or opening an existing project where you want to enter costs. Make sure that resources such as people and materials are already assigned.
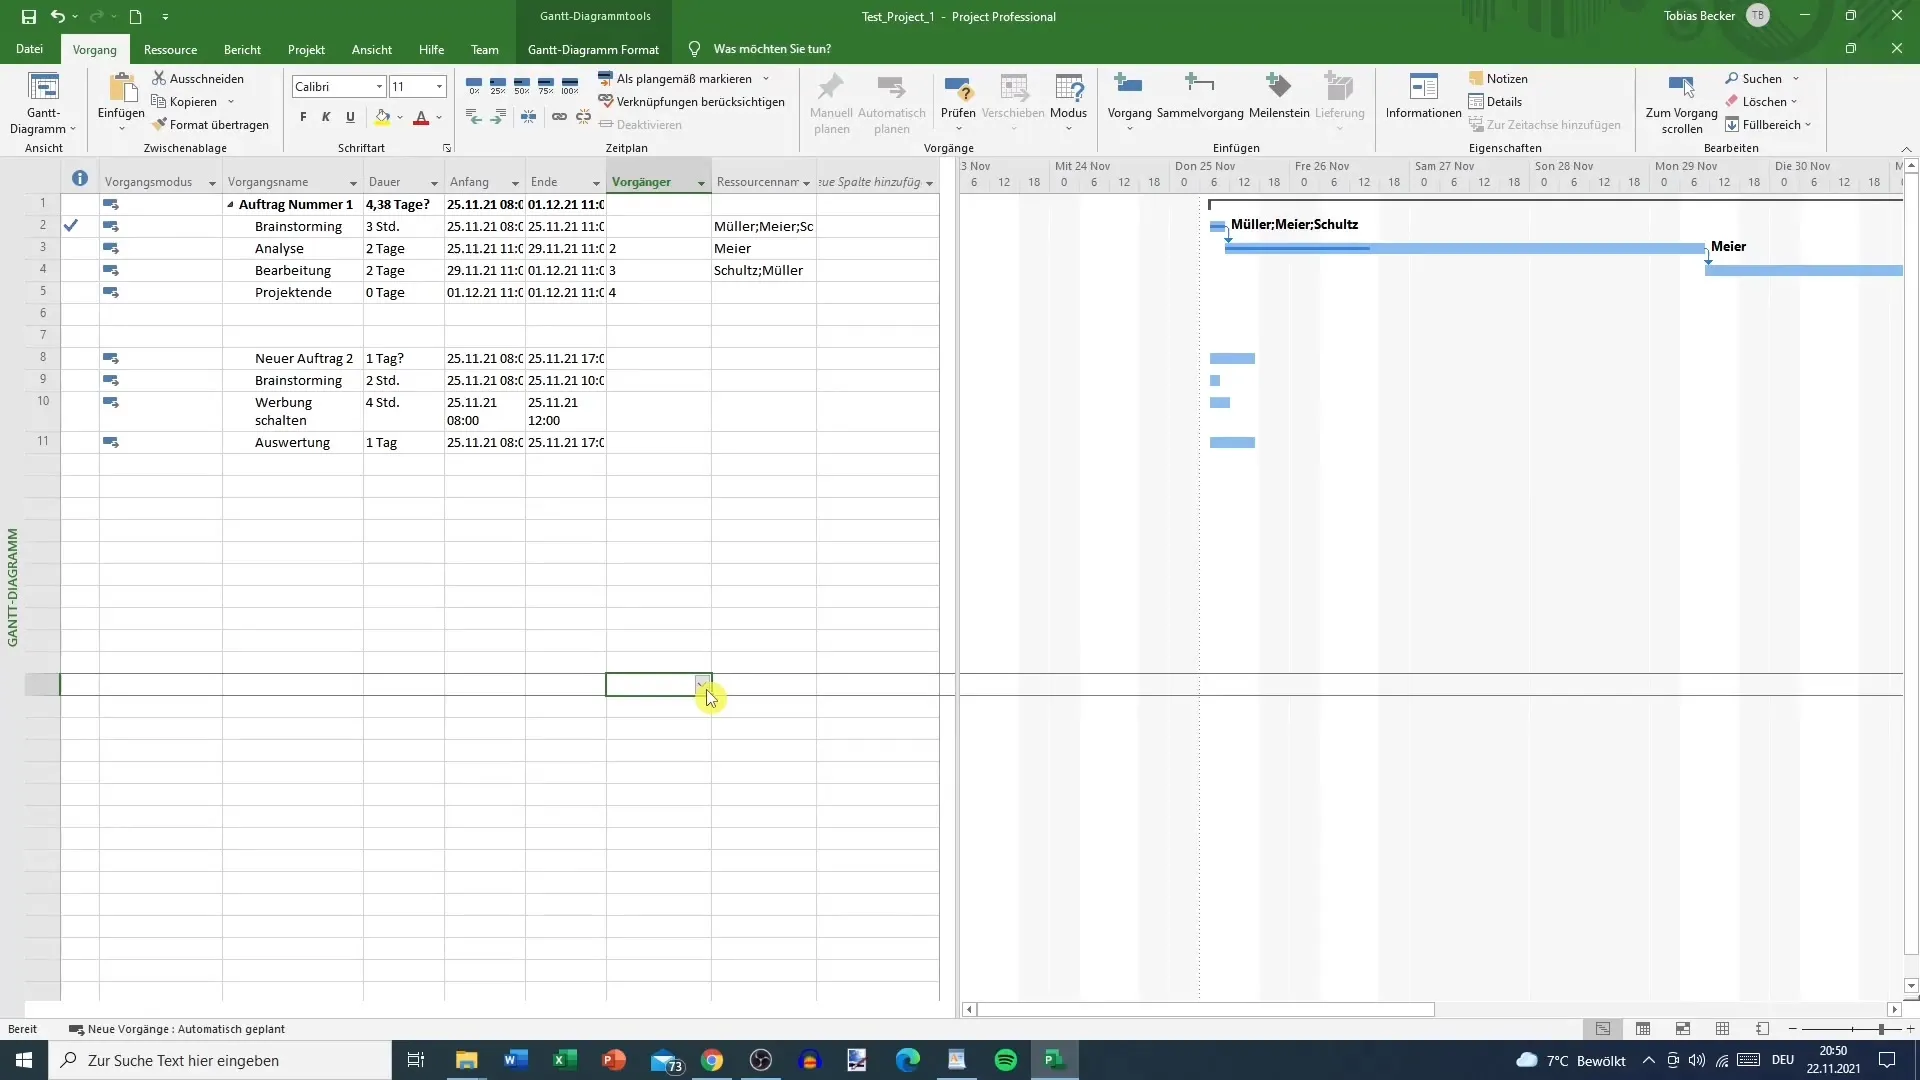
Now create a new project. In this example, we name the project "New Order 2". You plan to advertise for the project and conduct an evaluation. Add a milestone for the project that represents the completion of the advertisement. Make sure to enter the milestone at "0" for accurate representation.
You may want to group multiple activities together. Highlight all relevant points, then use the "Group" function. This simplifies the project overview and ensures that everything is summarized in a common task.
Once the project is structured and the activities are grouped into a common task, you can start calculating costs. To see the total costs, go to the "Project" menu and select "Project Information" as well as "Statistics". Here you can check the already entered and planned costs.
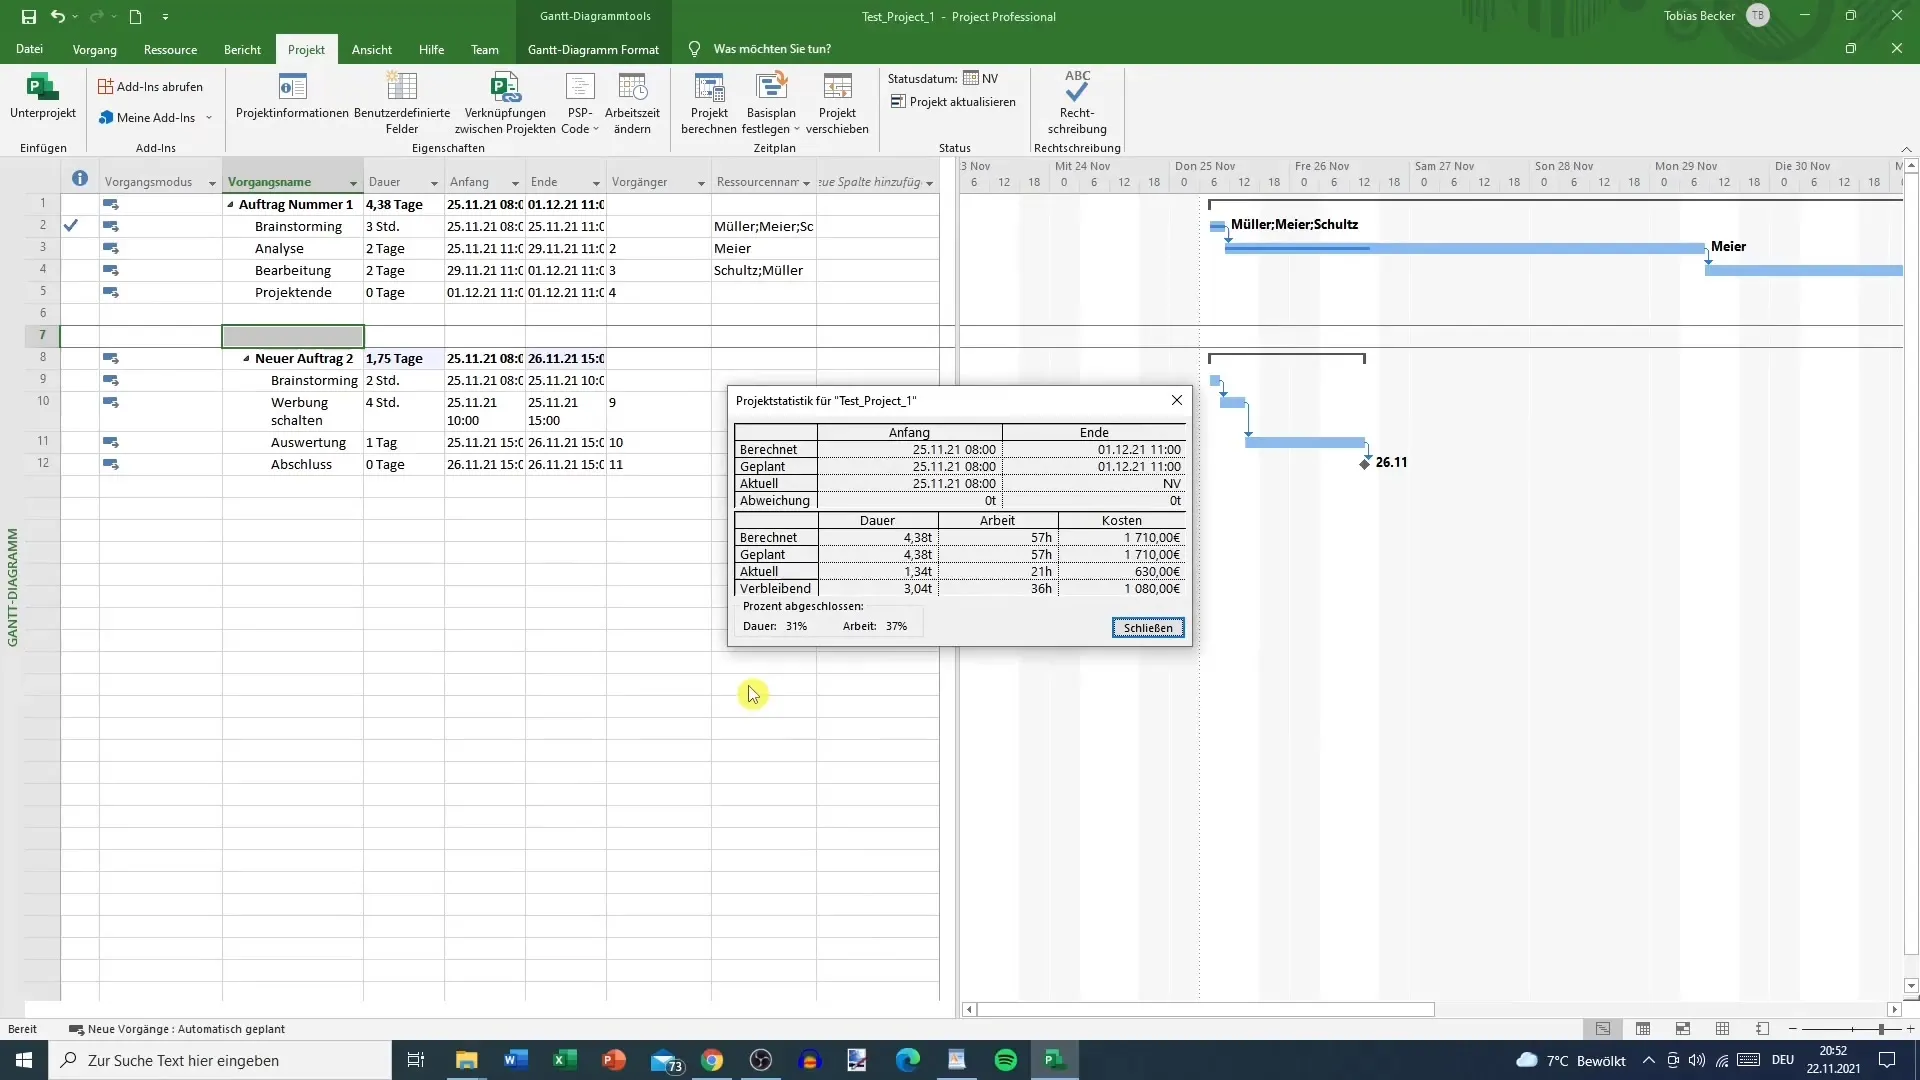
Display the total costs of your project. Note that currently the costs of both projects are displayed in one overview. It is advisable to use separate project sheets for different orders to maintain clarity.
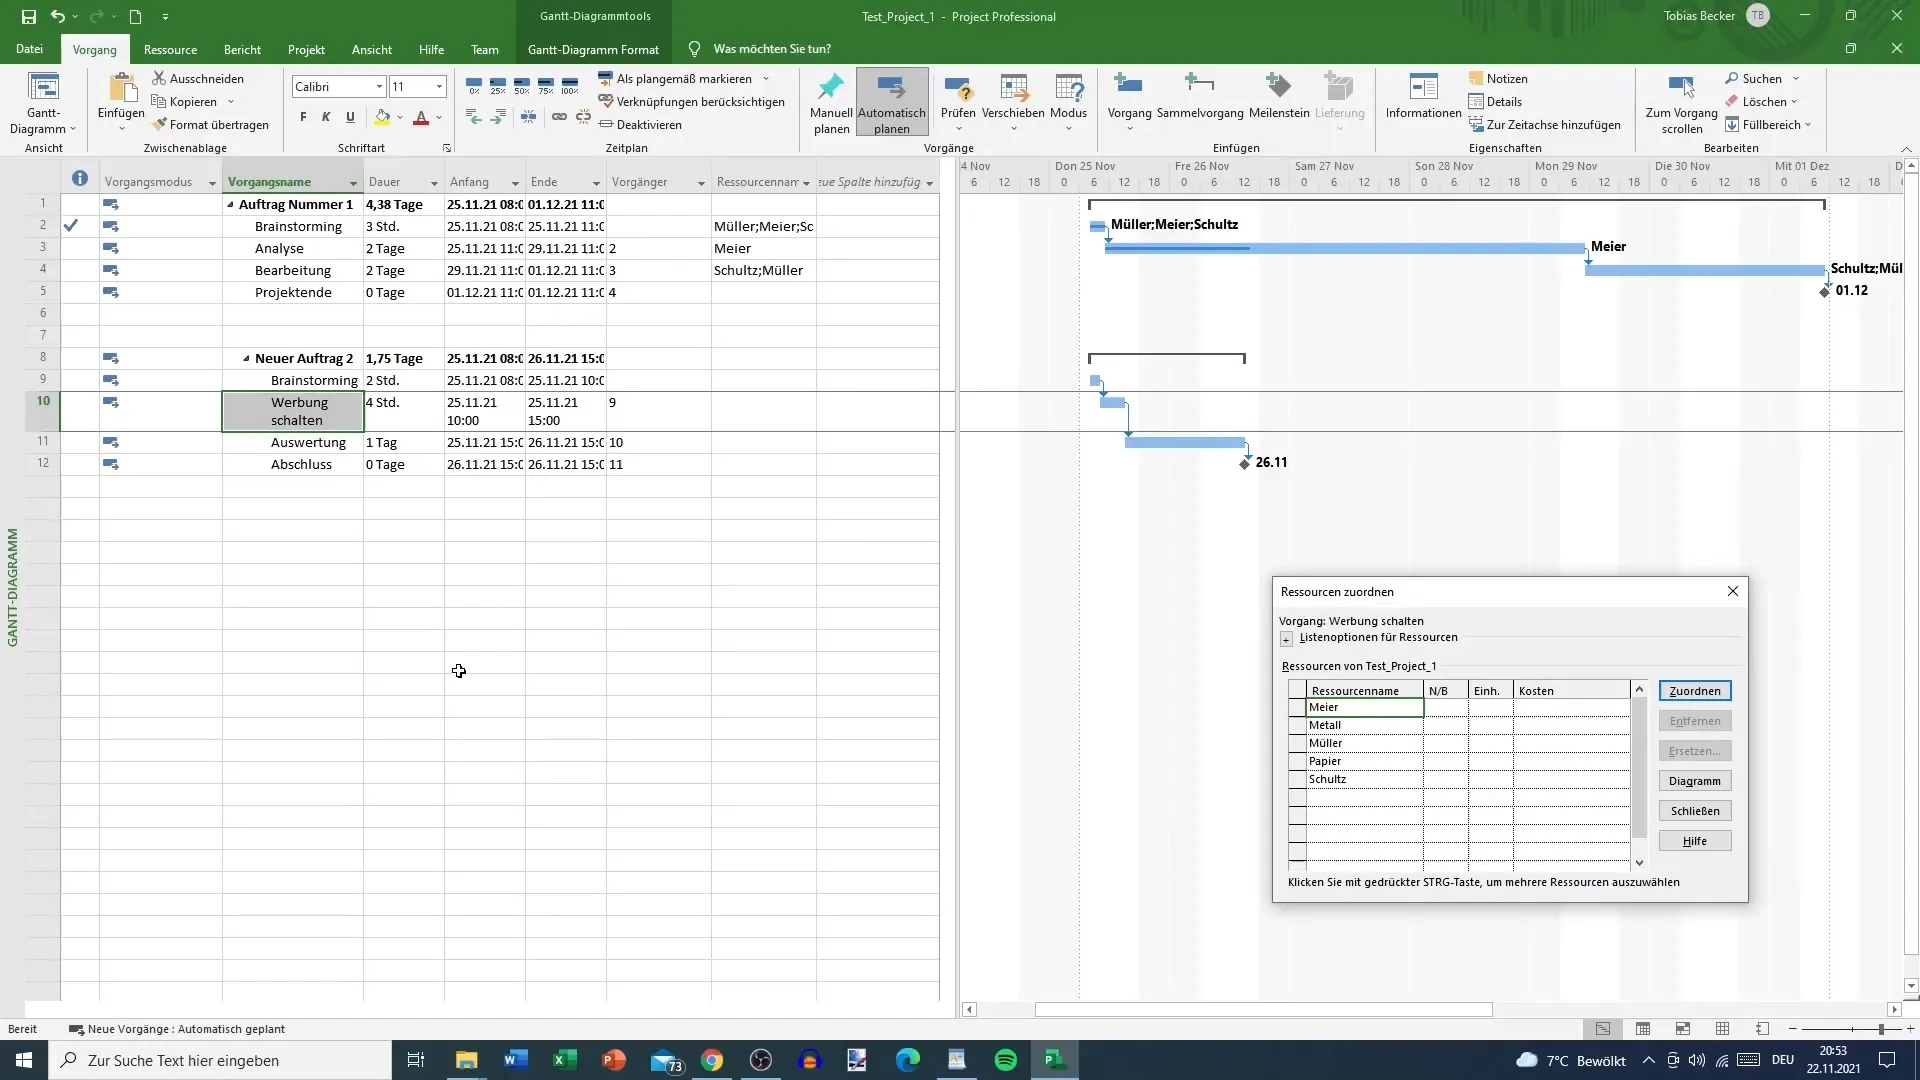
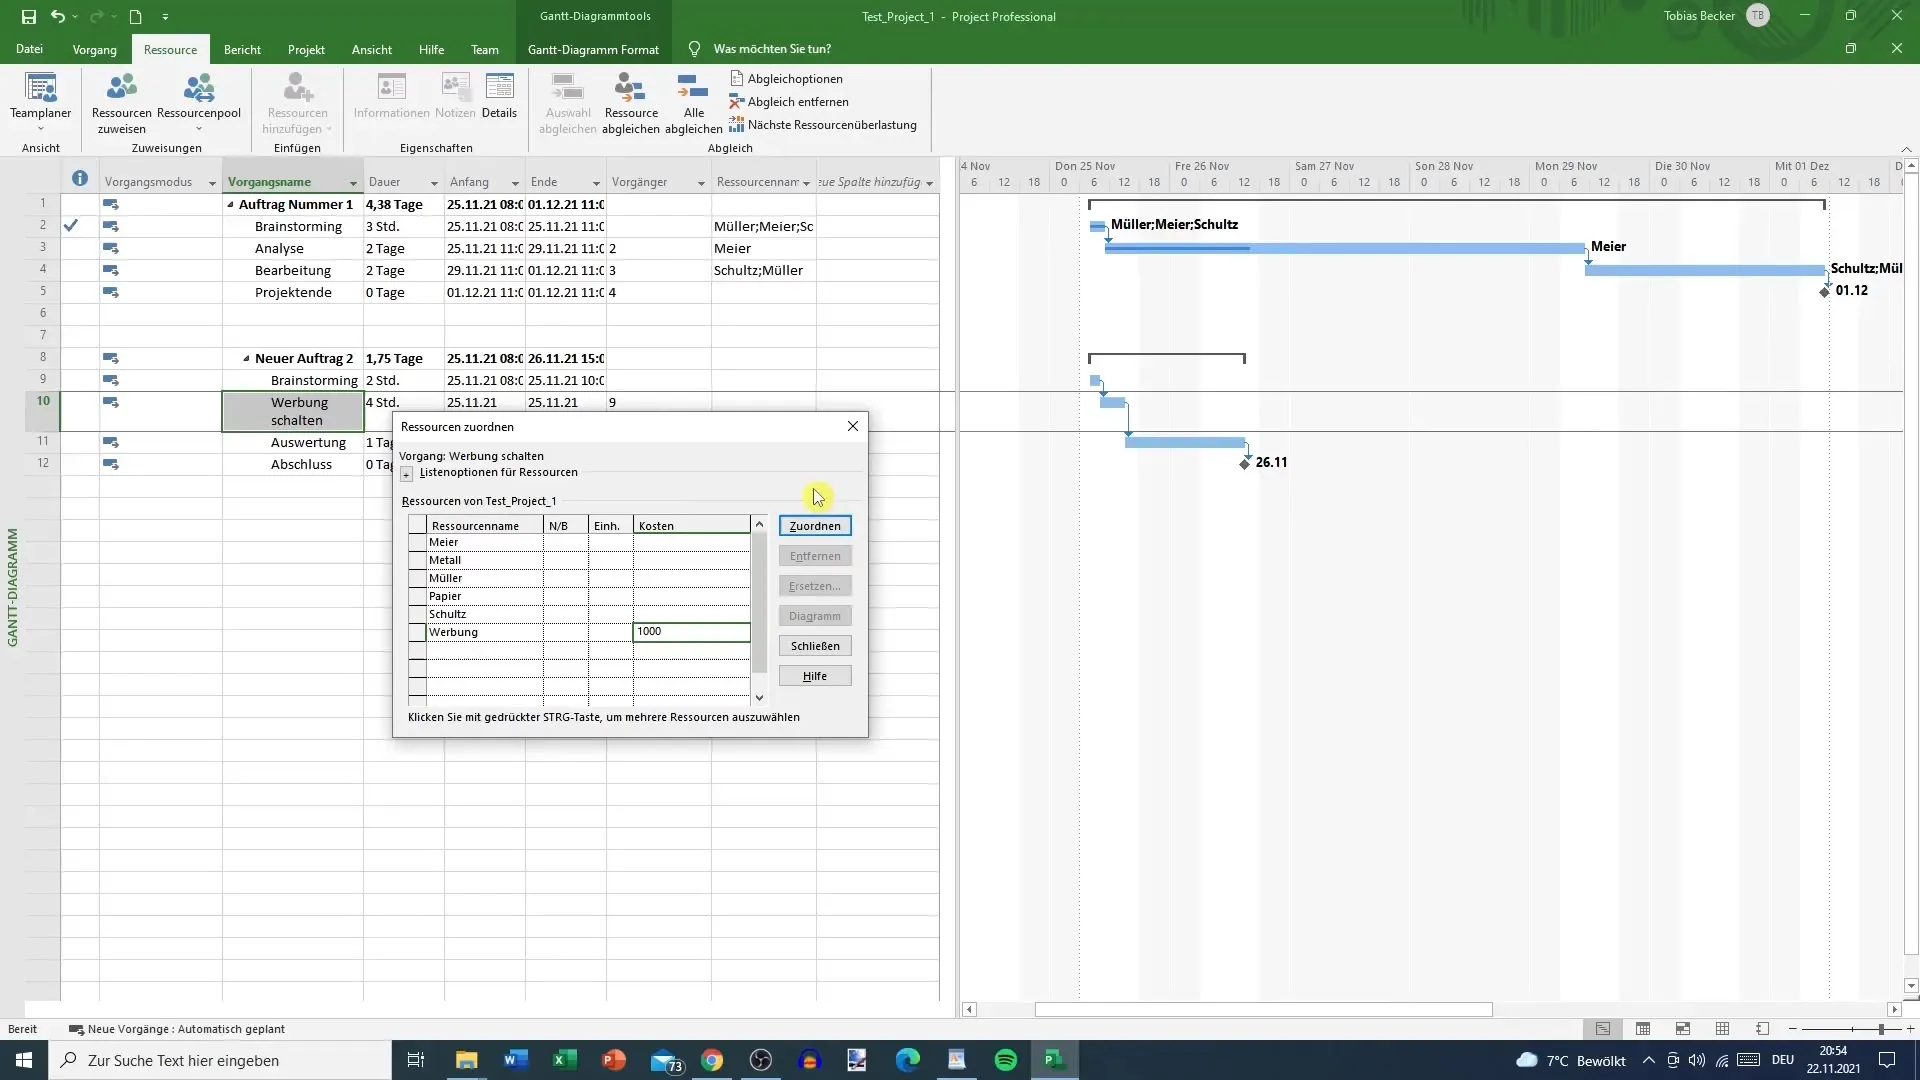
To assign specific costs now, click on the task "Advertising", then right-click and select "Assign Resources". You will notice that currently only people and materials are available. To add advertising as a resource, switch to the resource table.
In the resource table, add "Advertising" under "Resource Names". Depending on the type of advertising, such as Facebook Ads, you may add additional details. Under "Type", select "Cost". Note that you cannot enter further information such as cost per use or minimum amounts here. Only fill out the required field for a total amount.
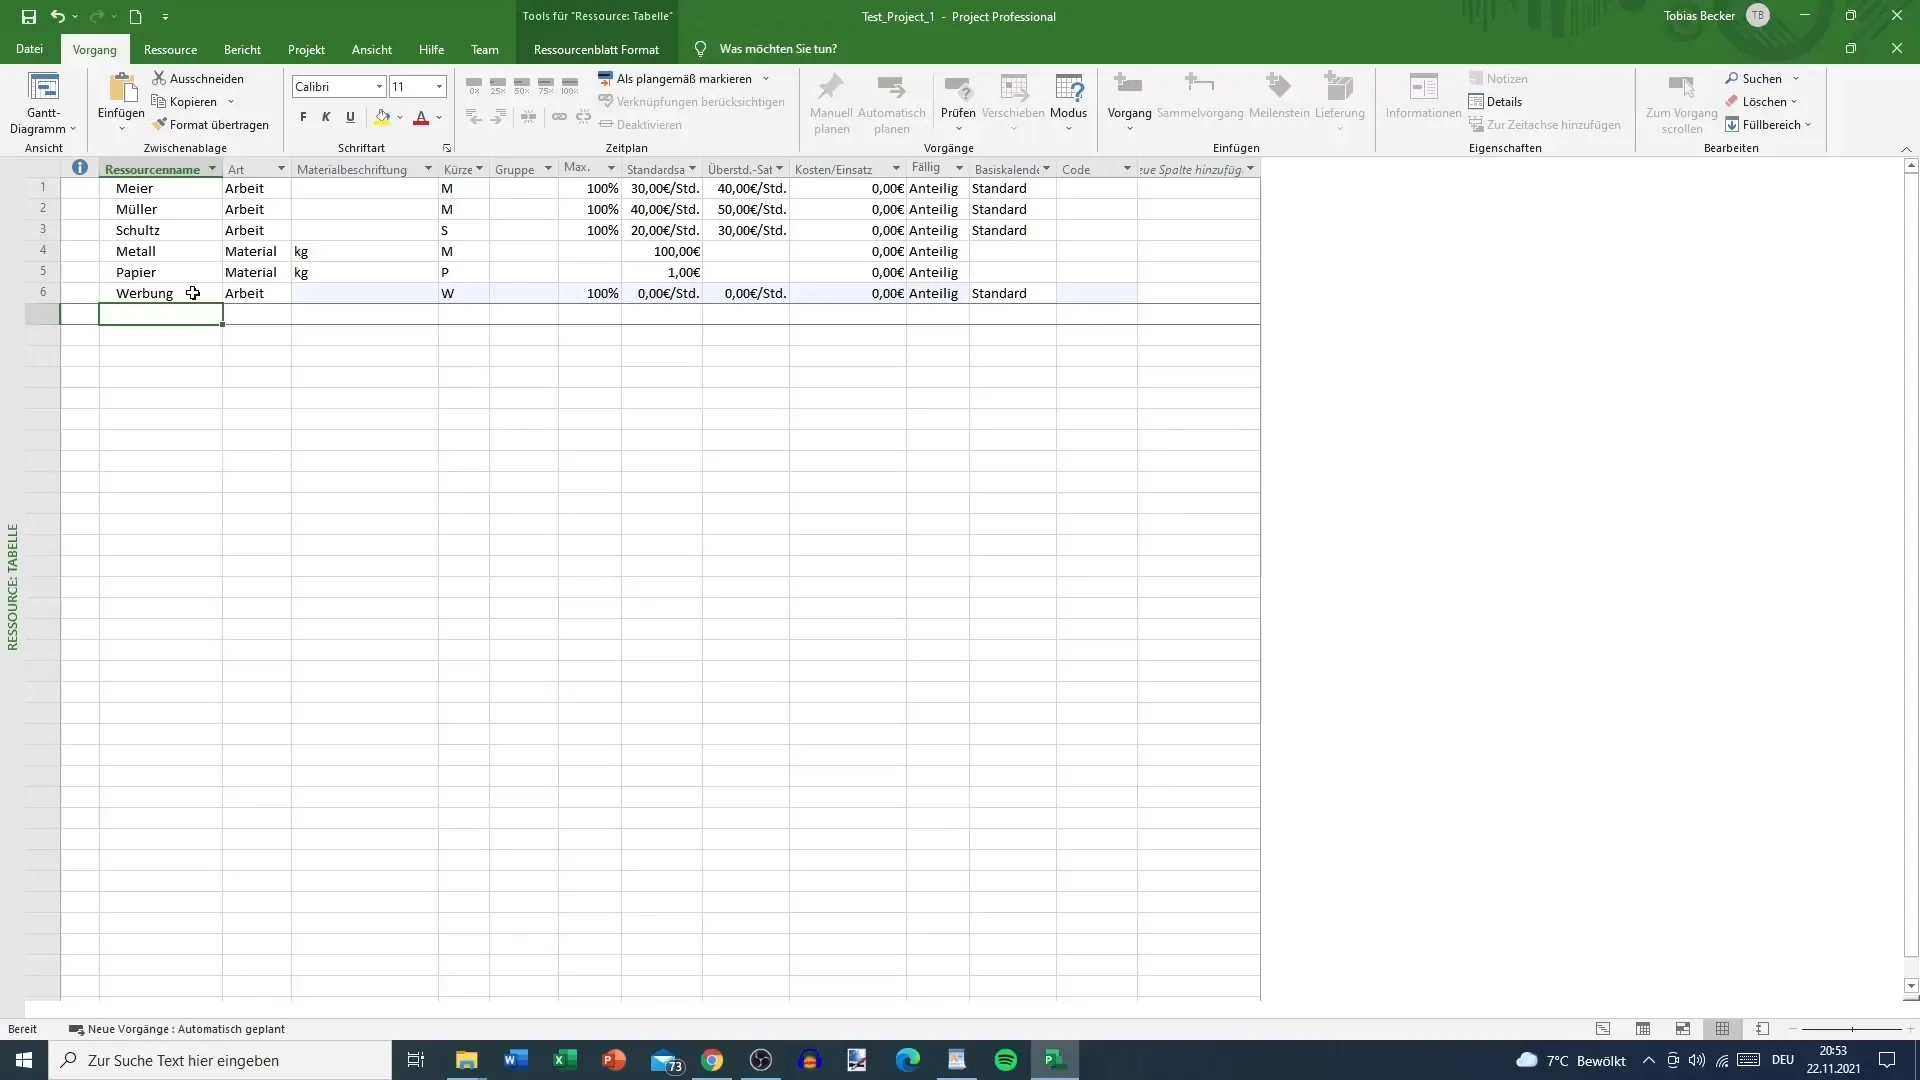
After you have entered the advertising resource, go back to the assignment. Select the resource "Advertising" and click on "Assign". At this step, you also add the costs for advertising, for example, an amount of 1000 euros.
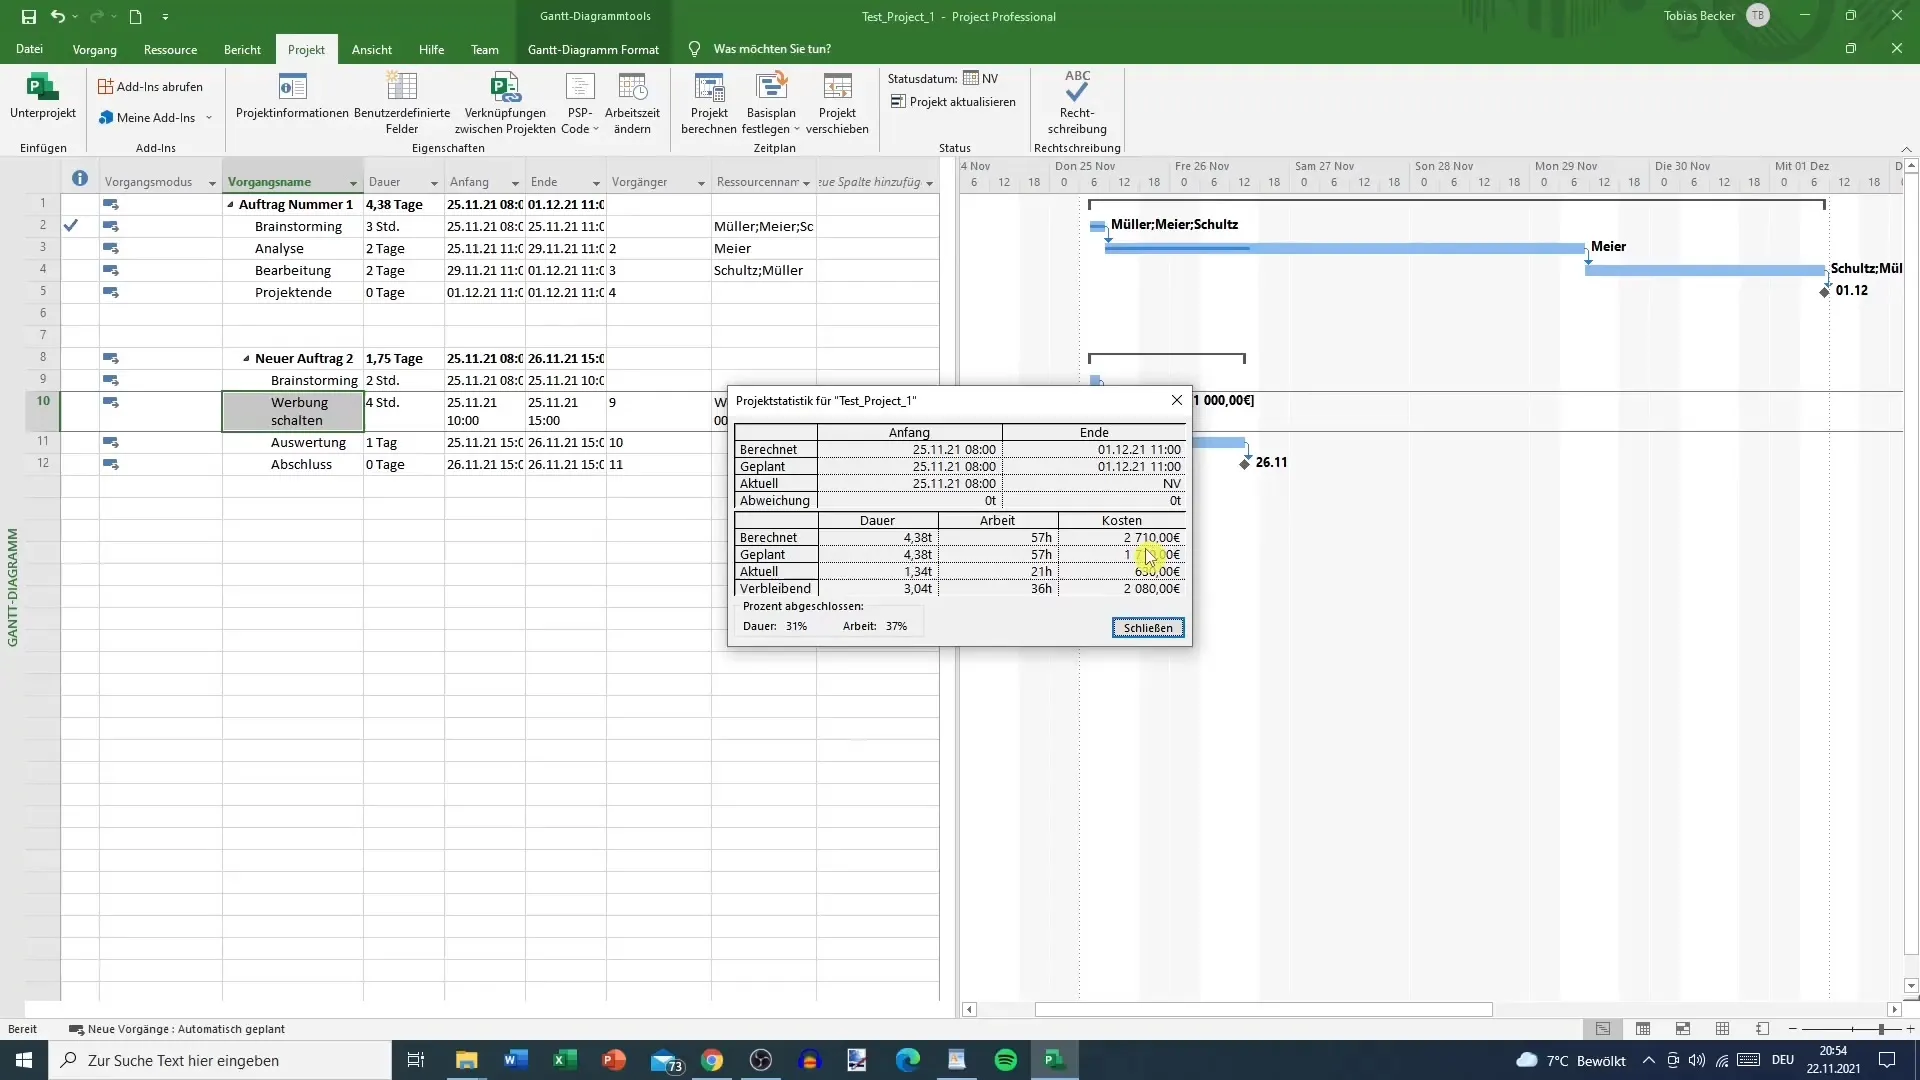
After the assignment, you can check whether the amount was correctly entered in the project. To do this, go again to the "Project" menu and select "Project Information" and then "Statistics". You should now see that the amount of 1000 euros is listed in the calculated costs.
After following all the steps, you have successfully entered costs in Microsoft Project. This is an important step for effective financial planning of your project.
Summary – Entering Costs in MS Project
In this guide, you have learned how to successfully enter costs in Microsoft Project to maintain a financial overview of your project.
FAQ
How do I add resources in MS Project?You can add resources in the resource table by entering a new resource name.
Can I manage multiple projects in one document?Yes, you can view multiple projects in one document, but it is advisable to use separate project sheets.
How do I check the total costs in my project?Go to the "Project" menu, select "Project Information" and then "Statistics" to see the total costs.
Do I have to provide cost per use information?No, when entering costs for specific resources in MS Project, this is not required.
