Before you design the first layout, the document itself determines whether your brochure will print cleanly later on. It is best to set the color mode, format, bleed, and page margins right when you create it. If you only change these values afterward, you may have to move elements or redo backgrounds.
The video is only loaded from YouTube when you play it – data (including your IP address) is then transmitted to YouTube/Google. More in the privacy policy
In this tutorial, you set up an A5 document for an eight-page brochure in Affinity Layout. You set the correct color mode, activate facing pages, define the bleed, and set up page margins as guides. You will see why these settings are so important for the print shop and where the boundaries lie between your guides and the print specifications.
Key Takeaways
For printed projects, you always work in CMYK color mode, because RGB colors often cannot be reproduced faithfully in print. The 3 mm bleed is intended for every graphic or image that extends to the edge of the page, and it is a requirement of the print shop. Page margins of about 12 to 15 mm, on the other hand, are only guides for you, so that important content does not sit too close to the trim edge. If you activate facing pages, you immediately see while designing how the spreads will work together later.
Open a New Document
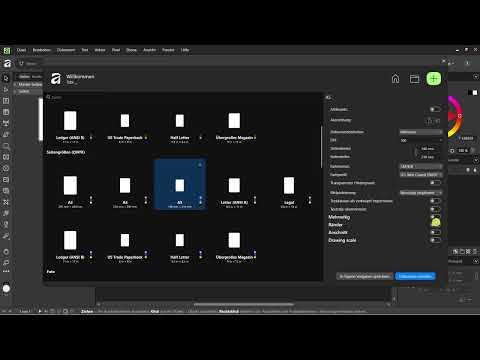
Open Affinity Layout and choose the New entry in the File menu. If you are on the start screen, you can reach the same view via the plus icon at the top right. Both paths lead to the document settings, where you can define everything yourself or select an existing template.

A note in advance: Templates are handy, but always check their settings before you start working. Many templates are intended for screen use and not for print.
Set the Color Mode to CMYK
Affinity distinguishes between RGB and CMYK. RGB is intended for everything that is not printed, such as social media graphics, websites, or purely on-screen PDFs. Everything that ends up on paper belongs in CMYK mode.
The reason lies in color representation. RGB can display colors that CMYK cannot reach. A bright yellow from your logo looks brilliant on the monitor, but in print it may look darker or lighter and lose its radiance. So if you are planning a brochure, switch the color mode in the document settings to CMYK/8. Make sure RGB is not selected there, even if the rest of the settings seem relatively unimportant.

Set the Format and Resolution
For the brochure, you choose the A5 format, which is well suited to handy booklets. Then you switch the orientation to portrait. The resolution setting is 300 DPI. You need this value for clean print quality, and it will play a role again later during export.

You can usually leave the remaining fields unchanged for this project. What matters are the format, the orientation, the 300 DPI, and the CMYK mode.
Set Up Facing Pages and Page Count
So that your brochure works like a real booklet, you activate the option for multi-page documents. In older versions it is called double pages; today it often goes by the name Multi-page. Also activate the Facing Pages option. The checkmark is usually already set automatically, but check it anyway.
You arrange the pages horizontally and start with a right-hand page, because that is also how an opened booklet behaves. You enter the page count directly as eight pages. This way, you don't have to add pages later, which usually makes the work less clear.
A small detail also belongs here: you leave the option for the master page, that is, a default page that serves as a template for all pages, deactivated for now. You don't need it for this basic layout, and you can add it at any time later.
Set the Bleed to 3 mm
The bleed is the most important point for the print shop. It specifies how far backgrounds, color areas, or images must extend beyond the later final format edge. This is not an option you can design freely, but a technical requirement that always applies as soon as someone prints the brochure.
Set the bleed to 3 mm. The reason is simple: when the paper is trimmed, minimal deviations occur. Without bleed, white slivers could appear at the edge, meaning light streaks, when a colored background doesn't extend exactly to the edge. The bleed therefore acts as a safety zone that disappears after trimming.
Define page margins as guides
Page margins are something different from the bleed, and you shouldn't confuse these two terms. Margins are intended exclusively for you as the designer. They show you how far you should keep text and important elements from the edge of the paper so that they aren't cut off during trimming and the page looks calm.
For brochures, sensible values are usually between 12 and 15 mm. You can simply set the value to 15 mm. At the top and bottom, you can leave a bit more space, because headers or page numbers are often placed there. These margins are not hard limits, but guides that give you orientation while designing. The print shop doesn't care about them.
Create the document and check the view
When all settings are correct, click Create Document at the bottom right. The document opens with eight pages, and in the page overview on the left side you can see that the numbering begins on a right-hand page.
On the workspace you now see two boundaries. The line at a distance of 15 mm shows your page margin. The outer boundary at a distance of 3 mm marks the bleed. As a rule of thumb: everything that extends into the bleed should reach exactly to the outer line, and everything important stays within the inner margins.

Navigate pages and test the basic layout
Finally, a quick test is worthwhile. In the page overview, select different pages and switch back and forth between the spreads. This way you see how the pages work together before you place the actual content. Feel free to practice this a few times, because later you will edit the brochure page by page.

With that, the basic framework of your brochure is done. In the next step, you can turn to the master pages, meaning the recurring elements such as headers or page numbers.
Summary – Setting up a brochure correctly in Affinity Layout
A cleanly set up document saves you a lot of trouble later when printing. You set the CMYK mode so that the colors are correct in print, choose the A5 format in portrait orientation at 300 DPI, and activate facing pages for eight pages. The 3 mm bleed ensures that backgrounds extend to the edge without leaving white slivers. The 15 mm page margins serve as guides for you and keep your text calmly within the page. With this basic framework, you can reliably begin with the actual design.
FAQ
Do I always have to set up the brochure in CMYK mode?Yes, as soon as the document is to be printed. RGB is suitable for screen media, but colors often can't be reproduced in print the way you see them on the monitor.
Is the bleed the same as the page margin?No. The bleed is a technical requirement for the print shop and lies outside the later format. The page margin is a guide for you, so that important content doesn't sit too close to the edge.
Why should the resolution be set to 300 DPI?300 DPI is the standard for sharp printing. With this value you ensure that images and graphics look clear and detailed on paper.
Can I still change the number of pages later?Yes, you can add or remove pages at any time. However, it is more practical to define the expected number of pages right away so that the layout stays clear from the start.
Do I need a master page for the basic layout?Not necessarily for getting started. However, master pages are helpful if elements such as headers or page numbers are to be repeated on multiple pages.


