Imagine you open a new project and expect an empty canvas on which you can place things freely. In Affinity's Layout Studio, it works differently. Here you don't think in terms of a single surface, but in terms of pages. This very difference determines how you build multi-page documents such as brochures, magazines, flyers, or books.
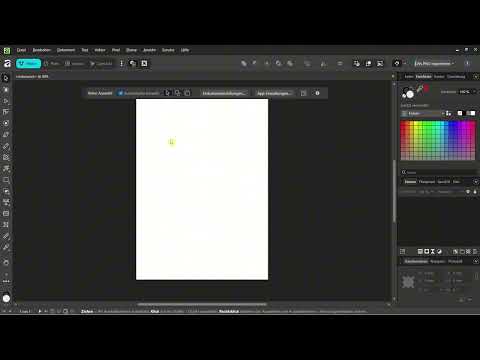
The video is only loaded from YouTube when you play it – data (including your IP address) is then transmitted to YouTube/Google. More in the privacy policy
This tutorial guides you through the Layout Studio interface. You will learn how to switch between the studios, why the toolbar in the Layout Studio is structured differently, and how to create a new document with bleed, page margins, and a double-page spread. The content comes from the first part of the video course, in which a complete brochure for a fictional Urban Coffee Festival is created together.
Key Takeaways
- The studios in Affinity are no longer separate programs, but can be switched via tabs at the top of the interface.
- In the Layout Studio, you work with pages instead of a single canvas. This is the central difference from the Vector and Pixel Studios.
- The tools remain fundamentally the same, but in the Layout Studio, text frames, image frames, and tables take center stage instead of pure pixel tools.
- The context toolbar changes depending on the selected object and shows you only the relevant options each time.
- In the Layout Studio, you still have access to vector and pixel tools.
Step 1: Switching Between the Studios
Before you start with the layout, you should know where you are in Affinity. At the top of the interface, you will find the studio tabs. So you no longer have to jump back and forth between different apps, but simply switch with a click within the same program. This saves time and ensures that you can access the same documents at any time.

Step 2: The Four Tabs at a Glance
In the past, the studios were actually standalone apps. Today, four tabs are available to you at the top. This also includes Canva's AI model, which you can use with a Canva Premium version. Once you get used to the structure, you quickly recognize which studio you are currently working in, and can switch if necessary without interrupting your workflow.
Step 3: The Difference Between the Vector and Layout Studios
In the Vector Studio, you see a canvas on which you draw and design. The tools are on the left. The Pixel Studio works the same way. One canvas, the tools on the left, that is the familiar basic principle. In the Layout Studio, exactly this element is missing. Here there is no single canvas on which everything comes together. You should keep this deviation in mind, because it changes the entire way of working.

Step 4: Working with Pages Instead of a Single Surface
If you have already worked with InDesign, you will find your way around quickly, because there too the page is at the center. In the Layout Studio, too, almost everything revolves around pages. Your document consists of individual pages that you add, arrange, and design. The tools remain the same. The key is that you regard the pages as the most important structural element. The Pages panel is therefore the heart of the studio, because from there you manage the structure of your entire document.
Step 5: The Tools in the Layout Studio
The toolbar on the left side is therefore retained. In the Layout Studio, however, you will not find classic pixel tools, but tools for text frames, image frames, and tables. At the top in the menu, you will also find the Insert area, through which you add these elements. A text frame is not freely written text, but a container into which you can let content flow. You will need exactly this logic later when you design a brochure with multiple columns and images.
Step 6: Using the Context Toolbar
At the top you see the context toolbar. It is not a fixed menu bar, but changes its content depending on which tool or object is active. When you edit text, options such as font and font size appear. If you select a shape instead, these settings disappear, and only a few suitable options remain. So always pay attention to what you have currently selected, because the context toolbar shows you exactly the commands that are relevant now.

Step 7: Access to Vector and Pixel Tools
An important point concerns the flexibility of the Layout Studio. Even though you mainly work with frames and pages in the Layout Studio, you have access to all vector and pixel tools at any time. So you can fall back on the same canvas, switch to the pixel layer, and edit images or individual elements directly there. With Adobe products, this switch is more laborious because they are separate applications. In Affinity, everything stays within one app, and that is precisely where the strength of the current program lies.
Step 8: Create a New Document with Bleed, Margins, and Facing Pages
Now you create your first document. In doing so, you set three options: the bleed, the margins, and the facing pages. The bleed, also called trim allowance, is an area outside the actual format that is cut off during printing. It ensures that backgrounds and images extend all the way to the edge without white strips appearing. The margins define the area in which you place content. You enable facing pages so that you can plan layouts across the spine fold, as is common with brochures and books.
Summary – Understanding Affinity Layout: Interface and Pages Panel at a Glance
You now have a clear overview of the Layout Studio. You know that in Affinity you switch between the Studios via tabs, and you know the key difference: in the Layout Studio you work with pages, not with a single artboard. The toolbar offers text frames, picture frames, and tables, while the context toolbar adapts depending on your selection. In addition, you can access vector and pixel tools at any time. With a document that contains bleed, margins, and facing pages, you have created the foundation for your first brochure.
FAQ
Do I need to know InDesign to work in the Affinity Layout Studio?No, no prior knowledge is needed. However, if you have already worked with InDesign, you will find your way around more quickly, because it also works with pages.
How does the Layout Studio differ from Vector and Pixel?In the Vector and Pixel Studios, there is a single artboard with tools on the left. In the Layout Studio, you instead work with multiple pages, and the tools are geared toward text frames, picture frames, and tables.
Can I also edit pixel images in the Layout Studio?Yes. In the Layout Studio, you still have access to all vector and pixel tools and can switch to the pixel layer to edit images directly.
Why does the context toolbar keep changing?The context toolbar only shows the options that match the currently selected tool or object. With text, you see font options; with a shape, different settings.
What does bleed mean?The bleed is an area beyond the final format that is cut off during printing. It prevents white edges on elements that are meant to extend all the way to the edge.


