Anyone who types page numbers in by hand notices, at the latest after the first inserted sheet, that all the numbers are no longer correct. This is exactly what Affinity Layout offers an elegant solution for: a page number field that is placed on the master page and then keeps count on its own. Whether you add, remove, or move pages, the numbering adjusts automatically.
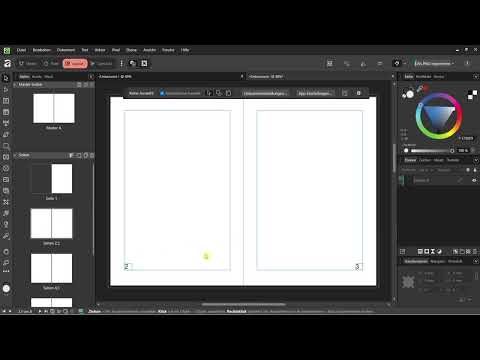
The video is only loaded from YouTube when you play it – data (including your IP address) is then transmitted to YouTube/Google. More in the privacy policy
In this tutorial, I will show you step by step how to create the field on the master page, style it, and apply it to all pages. You will also learn how to deliberately leave individual pages without a page number or set a custom number.
Key Takeaways
- Page numbers belong on the master page, because there they appear on every page and are managed centrally.
- The page number field is inserted via "Insert Text" and "Fields", not typed as normal text.
- Leave enough space in the text frame for two-digit numbers so that the number does not stick out of the frame.
- You change styling such as font, size, and color once in the master, and it applies to all pages.
- You can exclude individual pages from the master page or give them their own page number.
Step-by-Step Guide
Step 1: Switch to the Master Page
Before you insert the field, you need to make sure you are on the right level. Page numbers should appear on every page, which is why they belong on the master page. Open the master by double-clicking the master page in the pages area. Only when the master is active are you working there and not on an individual page.

Step 2: Create and Position a Text Frame
Choose the Frame Text Tool and drag a frame on the master page at the spot where the page number should later appear. You can also use a frame or a shape as a background, which looks clearer while you work. Then drag the corners to the desired size. Make sure to click the frame with the Move Tool so that it is active before you continue. The cursor must be inside the frame, otherwise the field ends up in the wrong place.

Step 3: Insert the Page Number Field
Now comes the actual trick. You don't type the page number yourself, but insert it as a field. To do this, go to "Insert Text" in the top menu bar, choose "Fields" and then "Page Number". The number initially doesn't appear as a number, but as a small hash symbol. This symbol is the placeholder that Affinity later replaces with the respective page number. The symbol also shows you how large the page number actually appears in the frame.

Step 4: Make Room for Two-Digit Numbers
As soon as your documents get longer, you will reach page 10, and then two digits will be in the frame. Therefore, leave enough space to the left and right so that the number does not extend beyond the frame. If you choose a large font, move the frame or enlarge it accordingly. This step seems inconspicuous, but it prevents unsightly line breaks later on.
Step 5: Check the Result on a Page
To see whether everything works, switch to a normal page by double-clicking it, for example page 3. The digit 3 should appear there automatically. This is exactly how you can tell that Affinity calculates the number on its own and you don't have to adjust anything by hand.

Step 6: Apply the Master Page to All Pages
So that the field appears on all pages, you apply the master page to the desired pages. To do this, select the pages, for example 2 to 8, and apply the master to this range. You will often notice that the page number is well placed on right-hand pages, but on left-hand pages it sits at the wrong edge. Then you switch back to the master page and simply move the field to the left with the Move Tool. If you change the position in the master, all pages adopt it automatically. In the end, page 2 and page 3 show the numbers just as you imagined.

Step 7: Make Design Changes in the Master
The biggest advantage of this method becomes apparent when you want to adjust the layout later. If you want to make the page number larger, choose a different font, or change the color, you don't have to do it on every single page, even if your document consists of hundreds of pages. You edit the field once on the master page, and the change applies everywhere. That's why it's worth working consistently with master pages from the start, because they are the key to everything that should look the same across multiple pages.

Step 8: Create a Page Without a Page Number
Sometimes a page should not carry a number, such as the title page or a page with a full-bleed image. To do this, you simply remove the master page on that page. After that, no page number appears on that page anymore, while all other pages remain unchanged. The master page remains in place in this case; you only change the assignment of the page in question.

Step 9: Set a Custom Page Number for a Single Page
If you need a different number on a particular page, you can also insert the field directly on that page. To do so, copy the frame with the page number from the master onto the page and insert the field there again via "Insert Text," "Fields," and "Page Number." This works independently of the master. Nevertheless, it makes sense to control as much as possible via the master, because this way you keep an overview and changes remain centralized.

Summary – Automatically Generating Page Numbers in Affinity Layout
With a page number field on the master page, you save yourself all the manual work. You create the text frame once, insert the field via "Insert Text," make sure there is enough space, and apply the master to the desired pages. You adjust design and position in the master, and individual exceptions can be handled specifically by removing the master page or by using a separate field. Anyone who internalizes this logic stays relaxed with long documents and avoids errors in the numbering.
FAQ
Do I really have to insert the page number as a field instead of just typing it?Yes, only a field counts automatically and adjusts when you add or remove pages.
Why should the page number be on the master page and not on each page individually?On the master page you design the field once, and the change applies to all pages on which the master is applied.
What do I do if the page number sticks out of the frame with two-digit numbers?Enlarge the text frame or move it so that there is enough space for two digits.
How do I remove the page number on a specific page?Remove the master page on that page, then the number will be omitted there while all other pages continue to display it.
Can I set a custom page number on a single page?Yes, you insert the page number field directly on that page via "Insert Text" and "Fields," independently of the master.


