

A good layout stands or falls with its images. If you place them correctly, every page immediately looks more high-quality. In Affinity Publisher there are several ways to do this, and each has its strengths. Here you will learn the most important ones: from classic placing to picture frames to bleed, resolution, and black-and-white conversion. In the end, you will be able to use images so that they fit cleanly into your document and can be adjusted easily later.
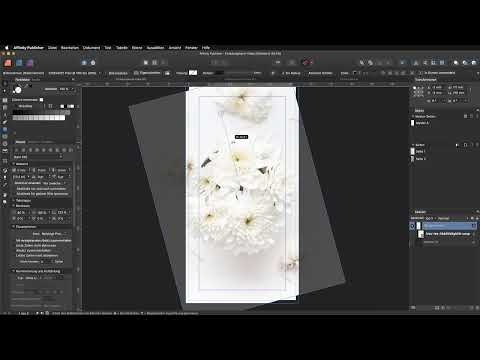
The video is only loaded from YouTube when you play it – data (including your IP address) is then transmitted to YouTube/Google. More in the privacy policy
Key Takeaways
- Images should extend all the way to the bleed so that no white slivers appear when cutting.
- A picture frame with an inserted image is more flexible than a directly placed image because you can edit the frame and the image content separately.
- With the shortcut Command+Shift+P (Windows: Ctrl+Shift+P) you can place not only JPEGs but also Affinity files, PDFs, and Word documents.
- By holding down the Alt key, you temporarily turn off snapping, which makes fine movement easier.
- You should check the resolution in ppi after every scaling. For print, the target is around 300 ppi.
- With the view mode "Clip to Canvas" you hide the pasteboard, which makes working on large documents clearer.
Step-by-Step Guide
Step 1: Getting to know the "Place Image" tool
You will find the simplest tool in the toolbar on the left side. When you click it, a dialog window opens in which you select one or more JPEG files and confirm with "Open". There are not many settings there, and that is exactly why you can hardly go wrong. The disadvantage is that the image ends up directly in the document as a fixed unit and it is difficult to readjust later.

Step 2: Extending images to the bleed
Before you place images, you should understand the bleed. This is usually 3 mm at the edge of your document that is trimmed off later when cutting. This gives the print shop a tolerance so that no white edges appear if the cut shifts slightly. Elements that sit at the edge should therefore always run to the bleed boundary or beyond. So make sure that your image completely covers the bleed.
Step 3: Dragging out an image directly and recognizing its limits
If you drag out an image directly in the document with the cursor, the proportions are preserved. So you cannot distort it freely, which is good in this case. It becomes problematic when you want to adjust the image section or the position within the frame. The placed image is namely "purebred"; there is no separate frame with which you could transform it. Disproportionate stretching is possible, but rarely leads to a usable result. That is why the next step is worthwhile.

Step 4: First drag out the picture frame, then insert the image
The reverse and much more flexible way is via a picture frame. You select the frame tool in the toolbar, drag it out from top left to bottom right, and then place the image. In the Layers panel you can then see that two elements are linked with each other: the frame and the image within it. You can show and hide the connection via the checkbox in order to check it specifically. The frame acts like a keyhole through which you look at the larger image.
Step 5: Placing files via the shortcut
The fastest way is via the "Place File" dialog, which you open with Command+Shift+P (Windows: Ctrl+Shift+P). Here you can embed not only JPEGs but also Affinity files, PDFs, and Word documents such as DOCX or RTF. PDFs remain editable, which is very helpful in practice. If you select several files at once, a panel appears on the left with the loaded cursor, similar to what you know from InDesign.

Step 6: Placing several images one after another
If you select several files, you can put them into frames one after another. To do this, click with the mouse in the desired object frame, and the current image is placed there. The program then automatically selects the next image. This approach is particularly suitable for image series or galleries. It is important that you work with placing and not with drag and drop, since only the dialog keeps the images in the loaded state.

Step 7: Adjust the image frame and image content separately
A great advantage of the image frame is that you can change it at any time. You simply adjust the size of the frame, and the image then scales automatically along with it. For the image content, you double-click on the image. This makes a control cross appear in the center, a zoom factor at the bottom, and a rotation tool at the top. With the zoom factor, you change the image section proportionally, while with the control cross you move the image within the frame. To rotate, you hold down the Shift key, and the rotation then snaps in 15-degree steps.

Step 8: Use anchor point and scaling options
Once the image is placed, the context-sensitive toolbar at the top shows input fields for the object. There you select an anchor point, for example the center. You also have scaling options available. "Scale to fit minimally" shows the entire image in the frame, but may leave empty areas at the top and bottom. "Scale to fit maximally" fills the frame completely and cuts off parts of the image in the process. You should always take the anchor point into account, because it determines from which point the image grows or shrinks. Just try out the options, and you will quickly see which variant suits your layout.

Step 9: Turn off snapping with the Alt key
When you move an image within a frame, it can seem jerky because the snapping locks onto guides. Snapping is actually helpful, but disruptive for fine adjustments. If you hold down the Alt key while moving, snapping is deactivated. When you release the key, snapping is active again. The difference is noticeable immediately once you have tried it.

Step 10: Check resolution and print suitability
No matter how beautiful an image looks, if the resolution isn't right, print quality suffers. You will find the display at the top of the toolbar; it shows the effective resolution in ppi. In the video, the value is initially around 1200 ppi, which is far more than necessary for print, since 300 ppi is enough. If you enlarge the image, the resolution drops. After enlarging to "Fill format," it is about 508 ppi, which is still sufficient. At the same time, the scaling display shows whether the image is still printable. So always check these values after every change.

Step 11: Set the image content precisely via the transformation
Sometimes you want to reproduce an image section exactly or move the content in a targeted way. For this, there is the Transform panel. There you can enter values such as the scaling in percent directly. In the video, the original scaling of 119% is read off, and you then adopt this value to get the right crop. The chain symbol option maintains the proportions. In addition, you can flip the content horizontally or vertically or rotate it by 180 degrees via "Transform layer".

Step 12: Experiment with black-and-white conversion
Some properties of an image are not immediately obvious, such as the abbreviation "K" in the image settings area. If you double-click on the image and look at the options, you will find the command "K" there. It stands for Key, that is, the key color black in the CMYK color space. One click converts the image to black and white. If the result is not what you want, you simply undo it or delete the image again. Trying things out beats studying here.

Step 13: Hide the pasteboard with "Clip to canvas"
With brochures and multi-page documents, image parts that extend beyond the document are sometimes distracting. These lie on the pasteboard, that is, in the area outside your document. Via the menu item "View" and then "View Mode", you activate the option "Clip to canvas". After that, everything that lies on the pasteboard disappears. The option can be deactivated again at any time as soon as you need the overhanging elements again.

Summary ??? Placing Images in Affinity Publisher: How to Get Started with Layout
You have learned how to use images in Affinity Publisher in different ways. The simple dialog is suitable for quick placements, while picture frames give you full control over the crop, position, and scaling. Pay attention to the bleed, check the resolution, and use aids such as the Alt key or the view mode. With these tools, you can create layouts that look clean and can be easily adjusted later.
FAQ
How large should the bleed be for printed products?3 mm at the edge is standard, so that the print shop has a tolerance when cutting and no white slivers appear.
Why can't a directly placed image be freely adjusted?A directly placed image does not have its own frame, which is why you cannot transform the crop and content. A picture frame provides the necessary flexibility here.
Which shortcut opens the "Place File" dialog?Command+Shift+P on the Mac or Ctrl+Shift+P on Windows opens the dialog, with which you can also embed PDFs and Word files.
How do I place multiple images in succession?Select the files together in the dialog, then click one after another into the desired frames, and the next image is loaded automatically.
Why does an image jerk when moving it within the frame?This is due to snapping being enabled, which snaps to guides. Hold down the Alt key while moving to temporarily disable it.
What resolution do I need for printing?For printing, around 300 ppi is sufficient. After each scaling, check the value displayed in the toolbar.
What does "K" mean in the image settings?K stands for Key, the key color black in the CMYK color space. Clicking on it converts the image to black and white.
How do I hide parts of images on the pasteboard?Under "View" and "View Mode," activate the option "Clip to Canvas," and then elements outside the document are no longer visible.

