

Imagine you are setting an article with dozens of paragraphs, and every paragraph should have exactly the same font, size, color, and spacing. If you do this by hand, you spend a lot of time on repetition and easily make mistakes. Paragraph styles solve exactly this problem. You define the formatting once, save it as a template, and apply it with a single click to as many text frames as you like.
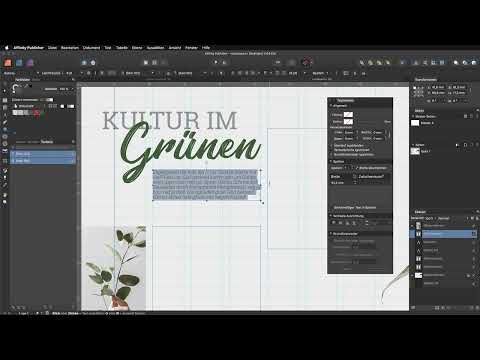
The video is only loaded from YouTube when you play it – data (including your IP address) is then transmitted to YouTube/Google. More in the privacy policy
In this tutorial, you will learn how to create a first paragraph style for an introductory text in Affinity Publisher. You will find out where the text styles are located, which settings in the dialog really matter, and why some changes made in the text frame do not reach the style. By the end, you will be able to confidently apply the style to your own texts.
Key Takeaways
Key Takeaways
- A paragraph style stores font, font size, color, and spacing as a reusable template.
- Paragraph styles affect entire paragraphs, whereas character styles only affect selected words or characters.
- The baseline grid influences line spacing. For small font sizes, you should deliberately ignore it in the text frame options and set a suitable leading instead.
- Manual changes in the text frame are not always carried over into the style. With the "Update Paragraph Style" function, you can update the style deliberately.
Step-by-Step Guide
The following steps build on each other. Work through them in order, and you will end up with a clean introductory text with its own paragraph style.
Step 1: Create a text frame for the introductory text
For the introductory text, choose the regular text frame rather than the artistic text frame. Drag it open below your heading. If you accidentally select the heading in the process, simply start the frame a little lower so that the two elements do not overlap.

Step 2: Insert placeholder text and check the starting point
Fill the new frame with placeholder text until it spans roughly three lines. This placeholder immediately shows you how the formatting affects the text flow. By default, the text is probably in Arial at 12 points. This starting point does not fit your layout, which is why it is the right starting point for all further adjustments.
Step 3: Open the Text Styles panel and clean up
You can find the Text Styles panel via View, then Studio, and there Text Styles. Many predefined styles are stored there by default. You could use one of them, but usually none fits your project exactly. That is why it makes sense to delete styles you do not need. Then select the text frame without a style so that it no longer contains a hidden default.

Step 4: Distinguish between paragraph style and character style
In the panel you see two symbols that differ clearly. The first symbol stands for paragraph styles. It applies to entire paragraphs. The second symbol, the one with the capital letter and the underline, stands for character styles. These refer to individual words or characters. For an introductory text, you need the paragraph style. At the bottom of the panel, you create it using the "Create Paragraph Style" symbol.

Step 5: Set the font
Choose Roboto as the font in the Light Italic variant. In Affinity Publisher, this variant is called Light Italic. The Roboto Slab font, which you used for the heading, does not fit here because it looks too heavy. A restrained font in the body text ensures calm readability.
Step 6: Determine font size and color
A font size of 12 points is too large for this introductory text. Eight points is perfectly sufficient. Then choose a dark gray shade. This makes the text appear more subtle than pure black, but it remains easy to read.
Step 7: Ignore the baseline grid and set the leading
Open the text frame options at the top and activate the option to ignore the baseline grid. The grid is set to 16 points, and a value of 12 points would not fit onto it cleanly. So that the line spacing is still correct, you instead set a suitable leading of 12 points. Three lines are fine for your introductory text. Four lines are also possible, depending on how much space you have in the layout.

Step 8: Create and Name a Paragraph Style
Now return to the text styles and click the plus icon for paragraph styles at the bottom. The "Create Paragraph Style" dialog opens. Give the style a unique name, for example "Intro Text". The name will help you quickly find the style in the document later.

Step 9: Check the Settings in the Dialog
On the left side of the dialog, you will find numerous categories. The "Character and Font" category adopts the settings you have already made, i.e. Roboto Light Italic, the size, and the color. The "Position and Transform" category remains at default because you haven't changed anything there. Under "Typography" you can specify additional finer details, such as capital letters. For now, you confirm the dialog with OK; the further finer details will follow later.
Step 10: Test the Style on the Text Frame
Now click on the text frame and first select "no style" as the style. The formatting immediately reverts to its original state. Then select the style "Intro Text" again. All the formatting is thus restored with one click. This shows you that the style actually contains the saved properties.

Step 11: Insert Filler Text and Apply the Style to the Entire Text Flow
Via the Text menu and the Insert Filler Text entry, you can also regenerate the dummy text if you want to change it. Then select the entire text flow between the two linked text frames and apply the paragraph style "Intro Text". All paragraphs are thereby uniformly aligned and formatted. This way you can immediately see how the style behaves across multiple frames.

Step 12: Observe Changes Live in the Dialog
Open the paragraph style dialog again and change, for example, the capitalization to "All Caps". You will notice that the text in the document reacts immediately. In this way, you can try out every setting before you commit. At the bottom of the dialog, there is also a summary of all the properties set so far. It is helpful for keeping track.

Step 13: Understand the Conflict with the Baseline Grid
If you disable the baseline grid in the dialog, you initially see no change in the text frame. This is because you previously manually influenced the baseline grid in the text frame. In this case, Affinity Publisher prefers the direct setting on the frame over the style. Therefore, reset the option in the frame so that the style takes effect again. This relationship explains why some formats are not applied as expected.
Step 14: Update the Paragraph Style via Text Selection
There is a second way to change the style. Select the text in the frame, change a property such as the color, and then click "Update Paragraph Style" at the bottom of the panel. The change is then applied to all text frames that carry this style as an attribute. So you don't have to open the dialog every time. If you don't want to keep the change, you can simply undo it. For the intro text, this is the appropriate starting point on which you can build in the next steps.

Summary ??? Defining Paragraph Styles in Affinity Publisher: Step-by-Step Guide
You have now created your own paragraph style for your intro text. You have learned to distinguish between paragraph and character styles, to choose the appropriate font, size, and color, and to ignore the baseline grid in favor of a fixed leading. You also know how to test the style, apply it to the entire text flow, and adjust it afterwards with the "Update Paragraph Style" function. With this knowledge, you can create further styles for subheadings, captions, or body text.
FAQ
What is the difference between a paragraph style and a character style?A paragraph style applies to entire paragraphs, while a character style applies only to selected characters or words.
Why is a change not applied to the paragraph style?If you have already set a property manually in the text frame, Affinity Publisher cannot apply the setting from the style. Reset the setting in the frame so that the style takes effect again.
What does the "Update Paragraph Style" function do?It transfers the changes you made to a selected text to all text frames that use the same paragraph style.
Why should I ignore the baseline grid?If the font size does not fit the grid, uneven line spacing results. With a fixed leading, you achieve even spacing regardless of the grid.
Can I delete text styles I don't need?Yes. In the Text Styles panel, you can remove preinstalled styles that you don't need. This keeps the list clear.

