

Circles, rectangles and triangles are the building blocks of almost every design. If you learn to merge them together or cut them out of one another, you can create icons, logos and cutouts that would otherwise be laborious to draw. In this guide, I will walk you step by step through the Add and Subtract commands in Affinity Publisher, just as I presented them in the basics tutorial.
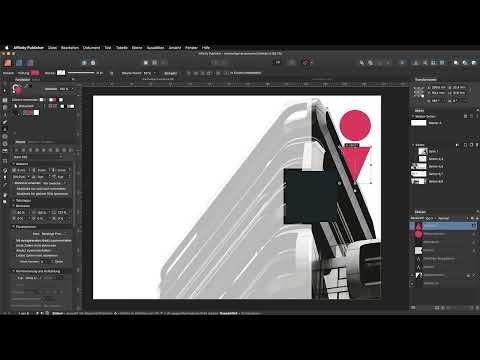
The video is only loaded from YouTube when you play it – data (including your IP address) is then transmitted to YouTube/Google. More in the privacy policy
Key Takeaways
- By holding down the Shift key, you select several objects at once and keep proportions or squares while drawing.
- Via the Layer menu and Geometry, you merge objects with Add or cut them into new shapes with Subtract.
- When subtracting, the front object is subtracted from the back object. The order of the layers therefore determines the result.
- The result is a vector path. You can scale it as much as you like without it becoming pixelated.
- Merged objects can be given a stroke together, which is not possible with separate objects.
Step-by-Step Guide
Step 1: Create a rectangle and adjust the opacity
Select the Rectangle tool and draw a rectangle at the top in the bleed area that takes up roughly the width of your page. So that the shape remains easy to recognize later, you then set the opacity to 80 percent. By the way, the example comes from a brochure cover, so you can work directly with a layout you already know.

Step 2: Draw a perfect square
Draw a second rectangle, but hold down the Shift key while doing so. This forces equal side lengths and gives you a clean square. Such exact basic shapes are the prerequisite for the objects to overlap cleanly later.

Step 3: Align objects to the edges
Align the square to the edge of the rectangle, once at the top and once at the bottom. The alignment ensures that both shapes lie exactly on top of each other. Only then will the result of the later calculation operation be correct.
Step 4: Duplicate the rectangle
Drag the rectangle onto a new layer to create a copy. Then hide the copy so that you keep the original in view. The original is the object you will work with in a moment, and the copy serves as a comparison.

Step 5: Select two objects and open the Geometry menu
Select the first object and then hold down the Shift key while you click the second one. Both objects are now active. Then go to Layer in the menu bar and choose the Geometry section. There you will find the commands Add, Subtract, Intersect and Divide. I am deliberately leaving the XOR command out of this guide, because it is not explained in the video. Concentrate on the first four commands for now, as they are the most important.

Step 6: Create a new shape with Subtract
Now choose the Subtract command. Affinity Publisher subtracts the front object from the back object and creates a new path. In the example, this produces a curved shape that lies exactly where the two shapes overlapped. Pay attention to which object is on top, because precisely this layer order determines the result.

Step 7: Show the rectangle again and position it
Show the previously hidden rectangle again. Shrink it while holding down the Shift key so that the proportions are preserved, and place it centered on the new shape. In this way, an effect is created that thrives on the interplay of the original and the cutout.

Step 8: Use the advantages of vector shapes
The result is not a pixel image, but a vector path. You can enlarge or reduce it, and the edges will still remain razor sharp. The shape changes proportionally to its original size. This is a great advantage, especially for logos and icons that appear in very different sizes on posters or business cards.

Step 9: Add a Triangle
Pick a triangle from the shapes, resize it to fit the rectangle, flip it once, and move it into the right position. It is important that you place the shape before merging exactly as it should look in the final result.
Step 10: Add Objects and Create an Outline
Select the triangle and the rectangle, open the Layer and Geometry menu again, and this time choose Add. The two objects become a single object. This is exactly what opens up new possibilities: you can now give the combined path an outline that flows around the entire shape. With two separate objects, this would not be possible in this form.

Step 11: Build an Icon with the Subtract Command
Next, the video shows how to create a location icon with just a few clicks, like the ones you know from map applications. Place a circle in the center of the shape, color it white, and position it so that it covers the shape. Then select both objects and apply Layer, Geometry, and Subtract again. The circle cuts itself out of the shape, and you get the finished icon.

Step 12: Cut Text Out of a Shape
The same principle also works with text. Place a shape over a text frame and subtract it by subtracting the top object from the text. Behind it, a see-through area is created that leaves out the text. You can then enlarge the shape, reduce its opacity, or add a subtle outline.

Step 13: Add the Finishing Touches
Finally, you can refine the result further. Reduce the opacity a little and add a fine outline in an accent color, for example red with a weight of about two points. This makes the design look lively while the shape remains clearly legible. Feel free to play around with different variations, because thanks to the vector basis, every step can be undone or adjusted at any time.

Summary – Vector Shapes in Affinity Publisher: How to Combine Objects Creatively
You have seen how to build new vector paths from simple basic shapes using the Add and Subtract commands. When subtracting, pay attention to the layer order, because the front object is subtracted from the back one. Use the Shift key for even proportions and squares, and use merged objects for outlines, icons, and textures. With this knowledge, you can develop your own shapes that can be scaled without loss of quality.
FAQ
What is the difference between Add and Subtract?Add merges the selected objects into one combined shape, while Subtract cuts the front object out of the back object.
Why does the result not become pixelated when scaling?The shapes are created as vectors and not at the pixel level. As a result, the edges stay sharp even at high magnification.
How do I draw a perfect square?Hold down the Shift key while dragging out the rectangle. This keeps the width and height equal.
How do I select multiple objects at the same time?Click the first object, then hold down the Shift key and click the second object.
What does the XOR command mean?The command is not explained in the tutorial. Focus first on Add, Subtract, Intersect, and Divide, as these form the basics.
Can I still edit individual objects after merging?A merged object is a single combined path. Changes to it affect the entire shape, so you should set the size and position beforehand.

