

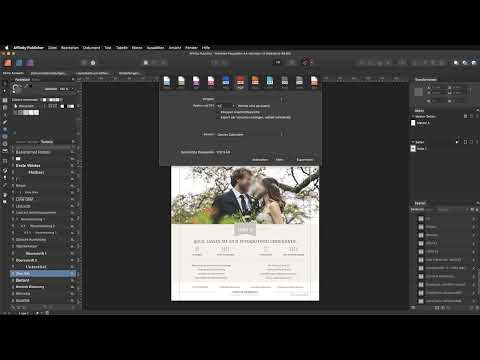
Imagine you have designed a price list with photos and tables and want to offer it on your website or as a download. A print file at 300 dpi would be far too large for that, and a document without clickable links wastes opportunities. In this tutorial by Stefan Riedel, you will learn how to export a PDF in Affinity Publisher that stays lean and is still easy to read. You will find out which settings are important for on-screen display, how to keep an eye on the file size, and how to save the settings as a preset so you can recall them immediately the next time you export.
The video is only loaded from YouTube when you play it – data (including your IP address) is then transmitted to YouTube/Google. More in the privacy policy
Key Takeaways
- 72 dpi is sufficient for on-screen display. For high-resolution displays, you can go up to 150 dpi.
- The file size is shown at the bottom of the export dialog. A print PDF of over 2 MB is often far too large for the internet.
- With "Downsample images" and JPEG compression, you control how much the file size is reduced.
- RGB and the sRGB color profile are the right choice for screens. You should have CMYK images converted to RGB.
- "Include hyperlinks" must be enabled so that links in the PDF remain clickable.
- You save your own preset once and then select it for every export.
Step-by-Step Guide
Step 1: Open the export dialog
Open your finished document and go to "File" in the menu and then to "Export". In the window that opens, you will find numerous output options. For web publishing, you are in exactly the right place, because you are not exporting for print but for the screen.

Step 2: Select the "PDF for Web" preset
In the export window, various presets are available to you, for example for print, for the web, or for reduced variants. The "PDF for Web" preset is a good starting point. It already sets many options appropriately, which you can then fine-tune.

Step 3: Set the raster resolution to 72 dpi
Set the rasterization to 72 dpi. For print, 300 dpi is necessary because each pixel is resolved very finely. On screens, this is not required. If you want your PDF to display optimally on devices with high pixel density, such as Apple Retina displays, you can alternatively choose 150 dpi. The file will then be somewhat larger.
Step 4: Keep an eye on the estimated file size
Pay attention to the estimated file size at the bottom of the dialog. As soon as you change the resolution values, it changes immediately. In print mode, the file was over 2 MB; at 72 dpi, it dropped in the example to just 78 KB. This display is your most important control tool before you even start the export.
Step 5: Open the "More" section
Now click on "More" and not directly on "Export". Behind this section are options for image processing, compatibility, colors, and content that you should adjust deliberately. An export without first looking at this section often leads to results you did not intend.

Step 6: Downsample images
Enable the "Downsample images" option. All images with more than 108 dpi will then be reduced to 72 dpi. This is a major lever for file size, especially for documents with many high-resolution photos.
Step 7: Set JPEG compression
With the JPEG compression slider, you determine how heavily images are compressed. A value of 85 percent is considered a good middle ground. If you move the slider further down, for example to 60 percent, images become blurrier, but the file becomes noticeably smaller. This is especially worthwhile for multi-page brochures with 20 or 30 pages, which otherwise can hardly be sent by email.
Step 8: Define compatibility
In the compatibility section, Affinity Publisher suggests PDF version 1.7 for Acrobat 8 as the default. You can generally accept this value. It ensures that the PDF can be opened without problems on most common programs and devices.
Step 9: Choose the RGB and sRGB color space
Choose RGB as the color space. This color space is intended for screens. You don't need CMYK here, because it is the color space for print. For the color profile, choose the sRGB standard. It is the most widely used for monitors and web applications.
Step 10: Convert colors to RGB
Activate the checkbox that converts colors to RGB. When it is active, all image color spaces used within the document are converted to RGB. For example, if you have placed a photo in CMYK format, you don't have to take care of it yourself. The program handles the conversion for you. I generally recommend this option.
Step 11: Activate Include hyperlinks
The "Include hyperlinks" option is especially important if your PDF is supposed to be clickable. Be sure to activate it, otherwise links in the exported document will not work. This is crucial especially for price lists, catalogs, or offers with references to websites.
Step 12: Leave out unnecessary options
The "Layers" option only makes sense if you are creating accessible PDFs. You don't need bleed areas and printer marks for a web file. Therefore, leave these options deactivated so that the file stays lean and contains no superfluous elements.
Step 13: Embed fonts
Activate font embedding. This way the PDF is displayed correctly even on computers that don't have your fonts installed. As a result, the layout stays the same on all devices.
Step 14: Save your own preset
Once you have chosen all the settings, save them as a preset. Via the preset management, you assign a name, for example "PDF for Web". This step saves you a lot of time with every further export, because you don't have to set each option again.
Step 15: Apply the saved preset
At the next export, you open the dialog again and select the saved preset at the top. All settings are then applied automatically. Afterwards, you click "Export".
Step 16: Define the save location and file name
The program now asks for a save location. Choose a suitable directory and give your PDF a meaningful name, such as "Price list online". With "Save", the export starts. The result is available a few seconds later.

Step 17: Check the exported PDF
Open the finished PDF in a viewer such as Acrobat and check whether the hyperlinks are clickable. In the example, clicking a link opens the browser. With security warnings, you should look closely at whether the connection is trustworthy. Incidentally, the address in the tutorial was fictitious.

Step 18: Weigh quality against file size
At the end, compare the image quality with the file size. The example shows that images in the web version look much grainier than in print. If the quality seems too low to you, you can turn the slider for JPEG compression up a bit again and repeat the export with a new result. This way you find the point at which quality and file size suit your project.

Summary – Exporting a PDF for web in Affinity Publisher: optimizing file size
With the "PDF for Web" preset and a few targeted adjustments, you export a PDF in Affinity Publisher that loads quickly and looks good on screen. The most important adjustments are the resolution of 72 dpi, the downsampling of the images, the JPEG compression, and the color settings with RGB and sRGB. Also make sure that hyperlinks are activated and unnecessary print elements are omitted. If you save the settings as your own preset, you save a lot of time with every further export.
FAQ
Why is 72 dpi enough for a PDF on the web?Screens display images with much lower pixel density than print, so 300 dpi is not necessary there. Only on high-resolution displays can a value of 150 dpi make sense.
How can I see how large my file will be?The estimated file size is displayed at the bottom of the export dialog and changes immediately when you adjust settings such as the resolution.
What does JPEG compression do?With a lower value, the file becomes smaller, but the images lose sharpness. A value of about 85 percent is a good starting point.
Why should I activate "Include hyperlinks"?Only with this option do links in the PDF remain clickable. Without it, references in the exported document are not usable.
Do I need printer marks and bleed areas for a web file?No, these elements are only relevant for print. Leave them out so that the file stays lean.
How do I save my settings for future exports?Save the desired options as a preset and assign a name. At the next export, you simply select this preset at the top of the dialog.

