A layout often looks perfect on screen, and only in print do you notice that a logo looks blurry or a paragraph is cut off. This is exactly where the preflight check comes in. It is an automatic check that scans your document for typical problems before export. In this guide, you will learn how to open the Preflight panel, read the warnings correctly, and fix the most common errors: image resolution that is too low, text overflow, and incorrectly set languages.
The video is only loaded from YouTube when you play it – data (including your IP address) is then transmitted to YouTube/Google. More in the privacy policy
Key Takeaways
The preflight check runs in the background and finds problems before they are noticed at the print shop. You can find it under Window, Layout, Checklist. The check can be run live or only on export; the live check is the safest. Not every message is a real error: spelling notices can be switched off via the profile, whereas text overflow and insufficient image resolution should definitely be fixed.
Step-by-Step Guide
Step 1: Understanding the Preflight Check
Before you get started, you should know what the function is for. The preflight check examines your document for things that are barely noticeable on screen but become immediately visible in print. These include images with too low a resolution, objects that lie outside the page frame, and text that does not fit completely into its frame. Think of the preflight check as the final inspection before you hand your project over.

Step 2: Opening the Preflight Panel
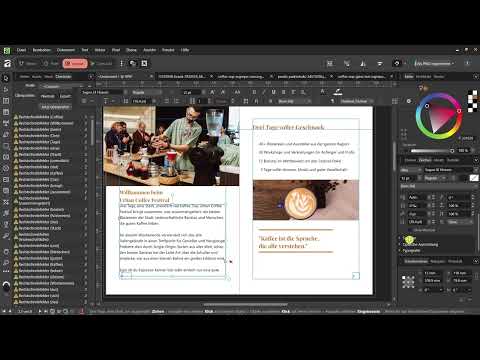
To start the check, open the panel via the Window menu, then Layout, and then Checklist. In Affinity Layout, the panel is actually called Checkliste in German, even though the English term Preflight is more common. Make sure the panel is activated. You can recognize this by the checkmark in the menu. It then appears in your panel group, typically next to Pages and Assets.

Step 3: Reading and Classifying the Warnings
As soon as the panel is open, it shows you a list of warnings. Typical messages are an image with too low a resolution that looks pixelated in print, an image that is incorrectly placed, or a text element that lies outside the frame. You can click on each warning to jump directly to the relevant element. This way you don't have to laboriously search through the document.

Step 4: Running the Check Live
In the panel you will find the button Check Now. With it, you start the check manually. However, you can also have the check run only on export. The live check is recommended, because that way you see errors immediately while you work and don't have to correct everything shortly before delivery.

Step 5: Properly Assessing Spelling Errors
In the example, the preflight reports numerous errors that are not real errors at all. The reason is that the text is actually written in German, but the language of the text was set to English. The software then marks German words as supposed spelling mistakes. Therefore, first check whether the messages are actually correct before you change anything.

Step 6: Correcting the Text Language
To change the language, select the affected text and open the Character panel on the right. There, under the Language tab, you can see which language is set. Choose German or, if you don't want a language check, the option None. It is best to select all affected text passages at once so that you don't have to edit each paragraph individually. Then run the check again, and the spelling messages should disappear.

Step 7: Disabling the Spell Check in the Profile
If the messages remain nevertheless, you can adjust the check permanently. To do so, open the menu via the three lines next to the profile and choose the option to edit the profile. There, you deactivate spelling errors as a check criterion. This makes sense if you know that your texts have already been proofread and you want to concentrate on the technical points.

Step 8: Detecting Text Overflow
A serious error is text overflow. In this case, the text does not fit into its frame, and part of it is simply not displayed in the document. Preflight marks this with a red triangle on the text frame. The hidden text is still there, you just can't see it. This is a warning you should never ignore, because words or entire sentences will be missing in the print.

Step 9: Adjusting the Text Frame
To fix the overflow, drag the text frame down by its bottom handle until all of the text is visible. If that isn't enough, enlarge the frame further. Sometimes it also helps to make images slightly smaller so that more room remains for the text. In the example, it is enough to lengthen the frame and make one image a bit smaller. After that, the messages disappear.

Step 10: Checking the Image Resolution
Images are the most common source of errors in print. For printing, you generally need 300 DPI. An image that looks sharp on screen can still look blurry in print if the resolution is too low. Therefore, check the resolution of every image before you place it, and not only afterwards. If you have an image from the internet, the likelihood of too low a resolution is particularly high.

Step 11: Assessing with Experience and Zoom
In addition to the warning in the panel, it helps to take a look at the document. Zoom in close on an image. If it still looks clear and detailed at high magnification, the resolution is usually sufficient. If it looks blurry instead, you should get a better version of the image. After some practice, you will often recognize problematic images at first glance.

Step 12: Evaluating Warnings Correctly
Not every message in Preflight means that you cannot save the document. Many notes are merely warnings. The file can still be saved, but problems may occur in print. Therefore, you should check and fix all relevant warnings before exporting. Only when the list is empty or contains only unimportant notes do you export the document.

Summary – Preflight Check in Affinity Layout: Finding Print Errors Before They Get Expensive
The preflight check is your last safeguard before printing. You can find the panel under Window, Layout, and Checklist, and you should let it run in live mode so that errors are noticed early. Spelling notes can be resolved via the language of the text or the profile. Text overflow and too low an image resolution, on the other hand, are real problems that you should correct before exporting. If you apply these steps regularly, you avoid unpleasant surprises at the print shop.
FAQ
What is the preflight check in Affinity Layout?The preflight check is an automatic check that scans your document for typical print problems before you export it.
Where do I find the Preflight panel?You can find it via the Window menu, then Layout and Checklist. Make sure that the panel is activated.
Do I have to fix every warning immediately?Not every warning is critical. You should definitely fix text overflow and too low an image resolution. Spelling notes can be reviewed and, if necessary, disabled via the profile.
Why does Preflight show spelling errors even though my text is correct?This often happens when the language of a text is set incorrectly, for example English instead of German. Change the language in the Character panel under the Language tab.
What does 300 DPI mean for images?300 DPI stands for 300 dots per inch. This resolution is usually recommended for printing so that images look sharp and detailed.
Can I also run the check only at export?Yes, that is possible. However, the live check is recommended because you see errors immediately and don't have to correct them only shortly before submission.

