
If you want to place a person on the hood of a car in an accident simulation, it's rarely enough to simply insert them. The figure has to move with the vehicle, be pushed out of the frame, and disappear in the right places. That's exactly why in this tutorial you combine several techniques: a null object with the Transform effect, the Puppet tool, a mask with an alpha layer, and motion blur.
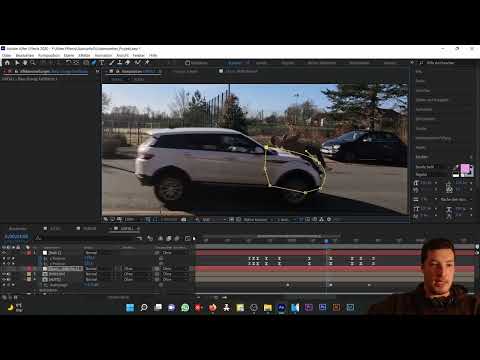
The video is only loaded from YouTube when you play it – data (including your IP address) is then transmitted to YouTube/Google. More in the privacy policy
Key Takeaways
- A null object controls the movement of the car, and other layers can adopt this movement.
- The Transform effect changes the starting position of a layer. Masks that you set afterward therefore act at a different location than expected.
- The Puppet tool works reliably only on a still image, not on moving footage.
- A solid with a mask serves as an alpha layer. It hides the area of the hood from the person.
- Parenting to a null object transfers its movement one to one, whereas linking via the Pick Whip tool only adopts the position data.
- Motion blur only looks realistic if you adjust the shutter angle to the speed of the scene.
Step-by-Step Guide
Preparing the Movement via the Null Object
The starting point is the null object on which you have already defined the basic orientation of the car. Now add further keyframes for position and rotation from the Transform effect. This way you rotate the car forward and then push it out of the frame. Make sure that this motion sequence matches the impact, because all following layers are guided by it.

Applying the Puppet Tool to a Still Image
Select the person composition and click the pin icon to activate the Puppet tool. Set puppet pins at the head, back, and both legs. If you move these points in the moving footage, the figure quickly falls apart, and the head looks as if it were separated from the body. That's why you deactivate the effect again and work on a still image. The still image is carried along over time, so that you can, for example, shift the back to the right for the strong impact or bring the leg closer to the hood. Keep in mind that you can readjust at any time this way.


Why the Mask on the Person Doesn't Work
The obvious way would be to draw a mask directly on the hood in the person composition. However, this leads to two problems. First, the Transform effect has already shifted the person. If you briefly turn it off, you'll see that the mask acts at a spot that no longer corresponds to the position of the hood. Second, the hood is located in the null object, which is constantly moving. A mask in the person composition cannot follow this movement.

Creating the Solid as an Alpha Layer
Delete the mask from the person composition and create a new solid instead. Hide it at first so you don't edit it by accident. Now draw the mask along the hood on this solid. You have to subtract this mask, because it is meant to hide the area of the person that must disappear behind the hood.
Name the layer clearly, for example "Motorhaube" (hood), and give it the function of an alpha layer for the person. Then return to the person layer and select the "Motorhaube" layer in the alpha mask section. As soon as you do that, exactly the area of the person that the solid covers disappears.

Linking the Solid to the Null Object
Now you need a connection so that the solid follows the movement of the car. You can link the position to the null object via the Pick Whip tool or set the layer directly as a child of the null object. The two variants differ significantly. When linking via the Pick Whip tool, you adopt the position data one to one, and the solid remains freely movable in its base position. With parenting, the layer adopts the behavior of the null object. So if the null object moves 50 pixels to the right, the solid also moves 50 pixels to the right. For this case, parenting is usually the better choice.

Animating the Mask Path for the Movement
The mask on the solid layer now has to move along with the car. Open the layer by double-clicking the mask and set the first keyframe where the position is already correct. A bit earlier, move the mask further to the left while holding down the Alt key. In this way, you work your way step by step through the footage until the person finally drives out of the frame on the right. Use all the tools you have learned previously, i.e. Position, Rotation, and the Puppet tool. For the hood in this example, it has proven effective to let the mask begin at half height and to set a soft mask edge of about 10 pixels.

Widening the Solid Layer So the Person Stays Visible
After the animation, a new problem appears. Since the alpha layer follows the person and shifts to the left with the null object, the person disappears on the right side. To fix this, you briefly hide the mask by pressing Ctrl+X. Then you widen the solid layer in the layer settings until it completely covers the right part of the frame. After that, paste the mask back in. It is important that you remove the mask during this change. Otherwise, it will be widened as well, and the result will no longer fit.

Adding and Fine-Tuning Motion Blur
Finally, you add motion blur. To do this, activate the Motion Blur switch in the person composition layer. At first glance, the effect often looks too strong. Therefore, open the composition settings, switch to the Advanced section, and reduce the shutter angle. In the example, a value of about 20° is a good starting point. Make sure that the blur remains visible during stronger movement but does not look exaggerated.


Summary – After Effects Car Accident: Using Masking, Alpha Layer, and the Puppet Tool Correctly
With this tutorial, you place a person convincingly on the hood of a car. The null object controls the movement, the Puppet tool corrects the body posture on a still image, and a solid layer with a mask provides the alpha layer. Parenting to the null object keeps everything in sync while you adjust the mask frame by frame. A widened layer prevents the person from disappearing at the edge of the frame, and an adjusted shutter angle ensures subtle motion blur.
FAQ
Why doesn't the mask work directly in the person composition?The Transform effect has already shifted the person, and the hood additionally moves within the null object. A mask there cannot follow this process.
Why should the Puppet tool only be used on a still image?In moving footage, the puppet pins quickly shift from their position, and the figure looks torn apart. On a still image, the correction is carried cleanly through the entire duration.
What is the difference between linking and parenting?With linking via the Pick Whip tool, the position data is adopted one to one, but the layer remains freely movable. With parenting, the layer takes on the complete behavior of the null object.
Why does the mask have to be removed when widening the solid layer?If the mask is active, it gets stretched along with the layer when widening it. That is why you hide it beforehand and paste it back in afterward.
Which shutter angle should I choose for the motion blur?In the example, a value of about 20° has proven effective. Adjust it until the movement looks believable without smearing the person too much.


