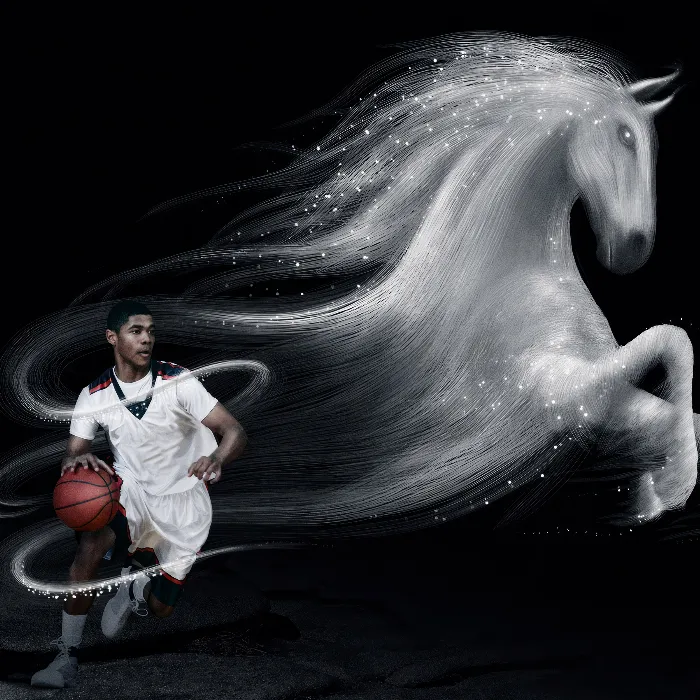
Creating depth and dimension in digital artworks requires a good understanding of how to use light and shadow. In this tutorial, I will show you how you can create an effective interplay of brightness and darkness using Adobe Photoshop to give your artwork more plasticity. We will specifically work on making the “Horse out of Threads” appear more lively. Let's get started with the implementation!
Key Insights
- Use the Dodge and Burn tools to shape light and shadow.
- Make sure to work with low exposure values to achieve smooth transitions.
- Work with different layers to make precise adjustments.
Step-by-Step Guide
Let's start with the horse's head. First, activate the head layer in the layers palette. It is important to be on the image layer and not on the mask to correctly apply the subsequent effects.
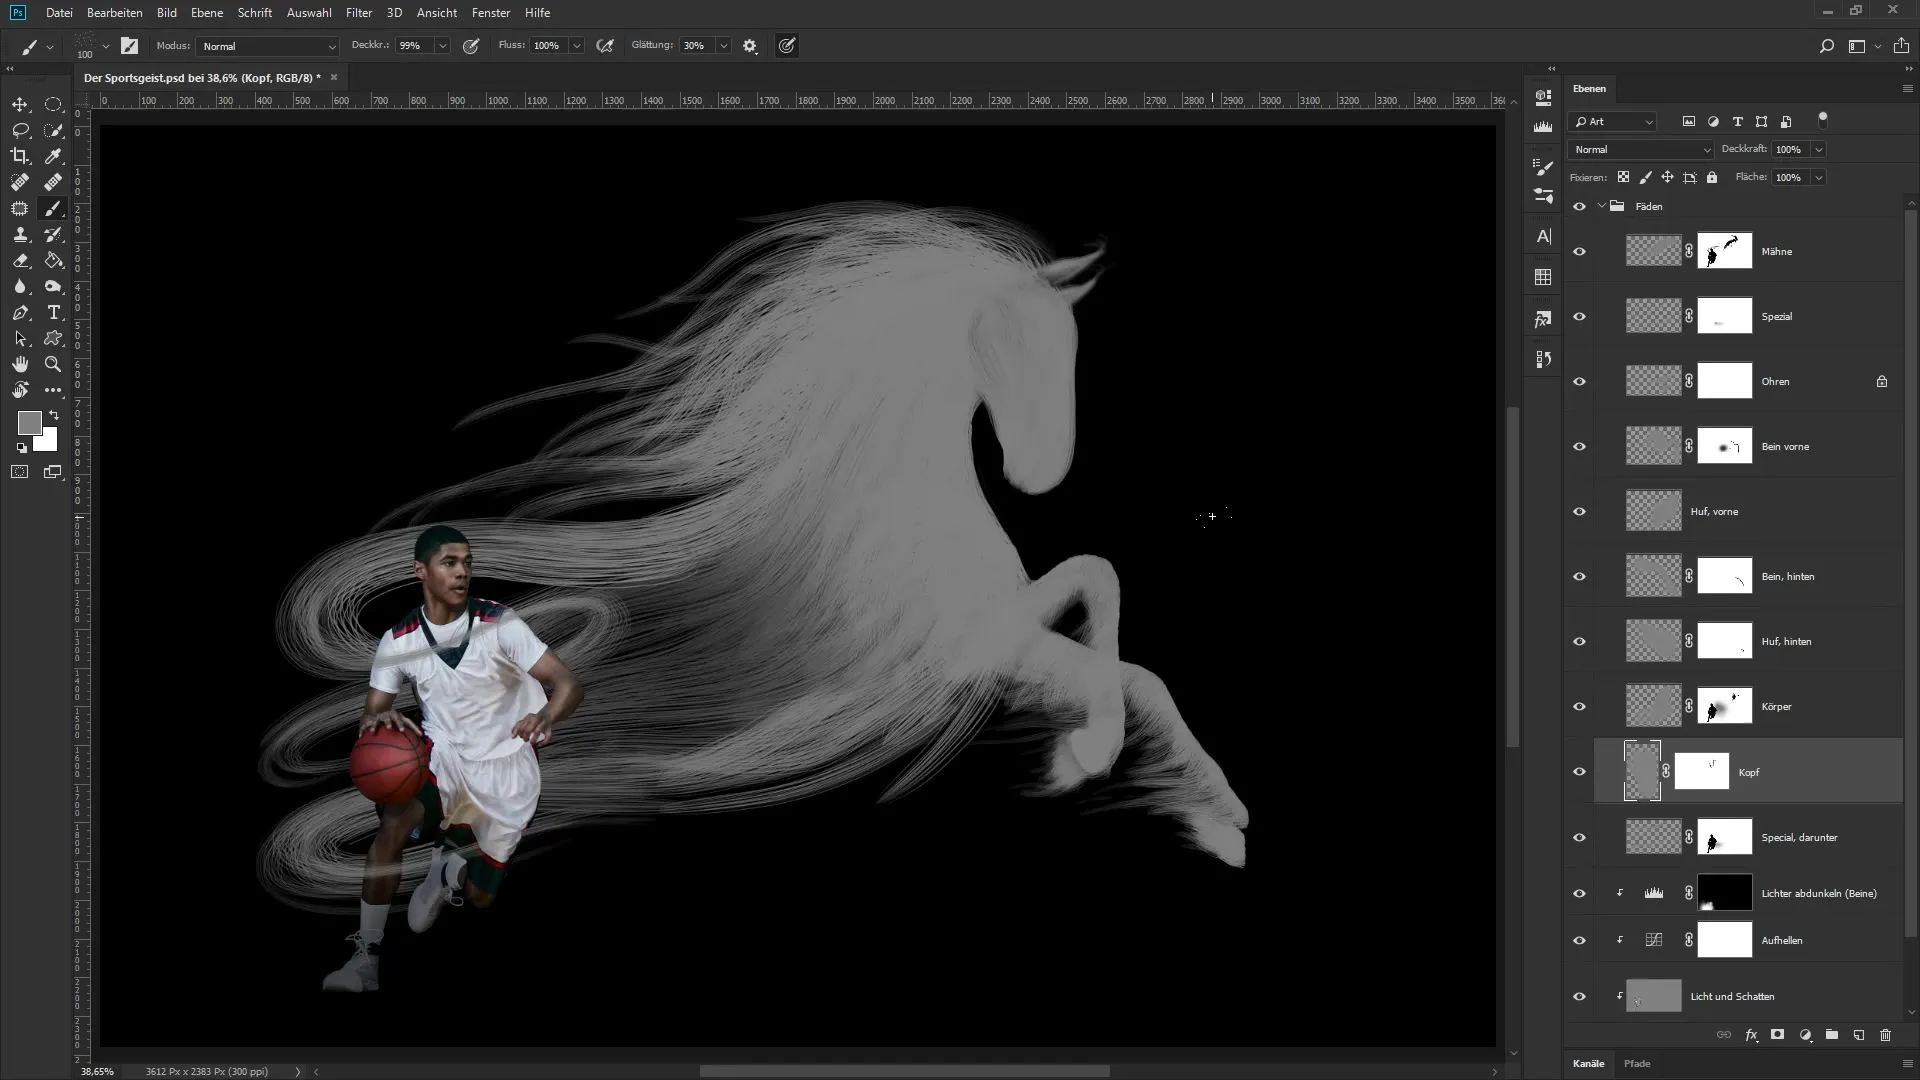
Now you will work with the Burn tool. You can find it behind the icons where the Dodge tool is located. With the Burn tool you can darken areas, while the Dodge tool is designed for lightening. Choose a medium gray color to alternately place light and shadow.
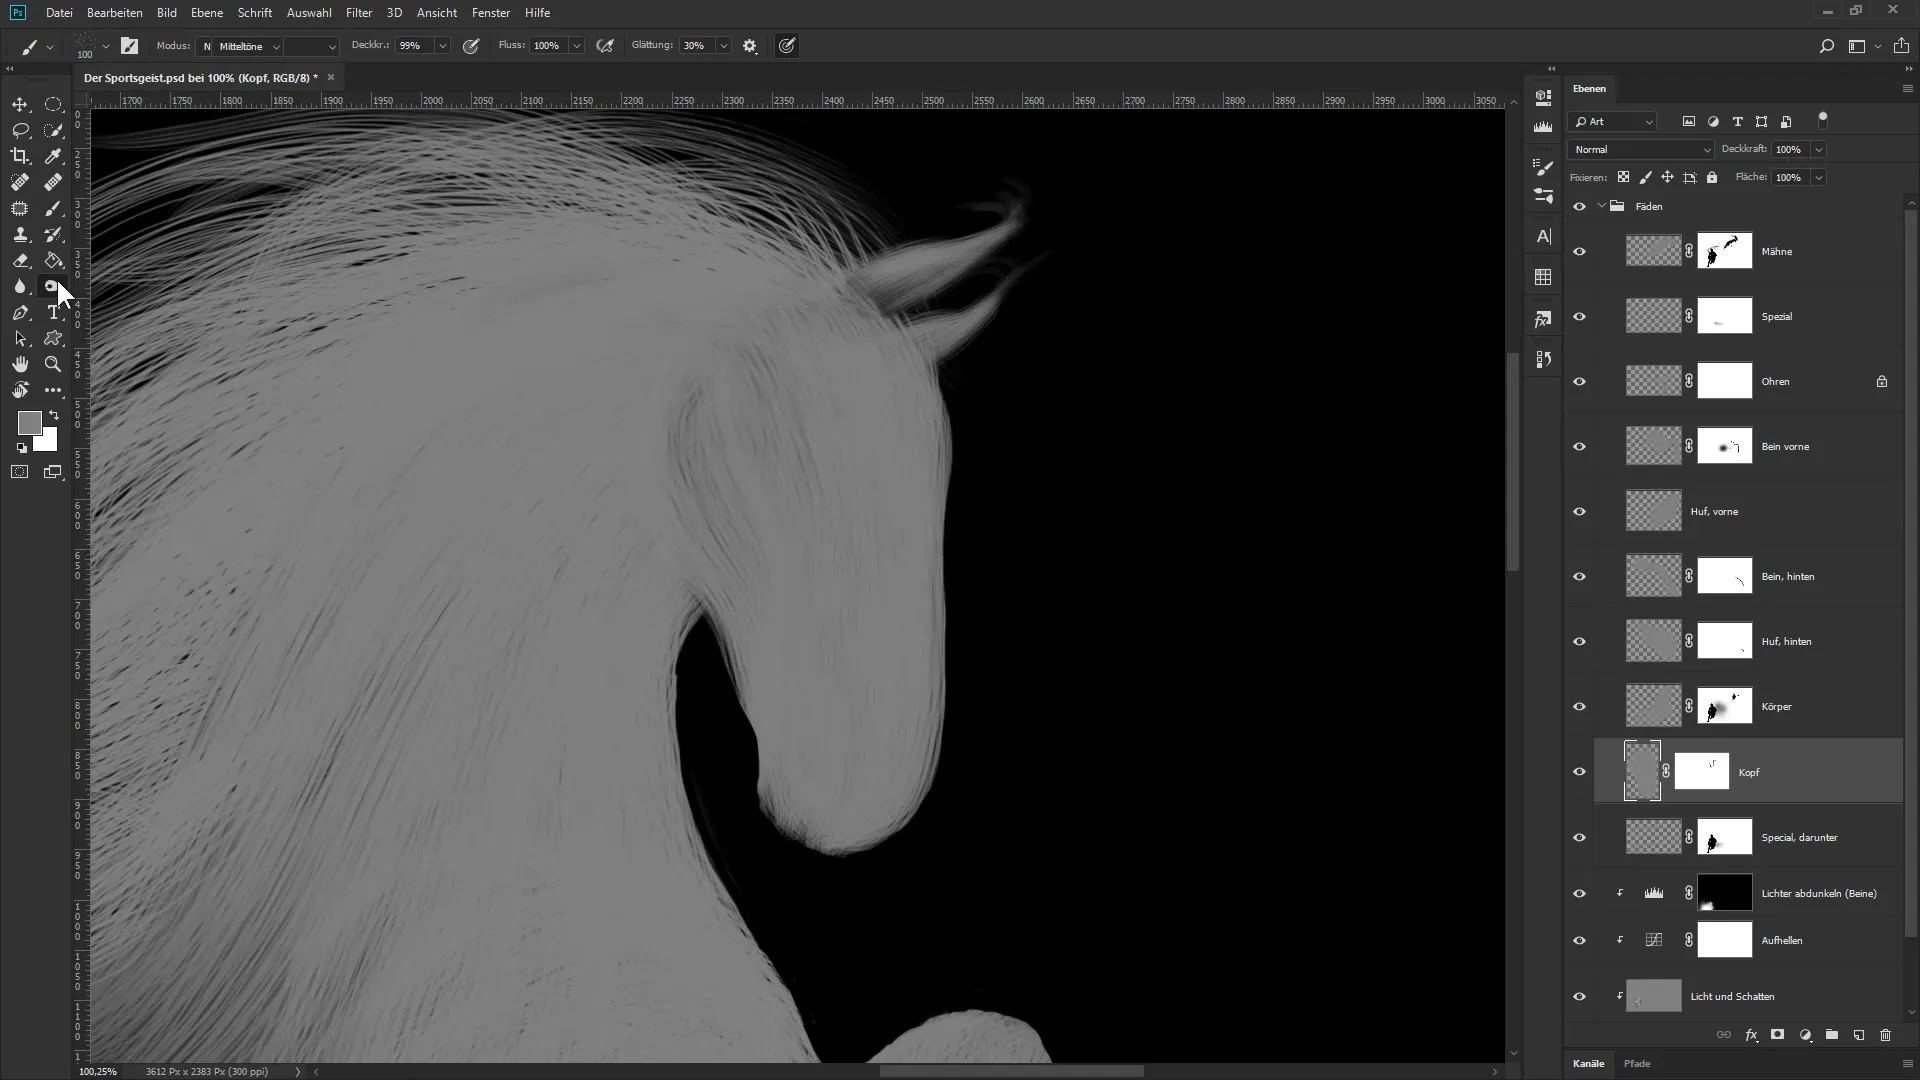
To start darkening, select the midtones and set the exposure to 2%. This is important because a higher value can quickly lead to excessive darkening, while a lower value allows for more cautious work.
Now aim for where the light should come from. In this case, we imagine that it comes from both the right and left sides. Start at the bottom near the nostrils and carefully darken areas in this region by painting over the gray. Make sure not to start with a dark gray but to darken the lighter color on the head layer.
After you have worked on the nostrils and the mouth area, you can also model the eyes. Here, it is important to work precisely. If the eyes do not turn out perfectly, do not hesitate to redraw them.
After darkening, it is important to also add the highlights. Switch to the Dodge tool and set the exposure to 18%. This way, you can bring accents into the image. Make sure to use the correct brush and purposefully paint light spots on the desired area in the image.
Return to the body of the horse. Here, you will repeat the process with the Burn tool to add shadows. This time, work larger and more effectively to model the legs and other areas.
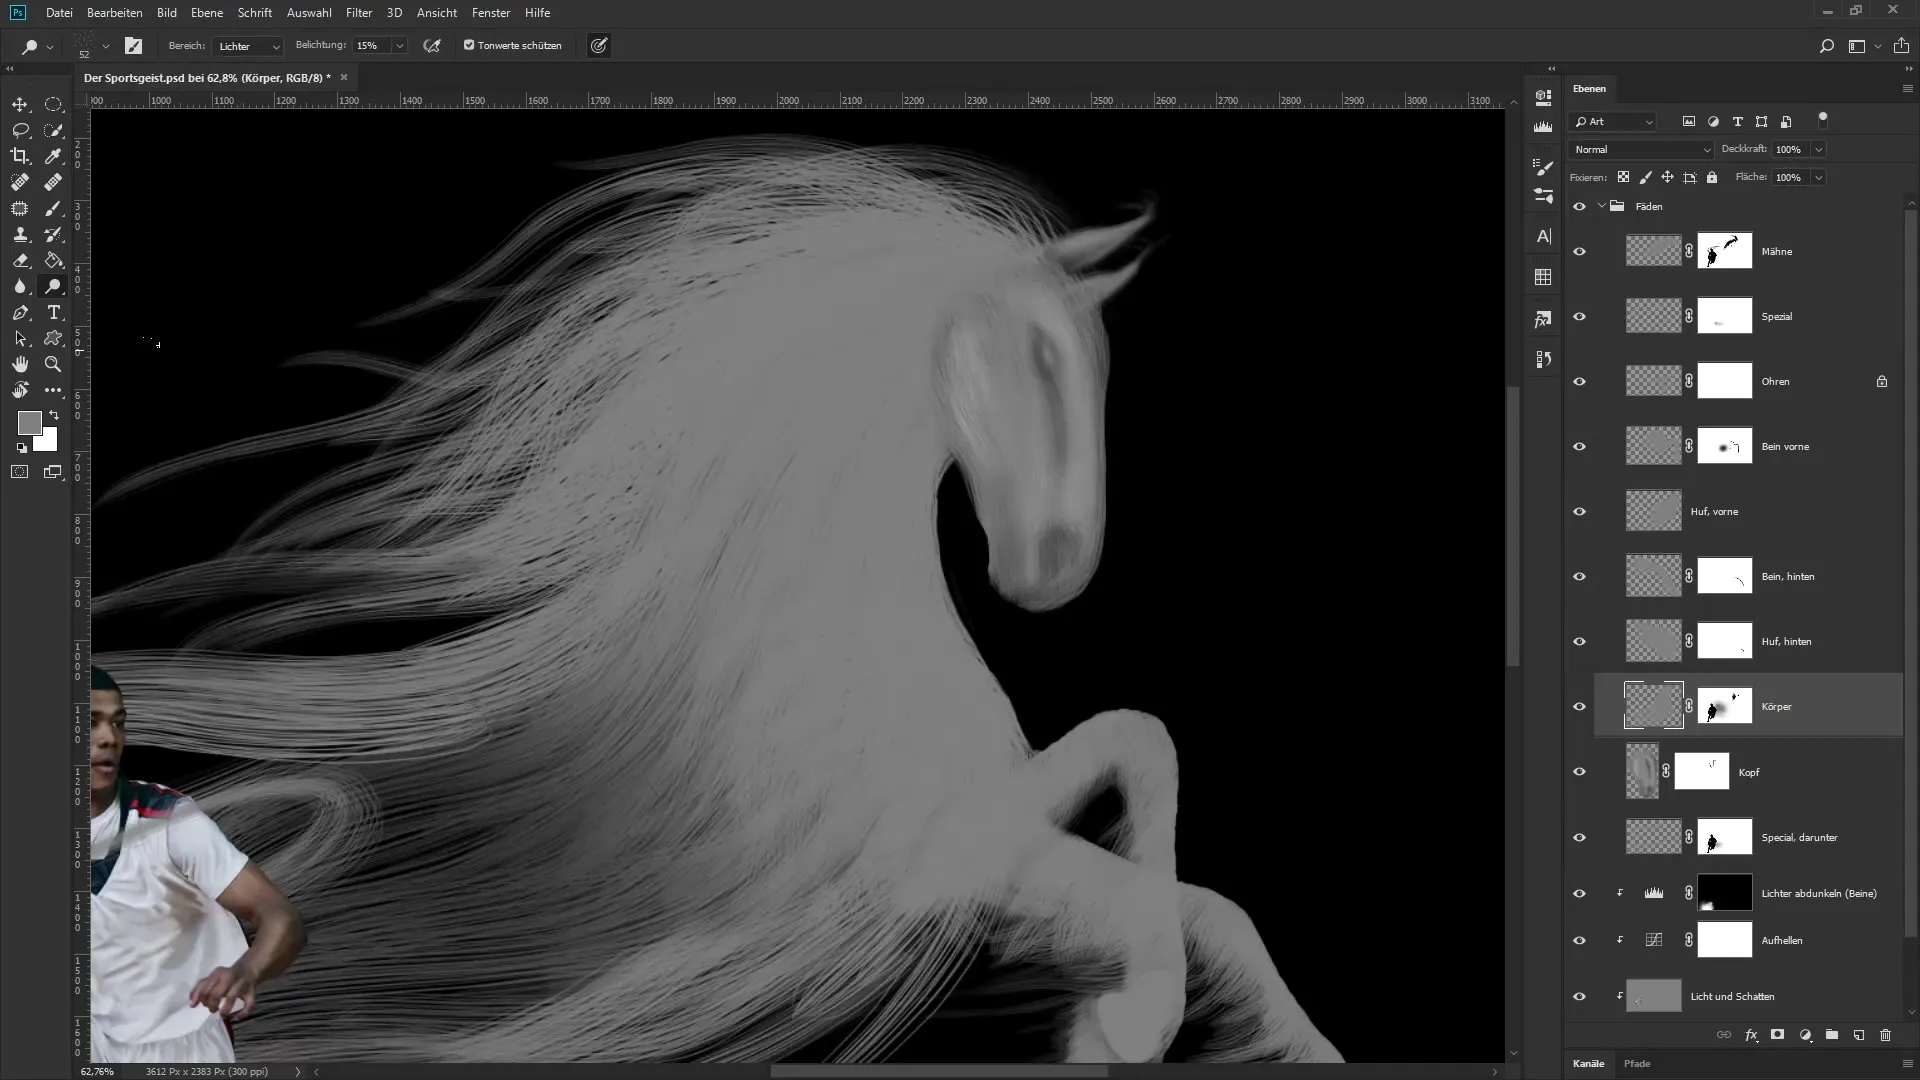
It is also worth mentioning that you are working with different layers to ensure that no areas are accidentally crossed or overworked.
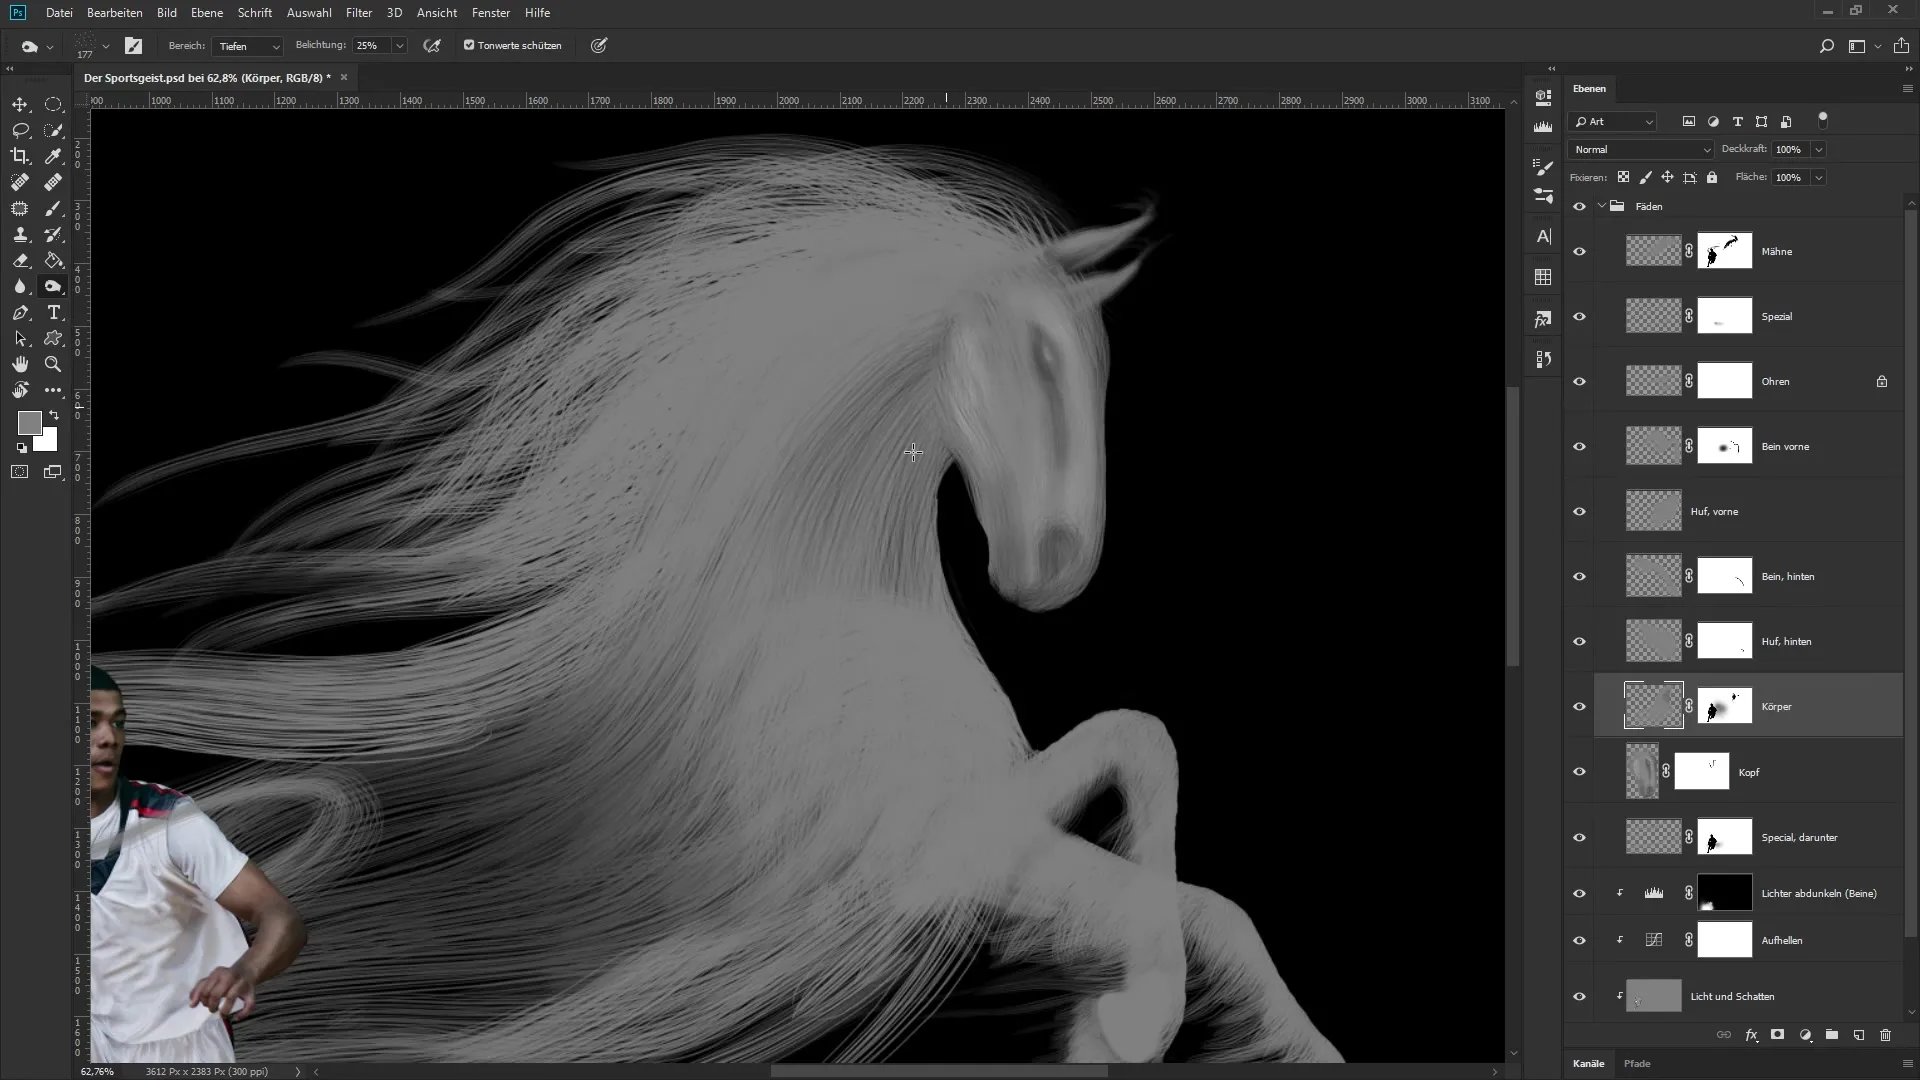
Take another look at the use of the Dodge tool and bring light into specific body parts through targeted strokes with light color. Pay attention to whether the areas become too bright or too dark. If necessary, repaint these with a medium gray color.
The next level of editing requires you to lock transparent pixels, so you can only paint over the already filled areas with color. Activate the checkerboard pattern in the upper selection for this purpose.
If you are tired from intensive work, take your time. The creative process is enhanced by care and repetition. The goal is to fully model your horse with light and shadow and to make the adjustments that you feel are best.
Summary - Creating Light and Shadow with Photoshop: The Sports Spirit
This guide walks you through the various steps to create a horse out of threads in Photoshop with more plasticity using light and shadow. With the Dodge and Burn tools and the right techniques, you can give your artworks more depth and expression.
Frequently Asked Questions
How do I choose the right brush for the Burn tool?You can select and adjust the brush via the brush palette, depending on how large or small you want to work.
How can I undo unwanted areas?The best way is to use the undo function or paint over those spots with a medium gray color.
Why is locking transparent pixels not working?Ensure that you are on the correct image layer and that this option is activated.
How can I ensure my colors appear harmonious?Experiment with different exposure values and hues to get a feel for the harmonies.
