When working with Git, changes to your project are inevitable. The ability to manage them efficiently is crucial. Below, you will learn how to integrate untracked files into your repository and what the significance of the.gitignore file is. You will learn how to add files while ignoring files that are not needed in version control.
Key Insights
- With the.gitignore file, you can exclude certain files from tracking.
- git add adds changes to the staging area, which is essential for the next commit.
- It is advisable to consider all necessary files and directories when adding, to avoid unnecessary data in your repository.
Step-by-Step Guide
Step 1: Initialize Repository
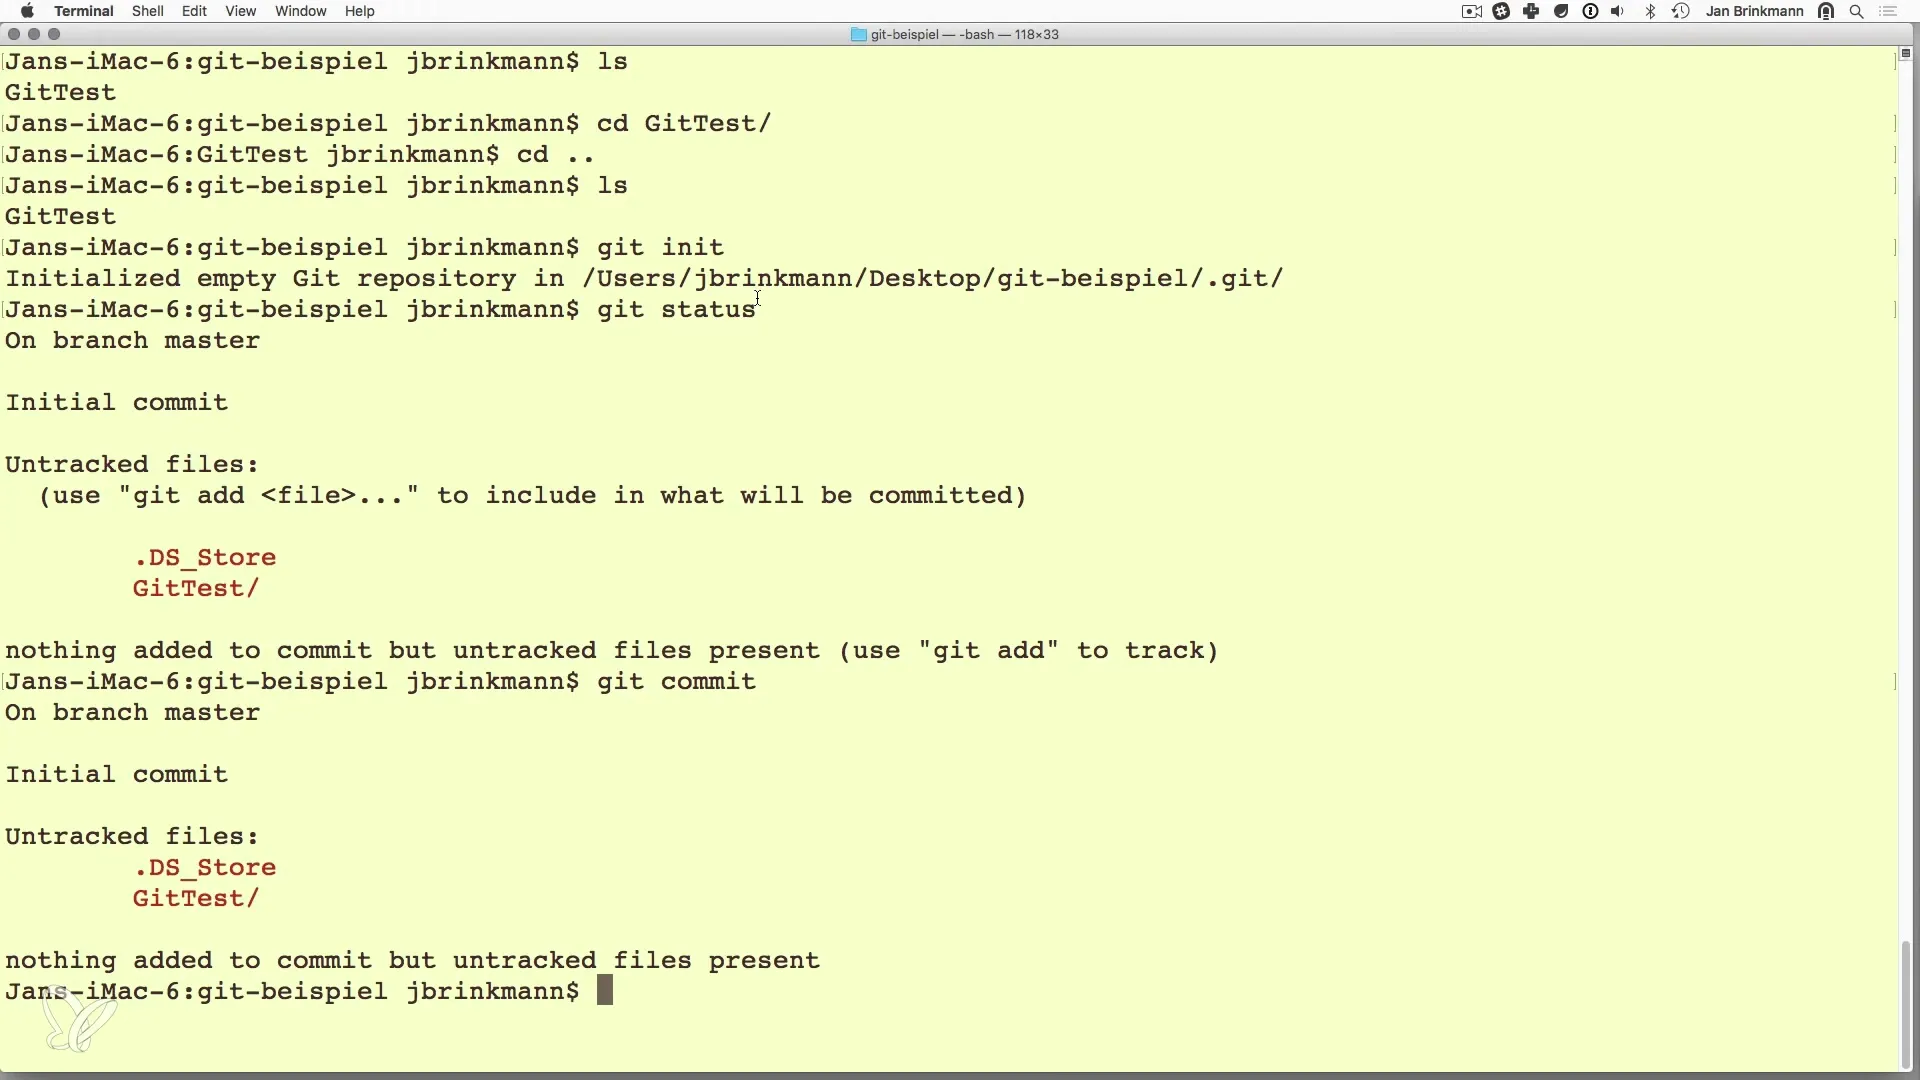
Before you can make changes, you need to initialize a new Git repository. This is done with the command git init. This creates a new Git directory in your current working directory that provides the history to be tracked.
Step 2: Check Status
Once the repository is initialized, you can check the status with git status. This shows an overview of the current state of your files. You will notice that there are untracked files, meaning files that Git has detected but have not yet been added to version control.
Step 3: Create.gitignore File
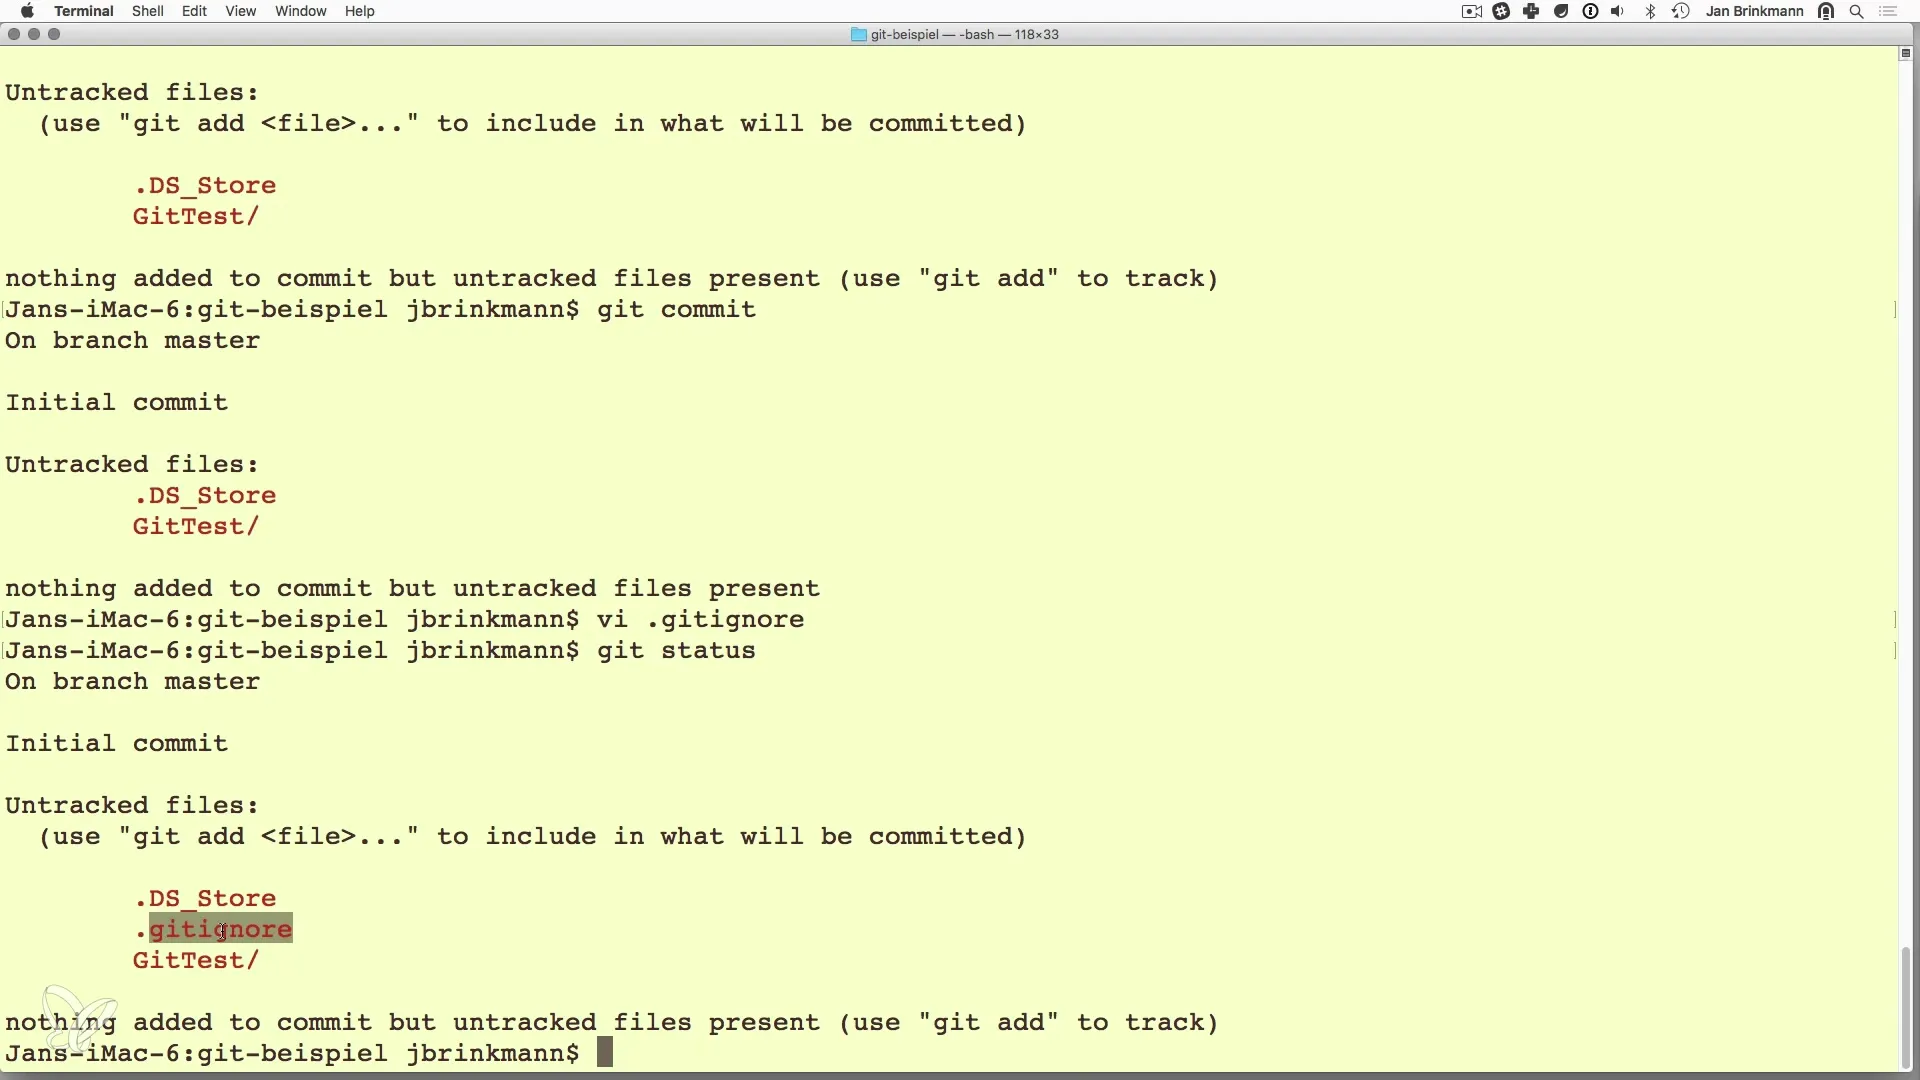
To prevent certain files from being tracked, you should create a.gitignore file. This file tells Git which files and directories to ignore. You can use the editor of your choice, such as vim, and create the file with vi.gitignore.
Step 4: Add Files to.gitignore
In the.gitignore file, you can specify specific file names or patterns. For example, you may want to exclude temporary files or configuration files for your development environment. Save the file after adding the appropriate entries.
Step 5: Check Status Changes
After saving the.gitignore file, you can run the git status command again. You will see that the files listed in the.gitignore file are now marked as ignored.
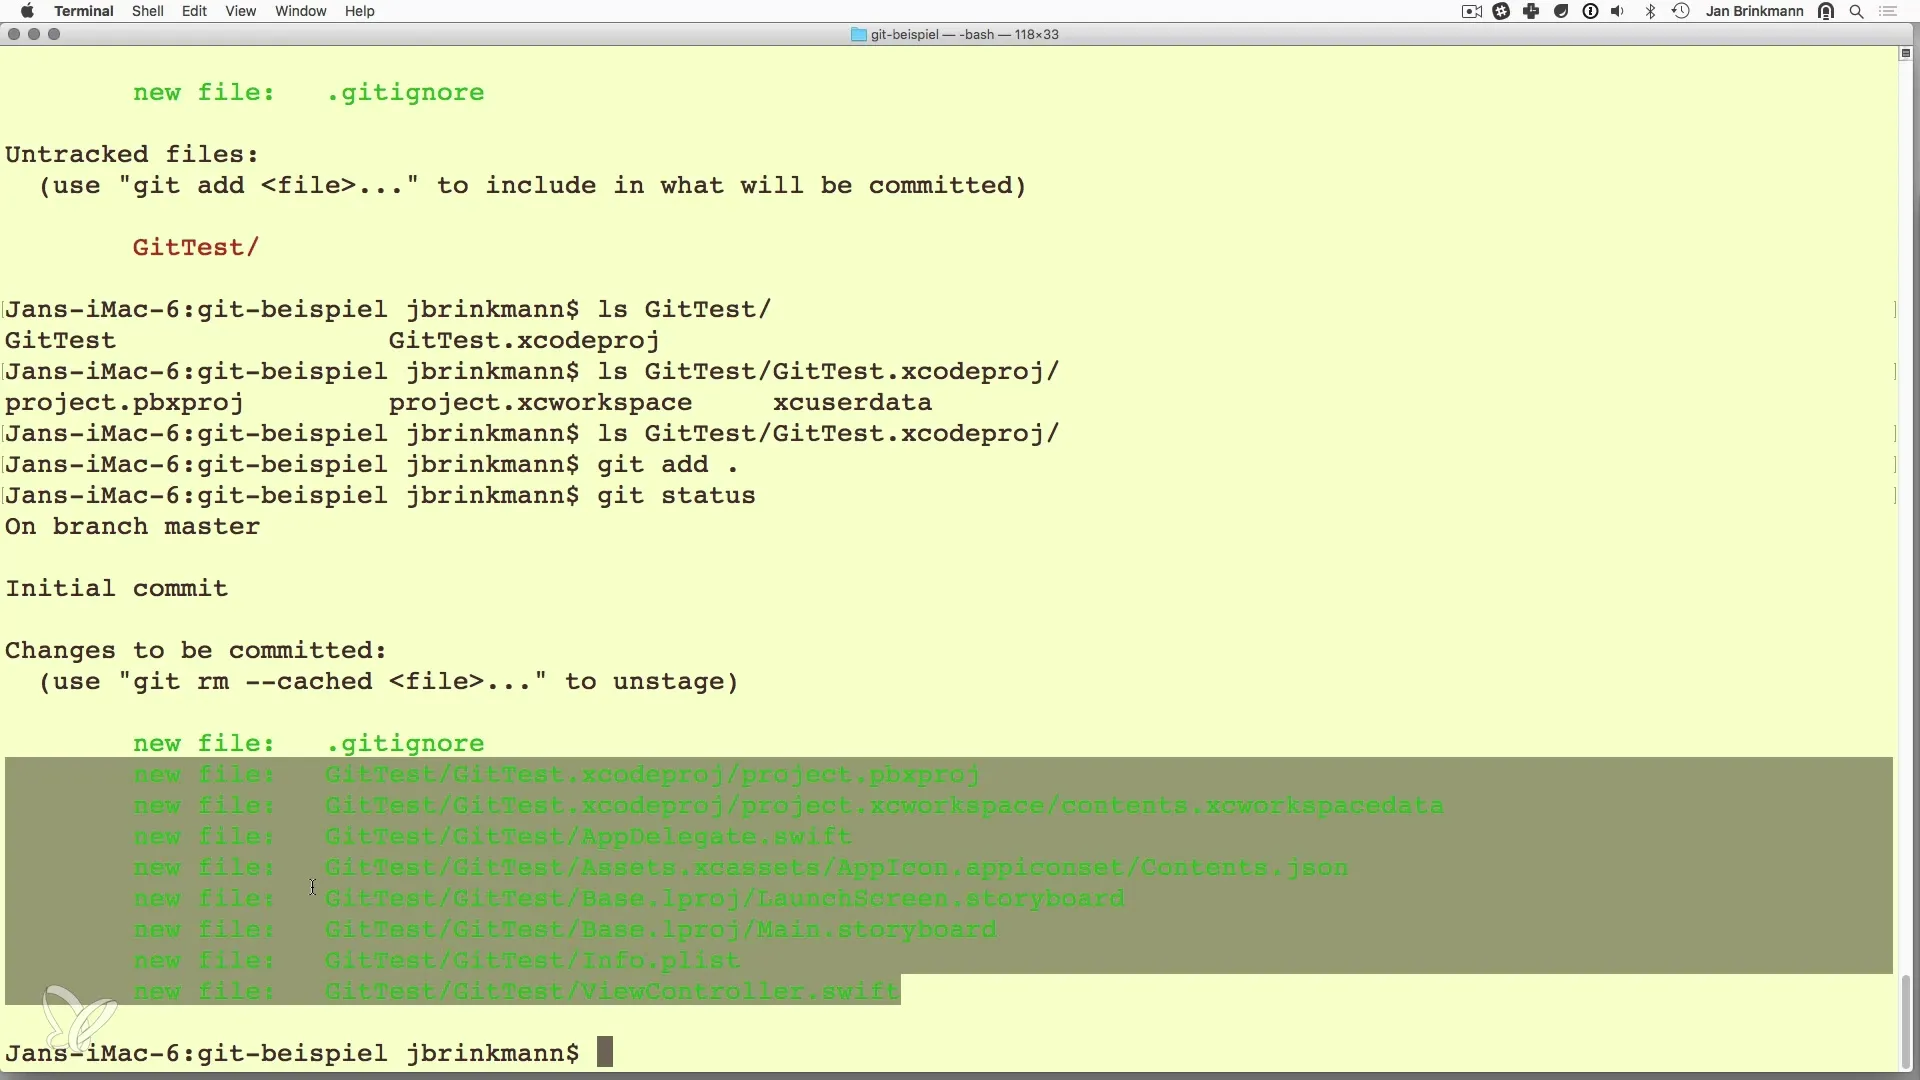
Step 6: Add Files
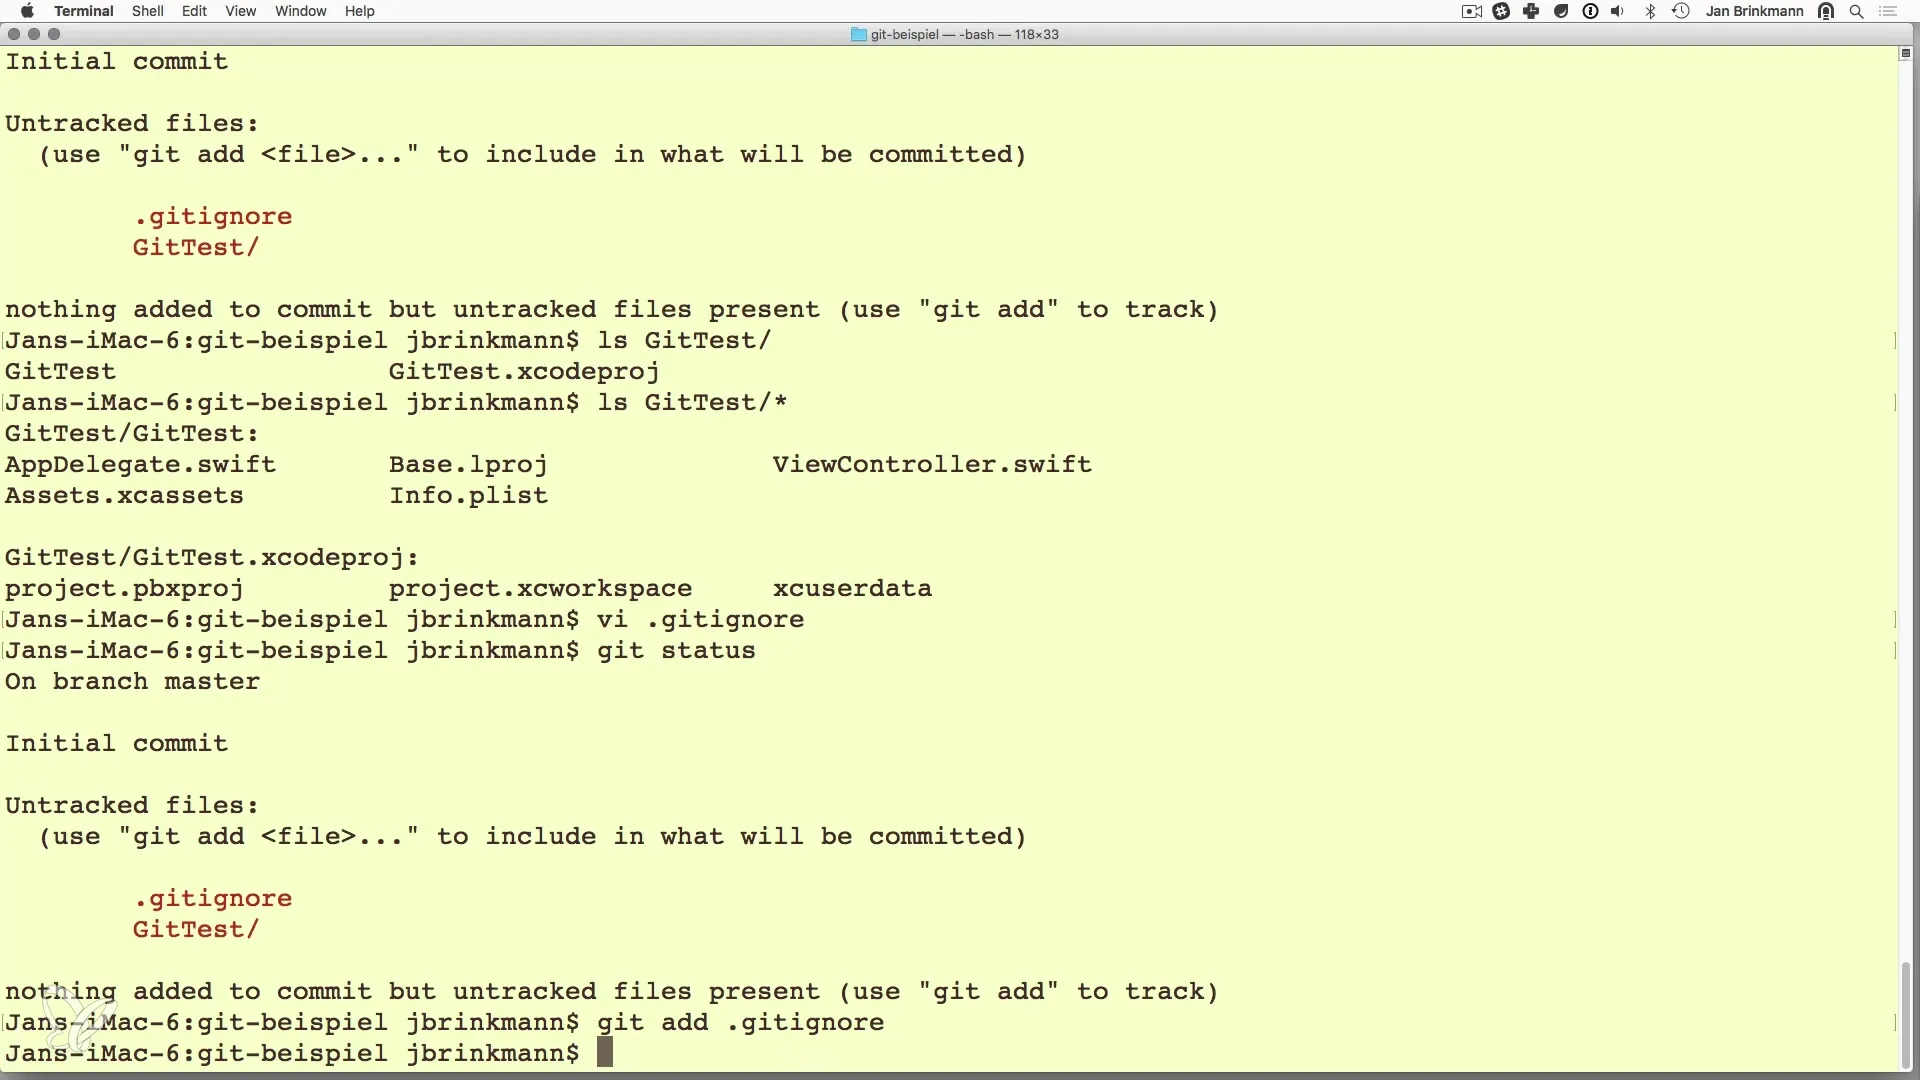
Now that you know which files will be ignored by Git, it's time to add the relevant files to the staging area. You can use git add. to add all changes in the current directory and its subdirectories to version control. Alternatively, you can also add specific files individually.
Step 7: Check Added Files
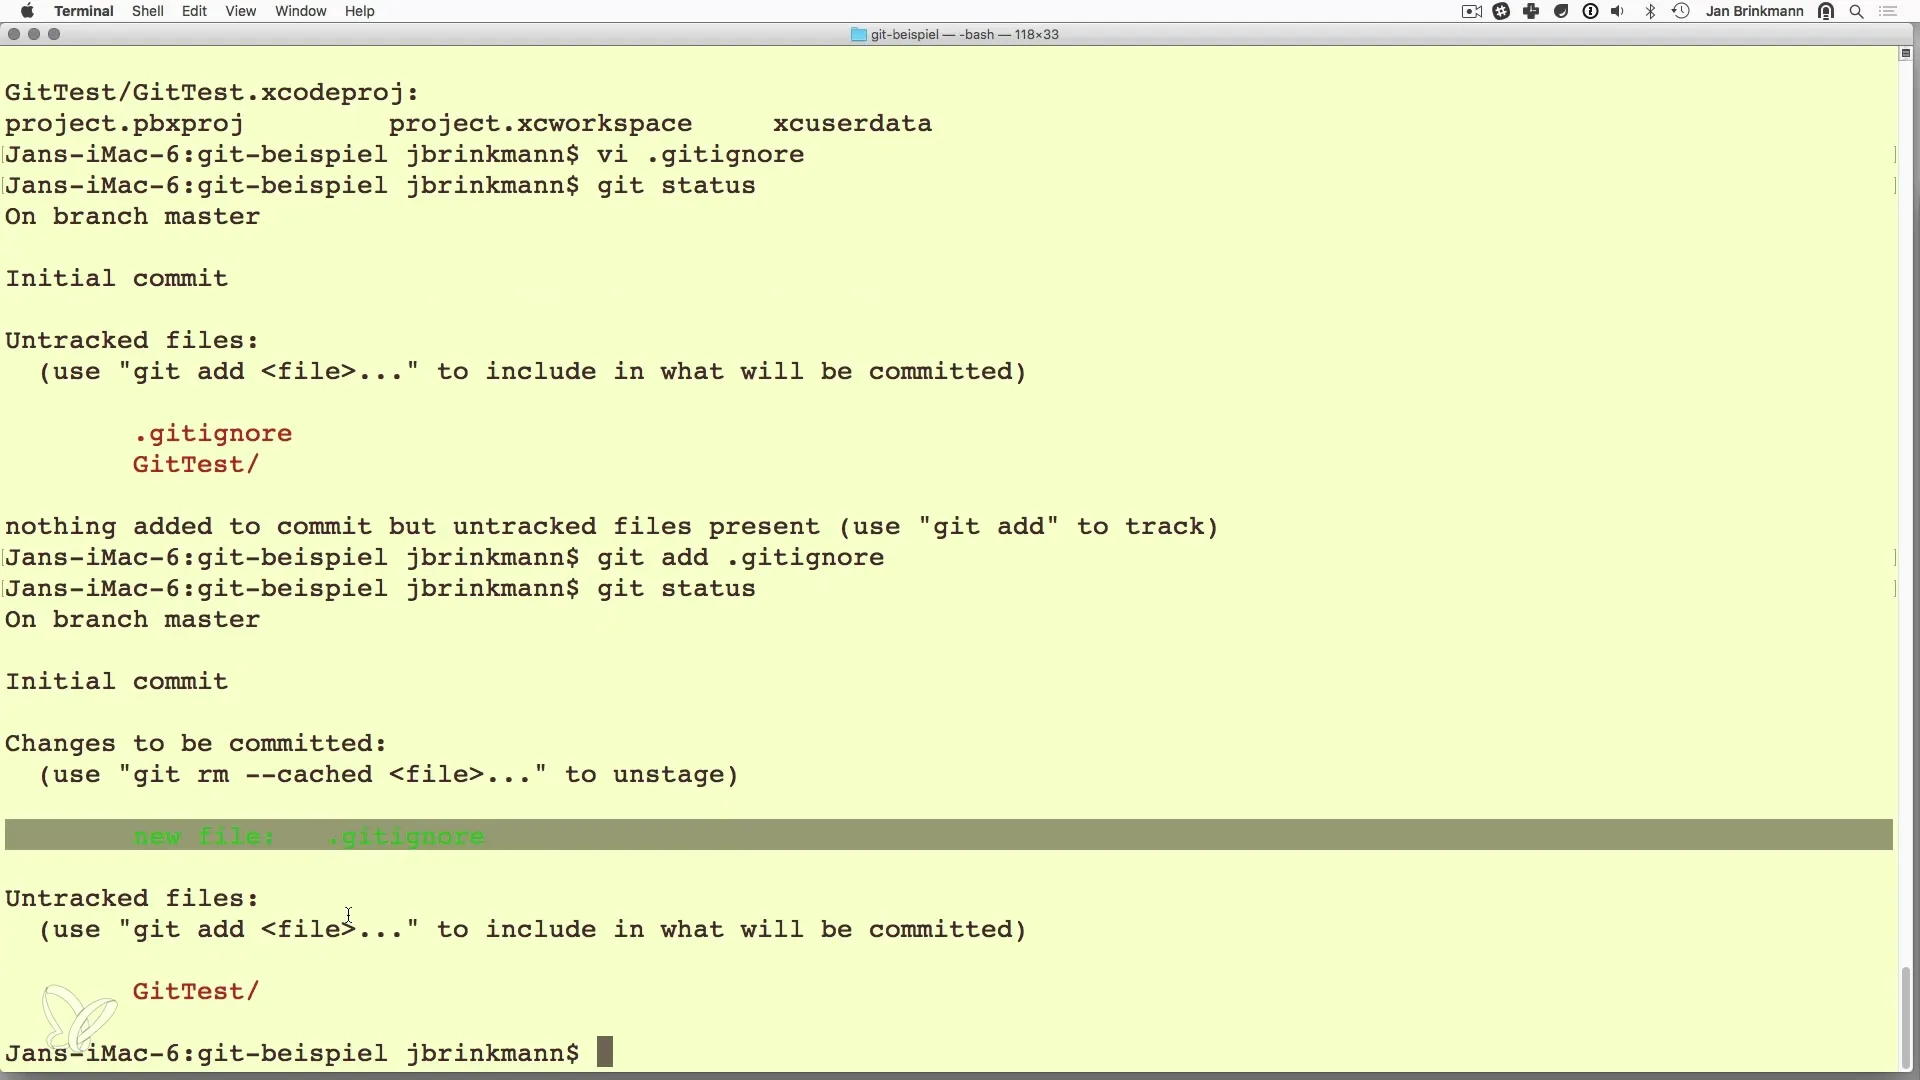
With git status, you can check which files are now ready in the staging area for the next commit. Make sure all the changes you wanted to add are displayed.
Step 8: Prepare and Execute Commit
After you have added the necessary files, the next step is to perform a commit. You do this with the command git commit -m "Your message here". This command saves all changes in the repository with a loose description documenting the commit.
Summary – Version Control with Git – Effectively Manage Changes
In this guide, you learned how important the.gitignore file is in version control with Git. By excluding certain files, you can keep your repository clean and manage only the relevant information. By using the git add command, you have control over the content of your next commit and can ensure that everything you need is properly maintained.
Frequently Asked Questions
What is the purpose of a.gitignore file?The.gitignore file lists files and directories that Git should ignore to keep the repository clean.
How can I add a file to version control?Use the command git add or git add. to add all changes in the current directory.
How do I check the status of my Git repository?Use the command git status to get an overview of current changes and the state of your files.
How do I perform a commit?Use the command `git commit -m "description"` to save your changes.


