A photo series only looks orderly when all images are the same size and have the same spacing between them. That is exactly what this tutorial is about. You will learn how to insert new pages with the correct master page in Affinity Layout, build an image series from duplicates, and arrange them cleanly using the align and distribute functions. Basic knowledge of working with rectangles and placing images will help you along the way.
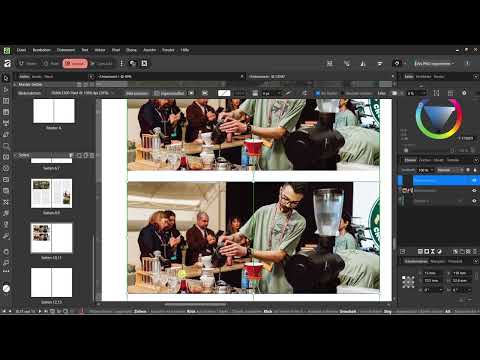
The video is only loaded from YouTube when you play it – data (including your IP address) is then transmitted to YouTube/Google. More in the privacy policy
Key Takeaways
- With a master page as a template, new pages automatically take over page numbers, text fields, and guides.
- With Ctrl+J you duplicate an object directly, without the detour of copying and pasting.
- Alignment refers to either the object, the page, or the page margin. This choice determines the result.
- You select multiple objects by holding the Shift key or in the Layers panel and align them together.
- Centering vertically usually makes no sense for images placed side by side, but it does for strips.
- Grouping helps if you want to move an image series together.
Step-by-Step Guide
Insert new pages via the master page
To add more pages, click the plus icon in the Pages panel. In the dialog you set the number; in the example it is four pages. The choice of template is important: select the master page so that page numbers and design elements are carried over directly. If you choose "none" instead, you only get empty pages with guides. You then have to insert the master page elements afterwards.

Set the position of the new pages
In the same dialog you determine where the new pages should end up. You can insert them after the current page or after a specific page number. In the example you choose "after page 9". If you chose "after page 7", the new page would come between page 7 and page 8. Check the number before confirming, otherwise the page ends up in an unwanted spot.
Readjust the master page
While trying things out, you notice that the page numbers at the new positions do not fit completely into their text fields. The two-digit numbers are too wide, which is why the digit looks cut off. To fix this, open the master page and enlarge the text field until all numbers are displayed completely. This excursion shows typical behavior: changes on the master page affect all pages that use it.

Create a rectangle as an image area
Only photos should appear on this page. To do this, first draw a rectangle with the Rectangle tool. It serves as a placeholder and determines the size you will use as a reference later.

Insert and duplicate an image
Now place an image on the page. So that all photos have exactly the same size, you do not have to scale them individually. Select the image and press Ctrl+J. This creates a copy directly. The detour via Ctrl+C and Ctrl+V is not necessary, so you save yourself a step. Repeat the process until you have the desired number, in the example three times.

Replace placeholders with your own photos
Now replace the copies with your own subjects. This makes the series recognizable as a sequence of images, and you can see how it will look later.

Find the alignment area
Click on one of the images. In the context toolbar at the top, next to the options for Vector, Pixel, and Layout, you will find the "Transform and Alignment" area on the right side. All the options for aligning are located there.

Align a single image left at the page margin
In the alignment area, select the option for left-aligned and the page margin as the reference. The image moves to the left edge of the page. The page margin serves as a fixed reference point, similar to a guide. This is especially useful when the image is smaller than the page.

Aligning images to the right
If all images are smaller than the page, it can make sense to align them to the right at the page margin. To do this, choose the right-align option and make sure to select the page margin. You choose the page margin because it refers exactly to the edge of this page.

Selecting multiple images at once
Instead of aligning each image individually, you select several objects at once. Click on one image, hold down the Shift key, and click on the other images. Alternatively, this also works in the Layers panel, where you select multiple entries while holding down the Shift key. After that, all images are selected together.

Alignment via the Layers panel
In the Layers panel, you see all objects on the page as a list. If you select all three images there, the alignment commands can be applied to the entire selection. This way, you always keep track of which objects are affected.

Centering horizontally
With the horizontal centering option, you align the selected images in the center. This is the right choice for an image series that lies side by side on the page, because the group then sits exactly in the middle.

Use vertical centering with care
Vertical centering would stack all the photos on top of each other with your side-by-side images. That makes no sense here. For an arrangement in strips stacked below one another, however, it can be exactly the right thing. So think beforehand about how your images are arranged.

Distributing for even spacing
In the "Distribution" section, you distribute the selected objects automatically. You specify what the distribution should be based on. In the example, you choose the page margin. This creates even spacing without you having to measure the positions by hand.

Centering the entire image series
Once you have aligned and distributed the series, you can move all images together to the center of the page. To do this, keep the selection active and move it. The spacing is preserved in the process.

Grouping images
If you want to treat the image series as a unit, you group the images. Afterwards, they are moved together as soon as you select one of them. You don't need grouping for this example, but it can be very helpful for larger layouts.

Summary ??? Aligning and distributing photo series evenly in Affinity Layout
You have seen how to insert new pages with a master page, duplicate images with Ctrl+J, and arrange them precisely using the alignment section. The commands for horizontal centering and distributing ensure even spacing, while grouping makes the image series movable as a unit. With these tools, every photo series looks tidy and professional.
FAQ
How do I quickly insert several new pages?In the Pages section, click the plus, set the number, and choose the master page as a template so that page numbers are carried over directly.
How do I duplicate an image without copying and pasting?Select the object and press Ctrl+J, and an exact copy is created immediately.
Why are my page numbers displayed cut off?The text box on the master page is usually too small. Enlarge it there, and two-digit numbers will fit as well.
How do I select several images at once?Hold down the Shift key and click on the individual images, or alternatively select them in the Layers panel.
When does vertical centering make sense?For images that are arranged as strips below one another. With side-by-side images, they would end up on top of each other.
What does grouping do?Grouped objects are moved together as soon as you select one of them.


