Imagine you're designing a brochure, and every photo needs to fit exactly into a predefined field, without having to start over every time something changes. That's exactly what picture frames are for. In this tutorial, the instructor shows you how to use picture frames as placeholders, load photos into them, and control the image crop independently of the frame size. You will also learn how to use frames as circles or ellipses and how to align them cleanly with text and a ruler.
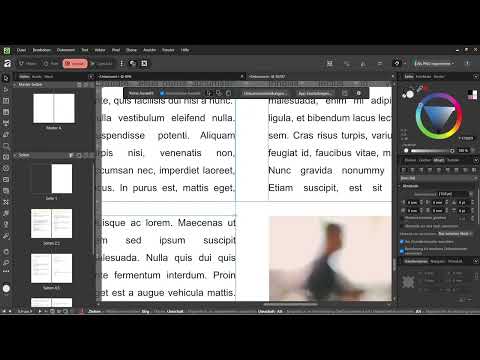
The video is only loaded from YouTube when you play it – data (including your IP address) is then transmitted to YouTube/Google. More in the privacy policy
Key Takeaways
Key Takeaways
- Picture frames act as placeholders into which you load images before the photos are even available.
- Frame and image crop can be edited separately: You can move the frame without changing the content, and vice versa.
- With picture frames, you create shapes such as ellipses or circles, which are hard to achieve cleanly by simply placing an image.
- The content fitting options determine whether the image is stretched, fitted minimally, or fitted maximally.
Step-by-Step Guide
Step 1: Why a Picture Frame Is Better Than Simply Placing
In Layout Studio, it's best to work with picture frames for images. The reason lies in the separation: The frame determines where something is located and how large it is. The image content inside can be moved and zoomed independently of that. If, on the other hand, you simply place a photo, location and image merge together. You can move the image freely, but there is no frame that holds the position and can be adjusted separately. Placing has its place in cases where you need an image in its original shape, but for layouts with frames it is impractical.

Step 2: Creating the Picture Frame
Create your placeholder by activating the Picture Frame tool with the K key. You can choose between a rectangular and an elliptical frame. Simply drag the frame across the page, ideally at the spot where the image will later be. You don't need to have a photo yet. The frame is a placeholder with which you can plan layout and spacing while the images are still missing.

Step 3: Positioning and Labeling Placeholders
Place the frame on the page the way you want it. So that you don't lose track later, label each placeholder with a text, for example "Coffee Image 1". Set this text at about 12 points and place it over the frame. This way you immediately see which motif belongs where. This is especially helpful when you have several photos in the document.

Step 4: Loading an Image into the Frame
Once the photo is available, you select the frame with the Selection tool. After that you have two options: You choose "Replace Image" and select the file, or you use the "Place" command and choose the image. In both cases, the photo adapts directly to the frame because you selected the frame beforehand. This saves you from fitting it manually.

Step 5: Designing the Frame
You control the appearance of the frame via the properties. You can round the corners if you want softer shapes, and add a border. For a clear separation from the background, a thin outline is often enough, for example one point in black. Try out different settings until the layout looks harmonious.

Step 6: Moving the Image Crop
The frame stays in place while you determine within it which part of the photo is visible. To do this, you double-click the image in the frame or hold down the mouse button for a longer time. Then you move the image content until the desired crop is visible. This is exactly where the great advantage of the separation shows: You change the crop without touching the frame.

Step 7: Setting the Content Fitting
If you want to see the complete image within the frame, you will find the right setting in the fill options. There you can switch from "Clear fill when inserting content" to "Adjust frame size to content". The available options also include "Do not scale", "Stretch to fit", "Scale to fit minimally" and "Scale to fit maximally". Try out the variants, as they change the result significantly. With "Scale to fit maximally", the frame is completely filled, although parts of the image may be cropped.

Step 8: Aligning a Layout with Columns and Ruler
Now you apply all of this to a brochure. Adjust the frames by arranging images and text blocks so that they fit together. It may be necessary to adjust the text paragraph, for example when you switch from one column to two. Activate the ruler that you displayed in the last section, and make sure that paragraphs and elements are at the same height. This way the brochure looks calm and orderly.

Step 9: Ellipses and Circles as Picture Frames
Elliptical shapes can hardly be created cleanly with simple placing. With an ellipse picture frame, however, this works without effort. While dragging, hold down the Shift key so that the aspect ratio is maintained and the ellipse becomes a circle. Alternatively, you can set the size in the Transform panel at the bottom right, for example by setting height and width to 50 mm each.

Step 10: Inserting an Image into the Ellipse
Once the circle is in place, you select the "Insert image" function and choose your photo. With a double-click you adjust the crop and move the subject until it sits correctly in the circle. In this way, you create an image element whose shape as well as crop is precisely controlled.

Step 11: Considering Layers and Legibility
Picture frames lie on layers like other objects. If you want to place an image behind a text, you move the image layer below the text layer. You must take care that the text remains easy to read. You can either give the text frame a background or reduce the transparency of the picture frame. Both can be set in the properties. This topic will be explored further in the project, but you already know the basics now.

Finally, simply create placeholders for all the images. If you already have the photos, you can insert them directly into the document. This is how your brochure takes shape step by step.
Summary – Picture Frames in Affinity Publisher: Precisely Controlling the Image Crop
Picture frames are the central tool when you want to integrate photos into a layout. They separate position and image content, so that you can adjust both independently of each other. You create placeholders before the images are ready, load the photos into them later, and control the crop with a double-click. With ellipses and circles, you create shapes that would be hard to achieve with simple placing. Once you confidently master the content options and the ruler, you will achieve a clean and consistent layout.
FAQ
Question: How does a picture frame differ from normal placing?Answer: A picture frame separates the position of the frame from the image content. You can move the frame without changing the crop, and change the crop without moving the frame. With normal placing, there is no such separation.
Question: How do I create a picture frame?Answer: Activate the Picture Frame tool with the K key, select rectangle or ellipse, and drag out the frame on the page. A photo is not required for this.
Question: How do I get an image into an existing frame?Answer: Select the frame with the selection tool and choose "Replace image" or "Place". The photo then adapts directly to the frame.
Question: How do I move only the image crop within the frame?Answer: Double-click on the image in the frame or hold down the mouse button for longer. You can then move the image content while the frame stays in its position.
Question: How do I create a round picture frame?Answer: Select the Ellipse tool and hold down the Shift key while dragging so that a circle is created. Alternatively, you can set height and width in the Transform panel.
Question: What do the content fitting options do?Answer: They determine how the image is displayed in the frame. You can leave it unscaled, stretch it to fit, scale it to fit minimally or maximally, or adjust the frame to the content.


