A photo in the right light rarely happens by chance. If you take the position of the sun, the time of day, and the weather into account when planning, you will save yourself a lot of post-processing work on the camera later. In this guide, you'll learn how to use simple apps and a clear process to plan ahead for when and where the sun will be, and how to design your shooting schedule accordingly.
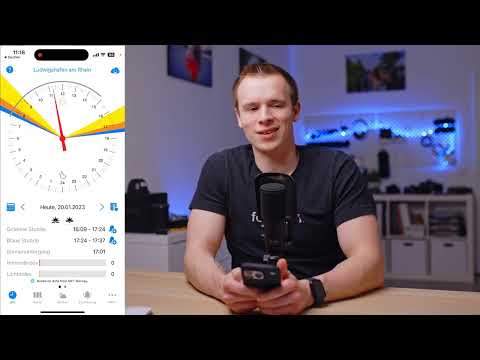
The video is only loaded from YouTube when you play it – data (including your IP address) is then transmitted to YouTube/Google. More in the privacy policy
Key Takeaways
- Light can be planned like a light source: direction, hardness, and color change with the position of the sun.
- The color of the sun becomes warmer over the course of the day. With an overcast sky it appears cooler, but it still remains present as a light color.
- Weather apps show you sunrise and sunset times. Special planners additionally show the direction of the sun.
- The season affects the position of the sun. In summer you usually have more time for the golden hour than in winter.
- The golden hour is not the only usable window. Blue hour and twilight also offer light that can be used deliberately.
- A sky with one or two clouds usually looks more interesting than a cloudless or completely overcast sky.
- Always plan a time buffer and don't rely blindly on forecasts.
Step 1: Understanding Light as a Light Source
Before you open an app, you should understand what the sun does for your image. The sun is basically a very large, very distant light source. The lower it is in the sky, the more orange its light becomes. If it shines through clouds, the light appears cooler but keeps its color temperature. Roughly 5500 Kelvin corresponds to neutral daylight, which serves well as a point of reference.
Direction and hardness come on top of that. If the sun is behind your subject, contours and a warm rim appear. Light coming in from the side models the face or object three-dimensionally. You can determine exactly these properties in advance if you know when and from where the light is coming.

Step 2: Using the Weather App as a First Orientation
The easiest way to start planning is the weather app on your smartphone. There you can see whether it is currently sunny or cloudy, when rain is expected, and when the sun rises and sets. The information is not exact, but it is perfectly sufficient for a first assessment.
Keep in mind that the sunrise and sunset times are official values. In the mountains or in valleys, the actual time can deviate by up to an hour. If you are shooting in a valley, the sun there often disappears earlier than the app shows. So plan with a reserve.

Step 3: Checking the Position of the Sun in the Planner
A weather app tells you when the sun comes, but not from which direction. For that you need a planner like Fotopilz. The app costs money, but is available for both Android and iPhone. It shows you the position of the sun on a map or in a compass. This way you can check whether your location faces in the right direction.
Imagine your location lies to the east and you want to have the sun in the background. In the planner you can immediately see at what time the sun sets in exactly this direction. Then you know that you have to shoot in this direction if you want to have it in the picture. This is initially just the theory, which you later verify on site.

Step 4: Factoring in Date and Season
The current day is often not relevant for your planning. In the planner you can change the date and have the position of the sun displayed for a later date. The position of the sun changes significantly depending on the season. In winter the sun sets further south, in summer further north, and the days are overall shorter or longer.
If you are planning for June 18, for example, you will see that the sunset comes from a completely different direction than in January. As a result, a location may work perfectly in winter but be unsuitable in summer. So always plan for the actual date.

Step 5: Aligning the Location with the Sun
Once you know the direction, you can think about how to position your subject. Often a small step to the side is enough to have the sunset exactly behind the subject. Height also plays a role: if you start earlier, the sun is higher. If you move a few meters further, the angle to the sun changes.
A park with a round or semicircular shape, for example, is well suited because you have different viewing angles on the sunset there. Plan such shifts in advance. That way you know that with an appointment on June 18 at 21:44, you will catch exactly the right moment. Still, arrive a few minutes early so you can set up in peace.

Step 6: See the sun's position on location in AR mode
Many planners offer an AR mode (augmented reality). You open your smartphone's camera and see an overlay showing exactly where the sun is at a specific time. You can change the date and immediately see that on the morning of the chosen day, the sun rises at a certain spot.
This is especially helpful if you want to take additional elements such as buildings or trees into account. You can see whether an obstacle blocks the sun and adjust your position. Sunrise and sunset change only slightly over months and years, which is why you can do such planning well in advance.

Step 7: Plan the golden hour and twilight
The Golden Hour One app shows you when which light prevails. The golden hour begins when the sky turns orange and the light from behind looks especially beautiful. Depending on latitude and season, it often lasts about 15 to 30 minutes, during which the light keeps changing its color.
After that comes the blue hour with bluish light, then nautical and astronomical twilight. So it doesn't get dark immediately, and you can also shoot during these phases. For portraits, nautical twilight is usually too dark, but for star photography or long exposures it is often perfect. The duration of the sunset depends on what you have planned, which camera you have, and how high the ISO value can be.
So plan your shoot like this: if you want to shoot between 3:30 and 5:30 p.m., for example, you can check that time window specifically with the app. The brightness changes, and some pictures become darker, others brighter. This effect can be used deliberately as a creative device.


Step 8: Check the sky and light index
The sun's position alone doesn't guarantee a good picture. The sky is also decisive. A completely clear sky often looks boring, and so does a completely overcast one. Shots usually become interesting with one or two clouds that bring color and structure into the picture. It is exactly these conditions that the sky index evaluates.
The higher the value, the better the sky is suited for photography. The light index evaluates how well the sun is visible at all through clouds or fog. If it is foggy or the sun has too many clouds in front of it, you can forget about it at that moment. The values are based on the weather report and are empirical values, not exact measurements. Still, they help you decide whether to keep the appointment or postpone it.

Step 9: Keep an eye on forecasts and wind
If you check the forecast for several days, you can often spot trends. Perhaps the sky index is high on the morning of the shoot but low in the evening. Then you can move the appointment accordingly. Many apps also show you a short description, such as broken clouds or a light breeze, which allows you to make a quick assessment.
Also pay attention to the wind. If many clouds move quickly through the frame, the light constantly alternates between bright and dark. Then you have to keep readjusting the camera, which unnecessarily slows down the process. More even conditions are generally more predictable.

Step 10: Allow for a time buffer and set the shooting schedule
At the end comes the shooting schedule. Note down the times for the sun's position, golden hour, and twilight, as well as the direction the light comes from. Also plan a buffer, because forecasts can change at short notice. It's best to arrive a few minutes early so you can check the location and set up the camera.
If you know a location well, you can even set the schedule a day in advance. You then know exactly when the sun will set, and you only have to check whether the weather fits. Also plan two to three variations for framing and position, so you can react flexibly if the lighting situation turns out differently than expected.

Summary ??? Planning a Shoot with the Sun's Position and Golden Hour
You plan a shoot by understanding light as a light source, using weather apps and sun planners, and deliberately aligning your location with the sun. The golden hour and the twilight phases offer you different lighting moods, while the sky index and light index show you whether the date is worthwhile. With a time buffer, several image variations, and a forecast for the specific day, you design your shooting schedule efficiently and are well prepared for changes in light.
FAQ
How do I find out when the sun sets?Use a weather app for the official sunrise and sunset times. In mountains or valleys, the actual time can differ by up to an hour.
Where does the sun come from at a certain time?A sun planner like Fotopilz shows you the direction of the sun's position for a selected date and time.
Why is the season important for planning?The position of the sun changes significantly depending on the season. In winter, the sun sets in a different place than in summer, and the lighting periods vary in length.
How long does the golden hour last?It depends on latitude and season and often lasts about 15 to 30 minutes. It is followed by the blue hour and twilight.
Can I also take photos after sunset?Yes. The blue hour and twilight still offer light. For portraits it is usually too dark, but for star photography or long exposures it is often ideal.
What does the sky index mean?The sky index rates how well suited the sky is for photos. One or two clouds are usually ideal, while a completely clear or overcast sky looks rather boring.
What does the light index indicate?The light index shows how well the sun is visible. In fog or dense cloud cover, the sun is often barely visible.
Can the sun's position also be checked on site?Yes. In the AR mode of some planners, you can see through the camera where the sun will be at a selected time.
Can I plan the sunrise the same way as the sunset?Yes. Sunrise and sunset follow a similar principle, just in the opposite direction. You can therefore plan both with the same tools.


