
Shortly after sunset, the sky turns into a deep blue backdrop, and the lights of the city begin to glow. This exact window of time is called the blue hour, and it is one of the most rewarding moments for urban photography. The problem: the sky quickly gets darker during this phase, while the city in the foreground often already looks too bright. So you face the dilemma of either blowing out the sky or letting the streets sink into shadow.
The video is only loaded from YouTube when you play it – data (including your IP address) is then transmitted to YouTube/Google. More in the privacy policy
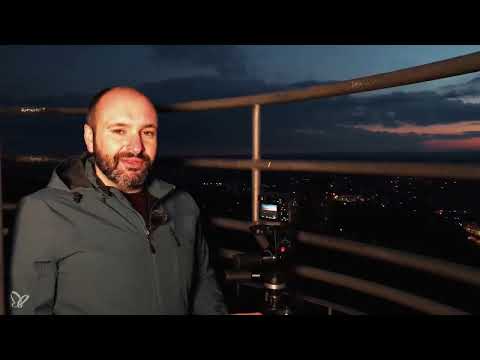
In this tutorial, Marko shows how to prepare for the blue hour and achieve a harmonious result with a graduated filter and manual exposure. You get not only the technique, but also an honest look at typical stumbling blocks from real-world practice.
Key Takeaways
A graduated filter balances the difference in brightness between the sky and the horizon before the camera captures the image. In manual mode, you keep full control over aperture, ISO, and exposure time. The histogram tells you more reliably than the small display whether highlights are being blown out. An exposure series with several variants gives you room to maneuver in later editing. And a tripod combined with the image stabilizer turned off ensures sharp shots at long exposure times.
Step-by-Step Guide
Step 1: Assess the Starting Situation Correctly
Before you attach the filter, take a close look at the sky. In the video, the upper area is already noticeably darker, but the transition to the horizon is still very wide. This is the moment when a graduated filter becomes useful. If it is already completely dark, it will hardly do anything for you. If the sky is still very bright, you have to adjust the exposure more. So make sure that the contrast between the sky and the city is clearly visible.

Step 2: Choose the Right Graduated Filter
For this situation, Marko uses a graduated filter with a transition from clear to an ND4 darkening. You should choose the strength deliberately. A strongly darkening filter quickly looks artificial, especially if the transition is hard. Marko opts for a moderate strength because he doesn't want too drastic a change. If in doubt, try different strengths and compare the results on the display.

Step 3: Align the Filter Correctly
The filter has a transparent area and a darkened area. The darker part goes on top, the transparent part on the bottom. Then you slide the filter so that the transition lies exactly where the horizon is to be darkened. Look through the viewfinder or at the display to check the position. Clean alignment is crucial, because a slanted line stands out immediately in the finished image.

Step 4: Expose Manually and Set the Basic Settings
Switch to manual mode so that the camera doesn't change values on its own. Marko chooses an aperture of 16 and an ISO value of 100. An aperture in this range provides sufficient depth of field across the entire image frame, and ISO 100 keeps image noise low. You then determine the exposure time based on the camera's suggestion and your histogram.

Step 5: Check the Camera's Suggestion and Take a Test Shot
With this setting, the camera suggests an exposure that, depending on the lighting situation, is two stops below the norm and requires a significantly longer exposure time. Trust the suggestion as a starting point, but check it with a test shot. Marko finds that the suggestion basically fits, but the lower area still looks a bit bright. A test shot quickly shows you whether you need to readjust.

Step 6: Turn Off the Stabilizer and Display the Histogram
When using a tripod, you should deactivate the image stabilizer. At long exposure times, it can generate unnecessary micro-movements that make the image blurry. Also display the histogram. The display is often set too bright in the dark and misleads you about the actual brightness. The histogram, on the other hand, objectively shows you whether the highlights are being blown out or the shadows are crushed.

Step 7: Critically check the result on the display
After the test shot, zoom into the image and check details, sharpness, and noise. Pay attention to areas with little light, which can easily become noisy. Marko points out that the small display quickly looks reassuring, but later on a large monitor it often reveals weaknesses. It is therefore worth deliberately planning in some leeway so that you still have reserves during post-processing.

Step 8: Adjust the exposure time step by step
To make the image darker or brighter, first change the exposure time. Marko reduces it from 30 to 25 seconds because the sky has meanwhile become darker and he wants to improve the balance between sky and city. Watch the histogram after each change. Only change one parameter at a time so that you can understand which setting has which effect.

Step 9: Release the shutter cleanly and avoid vibrations
Especially with long exposure times at a high location such as a tower, small movements are enough to make the image blurry. Marko therefore stands still until the shot is complete. If necessary, use a remote release or the self-timer function so that you do not touch the camera. Also keep in mind that the sky continues to change during the exposure. In the blue hour, this is a natural effect that you should factor in when selecting images.

Step 10: Create an exposure series with brighter and darker variants
Create several shots with different brightness. Marko takes a normal, a darker, and a brighter version. For the brighter variant, he first increases the exposure time but hits the limit of 30 seconds. He then raises the ISO value from 100 to 200. He justifies this by saying that the noise hardly increases as a result, while sharpness is retained because he does not have to open the aperture any further. With an exposure series, you can later choose the best variant in image editing or combine areas from different shots.

Step 11: Evaluate the finished shots
Finally, you compare the shots on the large monitor. Pay particular attention to transitions, sharpness, color cast, and image noise. Marko notices a slight haze in the middle area of the image, which however does not disturb the overall impression. Such a check is important because only on the computer do you see whether the exposure is really right. Note down settings and results, so that you can proceed more purposefully next time.

Summary – Photographing the blue hour: step by step with a graduated filter
The blue hour is a short but very rewarding window of time in which sky and city lights interact harmoniously. With a suitable graduated filter, you balance out the brightness difference between sky and horizon. Manual mode gives you full control over aperture, ISO, and exposure time. A tripod, a switched-off stabilizer, and a histogram ensure technical quality. With an exposure series and a critical evaluation on the monitor, you ultimately find the shot that you really like.
FAQ
When is the best time for the blue hour?The blue hour begins shortly after sunset and lasts, depending on the weather and season, about 20 to 40 minutes. Therefore, plan your location before dusk sets in.
Do I absolutely need a graduated filter?No, but it makes the work considerably easier when the contrast between sky and city is large. Alternatively, you can combine several exposures, which however requires more post-processing.
Why should I turn off the image stabilizer?On a tripod and with long exposure times, the stabilizer can generate its own movements that make the image blurry. Therefore, it is usually unnecessary in this situation.
What role does the histogram play?The histogram objectively shows you the brightness distribution in the image. The display often looks too bright in the dark, so the histogram is more reliable for detecting blown-out highlights.
Why am I reluctant to increase the ISO?A higher ISO amplifies image noise. If you cannot extend the exposure time any further, however, a moderate increase such as from 100 to 200 is often a sensible compromise.
Why should I take several shots?An exposure series gives you leeway for editing. You can choose the best variant or combine areas from different shots, which can give the result an HDR-like character.


