Dive into the fascinating world of night photography and discover how you can create impressive images with minimal equipment. In this tutorial, I will show you how to illuminate a large barn in the dark with a simple flashlight so that the result is breathtaking. Don't worry, even if you're just starting out, the technique of light painting will help you achieve amazing results with a bit of practice.
Main insights You will learn how to create a long exposure with a flashlight, apply various lighting techniques, and achieve creative light painting effects. The right settings for your camera are just as crucial as the technique of illuminating.
Step-by-Step Guide
1. Preparing the Camera
Set your camera to a long exposure of 30 seconds. It's important that the lens is focused on the barn to achieve the best results. You can use the light from the flashlight to do this.
2. Setting the Camera Parameters
The ISO setting should initially be set to a higher value, for example, 100, to better assess the sharpness. Set the aperture to f/8, which is a suitable compromise for most night shots.
3. Using the Self-timer
Activate the self-timer to avoid movement and shake during the exposure. This ensures that your image remains clear and sharp.

4. Test Shot without Light
First, take a test shot to see how the scene looks without additional light. Check if the barn and the background are well lit in the dark to ensure that no unwanted light sources are present.
5. Illuminating the Barn
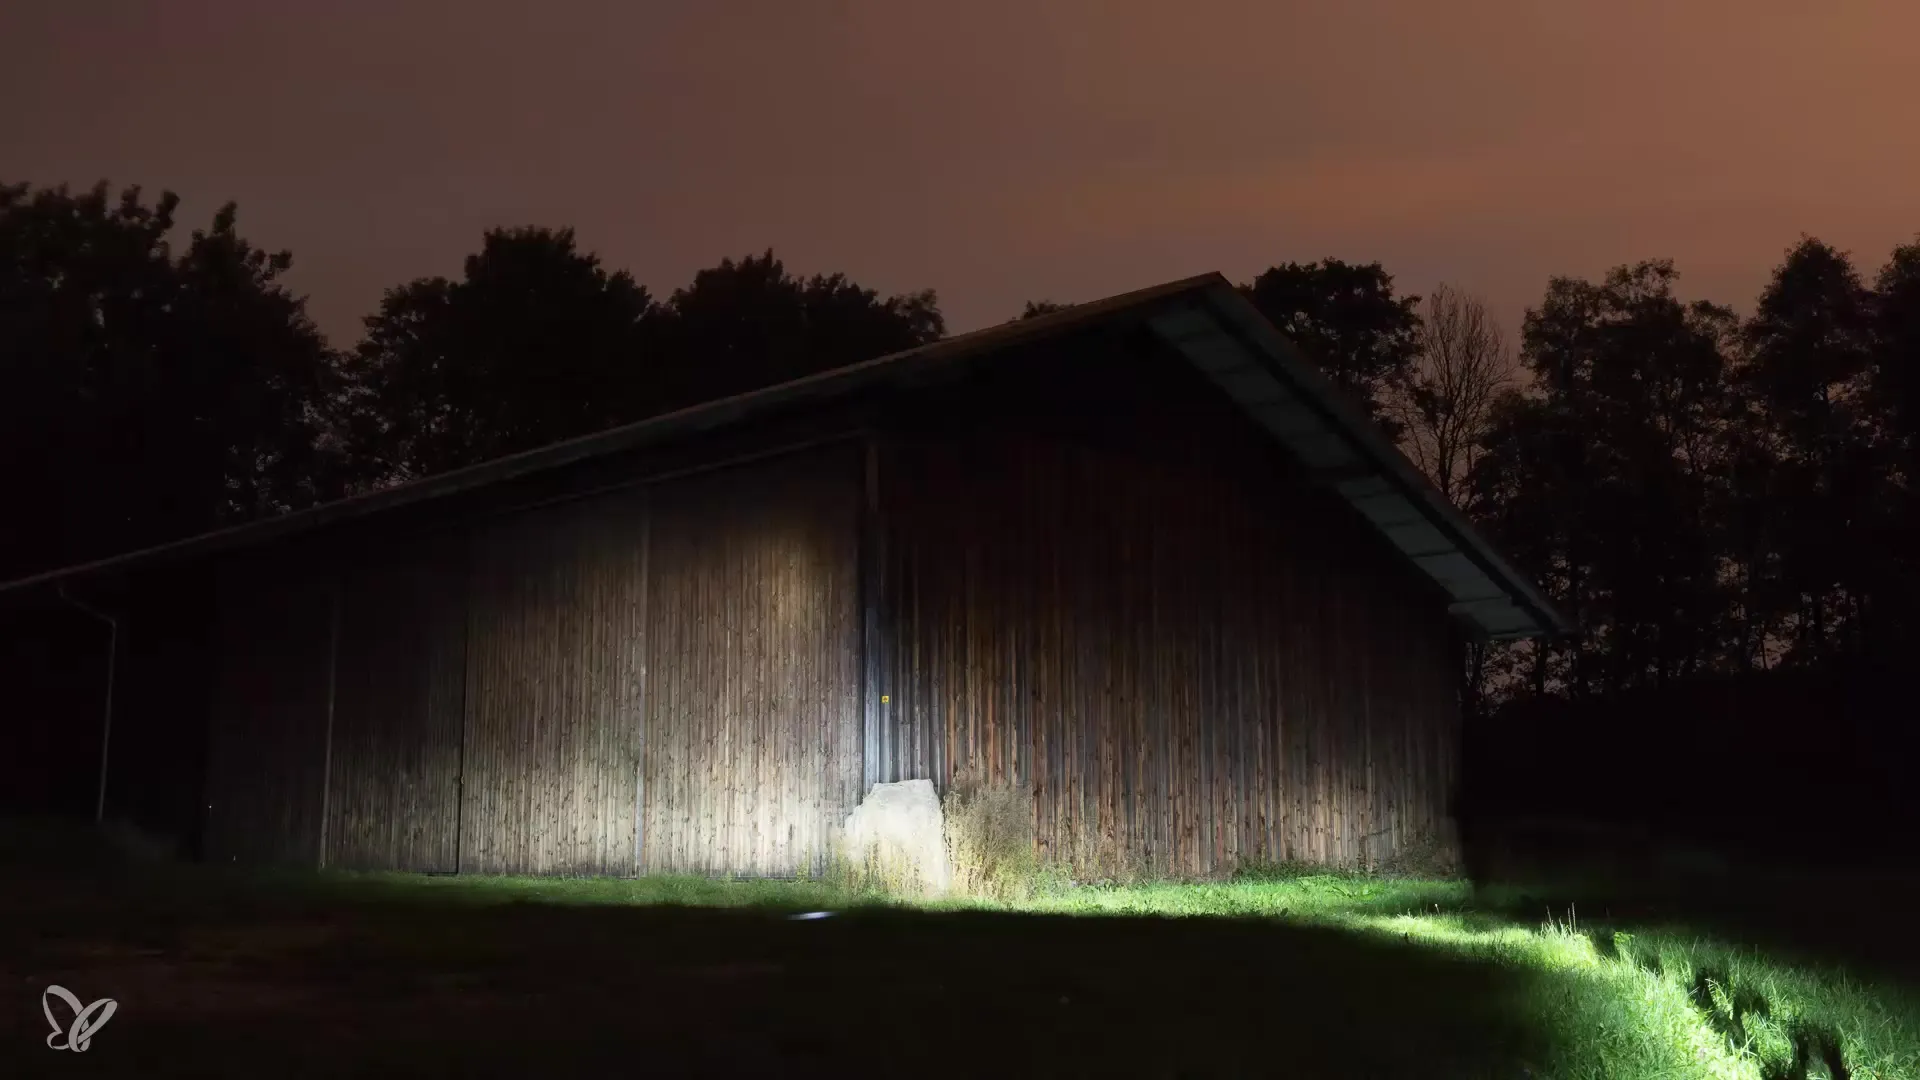
Now comes the exciting part! During the 30-second exposure time, you will illuminate the barn with your flashlight by sweeping from left to right. Use circular movements to create a softer and more even light distribution. This adds more dynamics to your image.
6. Varying the Light Source
Experimenting with the distance to the barn helps you vary the light intensity and the shape of the light spot. The closer you get with the flashlight, the smaller the spot becomes, which can lead to more dramatic effects.
7. Path to the Object
You can also get creative and lead the flashlight along an imaginary path to the barn. Only illuminate the lower area to create a mystical atmosphere and add depth to the image.
8. Evaluating the Results
Look at the first results and evaluate them. It may turn out that some areas need to be illuminated more or other adjustments are necessary to achieve the desired image effect.

9. Making Further Adjustments
If the first image did not quite meet your expectations, get back to work. Vary your location to achieve different perspectives and effects. Play with the lighting to emphasize contrasts and shadows.
10. Achieving Ghost Effects
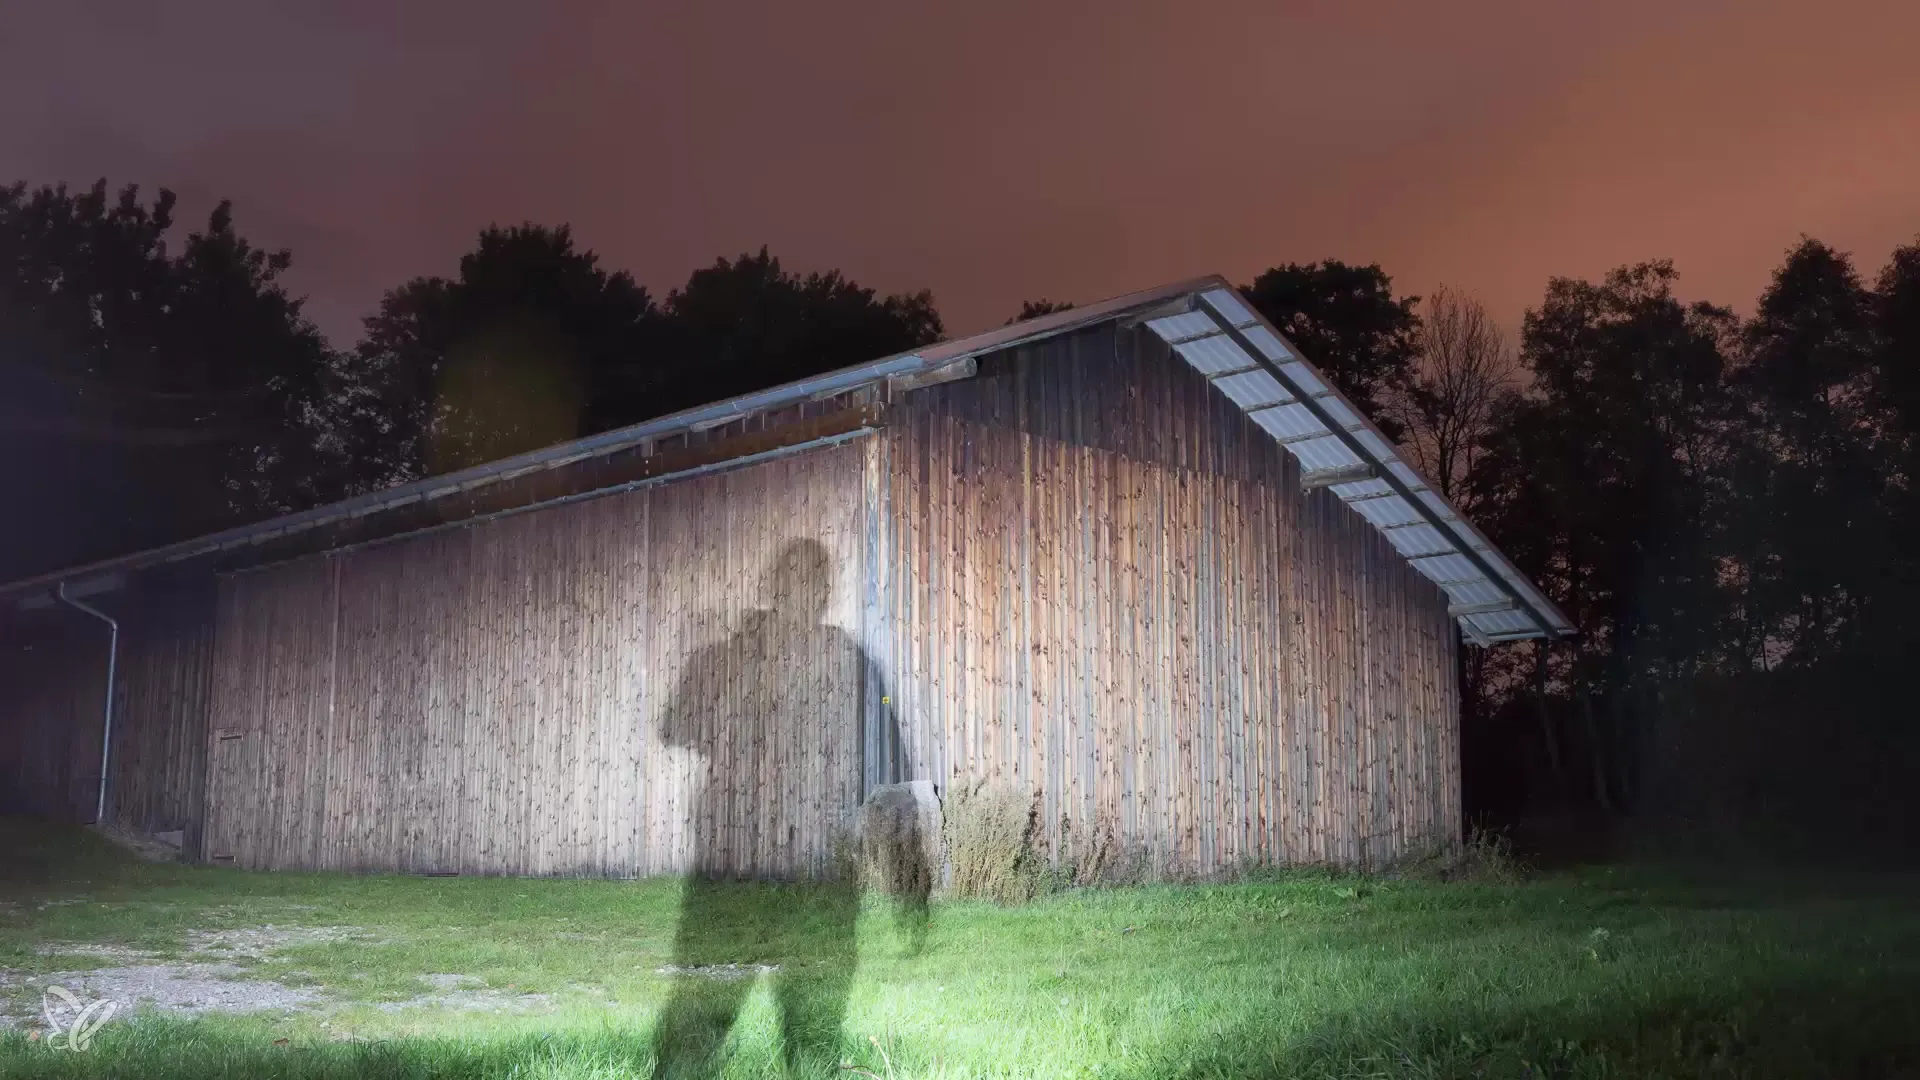
To integrate creative light painting, you can appear in the image by walking out of the frame during the exposure time. This creates interesting ghost effects that make your night photography unique.

Summary – Night Photography: How to Illuminate a Barn with a Flashlight
In this guide, you have learned how to illuminate a barn in the dark with a simple flashlight. By adjusting the camera settings, experimenting with light positions, and employing creative painting techniques, you can create impressive night shots.
Frequently Asked Questions
What do I need for night photography?A camera with long exposure option, a tripod, and a flashlight.
How do I set my camera for night photography?Use a low ISO, an aperture of f/8, and set the exposure time to 30 seconds.
How can I effectively illuminate a barn with a flashlight?Illuminate the barn during a long exposure using circular movements for even lighting.
Can I illuminate other subjects with this technique?Yes, the technique can be applied to various subjects to achieve creative effects.
Why are creative effects like ghost images interesting?They add a unique element to your photos and enhance their visual appeal.


