
Imagine an empty park bench in complete darkness. With a long exposure, a tripod and nothing more than the flashlight function of your smartphone, you can create a glowing figure there that looks as if it had just taken a seat. That is exactly what I will show you in this guide, step by step. You will get to know the right camera settings, learn why they are chosen that way, and get practical tips for focus, painting movement and light.
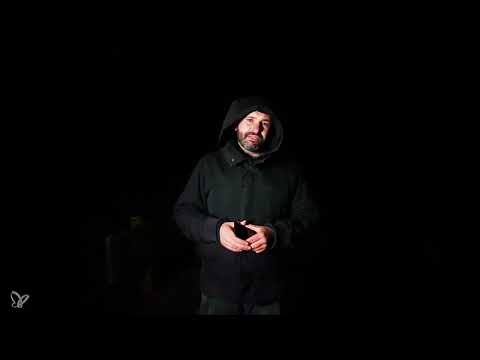
The video is only loaded from YouTube when you play it – data (including your IP address) is then transmitted to YouTube/Google. More in the privacy policy
Key Takeaways
- The camera must stand firmly on a tripod during the entire exposure.
- A closed aperture (f/16 in my example), a low ISO (100) and an exposure time of about 10 seconds are the starting point.
- The focus is set before the actual shot using a light source, since otherwise the camera cannot focus in the dark.
- The light is only switched on when the exposure starts, and stays on during the entire movement.
- The light always points toward the camera, and a small, point-like light such as the phone light produces the cleanest lines.
1. Preparing the location
Look for a place that is truly dark and quiet. A bench works well because it provides a clear outline. But watch out for disturbances: in the video, geese were startled, and they can disturb the picture or interfere with their noise. Therefore, plan enough time and make sure that nothing moves in your frame that could distort the shot.

2. Setting up the camera correctly
Set up your camera on a stable tripod and turn on the self-timer so that pressing the shutter button does not cause camera shake. Close the aperture as far as possible. On my camera, that is f/16. Set the ISO to 100 and the exposure time to about 10 seconds. This time is a guideline, because it gives you enough leeway to paint a figure in peace.

3. Why the closed aperture is important
You may be wondering why the aperture is closed so far and the exposure time is so long. The reason lies in the light itself. If you shine directly into the camera, an open aperture would scatter the light strongly. Your point of light would then become a large, blurry spot. With a closed aperture, on the other hand, a small, clearly defined point is created that can be painted cleanly as a line.

4. Using the video light for demonstration
Before you begin the actual painting, you can record the movement once with the video light switched on in order to preview the result. However, switch the light off again afterwards. As long as it is on, the image is evenly illuminated and the darkness you need for light painting is lost.

5. Avoiding reflections and setting the focus
Light-colored or shiny clothing reflects the light and causes unwanted reflections. Therefore, pull up the hood if you are wearing a jacket with a hood, and keep your clothing as matte as possible.
You have to set the focus before starting. First, roughly estimate the distance between the camera and the bench. Then point a light source, for example a flashlight or the video light, at the area where the figure will later appear. Temporarily set the ISO very high so that the subject becomes visible on the display, and set the focus manually. Afterwards, you set the aperture back to the open setting so that you can reliably check the focus. Then you close the aperture again to 16 and lower the ISO back to 100. Make sure that you do not change the focus anymore after these steps.

6. Painting the figure
Now the actual work begins. Start with the head and guide the light from there downward to the legs. Then go back along the same line to the middle of the body, then paint the arm and finally guide the light back to the head. Move steadily and calmly as you do so. Hectic movements lead to uneven lines.

7. Plan Multiple Attempts
On your first attempt, you probably won't hit the head quite right. That's normal and part of the learning process. In the video, the head was initially painted too high, and the hand only reached the head on the third or fourth try. Make a note of which parts don't fit, and adjust your movement with each attempt. For example, you can guide the legs closer to the ground or pull the arm further toward the head. With a bit of practice, you will quickly develop a feel for where the figure is located in the frame.

8. Adding Extra Light for Accents
Once the figure is in place, you can complement the image with additional light accents. In the example, the video light was placed behind the camera so that it isn't visible in the image. Its light fell on the grasses and the water in the foreground. This creates additional textures that give the image more depth. Make sure that the light only hits the areas you want to highlight.

9. Coordinating the Timing with the Lamp
On the first attempt with the video light switched on during the exposure, the figure appeared as a translucent ghost because the light illuminated the entire image. For a clean effect, you therefore proceed differently: the lamp stays off at first. You position yourself behind the camera, then switch the lamp on and use the residual light for the figure. You can also try out variations, such as letting the arms hang down. There are countless ways to design the figure.

10. The Most Important Rules for Painting
Summarize the most important points once more before your first attempt. The aperture stays closed, and the tripod must stand stable. The camera must not move during the exposure. Always point the light toward the camera and use a small, point-like light such as a phone light. Only turn the lamp on when the exposure starts, and then move in one continuous motion until the figure is completely painted. Turn the light off again afterward so that no unwanted traces appear.

Summary – Light Painting with Your Phone: Painting a Glowing Figure on the Bench
Light painting with your phone is easier than it first seems. With a stable tripod, a closed aperture, low ISO, and an exposure time of about 10 seconds, you lay the technical foundation. The focus must be set beforehand, and the light should only be switched on once you are in motion. Practice the movement several times, because the first attempts are rarely perfect. With each run, your painting movement becomes more confident, and you discover new creative possibilities for your light figures.
FAQ
Why should the aperture be closed as far as possible?A closed aperture ensures that the light is captured as a small, sharp point. With an open aperture, the point of light would become a large, blurry spot.
Why do I need an exposure time of about 10 seconds?The long exposure time gives you enough time to paint the figure calmly. It is a guideline that you can adapt to your movement and the ambient light.
How do I set the focus in complete darkness?Point a light source such as a flashlight or video light at the area where the figure will be created. Temporarily raise the ISO, set the focus manually, and then reset the settings to ISO 100 and aperture 16.
Why should I switch off the video light during the shot?A video light that is switched on illuminates the entire image and destroys the darkness needed for light painting. The result then looks like a ghost or an evenly lit subject.
Can I use a light other than the phone light?Yes, you can use any small, point-like light source. The phone light is well suited for beginners because it is readily available and handy.
What do I do if my figure doesn't turn out evenly?Practice the movement several times and make sure to paint calmly and evenly. Make a note of the parts that don't fit and adjust your movement with each attempt.


