
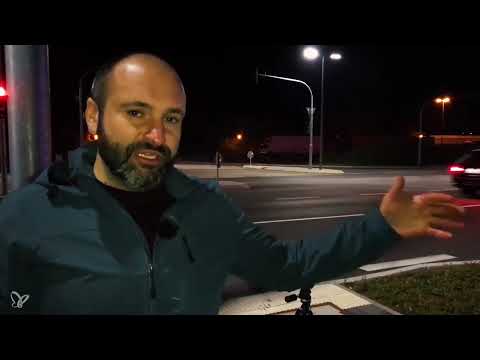
Passing cars in photos are often just blurry smears, and the hit rate for a sharp shot is low. With a long exposure, you turn the tables: The vehicles almost completely disappear, and all that remains are their headlights and taillights as glowing streaks. This is exactly what Marko shows in this tutorial at a busy intersection with a gas station in the background. You will learn how to choose the location, set up the camera, and get the bright gas station under control with an ND graduated filter.
The video is only loaded from YouTube when you play it – data (including your IP address) is then transmitted to YouTube/Google. More in the privacy policy
Key Takeaways
- An intersection with lots of traffic and varied lighting delivers the best light trails.
- Composition determines the image: Watch out for distracting elements such as signs or poles in the foreground.
- For long exposure times, you need a stable tripod, image stabilization turned off, and a self-timer or remote release.
- With a low ISO and a small aperture opening (high f-number), the exposure time can be extended.
- Bright light sources such as a gas station can be darkened with an ND graduated filter, without having to blend multiple shots.
- Patience is part of the process, because chance determines how many vehicles drive past during the exposure.
Step 1: Choose the right location
Pick an intersection or street with regular traffic. Marko chooses a place where cars, mopeds, and trucks are on the move at the same time. Walk around the spot and think about where the vehicles enter your frame and where they disappear again. Be sure to pay attention to your safety: Stay on the sidewalk or behind a barrier, and never set up your tripod on the roadway.
Try out different positions until you find a perspective in which the light trails run nicely through the image. An elevated vantage point or a slightly sideways position can show off the course of the road much better.

Step 2: Assess the light and the framing
Look at what color the street lighting has. Marko prefers the newer, whitish-cool lighting over the yellowish sodium-vapor lighting because it makes the scene look clearer and more modern. This is a matter of taste, but you should consciously choose the lighting mood before you continue.
Define the framing. Marko wants as many cars as possible on the left and the gas station on the right in the picture. So think in advance about which areas of the subject should dominate. Feel free to try out several framings before you commit.

Step 3: Determine focal length and perspective
Set the focal length as wide-angle as possible. In Marko's case, with a longer focal length the objects quickly become too close and too large, so that too little road remains in the frame. With the wide angle, you capture more of the traffic activity and the surroundings, which enhances the dynamics of the image.
Look through the viewfinder or the display and check whether the gas station and the roadway are captured evenly. Pay attention to whether the distance to the vehicles is right, so that they remain clearly recognizable as light trails in the image.

Step 4: Fine-tune the position
Often millimeters decide the quality of the image. Marko notices that a traffic sign at the top right disturbs the composition, and a pole additionally covers part of the sign. Therefore, he changes his position several times: He moves a bit to the left, then back again, and finally lowers the camera slightly.
After each change, check the image on the display. Pay particular attention to distracting elements at the edges and to making sure the horizon is level. When the image is level, you can finish the composition.

Step 5: Set the camera manually
At the beginning, you can use the program auto mode to get an impression of the exposure. For the actual long exposure, however, you switch to manual mode. Set the exposure time to 30 seconds, because that way you collect as many light trails as possible in the image.
Set the ISO as low as possible, in the example to ISO 100. This results in less image noise. Also choose the highest possible f-number, that is, a small aperture opening, in the example f/16. Then look at the camera's display to see whether the exposure suits your subject. With very bright ambient light, the image may still be overexposed despite everything, which you will solve later.

Step 6: Prepare the tripod, stabilizer, and shutter release
As soon as you expose for longer than a few seconds, a wobbly stance is no longer enough. Set up the tripod firmly and securely before you begin. Turn off your camera's internal image stabilizer, because with a stably mounted tripod it can even make the image blurry.
So that you don't accidentally shake the camera when pressing the shutter button, use the self-timer or a remote release. With the self-timer, you wait a few seconds until the vibration has subsided before the shot starts.

Step 7: Start the shot and be patient
Start the shot and wait until the exposure time has elapsed. The number of light trails depends heavily on chance. Marko is unlucky: the traffic light just switches to red, and so only a few vehicles are in the picture. He therefore takes several photos in a row until the result is right.
So plan enough time and watch the traffic. Traffic light phases, rush hour, and evening hours usually bring more movement onto the road. A remote release or an interval timer makes your work easier if you want to take several shots in a row.

Step 8: Darken the gas station with an ND graduated filter
The biggest problem in the example is the heavily overexposed gas station on the right side of the image. At ISO 100 and aperture f/16, you can't reduce the exposure any further, because you are already using the smallest aperture opening. You have two options: a darker single shot of the gas station, which you later blend with the main image, or a filter directly in front of the lens.
Marko decides on the second approach. He puts an ND graduated filter in front of the camera and places the dark part of the filter over the gas station, while leaving the left area of the image unaffected. This tones down the right side without the road losing brightness. When rotating the filter, make sure that the transition line does not become visible.
In addition, Marko shortens the exposure time to 20 seconds. This is a compromise: a shorter time reduces the brightness, but lets fewer vehicles into the shot. With a 20-second exposure, enough cars still drive through the frame.

Step 9: Post-process the result
After the shot, you can fine-tune the brightness in an image editing program such as Lightroom. Marko shows that a significantly better result can already be achieved with the graduated filter, without you having to do much compositing or multiple-exposure work. A few adjustments to highlights, shadows, and contrast round off the image.

Summary – Photographing light trails in road traffic: step by step
With a long exposure, passing cars can be turned into impressive light trails that make a dynamic image out of any street scene. For this you need a busy location, a suitable perspective, a low ISO, a small aperture opening, and a stable tripod. With an ND graduated filter, you combat disruptive overexposure in bright areas. And as Marko shows, a bit of patience is also part of it, because the traffic ultimately helps decide what your image looks like.
FAQ
What exposure time is suitable for light trails?For many traffic scenes, 20 to 30 seconds is a good starting point. Longer times bring more light trails into the image, but also make the scene brighter.
Why should I turn off the image stabilizer?On a tripod, the stabilizer can create unnecessary movements and worsen sharpness. When the camera is stationary, it is therefore usually unnecessary.
What does an ND graduated filter do for this shot?It darkens only part of the image, for example a blown-out gas station, while the rest remains unchanged. This way you prevent overexposure without shortening the exposure time any further.
Why are there sometimes hardly any light trails in the image?That depends on the traffic during the exposure. Red lights or quiet phases lead to few vehicles. Several shots in a row increase the chance of a good result.
Why is the ISO setting so important?A low ISO produces less image noise. Since you have plenty of time anyway with long exposures, a high ISO is not necessary.
Is working in road traffic dangerous?It can be. Always stay on the sidewalk or behind a barrier, don't place anything on the roadway, and pay attention to the traffic around you.


