

Imagine you have a simple poster in front of you with just one word and a patch of color, and you want to turn it into something that radiates quality. That is exactly where this training comes in. Stefan Riedel shows you how textures are used in graphic design, and in the process recreates a Barcelona poster with a golden finish. You work with blend modes, clipping masks and layer masks, that is, with tools that go far beyond simply inserting images.
The video is only loaded from YouTube when you play it – data (including your IP address) is then transmitted to YouTube/Google. More in the privacy policy
The guide follows the flow of the video. You start with the document, set up the background and typography, and work your way through metal, gold and feather textures up to the vignette. You need basic knowledge of Photoshop, for example in working with layers and the brush tool. The Helvetica Neue font is used in the video, but it is not essential for the technique.
Key Takeaways
- Textures only work through targeted limitation. With clipping masks, you apply them only to specific elements such as text or circles, and the design gains precision.
- Layer masks allow you to take areas back again without permanently deleting pixels. This applies equally to vignettes, crops and highlights.
- Blend modes such as Screen remove black values from textures. This way, even feathers or dust textures that have not been cut out can be used cleanly.
- Complex selections are created via a layer's thumbnail. With Ctrl-click you get the shape of the layer as a selection, which you can then invert.
- Restraint creates a lot of impact. Textures, shadows and highlights should be used sparingly so that the design stays calm and high-quality.
Step-by-Step Guide
Step 1: Create the Document
Create a new working file. In the video, a format of 2397 x 300 pixels at 300 ppi is used. These dimensions come from the Instagram format and are just an example. Choose the size that suits your project. For the training, however, you can use the same dimensions.

Step 2: Create the Background as a Color Fill Layer
Create a color fill layer at the very bottom. Via the adjustment layer icon, choose Solid Color and enter the hex code 1e1e1e. The advantage of a color fill layer over a normal color area is that you can adjust the color at any time later via the layer. Then lock the layer so that you don't accidentally move it while working.

Step 3: Place the Lettering
Above the background, set the word "Barcelona" as text and adjust the size. You can choose any other word. What matters is which word you want to emphasize in particular.

If you set very large font sizes, Photoshop often responds sluggishly. So reduce the text a little, right-click it and choose Convert to Shape. The font is thereby converted into paths, can be scaled conveniently and puts less strain on the computer. Returning to editable text is no longer possible afterwards. So make sure your text is already final before you carry out this step.

Step 4: Use a Bronze Texture as the Background
For the texture, you turn to a provider such as tutkit.com, where you search for keywords like "Bronze" and download suitable packs. Drag and drop a suitable texture directly into your document. In the video, a bronze gradient texture is used.
The texture can be reduced in size with Ctrl and Minus. To enlarge it proportionally, hold Shift and Alt and drag a corner. Then align it so that it completely covers the edges of the document. You can show and hide the guides with Ctrl and the comma key.

Step 5: Darken the Edges with a Layer Mask
For a subtle edge darkening, you use a layer mask. Choose the Elliptical Marquee tool and set a feather of 200 pixels. Drag an ellipse over the center of the document so that the edges lie outside. Then click the layer mask icon at the bottom of the Layers panel. The texture is now darkened at the edges, while the center stays bright. If the effect isn't strong enough for you, you can duplicate the layer with Ctrl and J.


Step 6: Add dirt and texture with brush splashes
To make the design look less sterile, you add texture. To do this, create a new layer and select the Brush tool. If you don't have suitable brushes, you can download them online. Grunge brushes or watercolor splatters, for example, are suitable. Set the color to black, since it will be changed later by a gradient overlay anyway. Place individual blotches deliberately and sparingly. You can also adjust the intensity with the opacity.

To color the brush blotches, right-click the layer to open the blending options and choose a suitable gradient. In the video, a gradient is used that already exists in the layer. Then confirm the setting.

Step 7: Apply the gold texture to the lettering
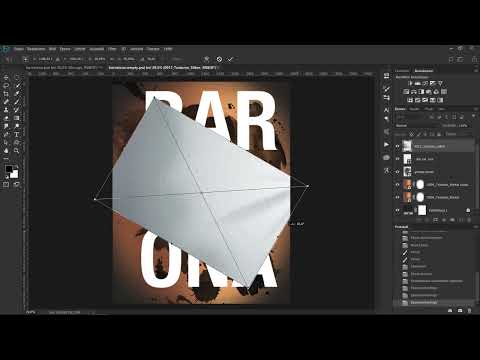
Now make the text layer visible again in your document and add a silver or gold texture above it, for example from a metal pack. Insert the texture via File > Place Linked, rotate it, and position it so that it completely covers the text box.

The crucial step follows: Hold down the Alt key and click between the texture layer and the text layer. The cursor changes, and the texture is applied as a clipping mask. From now on it appears only on the letters. You can make the outline of the lettering visible by Ctrl-clicking the thumbnail of the text layer. Afterwards, deselect with Ctrl and D. This look is reminiscent of brushed silver or stainless steel.

Step 8: Create circles with the Shape tool
You create the circles around the lettering with the Shape tool. Select the Donut shape there. Drag it out while holding the Shift key so that it is uniform. The guides help you position it precisely. Then copy the donut with Ctrl and J and move the copy so that the circles overlap. Make sure that a narrow gap remains between the two circles. This spacing is important for the later effect.

Step 9: Fill the circles with gold textures
Place two different gold textures over the circles. In the video, two textures with different structures are used so that the circles differ from each other. Here too, you apply a clipping mask each time by holding down the Alt key and clicking between the texture and the circle. Move the texture within the mask until the circles are filled properly. Make sure not to miss any spots.

A texture can, however, look too glaring. In that case, add a Vibrance adjustment layer as a clipping mask on the texture and reduce the value. The gold then looks softer and more uniform.

Step 10: Add a drop shadow
For more depth, the upper circle gets a drop shadow. Open the blending options with a right-click, select Drop Shadow, and set the opacity to about 70 percent, the angle to 103 degrees so that the light comes from the top left, and the distance and size to roughly 22 to 24 pixels. Then copy the layer style with a right-click and paste it onto the lower circle.

With this many layers, the Layers panel quickly becomes cluttered. Therefore, select all layers belonging to the circles while holding the Shift key and press Ctrl and G to put them into a group. Give the group a meaningful name, for example "Circles".

Step 11: Cropping the Lettering
To make the poster look more dynamic, individual letters are cut off at the edges. To do this, create a layer mask for the layer in question. Choose a round, hard brush with full opacity and paint with black over the areas that should disappear. However, this approach is only of limited suitability for clean edges.
A simpler way is to use a selection of the lettering. Hold down the Ctrl key and click on the thumbnail of the text layer. The shape of the letter is then loaded as a selection. If you now paint in the mask, the brush only works within this selection. This way, for example, the upstroke of the A can be masked out precisely.

If part of the line should remain as a shadow, work with an inverted selection. Select the shape of the upper circle with Ctrl and a click on it, invert the selection with Ctrl, Shift and I, and then paint with white in the mask. This way, shadow areas appear in a targeted manner outside the circle.

Make sure that the circles overlap in the right places. If the layers are arranged incorrectly, the result won't fit. Correcting the order, however, is done quickly.
Step 12: Inserting Feathers as a Texture
For a light counterpoint to the heavy gold, you can use feathers. Download high-resolution feather textures and drag one of them into your document. These textures are usually not cut out, since they have a black background. Therefore, choose the blend mode Screen. This makes all black values disappear, and the feather floats freely on your design. If the opacity is too low, duplicate the layer with Ctrl and J. With a layer mask, you can hide distracting parts again.

Step 13: Lines and Depth through Tonal Values
With the Line tool, you set two lines with a thickness of 20 pixels. The first line can be white, and the second gets, for example, the color code ffc949. These lines are deliberately a design element and follow no logic in terms of content. They must be placed below the feather layer and slightly rotated.

For more contrast, you use a Levels adjustment. In the video, the shadows are set to about 17 and the midtones to about 0.75. Subsequently, highlights appear, which you limit at the edges with an elliptical selection with a 200-pixel feather and a layer mask. With a large, soft brush in white, you place partial highlights that give the gold additional depth.

Step 14: Dust and Gold as the Finishing Touch
Place a dust texture over the design and set the blend mode to Screen. With a layer mask, you remove the dust where it gets in the way, for example on the letters. At the edges, you can soften the hard edge. Make sure to keep the effect subtle.

Place another gold texture on top, set it as a clipping mask on the dust layer, and set the blend mode to Color. With a layer mask, you again remove unwanted areas.

Step 15: Adding the Vignette
Finally, you darken the edges with a quick Levels adjustment. Reduce the highlights in the edge areas by about half, in the video to the value 55. Afterwards, compare the result with the original state to check the effect.

Summary ??? Using Textures in Photoshop Skillfully: A Golden Barcelona Poster Step by Step
You have now learned a complete workflow with which you use textures purposefully in graphic designs. The poster is built up from layers: bronze gradient, lettering, gold texture, circles, feathers, dust, and vignette. Each layer fulfills a purpose, and the most important tools remain the same. Clipping masks limit textures to their target objects. Layer masks allow you to gently correct areas. Blend modes like Screen make textures with a black background usable. Selecting via thumbnails delivers precise edges. Practice these steps with a word of your own, and you will quickly become more confident.
FAQ
Do I need a specific font for this tutorial?Helvetica Neue is used in the video. However, the font is not decisive for the technique. You can use any font you like.
Why should I convert the text to paths?Very large font sizes put a heavy strain on the computer. After converting to a shape, the text is easier to scale. However, the text can no longer be edited afterwards.
What does the Screen blend mode do?It removes the black values of a layer. As a result, textures such as feathers or dust look cut out, even though they originally have a black background.
How do I create a selection from a layer?Hold down the Ctrl key and click on the layer thumbnail. Photoshop loads the shape of the layer as a selection. With Ctrl, Shift and I you invert the selection.
What do I do if my clipping mask doesn't work?Check whether the texture is located directly above the target layer. A clipping mask only works with the layer below it. Hold down the Alt key while clicking between the layers.
Can I also apply the techniques to other projects?Yes, the tools can be used universally. Clipping masks, layer masks and blend modes work equally well for posters, flyers, logos or social media graphics.
