
A leaf in front of a white background looks like a quick selection job for the Magic Wand, but fine stems, bright edges, and soft transitions quickly spoil that result. There is a better way for exactly this: you use the color channels of your image to create a precise mask. Then you shrink the selection, remove bright fringes, and retouch the edges with the Smudge tool. Finally, you place the cut-out leaves into an autumn scene and adjust their colors to match the surroundings.
The video is only loaded from YouTube when you play it – data (including your IP address) is then transmitted to YouTube/Google. More in the privacy policy
Key Takeaways
The blue channel usually shows leaves against a white background at their darkest and is therefore best suited for masking.
Using the channel calculation in "Color Burn" mode creates an alpha channel that can be used directly as a selection and mask.
A selection that you shrink inward removes the bright border around the leaves.
Content-Aware Fill and the Smudge tool remove any remaining light fringes.
A Smart Object with a mask remains flexibly editable and can be moved, scaled, and color-adjusted without loss.
Step-by-Step Guide
Step 1: Check the starting point and open the channels
Open your image with the leaves on a white background. With this material, the leaves are on the background layer and are not already cut out. So you have to do the cutout yourself. For this work you need the Channels panel. If it is not visible for you, open the Window menu and activate the Channels entry there. Then you will see the RGB channel as well as the individual Red, Green, and Blue channels.

Step 2: Compare the color channels with each other
Click one after another on the red channel, the green channel, and the blue channel. Pay attention to how strongly the leaves stand out from the light background. In the red channel the contrast is still low, in the green channel it gets better. The blue channel shows the darkest leaves, but in the blue channel there are still some details and brightness gradations. That is exactly why you want to get the leaves as black as possible and the background as white as possible in one step.

Step 3: Channel calculation for strong contrast
In the Image menu, select Calculations. Set Source 1 to the blue channel, and Source 2 also to the blue channel. The channel is thus blended with itself. As the blending mode, choose Color Burn. The preview immediately shows how the leaves darken significantly while the background stays light. Confirm with OK. Photoshop then automatically creates a new channel called Alpha 1, which contains the black leaves.

Step 4: Load the selection from the alpha channel
Hold down the Control key and click on the thumbnail of the Alpha 1 channel. This creates a selection. On closer inspection, you will see that the white background is selected first. So press Control, Shift, and I to invert the selection. Now the black leaves are selected. Then click back on the RGB channel, activate the background layer, and with the selection active, tap the mask icon at the bottom of the Layers panel. The leaves are now separated from the background. It is best to give the layer a meaningful name, such as "Leaves".

Step 5: Check the cutout with an auxiliary layer
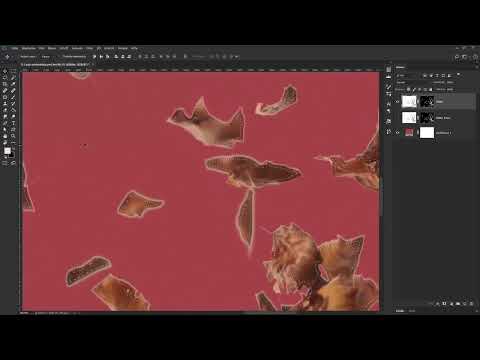
Using the icon for adjustment layers, create a solid color fill and drag it beneath the leaves layer. This way you can see how well the cutout worked. Zoom into the image. You will probably discover bright edges that are barely noticeable against a white background. Set the solid color to black by double-clicking so that you can clearly see the fringes. The edges then look almost like a glow. Since the background of your original layer is white, however, you have to correct these bright areas afterward.

Step 6: Shrink the selection inward
First, duplicate the image layer with Control and J so that you can return to the original at any time. Hide the copy and select the original layer again. Hold down the Control key and click on the mask. The leaves are now selected, including the light border. Go to Select in the menu, choose Modify, and then select Contract. In this example, you use 15 pixels. However, this value depends on the source material, so you should experiment a little with the pixel value. After confirming, the light border has disappeared from the selection.

Step 7: Fill the outer areas content-aware
The contracted selection now contains the leaves, but you need the inner area that surrounds the light edges. Therefore, invert the selection again with Control, Shift, and I. Now the marching ants along the edge show the light lines exactly. Then, in the Edit menu, choose the Fill command and set the content option to Content-Aware. Photoshop analyzes the structures and colors within the leaves and uses them to fill the selected edge areas. This can take a moment. Afterwards, the light lines have usually disappeared. Deselect with Control and D and compare the result with the before state.

Step 8: Assess the result in context
Hold down the Shift key and click on the layer mask to hide it. Then you can see what Photoshop actually inserted. When viewed in isolation, the fill often looks unnatural because structures and colors are scattered everywhere. Afterwards, show the layer again or display only the leaves. Then you can tell whether the leaves look harmonious overall. Some individual leaves may still be a bit too bright. You will correct these in the next step.

Step 9: Refine with the Smudge tool
Activate the image layer and select the Smudge tool. A brush size of around 34 pixels is suitable to start with, and you can leave the strength at 30 percent. You can change the brush size and hardness quickly by holding down the Alt key and the right mouse button and moving the mouse left or right. For hardness, move it up or down. Always drag the light areas toward the leaf edge with the Smudge tool. This makes the light fringes disappear, and the structure is preserved. For narrow sections, reduce the brush size; for large areas, enlarge it. Also pay attention to the direction of the leaf. Always smudge along the leaf structure, not across it, otherwise the veins look unnatural. Especially at shadow edges, move the Smudge tool carefully and bit by bit.

Step 10: Secure the leaf layer as a Smart Object
Once you are satisfied with the cutout, tidy up the Layers panel and delete unnecessary layers. Then right-click on the leaf layer and choose Convert to Smart Object. The mask is preserved and is now located inside the Smart Object. If you would rather have the mask outside the Smart Object, create an empty layer, drag the mask onto this layer, convert the leaf layer into a Smart Object, and then drag the mask back onto the Smart Object. Afterwards, delete the empty layer. This way, the Smart Object with its mask remains flexibly editable.

Step 11: Insert the leaves into the autumn image
Copy the Smart Object to the clipboard with Control and C. Then switch to your autumn image and paste the leaves with Control and V. With Control and T, you activate Free Transform. When scaling, hold down the Shift key and the Alt key so that the size is changed proportionally and from the center. Via Edit and Transform, you can also flip the layer horizontally. Then place the leaves where they look good in the scene. Afterwards, confirm the transformation with the Enter key.

Step 12: Adjust the colors to the autumn image
So that the leaves do not look pasted on, you adjust their color to the rest of the image. To do this, create a Solid Color adjustment layer and choose a warm hue, for example R 122, G 125, and B 96. Then hold down the Alt key and click between the color fill and the leaf layer. This creates a clipping mask that applies the hue exclusively to the leaves. Name the layer, for example, "Color" and set the layer blend mode to Soft Light. The leaves now look integrated in terms of color and slightly more saturated.

Summary ??? Isolating Foliage in Photoshop: Masking and Inserting Leaves with Channels
You have learned how to precisely separate leaves from the white background using the blue channel and channel calculations. Through selecting, shrinking, and content-aware fill, you remove light edges, and the Smudge tool refines the fine details. With a smart object and a clipping mask, you then flexibly insert the leaves into an autumnal scene and adjust them in color. With this method, isolating works not only for autumn foliage, but also for other subjects with a light background.
FAQ
How do I tell which color channel is best suited for isolating?Usually it is the blue channel, since the leaves appear darkest there and the light background stays white. It's best to compare all three channels and choose the one with the greatest contrast.
What do I do if the Channels panel is not displayed?Open the Window menu and activate the Channels entry there, and the panel will appear again.
Why should I shrink the selection?The mask often contains a light fringe around the leaves, and by shrinking it, for example by 15 pixels, this edge disappears. The appropriate value depends on the source material.
Why should I convert the leaves into a smart object?A smart object remains editable at any time, the mask is preserved, and you can scale the layer without loss.
How do I quickly change the brush size with the Smudge tool?Hold down the Alt key and the right mouse button. If you move the mouse left or right, you change the size; up or down changes the hardness.


