
A portrait only looks truly convincing when skin blemishes, distractions, and uneven sharpness do not draw attention away from the subject. That is exactly where this tutorial by Marco Kolditz begins. Before you work on textures or graphic effects, you should prepare the source material cleanly. In this guide, you will learn how to remove distracting spots with the Spot Healing Brush and the Patch tool, how to sharpen only the blurry areas using Smart Filters and layer masks, and how to finally emphasize the details in the beard and the glasses frame with the High Pass filter.
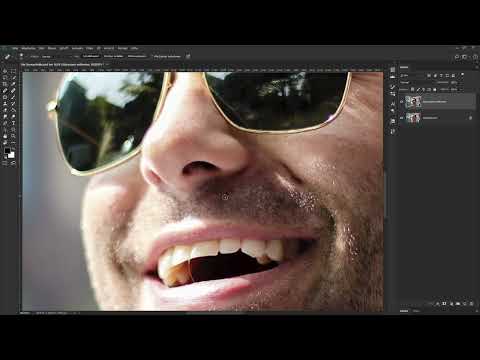
The video is only loaded from YouTube when you play it – data (including your IP address) is then transmitted to YouTube/Google. More in the privacy policy
Key Takeaways
Always work on duplicated layers so that your original image remains unchanged. The Spot Healing Brush with content-aware selection is excellent for small blemishes. For difficult areas, switch to the Patch tool, the Healing Brush, or a Clone Stamp-like approach using the Alt key. A Smart Object with a filter can be adjusted or removed at any time. With an inverted layer mask, you can restrict the sharpening filter specifically to the areas that were previously blurry. At the end, you merge all changes onto a new layer with Ctrl+Shift+Alt+E and subtly sharpen the details with the High Pass filter.
Step-by-Step Guide
Step 1: Assess the Source Image Correctly
Before you get started, look at the image critically. The background is pleasantly blurred, and the person shows a gradient in sharpness: the hair looks soft, while the area around the sunglasses is sharpest. Make a note of the areas with skin blemishes, stubble, tooth flaws, and blown-out highlights, that is, areas that show pure white without detail. You can conceal such areas later with texture or artistic means, but they can no longer be filled with real structure.

Step 2: Duplicate the Background Layer
The background layer is locked, and you should not work directly on it. Activate it and press Ctrl+J to create a floating layer copy. By double-clicking the layer name, you give the copy a descriptive name such as "Remove Blemishes." This way you keep an overview, and you can trace or undo every work step.

Step 3: Set Up the Spot Healing Brush
On the duplicated layer, activate the Spot Healing Brush in the toolbar. In the options bar, set the mode to "Normal" and the type to "Content-Aware." You adjust the brush size either with the slider in the context menu, which you open with a right-click on the image, or more intuitively by holding the Alt key and the right mouse button. If you move the mouse left or right while doing so, you change the size. Moving up or down changes the hardness.
Step 4: Remove Skin Blemishes Selectively
Now zoom in closer on an area, such as a noticeable skin blemish. Simply paint over it and release the mouse button. Photoshop analyzes the surrounding areas and automatically fills the spot appropriately. If you do not like the result, undo the step with Ctrl+Z and try a larger or smaller brush. It is important that you do not try to create a complete portrait retouch. Concentrate on the major distractions that really bother you.
To navigate, hold down the spacebar until the cursor turns into a hand, and drag the image to the desired position. Work your way systematically through all areas, for example at the nose, at the beard line, or at bright spots on the face.

Step 5: Edit Stubborn Areas with the Patch Tool
If the Spot Healing Brush does not deliver the desired result in a particular spot, switch to the Patch tool. At the top under "Patch," set the mode to "Normal" and select the "Source" option. Then drag a selection around the area to be repaired. Next, drag the selection to a spot whose structure seems more suitable to you. When you release, Photoshop takes over the structure from the new area. With Ctrl+D you deselect the selection again. Once you have found a solution, switch back to the Spot Healing Brush.

Step 6: Edit Glasses Lenses and Edges Cleanly
The glasses lenses often contain small white dots, which you paint over selectively with a smaller brush tip. For particularly large areas, you may also stroke over the area with a larger brush. Be careful with edges. If you paint too close to a contour, the shape can blur. Therefore, zoom in closer, reduce the brush size, and work close to the edge. If unattractive gradients or artifacts appear, undo the last step. You can do this with Ctrl+Z or more conveniently via the History panel under "Window" and "History." There you can see all previous steps and jump back to any of them.

Step 7: Use the classic Healing Brush with the Alt key
Sometimes the automatic Spot Healing Brush doesn't help, for example when artifacts form. In that case, you switch to the regular Healing Brush. It works like a clone stamp where you define the source yourself. Set the mode back to "Normal," hold down the Alt key, and click on the area you want to use as a template. Release the Alt key and paint over the blemish. Working with a slightly larger brush tip is usually more comfortable for large areas.

Step 8: Correct teeth and contours using shapes
In the area of the teeth, you can use the existing shape. Hold Alt and click on a similarly shaped tooth or on a suitable contour. When positioning, the brush tip shows you a preview, so you can place the source exactly where you need it. This way, natural-looking transitions are created without having to completely redraw the tooth structure.
Step 9: Check the result
Once you have removed all blemishes, a comparison is worthwhile. Briefly hide the "Remove blemishes" layer using the eye icon in the Layers panel and then show it again. This way you can see how much the image has changed and can evaluate the corrections once more. Take your time with this check, because later steps build on this result.
Step 10: Prepare blurry areas
Now you turn your attention to sharpness. Duplicate the "Remove blemishes" layer again with Ctrl+J and rename it, for example, to "Sharpen edge areas." Convert this layer into a Smart Object with a right-click. This is important because it lets you adjust, hide, or remove the filter at any time later. You will not make the entire image razor-sharp, because the original is physically blurry. The goal is to soften the blur somewhat so that the sharpness gradient looks more harmonious overall.
Step 11: Apply the "Unsharp Mask" filter
For the Smart Object, choose the "Unsharp Mask" filter under "Filter," "Sharpen." In the preview window you immediately see the effect. First set the radius to about 3 to 3.5 and then increase the amount step by step. Pay particular attention to the previously blurry areas such as hair or ears. To check how strong the effect is, you can also temporarily test 100 percent. When you confirm with OK, Photoshop creates a Smart Filter, and a white layer mask is also created automatically.

Step 12: Paint on the Smart Filter mask selectively
Since the entire image was sharpened at first, you want to apply the effect only to the blurry areas. To do this, click on the Smart Filter's mask and press Ctrl+I to invert it. The mask is now black and hides the filter completely. Select the Brush tool with white as the foreground color, a soft brush, and an opacity of 100 percent. Then paint over the areas you want to be sharper. The corresponding spots become visible again. With this original material you won't achieve a completely uniform level of sharpness, but the overall image already looks much more balanced.
Step 13: Check and refine the mask
To check the mask, hold down the Alt key and click on the mask. Then you see it as a grayscale image and can recognize where dark or gray areas remain that you may want to rework. With another Alt-click you return to the normal view. If you want to view the full effect of the filter, hold down the Shift key and click on the mask to disable it temporarily. Another Shift-click enables it again. Edit the mask calmly, because this is exactly where it is decided whether the sharpening looks natural.

Step 14: Combine all changes on one layer
Now all the corrections made so far should be processed together. To do this, click on the top layer and press Ctrl, Shift, Alt, and E at the same time. Photoshop then creates a new layer with all visible changes, while the layers beneath it are preserved. Rename this layer by double-clicking, for example to "Sharpen details."

Step 15: Emphasize the details with the High Pass filter
Finally, the High Pass filter provides subtle sharpening of the details. First convert the new layer into a Smart Object again so that you can undo changes later. Then set the layer mode to "Soft Light." This makes the image look higher in contrast and slightly more saturated. However, this effect disappears as soon as you apply the filter. To do so, choose "Filter," "Other," "High Pass." In the preview you see that the image initially appears mostly mid-gray and only the details stand out. If you set the radius all the way down, the image remains almost unchanged. If you increase it, the beard and glasses frame become visibly sharper. At a value of about 4, the result usually looks coherent. Confirm with OK and compare the result with the previous state. Especially in the beard area, the portrait gains noticeably in presence.

Summary ??? Retouching a Portrait in Photoshop: Removing Blemishes and Sharpening Selectively
You have learned how to prepare a portrait cleanly in Photoshop. By working with duplicated layers, you work non-destructively and keep control at all times. The Spot Healing Brush removes small blemishes quickly, while the Patch Tool and the classic Healing Brush are available for more difficult areas. Sharpening is done via a Smart Object with a filter and an inverted mask, so that only the blurry areas are affected. Finally, the High Pass filter in Soft Light mode brings out the details in the beard and the glasses frame. With this preparation, you are well equipped for the creative further editing of the portrait.
FAQ
Why shouldn't I edit the background layer directly?The background layer is locked, and changes made to it would be permanent. With a duplicated layer, your original is preserved and you can correct every step at any time.
When do I use the Spot Healing Brush and when the Patch Tool?The Spot Healing Brush is suitable for small blemishes because Photoshop calculates the correction automatically. If the result doesn't fit, you switch to the Patch Tool, where you determine the source yourself.
What does the Alt key do with the Healing Brush?By holding down the Alt key, you define the source from which the texture is copied. The procedure is similar to the Clone Stamp and gives you more control over the result.
Why do I convert the layers into Smart Objects?A Smart Object allows you to edit, hide, or delete filters such as "Unsharp Mask" or "High Pass" at any time without changing the image again.
What is the inverted layer mask for?After inverting, the mask is black and hides the filter. With white paint, you paint the effect back in only where you need it, for example in the previously blurry areas.
How can I check the layer mask?Hold down the Alt key and click on the mask to display it as a grayscale image. By holding down the Shift key and clicking, you temporarily disable the mask.
Which key combination merges all visible layers?With Ctrl, Shift, Alt, and E, you create a new layer that contains all visible changes without altering the layers beneath it.
Why does the High Pass filter look so strong in Soft Light mode?The High Pass filter initially shows only the edges and details in medium gray. In Soft Light mode, these details are overlaid on the image, which noticeably increases contrast and sharpness.

