
A portrait quickly looks flat when all elements have the same look. With golden sunglass lenses and graphic polygons that adapt to the rough style of the image, you give it depth and character. In this tutorial, I'll show you how to tint the lenses with a gradient map, expose them precisely with paths and masks, and then integrate a polygon group with an outline, scribbles, and layer styles into the composition.
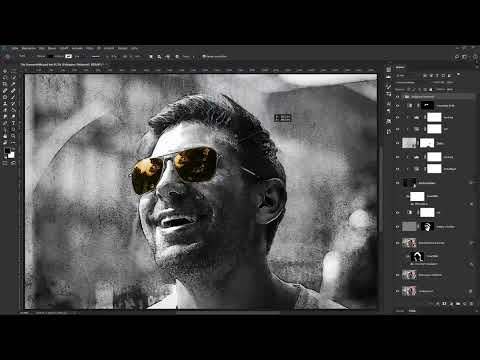
The video is only loaded from YouTube when you play it – data (including your IP address) is then transmitted to YouTube/Google. More in the privacy policy
Key Takeaways
- A gradient map as an adjustment layer tints brightness ranges selectively without destroying the original image.
- A path created with the Pen tool can be edited at any time and precisely converted into a selection.
- Masks are the tool you use to limit changes to specific areas and preserve the look of the image.
- Polygons are combined in a group, given outlines, and blended back into the background using layer styles.
- Scribbles made with a hard or blotchy brush take the smoothness away from the graphic elements and adapt them to the photo.
Step-by-Step Guide
Creating a Gradient Map as the Foundation
At the very top of the Layers panel, you add a new adjustment layer of the type Gradient Map. It first converts the image to black and white and assigns a color to each brightness range. Since the gradient should later only affect the lenses, the rest of the image is still unimportant at this point and will be corrected later using a mask.

Tinting Brightness Ranges Selectively
Click on the gradient in the settings. At the bottom of the gradient, you set the color for the darkest areas, and at the top the color for the brightest. Set the dark stop to black and the light one to white. This way you keep the tonal values of the original, and you can now use the stops to control which areas will later get which color.

Switching the Gradient to Sun Yellow
For the lenses to turn sun yellow later, you need a transition from black to a golden color. To do this, click at the appropriate spot below the middle of the gradient to create a new color stop. It is automatically filled with black, so the dark areas don't change. Double-clicking the stop opens the color picker, in which you choose a warm yellow tone.

Fine-Tuning the Gradient
Now you can refine the transition further. Set a stop for a bright white in the upper area and another for a slightly more reddish, very light yellow. Move the stops so that the truly bright spots become pure white and the slightly darker ones show a light sun yellow. Confirm the setting as soon as you like the lenses in the preview image.

Naming the Layer and Inverting the Mask
Give the new layer a fitting name, for example "gilded glasses". Then click on the layer mask and press Ctrl+I to invert it. The mask is now black, and the color change is no longer visible in the image. Only when you expose the lenses will the color become visible again in the right place.

Creating a Path with the Pen Tool
To select the lenses precisely, zoom in close to the face and choose the Pen tool. A click sets an anchor point. When placing a point, simply keep the mouse button held down, and two small handles appear with which you shape the following curve. While holding the Ctrl key, the cursor turns into a white arrow with which you can move existing anchor points or readjust the handles. The path can therefore be corrected at any time, even if you have already closed it.

Naming and Saving the Path as a Work Path
Once you have closed the edge of the lens, the path appears in the Paths panel under the tab "Work Path". Open the panel via Window > Paths. Double-clicking the work path allows you to give it its own name. If you save the file in Photoshop format, the path is preserved and can be reused later. To continue working with this path, you simply drag it to the trash, provided you only created it as a test, or you keep it for later use.

Creating a Selection from the Path
To get a selection from the path, hold down Ctrl and click on the path. The marching ants show you that the selection is active. Now switch to the black layer mask of the gradient map. If you fill the selection with white, the golden color appears exactly in the lenses. If black is your foreground color and white is your background color, use Ctrl+Backspace for the background color. Alt+Backspace fills with the foreground color. Ctrl+D then deselects the selection again.

Using a Brush as an Alternative
You don't necessarily have to use the path. Alternatively, you can paint directly on the mask with a soft brush and white color. This is especially suitable for areas that cannot be easily described as a curve. A quick test will show you whether the transition at the edges looks clean.

Creating a Polygon Group
Now it's the graphic elements' turn. First, collapse the Paths panel by double-clicking on the tab. Then, at the very top of the Layers panel, create a new empty group using the folder icon. Name it "Polygone" so that you can control all the shapes together later.

Drawing the First Polygon
Select the Polygon tool. If you hold the mouse button on the tool icon, additional shape tools appear. In the options bar you set the number of sides. Three sides make a triangle; for a polygon with six corners, enter six. Drag out the shape while holding Ctrl to control the orientation. Then change the fill color to a sunny yellow that harmonizes with the image by double-clicking on the preview.

Duplicating and Aligning Polygons
To create three polygons of equal size, hold Alt while dragging and copy the shape. The Shift key ensures straight alignment. If the "Snap" option is active, the polygons snap to the edges of their neighbor. Then zoom in closer to check whether the edges meet cleanly. A small offset in the preview can be a mere display error.

Adding a White Border with a Layer Effect
So that the polygons stand out from the background, they get an outline. To do this, click on the polygon, select "FX" at the bottom and then "Stroke". Set the color to white, the position to "Center" and the size as you like. The stroke can be adjusted at any time later. The remaining polygons then get it by Alt-dragging the effect, which can be transferred via drag-and-drop.

Color Variation and Duplicate
To make the group look lively, tint the top polygon a bit more reddish. Then duplicate it upward while holding the Alt key and choose white for the duplicate. With Ctrl+T you transform it, hold Shift and Alt and shrink the shape from a corner. This creates a small accent within the composition.

Scribbles for Rough Edges
The polygons still look too smooth. Therefore, create a new layer named "Scribbles" above the group. Choose a round, hard brush with a small size and white foreground color. Zoom in on the edges and make short, irregular strokes along the borders. They don't have to be straight, because they should look like a quick sketch. If a stroke fails, simply undo it and try again.

Breaking Up the Edges and Fine-Tuning
Enlarge the brush tip and set the opacity to 100 percent if you want stronger strokes. You can work on the edges both inside and outside so that the shapes look evenly rough overall. If a polygon sits too low, move it with the arrow keys. Then return to the Scribbles layer and continue working.

Adjusting the scribble group in perspective
Once all the scribbles are in place, combine the layers into a group. With Ctrl+T you can select them all and tilt them in perspective via Edit > Transform > Distort. Confirm the transformation with Enter. Make sure the shape looks natural and doesn't look like a technical distortion.

Using a mask for the head and hair
Now add a mask to the group so that the face stays in the foreground. With a hard brush, paint over the face in black so that the polygons don't overlap it. You can trace the hair with a softer brush in white so that the composition appears to sit behind the head. It doesn't have to be accurate to the millimeter, because the edges will be loosened up later anyway.

Splatter brush for uneven mask areas
To keep the group from looking too flat, use a blotchy splatter brush. You can find many such brushes on the internet, which you can install as a file. Place individual blotches in black on the mask to break up areas, and with white you selectively bring parts back. Vary position and size so that the patterns don't repeat.

Using layer styles for see-through areas
Finally, parts of the original image should show through again. Open the group's layer styles by clicking on an empty area in the group. Drag the black slider of the underlying layer to the right so that dark areas of the photo come forward again. By holding down the Alt key, you split the slider and get a soft transition. Move the white slider to the left accordingly to bring back bright areas. Then reduce the group's opacity, for example to 90 percent.

Adding triangles as additional elements
For further accents, create a second group and name it "Polygons" or "Triangles". Select the polygon tool with three sides and color the triangle sunny yellow. With the Direct Selection tool, click on the anchor points and shape the triangle so that it sits in the right area. Reduce the opacity to about 60 percent and give the triangle a white stroke in the center via FX. A duplicated triangle can be rearranged with the Direct Selection tool so that both shapes overlap. In the overlapping area, the surface looks less transparent, which makes the look more interesting.

Protecting the face area with a mask
This group also gets a mask with a blotchy brush so that it gains structure. Then you zoom into the image and, with a normal brush, mask the areas in front of the face and around the glasses. This way the triangle doesn't protrude over the facial features, and the glasses remain clearly recognizable.

Final adjustment of the group's layer styles
Adjust the layer styles one last time so that the background shows through subtly. Split the sliders as before and compare the state before and after the adjustment. A quick look at the overall image shows whether the composition looks harmonious or whether you still want to tone down individual elements.

Summary ??? Photoshop Composing: Designing sunglasses and polygons in a portrait
You now have a gradient map that colors your glasses lenses sunny yellow, and a path that can be adjusted at any time. The polygons are integrated into the image with strokes, scribbles, and masks in such a way that they pick up the rough look of the photo. With the layer styles, you also bring back parts of the original. These steps can be transferred to other portraits if you adapt the colors and shapes to your subject.
FAQ
What is the gradient map used for in this tutorial?It selectively colors the brightness ranges of the image. This allows the glasses lenses to be shown in sunny yellow without permanently altering the original photo.
Why is the adjustment layer's mask inverted first?With the inverted mask, the color change initially has no effect anywhere. Only by selectively revealing with a selection or brush does the color appear in just the desired areas.
Can I modify a path afterwards?Yes. By holding down the Ctrl key and using the Direct Selection tool, you can move individual anchor points and adjust the curves, even if the path has already been saved.
How does Alt-dragging differ from normal dragging?By holding down the Alt key, you create a duplicate of the layer or shape. With normal dragging, you move the original.
Where can I get blotchy or splatter brushes?On the internet there are many free and paid brush sets for Photoshop. You can install the files and select them via the brush panel.
Why should polygons be in a group?A group allows you to transform, mask, and edit all shapes together with layer styles.


