
A grid from a texture pack looks like a simple cutout at first glance, but the dark areas are usually mottled and textured. This is exactly where many cutouts fail. In this tutorial, I will guide you step by step through a workflow that uses Levels, the Magic Wand, and a luminance mask. Afterwards, you will place the grid as a Smart Object in a scene, rust it with a texture, and stage it with blur so that it looks as if you were looking through a fence at a car.
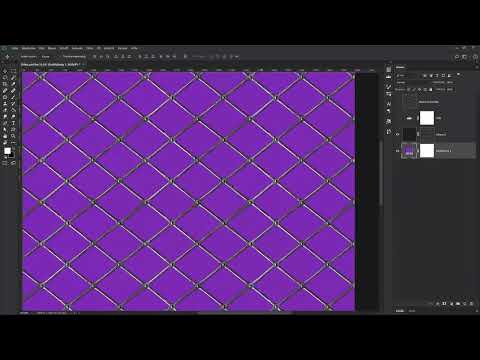
The video is only loaded from YouTube when you play it – data (including your IP address) is then transmitted to YouTube/Google. More in the privacy policy
Key Takeaways
Optimize contrast before cutting out: With Levels and the Alt key held down, you can see where the true black and white values lie. This makes distracting spots disappear.
Luminance selection as the basis for the mask: The bright areas of the grid can be loaded as a selection via the channels and converted directly into a layer mask.
Refine the border and edges deliberately: The mask is pixelated at first. With smoothing, feathering, and contrast at the edge, the cutout looks clean.
Control everything with Smart Objects and layers: Filters, distortion, and blur remain editable afterwards if you use the grid as a Smart Object.
Step 1: Open the source image and identify weaknesses
Open the grid from the texture pack. It is available as a background layer, and if you look closely, you will see that the dark areas are not truly black but appear slightly mottled. This structure has to disappear before cutting out, otherwise it will remain later as a flaw in the mask.

Step 2: Set the black point with Levels
Create a Levels adjustment layer using the adjustment layer icon at the bottom of the Layers panel. The trick now lies in dragging the black slider: hold down the Alt key while you move it to the right. The preview then doesn't show you the image, but only the areas that are now becoming pure black. Drag the slider until the yellowish spots disappear.

Step 3: Adjust the white point and create a helper layer
You proceed in the same way with the white slider. Hold down the Alt key again and drag it to the left until the grid becomes visible and appears almost completely white. Some shadow areas cannot be removed completely this way, but that's fine, since you will deal with them later with the mask. Then name the adjustment layer "Hilfsebene" (helper layer) so you keep track of things.

Step 4: Combine the changes on a separate layer
To capture all the adjustments so far, activate the helper layer and press Ctrl + Shift + Alt + E. Photoshop then creates a new layer that contains all the previous changes. Give it a descriptive name, for example "Maske vorbereiten" (Prepare mask).

Step 5: Remove colors and work out the shadows deliberately
You don't need colors for the mask. Activate the new layer and press Ctrl + Shift + U to desaturate it completely. Make sure the bright areas really look bright and the dark areas become black. Only then will the grid be masked cleanly later.
Step 6: Select the black areas with the Magic Wand
Instead of painting over every shadow with the brush, you use the Magic Wand tool. First click on a black area. Then hold down the Shift key until a plus sign appears next to the Magic Wand, and click one after another on the other black areas. This way you add the areas to the selection without tracing along all the shadows.
In the tool options, set a sample size of 3 x 3 pixels and a tolerance of 32. Contiguous should be enabled so that connected areas are captured. Leave Anti-alias switched on.

Step 7: Invert the selection and fill with white
At the moment you have selected the black areas, but you need the light parts of the grid. Press Ctrl + Shift + I to invert the selection. Now the grid is selected, including the dark areas that you want to remove. Set white as the foreground color and press Alt + Backspace to fill the selection with white. Then deselect with Ctrl + D. The grid is now completely white, the background solid black.


Step 8: Create a luminance mask from the channels
Switch to the Channels panel via Window and Channels. Hold down the Ctrl key and click on the thumbnail of the RGB channel. This loads a luminance selection, meaning all the light areas of the image. Then activate the Layers panel again, click on the background layer with the grid, and use the mask icon to create a layer mask from this selection. Briefly hide the two other layers, and you will see that the grid is now masked.


Step 9: Check the mask and refine the edges
To check the mask, place a color fill in any color underneath. The edges look pixelated, and individual pixels are floating around. That doesn't matter at this stage, because now comes the editing. Double-click on the layer mask to open the mask settings.
First increase the Smooth value to about 12 to 13. The edges then look noticeably rounder. Then activate a feather of about 2.6 pixels. Next, drag the Shift Edge/Contrast slider to around 50 percent so that the edge regains some sharpness. Compare before and after until you are satisfied with the result, and confirm with OK.


Step 10: Save the cutout
Hide the color fill again so that only the isolated grid remains. Save the file, for example, under the name gitter.psd. This file will later be inserted into your scene.

Step 11: Insert the grid into the scene as a Smart Object
Now open the scene image as a background layer and drag the saved gitter.psd directly into it. Photoshop automatically imports it as a Smart Object, which you can recognize by the small icon in the layer thumbnail. By holding down the Shift and Alt keys, you scale the grid proportionally and adjust it to the foreground. The size can be corrected at any time later.
For this, it's best to create a group named Gitter Vorbereitung so that your further steps stay organized.

Step 12: Adapt the grid to the environment
The grid looks too bright compared to the surroundings. Therefore, use the adjustment layer icon to create a color fill with a gray tone, for example with the values 79 for R, G, and B. Name it abdunkeln.
So that the color fill affects only the grid, hold down the Alt key and click between the color fill and the grid layer. Then reduce the opacity of the color fill to about 70 percent so that structure and light become visible again.

To bring back some of the highlights of the original grid, open the layer styles of the abdunkeln layer by double-clicking on an empty area. With the Underlying Layer slider, drag the light slider to the left and split it by holding down the Alt key. This creates a soft transition, and the result looks more natural. Confirm with OK.


Step 13: Adding a Rust Texture
Now the grid is going to get rusty. To do this, drag a rust texture from the TutKit package, in this example from the category Photos Rust, Light Rays and Backdrops, directly into Photoshop. Enlarge it with Shift and Alt until it fits, and confirm with Enter.
So that the texture only sits on the grid, hold down the Alt key again and click between the rust layer and the grid layer. So that the structure of the grid does not disappear completely, change the layer mode from Normal to Soft Light and reduce the opacity to about 60 percent.


Step 14: Darkening the Edges of the Grid
Create a new black color fill layer, set it to Soft Light with about 80 percent opacity, and restrict it to the grid layer with an Alt-click. The entire grid now becomes darker, which you don't want everywhere. The layer mask is currently white, so you invert it with Ctrl + I so that it becomes black.
Next, choose a soft brush. With the Alt key and the right mouse button held down, you can adjust the size and hardness directly via mouse movement. Set white as the foreground color by pressing the X key, and paint carefully along the edges of the grid. If necessary, reduce the brush opacity so that the transitions look natural. By holding down the Shift key and clicking on the mask, you can check in between what the result looked like before.
At the end, give the layer a meaningful name, for example Darken edges.


Step 15: Merging and Warping the Grid
Briefly hide the background so that only the grid with all adjustments is visible. Click on the group and press Ctrl + Shift + Alt + E to merge all layers into one standalone layer. Name it Grid and convert it into a Smart Object via the context menu.
So that the edges don't break off at the document edge during the later blurring, enlarge the grid slightly with Ctrl + T, Shift and Alt. For a more realistic perspective, then choose Edit, Transform and Warp. Drag the handles to bend the grid slightly. Then confirm with Enter.


Step 16: Blurring the Grid with Field Blur and Iris Blur
Since the car in the background is sharp, the grid in the foreground has to look somewhat blurrier. Because the grid exists as a Smart Object, you can adjust the filters at any time. Choose the Blur Gallery and there the Field Blur. Set a value of about 19 pixels and confirm with OK.
For an additional effect, the edges should be even blurrier than the center. To do this, open the Blur Gallery again and choose Iris Blur. Increase the strength to about 60 pixels. With the center point you determine where the sharp area lies, and with the handles on the circle you determine the soft transition. You can also shape the circle into an ellipse or almost into a rectangle. Confirm with OK.


With that, the grid is rusty, blurrier at the edges, and the center remains clear. It now looks as if you were looking at the car through a fence.
Summary ??? Isolating a Grid in Photoshop and Placing It Rusty into a Scene
You have learned to prepare a grid cleanly using a Levels adjustment and Alt-click control, and to isolate it with the Magic Wand and a luminance mask. Afterwards, you smoothed the edges, built the grid into a scene as a Smart Object, and designed it realistically with rust elements, color fills, and layer modes. Finally, with warping and blur filters, you created the depth that gives the image its impact.
FAQ
Why should I adjust the contrast before isolating?A higher contrast ensures that the dark areas of the grid become truly black and the blotches disappear. This makes creating the later selection much easier.
What is the Alt key for when dragging the Levels sliders?With the Alt key held down, Photoshop shows a preview of the areas that become completely black or white as you drag. This way you can see exactly how far you need to move the sliders.
What is a luminance selection?A luminance selection loads the brightness-based areas of an image as a selection. It is created when you Ctrl-click on the RGB channel in the Channels panel.
Why is it useful to use the grid as a Smart Object?A Smart Object retains the applied filters and transformations, so you can change them at any time later without damaging the original image.
How do I make a texture affect only the grid?Hold down the Alt key and click between the texture layer and the grid layer. This restricts the texture to the grid as a clipping mask.
What is the purpose of the Soft Light layer mode for the rust texture?Soft Light transfers the brightness structure of the rust texture without completely covering the grid. This way the structure is preserved and the rusting looks more realistic.
How do I darken the edges of the grid?Create a black color fill in Soft Light mode, restrict it to the grid, and invert the mask. Then paint on the edges with a soft white brush so that the darkening becomes visible there.
Why combine Field Blur and Iris Blur?Field Blur makes the entire grid blurrier. Iris Blur additionally ensures that the edges blur more strongly than the center, which reinforces the impression of depth of field.


