
A photo often looks flat even though the subject and composition are right. With snowflakes, dust particles, and light rays as overlays, you can give the image depth and a cool, wintry mood without destroying the original. This tutorial shows you step by step how to place the textures, blend them using blend modes, and finish them off with color adjustments and noise.
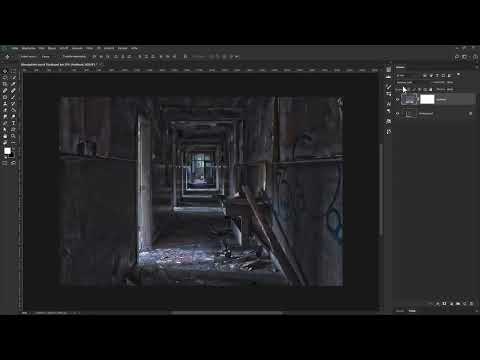
The video is only loaded from YouTube when you play it – data (including your IP address) is then transmitted to YouTube/Google. More in the privacy policy
Key Takeaways
Key Takeaways
- Textures such as snowflakes or dust are blended in using the "Screen" blend mode. This makes the dark areas disappear, and only the bright particles remain visible.
- Inserting placed images as a Smart Object allows you to scale and rotate them later without loss of quality.
- With clipping masks, you restrict color fills and adjustments to a single group or layer, so the background image remains untouched.
- A color fill in the "Vivid Light" blend mode with reduced opacity gently changes the color mood and can be adjusted at any time.
- A fine noise, created on a layer in "Soft Light" mode, ties all the elements together and looks more atmospheric.
Step-by-Step Guide
Step 1: Create a folder structure for the snowflakes
Open your photo in Photoshop and check whether the Layers panel is visible. If not, you can find it under "Window" and "Layers". Your original image is on the background layer. Since you will be using several snowflake layers later, it is worth collecting them in a group from the start. To do this, click the folder icon at the bottom of the Layers panel. The new group automatically gets a name like "Group 1". Double-click it and rename it, for example, to "Snowflakes". Make sure the group is actively selected before you add more images.

Step 2: Place snowflake images
Now simply drag a snowflake image from your image folder into the Photoshop window and release the mouse button. The image immediately appears with a transform frame. You can place it right in the center or move it slightly. What matters is that the texture fits your subject. If it looks too large or too small, scale it: hold down the Shift and Alt keys and drag a corner handle. This enlarges or reduces the image evenly from the center. Then confirm with the Enter key.

Step 3: Move the snowflake layer into the group
After placing it, the new layer is often at the very top, i.e. outside your group. Click it and drag it into the group layer. Visually, little changes at first because the snowflake image still completely covers the background image. So that only the bright flakes affect the subject, you need to adjust the layer mode. Select the snowflake layer, open the menu for layer blend modes at the top, and choose "Screen". This lightening mode makes the dark areas of the texture disappear, and only the white flakes remain.

Step 4: Work with a Smart Object and control the opacity
When inserted, the snowflake layer was converted into a Smart Object. You can recognize this by the small icon on the layer thumbnail. The advantage: if you scale, rotate, or move the layer with Ctrl and T, no image quality is lost. When moving it, make sure no unsightly edges become visible at the border. If that happens, undo the change with Ctrl and Z. If the effect is too strong for you, lower the opacity. To do this, click "Opacity" at the top right and drag the mouse to the left until the texture looks pleasantly subtle. In the example, the opacity stayed at 100 percent so that the individual flakes are clearly recognizable.

Step 5: Add more snowflake layers and check the effect
For more density, it is worth using several snowflake layers. Place another texture each time, confirm it, and set the mode to "Screen" again. In the example, a total of three layers were combined, which gives the image significantly more snow. To check the change, click the eye icon of the group. This way you show and hide all the snowflakes at once and compare the result with the original. You will see how much the atmosphere already increases.

Step 6: Add a light source with a light beam
In the next step, you make the sun cooler and brighter. For this, you use a light beam image, which you drag into the document as before. Since the beam is initially in an awkward position, drag the layer all the way to the top until a blue line appears, and rename it, for example, "Rays". Also set the mode to "Screen" so that the dark areas become transparent. Then move the beam so that it radiates exactly from the sun. To do this, you can bring up the transformation frame with Ctrl and T, set the center point to the center of the light source, and scale while holding down the Shift and Alt keys.

Step 7: Remove hard edges with a layer mask
With larger light images, visible edges often appear at the border. You remove these with a layer mask. Select the rays layer, click the layer mask icon at the bottom, and activate the Brush tool. Set the foreground color to black, because black hides on a mask. Choose a soft brush with a hardness of 0 percent. By holding down the Alt key and the right mouse button, you can change the brush size. Then paint over the disturbing edge until it disappears. Reduce the brush opacity if you need softer transitions. For comparison, you can briefly hide the mask.

Step 8: Note the move tip
If you later want to move individual snowflakes, it may happen that a completely different element moves instead. This is due to the "Auto-Select" option in the Move tool. Deactivate it in the options bar at the top so that you decide which layer is moved. Then select the desired layer in the Layers panel and drag it in the image. This setting is especially helpful when you are working with many layers and a top layer covers others. Reactivate the option after the work if you want to use it for quick moving.

Step 9: Give the image a cooler color look with a solid color layer
The second example image shows an abandoned building. Here you want to make the atmosphere gloomier. To do this, click the adjustment layer icon at the bottom and choose "Solid Color". In the color picker, you can define a gray-blue tone, in the example with the values Red 79, Green 85, and Blue 114. Confirm with "OK" and rename the layer by double-clicking, for example, to "Color look". For the color to affect the image, choose "Vivid Light" as the blend mode. Then you reduce the opacity to about 70 percent so that the effect does not become too dark.

Step 10: Add dust particles as a group
For the dust effect, you drag two dust images into Photoshop at the same time. After confirming, both layers are in the document. Select both by holding down the Shift key and press Ctrl and G to bundle them into a group. Rename the group to "Dust". Then set the blend mode for the entire group to "Screen" so that not every layer has to be edited individually. To make the particles look more subtle, you can set the opacity of the upper layer to about 66 percent and the layer below it to 80 percent.

Step 11: Fine-tune the dust layers with the layer style
For the finishing touch, you open the layer style by double-clicking on an empty area of the dust layer. There you will find the slider for the dark areas. If you drag it to the right, the milky particles become more transparent. However, this quickly leads to hard edges. Therefore, you split the slider by holding down the Alt key and clicking on the handle. Then drag one half slightly to the left so that a soft transition is created. Confirm with "OK" and repeat the process for the second dust layer until the particles look natural.

Step 12: Adjust the dust color with a clipping mask
The dust particles may not yet match the color mood of the image. Click on the dust group and create a new solid color layer above it. In the example, a blue tone with the values Red 34, Green 82, and Blue 154 was chosen. Rename the layer to "Dust color" and set the mode to "Color Dodge", which worked best in the example. So that this color only affects the dust group, hold down the Alt key and click between the solid color layer and the group. The small arrow icon shows you that a clipping mask has been created. An opacity of about 90 percent usually looks harmonious.

Step 13: Softly blend in a bokeh image and desaturate it
For additional lighting mood, you can insert a bokeh or light leak image. Place it in Photoshop, confirm, and switch the mode to "Soft Light". If the colors seem too garish, desaturate the layer with a Hue/Saturation adjustment layer. Drag the Saturation slider all the way to the left. So that the correction only affects the bokeh image, create a clipping mask again by holding down the Alt key and clicking between the two layers. This way the rest of the image remains unchanged.

Step 14: Add noise as a finishing touch
As the last step, you create a noise layer. Hold down the Alt key and click the new layer icon at the bottom. In the dialog, enter the name "Noise" and set the mode to "Soft Light". Activate the option to fill with neutral gray and confirm with "OK". Then convert the layer into a Smart Object via the context menu. Next, choose "Filter", "Noise" and "Add Noise". In the example, the value was set to 23 percent, with Gaussian distribution and monochromatic. With an opacity of about 80 percent, the image looks more cohesive because all the elements blend together better.

Step 15: Compare the result with the original
Finally, you can check how much your image has changed. Hold down the Alt key and click the eye icon of the bottom layer, that is, the original image. All other layers are briefly hidden. Another click with the Alt key held down makes them visible again. This comparison shows you how much atmosphere the textures and color adjustments have created. Since the original is at the very bottom, you can also place a different starting image above it at any time and apply the same editing method.

Summary ??? Winter mood in Photoshop: Using snow, dust and light purposefully
With snowflakes, dust and light rays, you create a wintry atmosphere in Photoshop that makes your image more lively. The decisive factors are the blend modes "Screen" for textures and "Vivid Light" or "Soft Light" for color and light layers. Groups, Smart Objects and clipping masks keep your file organized and flexible. With a final noise layer, you combine all the components into a cohesive overall image. Try out the modes and opacities on your own photo, because every subject requires slightly different settings.
FAQ
Do I always have to use the textures in Screen mode?Not necessarily, but for light textures such as snowflakes on dark backgrounds, this mode is particularly practical, since it makes the dark areas transparent. For dark subjects, you can also try other modes.
Why should I insert images as a Smart Object?Smart Objects allow you to scale, rotate and move later without the image quality suffering. This is particularly helpful if you want to adjust the size of the texture afterwards.
What do I do if the wrong layer gets moved when moving?Disable the "Auto-Select" option in the Move tool. Then select the desired layer manually in the Layers panel and move it precisely.
How do I create a clipping mask?Hold down the Alt key and click in the Layers panel between the adjustment layer or color fill and the layer below. The small arrow icon shows you that the correction only affects the layer below.
What is the noise at the end for?A fine noise ties different elements such as dust, light and snow together into a harmonious overall image. Especially with spooky or atmospheric subjects, it often looks very cohesive.
Can I change the effect afterwards?Yes, thanks to Smart Objects, opacity sliders, adjustment layers and layer styles, every change stays flexible. You can go back at any time and correct individual steps.

