
A bare, dry tree often looks lifeless in a photo. With just a few layers and the right blend modes, however, it can be set on fire without destroying the original image. That is exactly what video trainer Marco Kolditz shows in this tutorial. He uses fire footage from a texture pack, adds smoke, and adjusts the mood of the image. The result is not a finished masterpiece, but a comprehensible technique that you can apply to your own subjects.
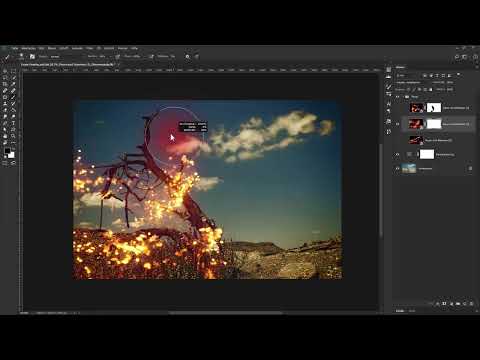
The video is only loaded from YouTube when you play it – data (including your IP address) is then transmitted to YouTube/Google. More in the privacy policy
Key Takeaways
- You blend fire overlays in using the "Screen" blend mode so that only the bright areas remain visible.
- Smart Objects allow you to scale, rotate, and distort fire layers without losing quality.
- Layer masks with a soft brush remove hard edges and distracting areas.
- Smoke is first inverted, then applied in Multiply mode and strengthened with a Levels adjustment.
Step-by-Step Guide
Step 1: Darken the basic mood with a curves adjustment
Before the fire comes into play, the surroundings should become somewhat darker so that the flames stand out more strongly later. To do this, create an adjustment layer above the background layer. In the Layers panel, click the adjustment layer icon and select Curves. Give the new layer a meaningful name, such as "Color Adjustment". Then pull the middle of the curve slightly downward until the image looks noticeably, but not excessively, darker.

Step 2: Protect saturation with the Luminosity blend mode
The curves adjustment darkens the image but at the same time increases color saturation. You want to avoid that at this point. Therefore, change the blend mode of the adjustment layer from Normal to Luminosity. This way, the adjustment affects only the brightness, and the colors stay calmer. A click on the layer's eye icon shows you the difference from the original at any time.

Step 3: Adjust individual color channels selectively
Now you control the color mood more finely. In the curves adjustment, select the red channel and pull the diagonal in the middle slightly downward to darken the red tones. For the green channel, a restrained change is enough; for the blue channel, you pull the curve upward instead. The goal is a warmer base tone on which the fire will look particularly good later.

Step 4: Create a group for the fire layers
To keep the layer stack organized, you collect the fire layers in their own group. Click the folder icon at the bottom of the panel to create an empty group. Double-click "Group 1" to rename it "Fire".

Step 5: Insert fire images into Photoshop
You drag the fire subjects from the texture pack directly from the file folder into the Photoshop window. If you select several files at once, you can drag them in in a single step. Each file ends up as its own layer in the document. Confirm the placement each time with the Enter key. Afterwards, you move all three layers into the "Fire" group by clicking them while holding the Shift key.

Step 6: Work non-destructively with Smart Objects
When you drag them in, the images automatically become Smart Objects. This allows you to change size, rotation, or filters at any time without losing the original material. If you greatly shrink a layer and enlarge it again later, the image quality is preserved. Toggle the layers on and off as a test to assess each texture individually.

Step 7: Use the Screen blend mode
Fire is bright, so only the bright areas should become visible while the dark parts remain transparent. Activate the top fire layer and open the blend mode menu in the Layers panel. Select "Screen" there. This mode brightens the image and hides the dark areas of the overlay. You can try out the other modes later to compare them directly.

Step 8: Flip and scale the fire layer
Since the fire on the right side doesn't make much sense, flip the layer via Edit, Transform, Flip Horizontal. Press Ctrl+T (Command+T on a Mac) to open the transformation frame. If you hold down the Shift key while dragging, you scale proportionally. If you also hold down the Alt key, the scaling is done from the center. Then place the fire at the bottom left of the trunk and confirm with Enter.

Step 9: Remove hard edges with a layer mask
The fire is cut off sharply at the right edge. To fix this, create a layer mask using the mask icon at the bottom of the panel. Select the Brush tool with a soft brush and paint over the distracting areas with black as the foreground color. You change the brush size by holding down the Alt key and the right mouse button and moving the mouse left or right. Moving up or down changes the hardness. With reduced opacity, you achieve soft transitions. With the X key, you swap the foreground and background colors if you want to make an area visible again.

Step 10: Place the second fire layer
Hide the first fire layer and show the second. Set this one to "Screen" as well. With Ctrl+T, position and scale the motif so that it is visible at the bottom left of the tree. A slightly more elongated format often looks more natural. An edge usually appears at the top again, which you fade out more softly with a mask and a more transparent brush.

Step 11: Rotate and warp the third layer
First, rotate the third layer until it runs diagonally like the tree trunk. To do this, press Ctrl+T and move the mouse outside the frame until a double arrow appears. With the Shift and Alt keys held down, you scale down from the center. Then choose Edit, Transform, Warp. Using the grid that appears, you adapt the shape to the branch by moving the points and fields.

Step 12: Finish the fire layers
Create a mask for the third layer and, using a brush at 100 percent opacity, remove the areas that don't fit. You should not just soften an edge at the bottom, but remove it completely. Once the result looks right, combine the three fire layers into a single layer and close the group.

Step 13: Create a smoke group and align the texture
Create a new group below the fire group and name it "Smoke". Then drag a fog image from the texture pack into Photoshop. Since the smoke should rise upward, rotate the image accordingly. Confirm with Enter and move the layer into the smoke group.

Step 14: Invert the fog and limit it with a clipping mask
The fog texture is light, but smoke should look dark. Therefore, you invert the texture using an "Invert" adjustment layer. Hold down the Alt key and click between the fog layer and the adjustment layer to create a clipping mask. As a result, the inversion affects only the fog and not the entire image.

Step 15: Multiply the smoke and increase the contrast
Set the fog layer to Multiply mode. Then increase the contrast with a Levels adjustment layer, which is also created as a clipping mask. Move the white slider to the left so that the fog appears black after the inversion. To avoid creating additional color, set the Levels adjustment to Luminosity mode. Finally, rename the layer "Contrast".

Step 16: Reduce the saturation of the smoke
The fog texture still contains a slight color cast. Therefore, add a Hue/Saturation adjustment layer and pull the saturation slider down until the smoke looks neutral gray. Complete desaturation is also possible if the smoke is to remain completely colorless.

Step 17: Transform the smoke and align it with the tree
So that the smoke doesn't engulf the entire landscape, select the smoke layer and open the transform frame with Ctrl+T. Under Edit, Transform, Warp, adjust the shape until the smoke rises mainly in the area of the tree. Confirm the changes with Enter.

Step 18: Refine the smoke with a mask
Create a layer mask again and paint with black over the areas where the smoke is distracting, such as over the dark ground. A transparent, soft brush allows you to paint over the same spot several times and thus create fine gradations. Finally, check the edge areas, because edges can remain visible there.

Step 19: Compare before and after
Finally, you can check the effect. Hold down the Alt key and click on the eye icon of the original image. This way you see the initial state in direct comparison to the edited version and recognize how strongly fire and smoke change the scene.

Summary ??? Fire Overlays in Photoshop: Setting a Dry Tree on Fire with Smoke
With fire overlays, the "Screen" blend mode, and cleanly placed masks, a dry tree can be convincingly set on fire. The curves adjustment in Luminosity mode provides the appropriate, darker mood, while smart objects keep every adjustment non-destructive. The smoke is created from an inverted fog texture, which is applied in Multiply mode, made higher in contrast, and desaturated. If you transfer these steps to your own subjects, you gain a flexible technique for many composites.
FAQ
Which fire shots are suitable for this technique?Shots with a dark background are best suited, because the Screen blend mode makes dark areas transparent.
Why should the curves adjustment work in Luminosity mode?This mode prevents the colors from becoming more saturated when darkening, since only the brightness is changed.
Why do you use smart objects for the fire layers?Smart objects allow scaling, rotating, and warping without loss of quality, because the original material is preserved.
How do I change the brush size quickly?Hold down the Alt key and the right mouse button and move the mouse left or right. Moving up or down changes the hardness.
How do I quickly switch between foreground and background color?With the X key you swap both colors, so that you can make areas in the mask visible again with white.


