
Imagine your photo looked as if it were printed on cracked stone or coarse linen. That is exactly what you can achieve with textures in Photoshop, without having to draw anything yourself. You place texture images over your original, blend them using layer blend modes, and control contrast and color with adjustment layers. In this tutorial, I will guide you through three examples: a stone surface with cracks, a coarse cloth, and a fine fabric.
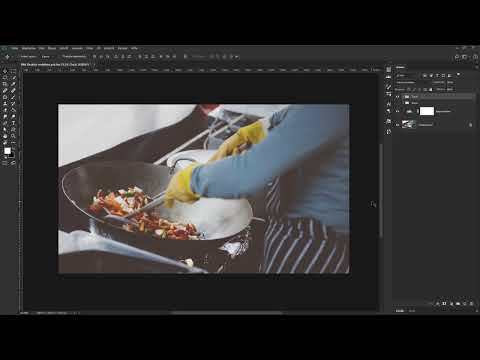
The video is only loaded from YouTube when you play it – data (including your IP address) is then transmitted to YouTube/Google. More in the privacy policy
Key Takeaways
- Textures should always be placed in their own layer groups so that you can show and hide each effect independently.
- The Soft Light blend mode combines the texture with the original image and creates the visible structure.
- Adjustment layers with a clipping mask only affect the texture below them and protect your original image from unwanted changes.
- With the luminance selection, you can separate light and dark areas of a texture and treat them differently.
- A Smart Object allows you to adjust or hide filters such as Ripple at any time later on.
Step-by-Step Guide
Step 1: Prepare the Source Image and Create a Group
Open your photo in Photoshop. It initially appears as a background layer in the Layers panel. Before you start with the texture, create a new group using the folder icon at the bottom of the Layers panel. Double-clicking the group name allows you to rename it appropriately, for example "Cracks". This organization will save you a lot of time later when you try out several structures.

Step 2: Place and Scale the Stone Structure
Now drag a stone texture from the Tutkit texture pack directly into your document via drag & drop. Photoshop creates it as a new layer, and you will see the transformation frame. When enlarging, hold down the Shift and Alt keys and drag an outer handle. This scales proportionally from the center. Then confirm with the Enter key.
If you want to distort the texture freely, simply release the keys and drag the frame with the mouse. Pay attention to the image content: with portraits or faces, any compression quickly looks unnatural, while with surfaces such as stone or fabric it is hardly noticeable. Finally, move the layer into the "Cracks" group via drag & drop.

Step 3: Blend the Texture with the Original Image
At the moment you only see the texture. To make it combine with your photo, with the texture layer active, change the blend mode from Normal to Soft Light. The cracks become visible, and the original image shows through. However, you will notice that the black and white values still look too strong. In reality, a stone or fabric surface would never show such deep black or pure white. This is exactly what you will work on in the next step.

Step 4: Soften Black and White with a Levels Adjustment
Create a Levels adjustment layer above the background layer. To do this, click the adjustment icon at the bottom of the Layers panel and select Levels. In the Properties panel you will see the histogram with three sliders. Drag the white slider slightly to the left and the black slider slightly to the right. This brightens the shadows, and the image no longer contains pure black or pure white. Then name the layer, for example "Clipping".

Step 5: Apply Contrast Only to the Texture
A second Levels adjustment should increase the contrast of the texture without affecting the original image. For this you need a clipping mask. Hold down the Alt key and click the dividing line between the adjustment layer and the texture layer beneath it. The mouse pointer changes accordingly. Now adjust the contrast. The changes affect only the texture, and the individual structures in the image become more clearly recognizable. Name this layer, for example, "Contrast".

Step 6: Reduce Colors with a Vibrance Adjustment Layer
The orange and yellow tones in the image often look too strong. Therefore, create a Vibrance adjustment layer above the texture group. Make sure it is located within the group. Drag the Vibrance slider far to the left and the general Saturation slider back slightly. By clicking the eye icon of the adjustment layer, you can switch between before and after. Play with the sliders until you like the color effect. This depends heavily on the source image.

Step 7: Check the result and hide the group
Hide the group by clicking the eye icon to see the edited original. Then show it again and compare both states. The stone structure is now clearly visible, and your photo looks as if it were lying on a cracked surface. You should repeat this comparison at every step, because small adjustments often change the overall effect more than you would expect.

Step 8: Insert a cloth texture and separate it with a luminance selection
For the second effect, create a new group named "Cloth" and hide the stone group. Drag a cloth texture from the high-resolution texture pack into your document, scale it proportionally, and move it into the cloth group. To make the texture look realistic, you want to treat light and dark areas separately. For this, you use a luminance selection.
Open the Channels panel via the Window menu. Hold down the Ctrl key while the cloth layer is active, and click on the thumbnail of the RGB channel. Dashed lines appear that outline all very bright areas. You drag this selection onto its own layer with Ctrl and J.

Step 9: Split light and dark areas into layers
Hide the light layer, activate the cloth layer again, and load the luminance selection once more. This time, select the dark areas via Select and Inverse Selection (Shift, Ctrl and I). Copy this selection onto a new layer with Ctrl and J as well. Name the light layer "Highlights" and the dark one "Shadows".
Now set the blend mode of the highlights layer to Screen. The light areas of the cloth are thereby blended with the original image. At first glance this looks too bright, so you reduce the opacity, in the example to about 75 percent. For the shadows layer, you also test various opacity values, in the example about 70 percent. Adjust the values to your image.

Step 10: Strengthen the structure with contrast clipping masks
So that the cloth does not look like fabric that has been washed a thousand times, you strengthen the structure. Select the highlights layer and add a Levels adjustment via the adjustment icon. Name it "Contrast" and be sure to create a clipping mask by holding down the Alt key and clicking between the two layers. Then drag the black slider as far to the right as possible and the middle gray slider to the right as well.
Repeat the process for the shadows layer. With another Levels adjustment and clipping mask, you drag the black slider to the right so that the dark areas stand out somewhat more. The result has stronger contrast and is more vivid.

Step 11: Adjust group opacity and soften contours
If the overall effect seems too strong to you, reduce the opacity of the entire cloth group, in the example to 80 percent. This is often more elegant than adjusting each layer individually. Hard contours, for example on gloves or edges, can be softened with a filter. To do this, right-click the background layer to create a Smart Object and name it "Original image".
Then apply the Distort, Ripple filter to the Smart Object. Since this filter offers no preview, you simply try out the strength on the image. Confirm with OK. Should you want to hide individual effects later, you keep control at all times, because the filter remains as a Smart Filter.

Step 12: Work in fine fabric with a blend mode
For a third variant, you create a new group named "Fabric" and hide the cloth group. It is important that the Ripple filter remains deactivated. Then choose an image file from the Acrylic Paints and Lacquers pack. If the image is in landscape format and your photo is in portrait format, that is not a problem. You rotate the image in 15-degree steps by dragging outside the frame at the anchor point while holding the Shift key. Enlarge it with Shift and Alt from the center, confirm with the Enter key, and name the layer "Fabric".
Set the blend mode to Overlay. Soft Light looks too weak here, Hard Light too aggressive. Overlay increases the contrast and brings out the structure pleasantly. Zoom into the image to check the fine details.

Step 13: Changing the Hue with a Solid Color Layer
With a Solid Color adjustment layer, you can adjust the color impression of the fabric at any time. Create the layer via the adjustment icon, choose a test color, and name it "Hue". Drag the layer so that it sits directly above the fabric layer, and create a clipping mask by holding down the Alt key. This way, the color affects only the fabric.
Then change the blend mode of the Solid Color layer from Normal to Hue. Double-clicking the color swatch opens the color picker. Choose a red, for example. The image now looks more reddish, but the original colors of the photo are preserved. Try out different hues until the mood is right. If you zoom into the image, you will see a beautiful fabric structure that gives the photo a character all its own.

Summary ??? Textures in Photoshop: Creating Surface Structure for Photos
With textures from a pack, you can give any photo a stone, cloth, or fabric structure. You work with groups, blend modes such as Soft Light or Screen, clipping masks, and luminance selections, and thanks to Smart Objects and adjustment layers, you keep full control. Take your time trying out each texture, because every image requires its own settings for opacity, contrast, and color.
FAQ
Which texture is suitable for portraits?Even surfaces are best suited, because strongly compressing adjustments quickly look distorted on faces.
Why should I use adjustment layers as a clipping mask?A clipping mask ensures that changes only affect the texture below and the original image remains unchanged.
What does the Soft Light blend mode do?It blends the texture with the image below, so that structures such as cracks become visible without completely overlaying the image.
How do I remove a filter again without destroying the image?Convert the original image into a Smart Object beforehand. Then you can hide or adjust the filter at any time.
How do I set the strength of a texture?Reduce the opacity of the individual layer or the entire group until the structure looks natural.
Why do I separate light and dark areas of the texture?With the luminance selection, you can edit highlights and shadows separately in order to use different blend modes and opacity values.


