Imagine the bride and groom stepping out of the church at 2 p.m., the midday sun high in the sky and not a shadow for miles around. Moments like these often decide whether a photo succeeds. These are exactly the situations at the center of this guide.
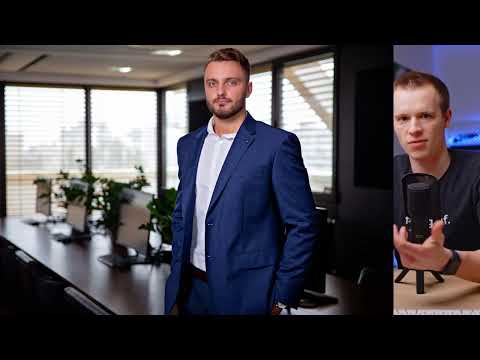
The video is only loaded from YouTube when you play it – data (including your IP address) is then transmitted to YouTube/Google. More in the privacy policy
It is based on a video in which Matthias uses his own images to show how he sets up light for weddings, business portraits, studio shoots and shots in the park. You will learn why he positioned lamps and reflectors the way he did, where he made compromises, and which principles you can transfer to your own projects.
Key Takeaways
- Perfect light is rare. Especially at weddings or in spontaneous moments, you have to make compromises and make the best of the situation.
- Backlight is a powerful creative tool when you place the sun behind or above your subject while keeping an eye on the background.
- Manual exposure and the RAW format give you reserves to correct shadows and highlights afterwards.
- Mixed light from studio flash and existing light sources looks more natural than a completely darkened room.
- The hardness and direction of the light determine the mood. A steep, hard source creates distinctive shadows, while soft light creates gentle transitions.
- Knowledge about light only comes from trying things out yourself.
Step-by-Step Guide
Step 1: Using Backlight in Unplannable Situations
In spontaneous scenes such as the exit from the church, there is often only one way: you position yourself so that the sun is behind or above your subject. Midday sun from the front would quickly blow out faces and cast harsh shadows under eyes and noses. With backlight, on the other hand, the subject gains contours and fine highlights. Make sure the person does not disappear completely into darkness but is merely framed by the light.

Step 2: Expose Backlight Manually and Preferably a Bit Darker
In backlight, you should shoot manually. Automatic mode rarely gets the exposure right reliably when the light changes strongly. Expose so that the background still has detail and you can later recover something from the shadows. Matthias openly admits that he tends to shoot too dark rather than too bright in order to avoid overexposure. This is a sensible approach, because blown-out highlights can hardly be recovered, while dark areas in RAW format often still show details. A glance at the histogram helps you check the balance.

Step 3: Deliberately Place Portraits in the Shade
If you have the time to shape the situation, shade is your most important ally. Place the subject so that it stands completely in the shade, and let the soft ambient light shape the face. The result looks even and calm. Keep in mind that a subject in the shade is only convincing if the background is also harmonious. A brightly lit background draws attention away.

Step 4: Keeping the Background in the Shade
In this example, the landscape in the background was heavily overexposed by the midday sun. Matthias used three to four trees to create a larger shaded area in which both the subject and the background are located. Only a few patches of sunlight come through the foliage and set small accents on the head and shoulder. This keeps dynamism in the image without the background outshining the person. When positioning, make sure you control the light spots deliberately rather than leaving them to chance.

Step 5: Using a Reflector Purposefully
A reflector can gently brighten shadows if it is positioned correctly. Matthias places it on the side from which the light is to be bounced back, for example opposite the light source, and works with the white or silver side. The translucent side, on the other hand, is suitable for softening light when it becomes too harsh. The problem: you need an assistant who holds the reflector steady and constant. If you are out alone, think beforehand about whether the effort justifies the benefit. In many cases, Matthias does without it entirely and accepts the result.

Step 6: Setting Up Mixed Light with Studio Flash in the Office
In the office shoot, the goal was not to show the employees against a black background, but to make the surroundings visible. To achieve this, the blinds were lowered halfway, so that no harsh light falls into the room, but the room does not become completely dark. A beauty dish with a studio flash stood slightly to the left of the subject. The camera was set so that the background was already properly exposed, and the flash was only turned up until the subject was correctly exposed. This order is crucial: first set the background, then match the main light to it.

Step 7: Deliberately Incorporate Practical Lighting
Existing lamps in the room do not have to be switched off. Matthias left them on in the office because they contribute a small but noticeable amount to the mood. This combination of studio flash and practical lighting looks more natural than a sterile studio portrait. However, make sure that the light colors match. Very different color temperatures, such as sunset and cold artificial light, can make the image look restless. It is always worth experimenting here.

Step 8: Brighten Dark Locations with a Video Light
In the pole dance studio, the walls and string lights reflected in all directions. Instead of hiding the surroundings, Matthias used a video light from the front to lightly brighten the face. The arcs of lights and lamps in the background remained visible because they show the character of the room. It is crucial that the main light does not become too strong, otherwise it becomes noticeable that artificial lighting was used. An evenly appearing, slightly boosted front light is often less conspicuous than a dramatic flash.

Step 9: Combine Natural Light in the Park with Backlighting
For outdoor shots in the park, the sun is often the strongest light source when it is low in the sky. Place the subject so that the sun is behind them, and make sure you don't shoot too dark from the front. In such cases, Matthias works without a reflector and without a flash and deliberately exposes the face with an eye on the remaining light. The challenge lies in keeping both the background and the subject in view at the same time, without the image as a whole becoming flat or too high in contrast.

Step 10: Use Striplights for Unusual Light Directions
In boudoir and nude shots, striplights work particularly well because they deliver light from an unusual direction while emphasizing contours. Here in the studio, Matthias works with strip lights and deliberately lets the light fall from the side or from behind. The front often stays dark, creating tension and mystery. Be careful not to let the light come from below, as this quickly creates an unflattering, almost creepy effect. Experiment with different directions and observe how the mood changes.

Step 11: Emphasize Muscles with Steep Light
The so-called muscle setup uses a steep light source from above, slightly offset in front of the subject. The light source should not stand exactly vertically above the person, but somewhat further forward, so that the shadows do not become too flat. A beauty dish is well suited for this, as it delivers hard, crisp light in the center that falls off more softly toward the edges. Especially with portraits, you should be aware that a strong light source also creates strong shadows. You can brighten these shadows somewhat again with a reflector if they become too deep.

Step 12: Test Setups on Your Own Projects
In the end comes the most important exercise: experimenting. Get yourself a flash or a reflector, place the lamp in different positions, and photograph yourself or a test subject. Note how direction, hardness, and distance affect the image. Matthias used exactly this method at the beginning of his career and as a result understood much better how light works. Knowledge without practical application, on the other hand, remains abstract.

Summary ??? Lighting Setups in Photography: Proven Setups for Everyday Use
The lighting setups presented show that good light rarely depends on chance, but arises from deliberately chosen positions. Backlighting, shadow placement, reflectors, mixed light, striplights, and steep beauty dishes are tools that you can combine depending on the situation. Crucial here are manual exposure, a look at the background, and the willingness to make compromises. Take the examples as a starting point, test them in your own environment, and develop your personal style from them.
FAQ
What is the best way to expose in backlight?Shoot manually, slightly darker than the automatic mode suggests, and use the RAW format so you can brighten shadows later.
Why should I use mixed light instead of a completely dark room?Mixed light looks more natural because the room remains recognizable, and the studio flash provides the necessary main light on the subject.
When is a reflector worthwhile?A reflector is worthwhile when shadows become too deep and you have someone who can hold it reliably. Without an assistant, the effort is often greater than the benefit.
Why shouldn't a beauty dish be positioned exactly above the subject?A slightly forward, steep position creates more balanced shadows than a light source directly above the head, which casts unflattering shadows on the face.


