With one of the most exciting filters in Photoshop Elements, you can create dramatic light accents – the lens flares. This impactful filter not only provides realistic sunlight, but it also allows for precise control over the light source. In this guide, I will show you how to use this filter optimally to elevate your photos to a new level.
Key Insights
- The lens flares provide realistic light accents in your images.
- You can individually adjust the light source, its intensity, and direction.
- The filter is particularly well-suited for scenes with strong light and flares.
Application of the Lens Flare Filter
To use the lens flare filter effectively, follow the steps below.
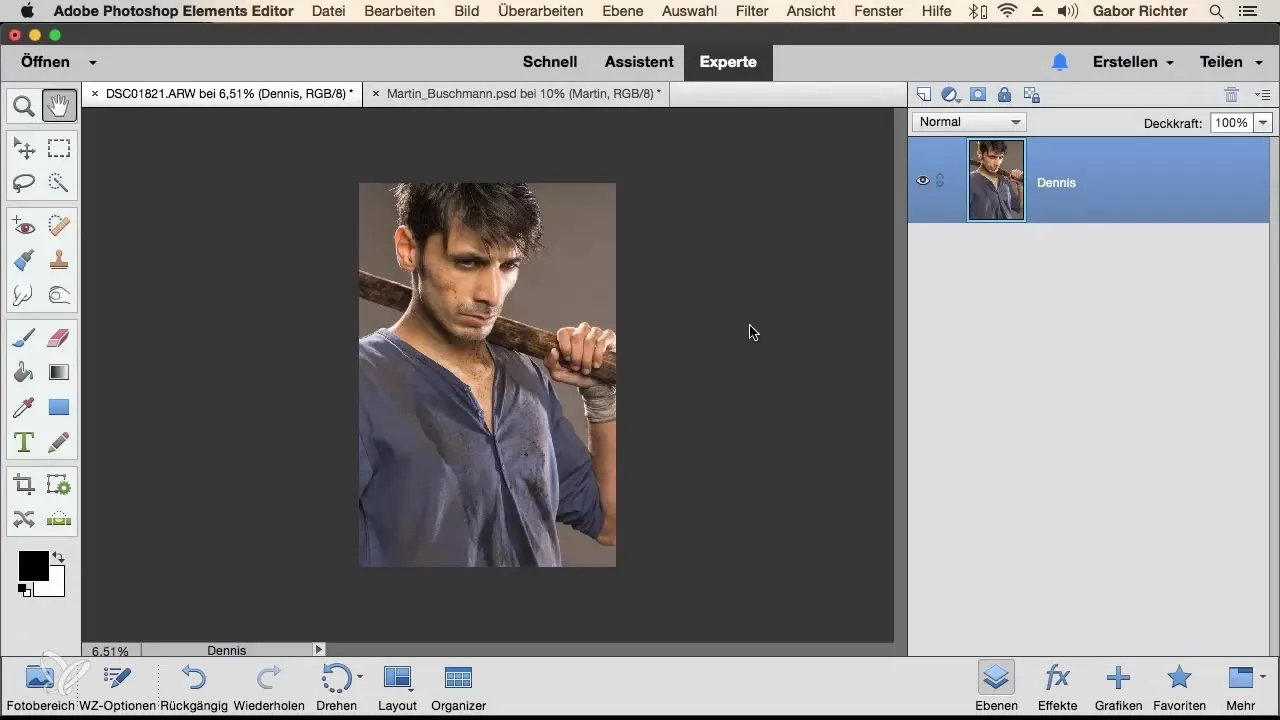
Start by opening your image in Photoshop Elements. Choose a subject that is influenced by natural light, such as a scene with direct sunlight. The stronger the light source, the better the effect will be.
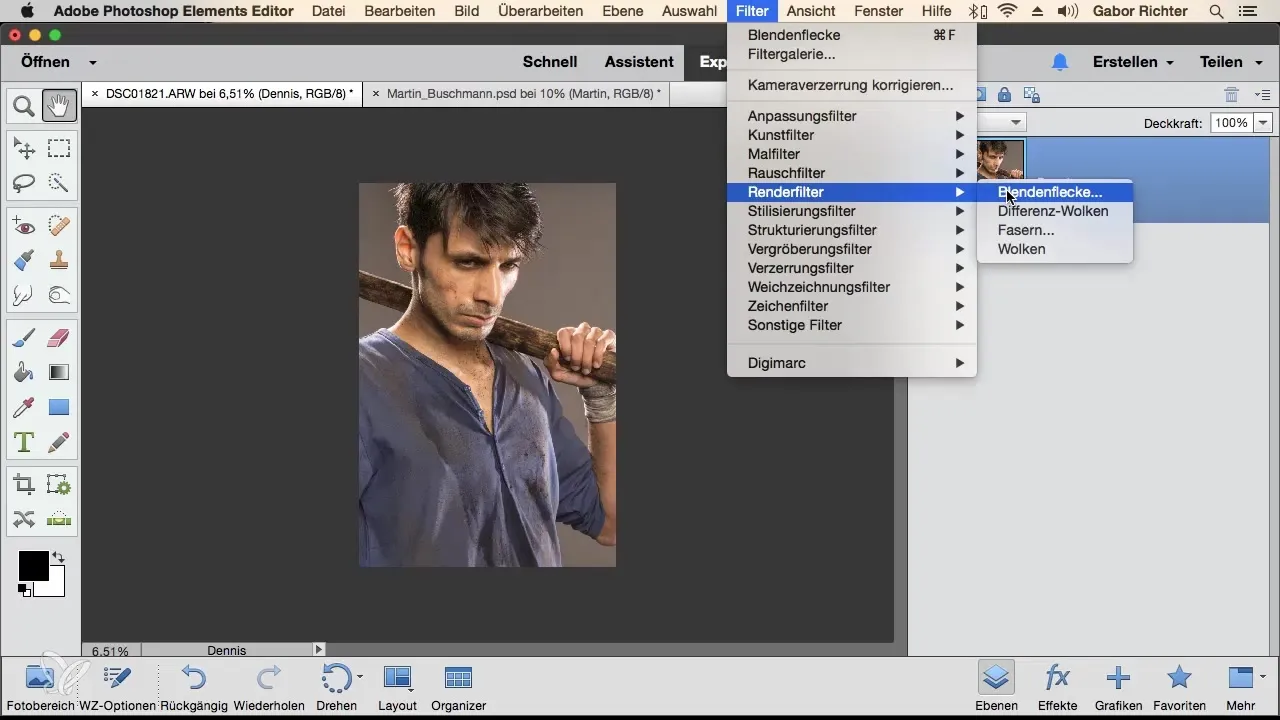
Activate the lens flare filter through the menu provided above. Go to "Filter", then "Render" and choose "Lens Flare" from the dropdown menu. After activation, a new dialog window will open where you can select different lens types.
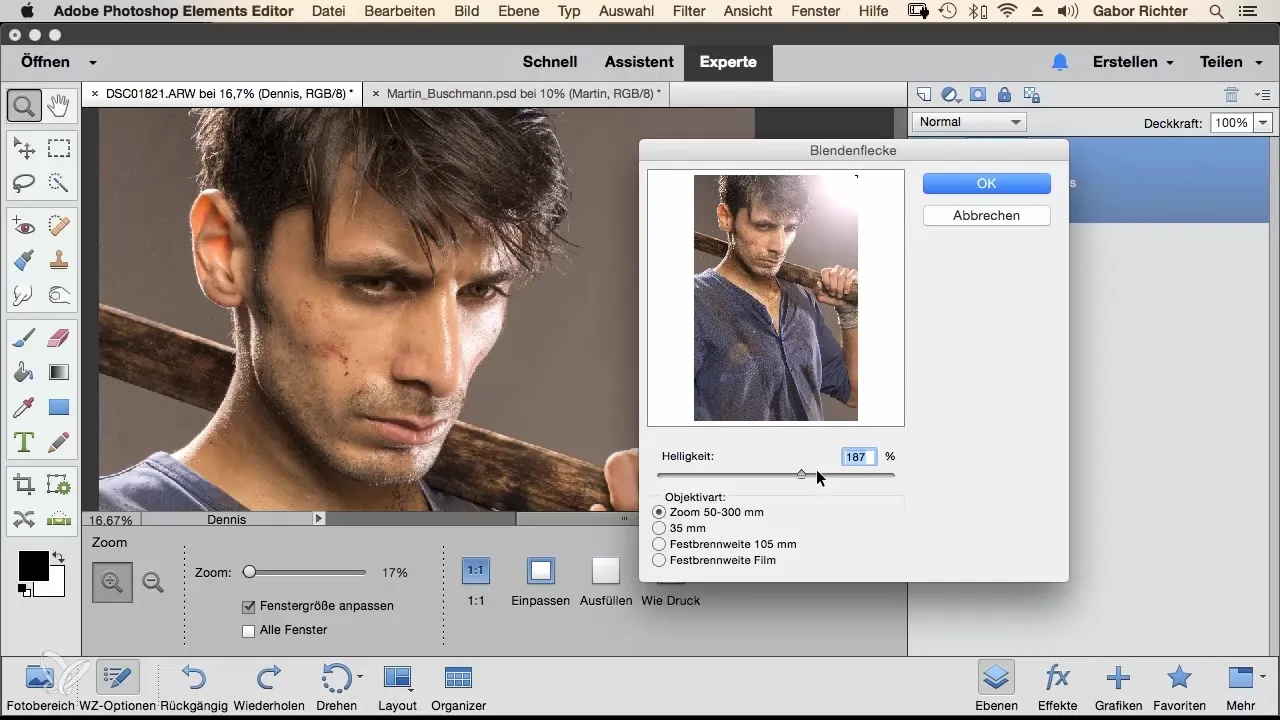
Now select a lens-type light source, such as the 35 mm lens. With this setting, you have the option to scale the brightness of the lens flare. Pay attention to the intensity to ensure the effect looks realistic and blends harmoniously into the image.
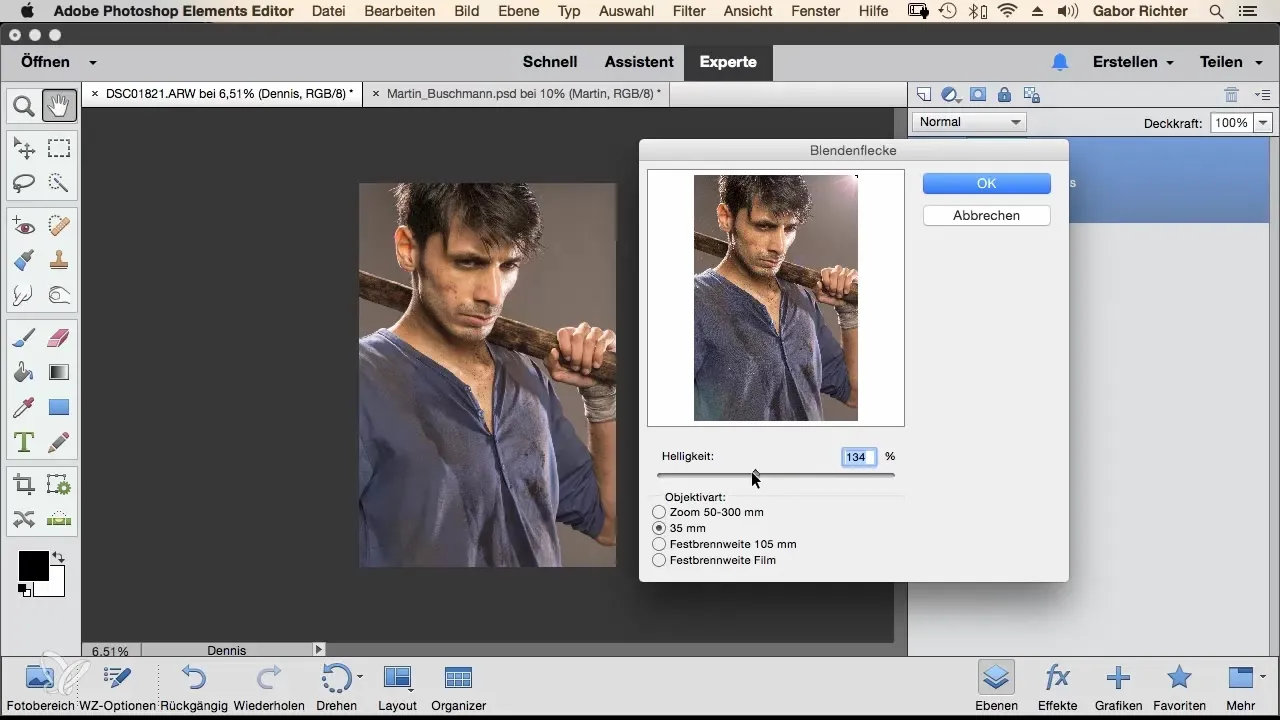
Position the lens flare in your image as desired. A targeted placement, such as the upper right side, enhances the effect of the light play. Experiment a bit with the brightness and placement until the result meets your expectations. This step is crucial for achieving an appealing effect.
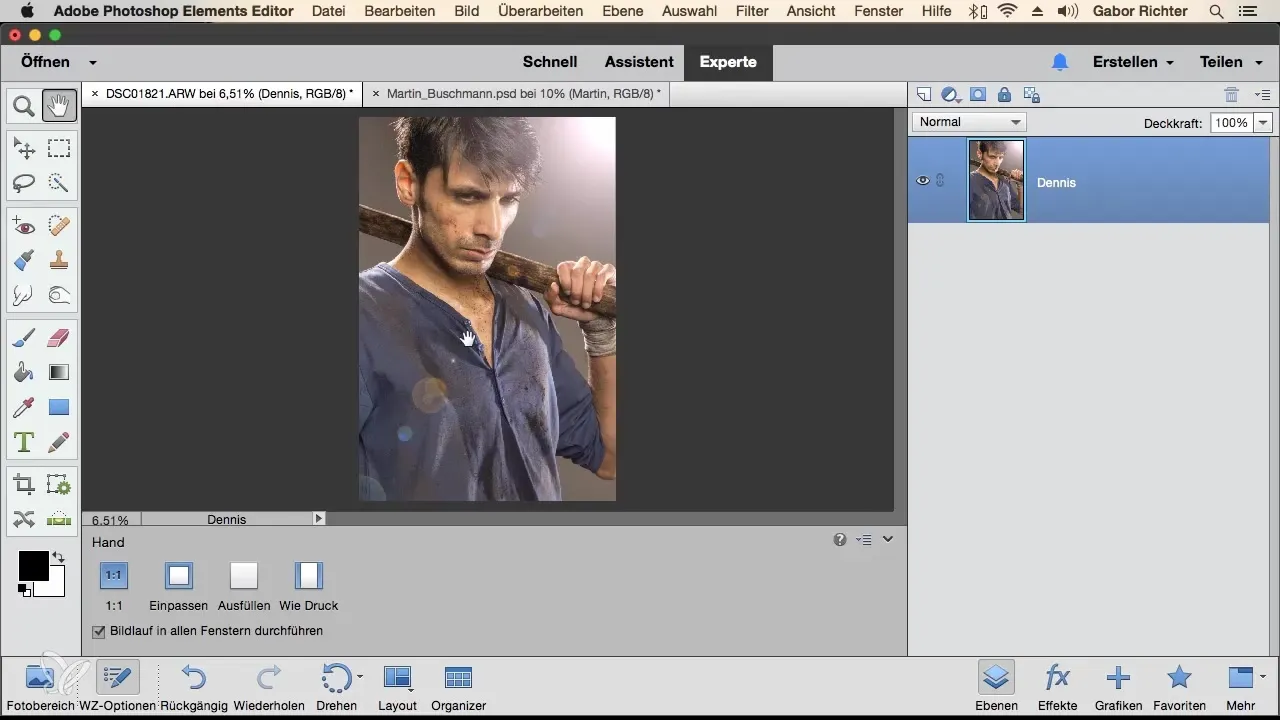
Confirm your settings with "OK" and observe your image. You should now see an impressive lens flare and the highlighting that gives depth and atmosphere to your photo.
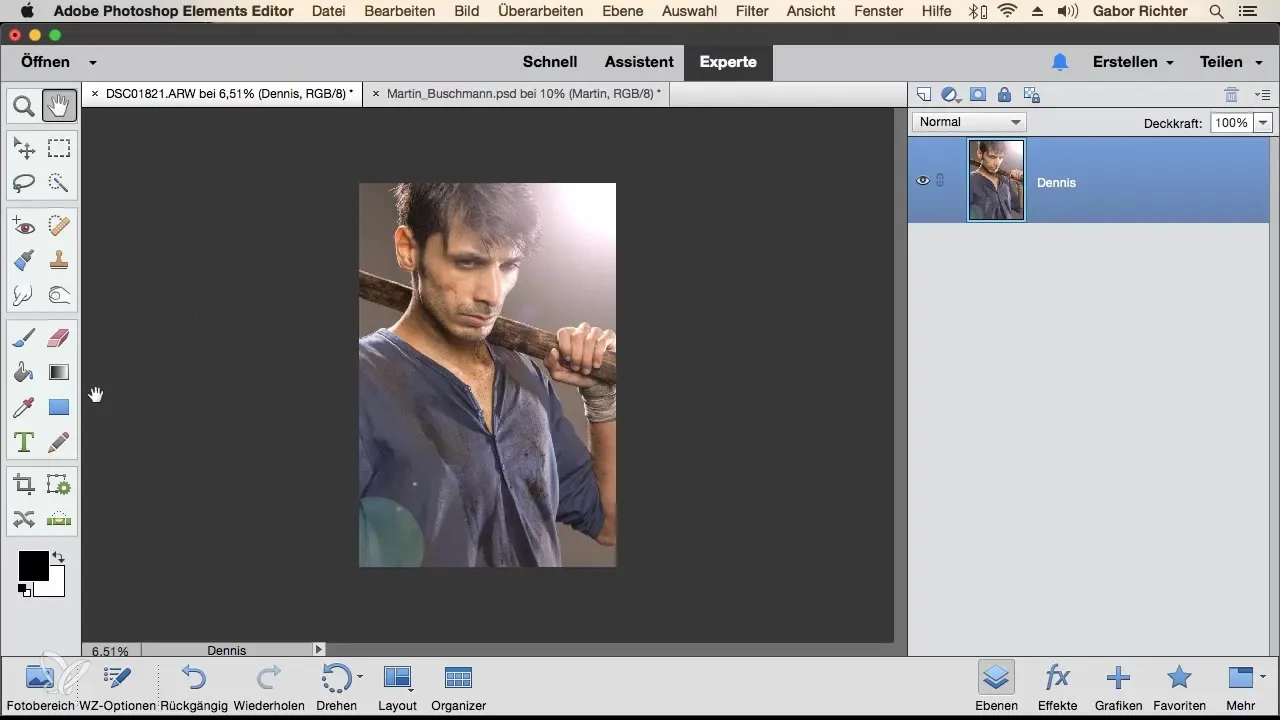
If you are not satisfied with the result or want to try a different look, you can easily undo the process and select a different lens flare. Go back to "Filter", then "Render" and choose "Lens Flare".
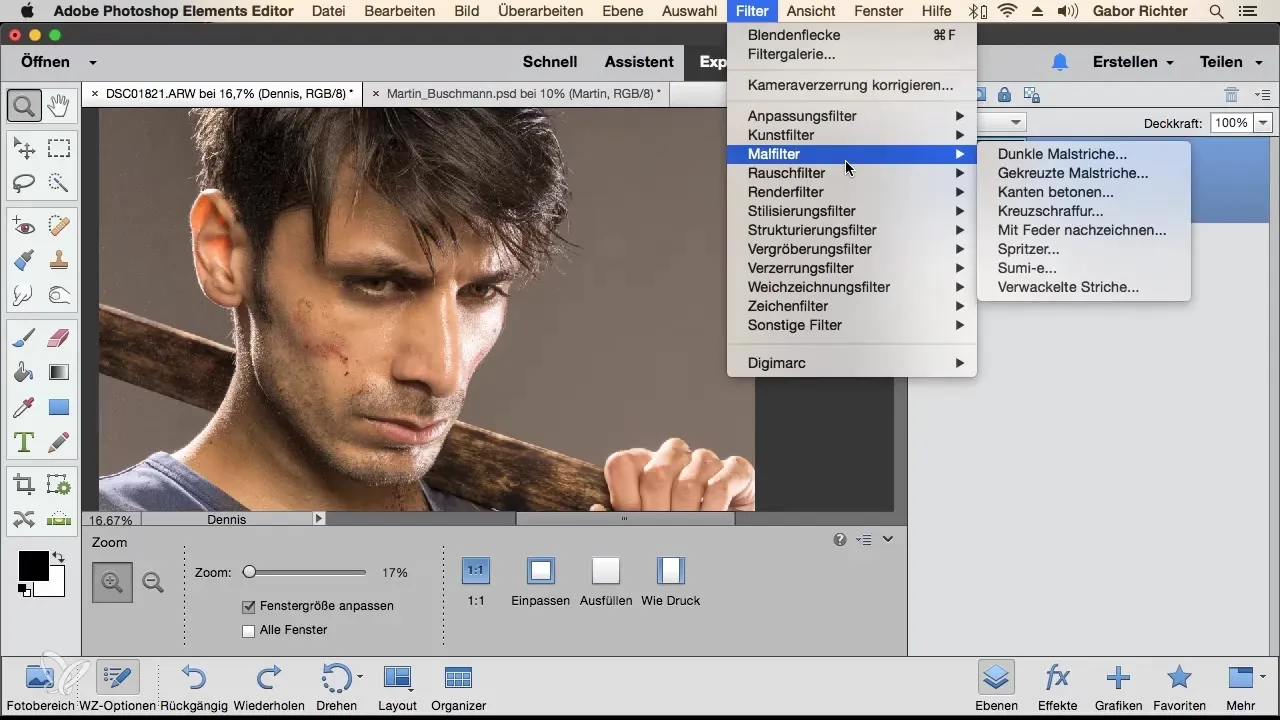
Experiment with other lens types, such as the 50 to 300 mm lens. Adjust the brightness up or down depending on the desired effect. Also, be sure to vary the position and intensity of the lens flares to create a soft or aggressive light structure.
Every attempt brings you closer to your ideal light accents. Use this filter especially for photos that are affected by a harsh light source. Whether you prefer a scene with direct sunlight or an artistic flare, the filter offers you unlimited possibilities.
Summary – Lens Flares in Photoshop Elements – how to set effective light accents
The lens flare filter in Photoshop Elements is a powerful tool that allows you to create stunning light plays in your images. You can not only adjust the brightness and direction of the light source, but also vary the type of lens flare to achieve realistic and appealing results. With a little experimentation, your photography will become much more vibrant and exciting.
Frequently Asked Questions
How do I activate the lens flare filter in Photoshop Elements?Go to "Filter", then "Render" and select "Lens Flare".
Can I apply the lens flare filter to all images?Yes, it works particularly well for images with strong light sources.
Can I adjust the brightness of the lens flare?Yes, the brightness and position of the lens flare can be individually adjusted.
Which lens should I choose?The 35 mm lens is a good start; also try other options.
Does the lens flare filter only work with sunlight?No, it works very well with other light sources as well.


