Do you want to work quickly and precisely with masks and adjustment layers in Photoshop Elements to make specific adjustments to an image? This guide shows you how to highlight or change the colors and details in your image by combining masks and adjustment layers. Using a practical example, you'll learn the steps necessary to perform a color change on an image and how to work with masks.
Main insights
- Every adjustment layer in Photoshop Elements comes with a mask that gives you control over the visibility of the changes.
- By inverting the mask, you can apply the changes selectively to certain areas.
- You can always go back and adjust the color or the settings of the mask, giving you high flexibility.
Step-by-Step Guide
To demonstrate how to use masks in combination with an adjustment layer, let's assume you have a calendar motif where you want to change a column from one specific color to another.
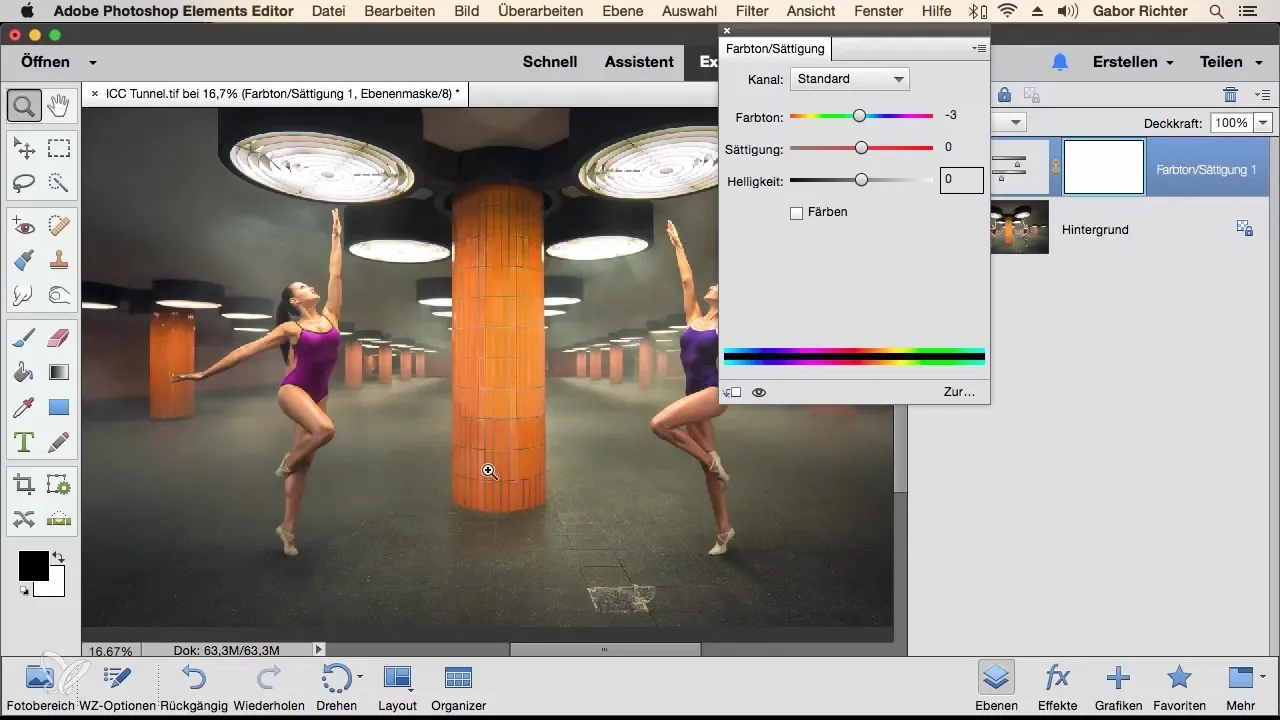
First, open your image in Photoshop Elements. Choose the option to create a new adjustment layer, specifically, "Hue/Saturation".
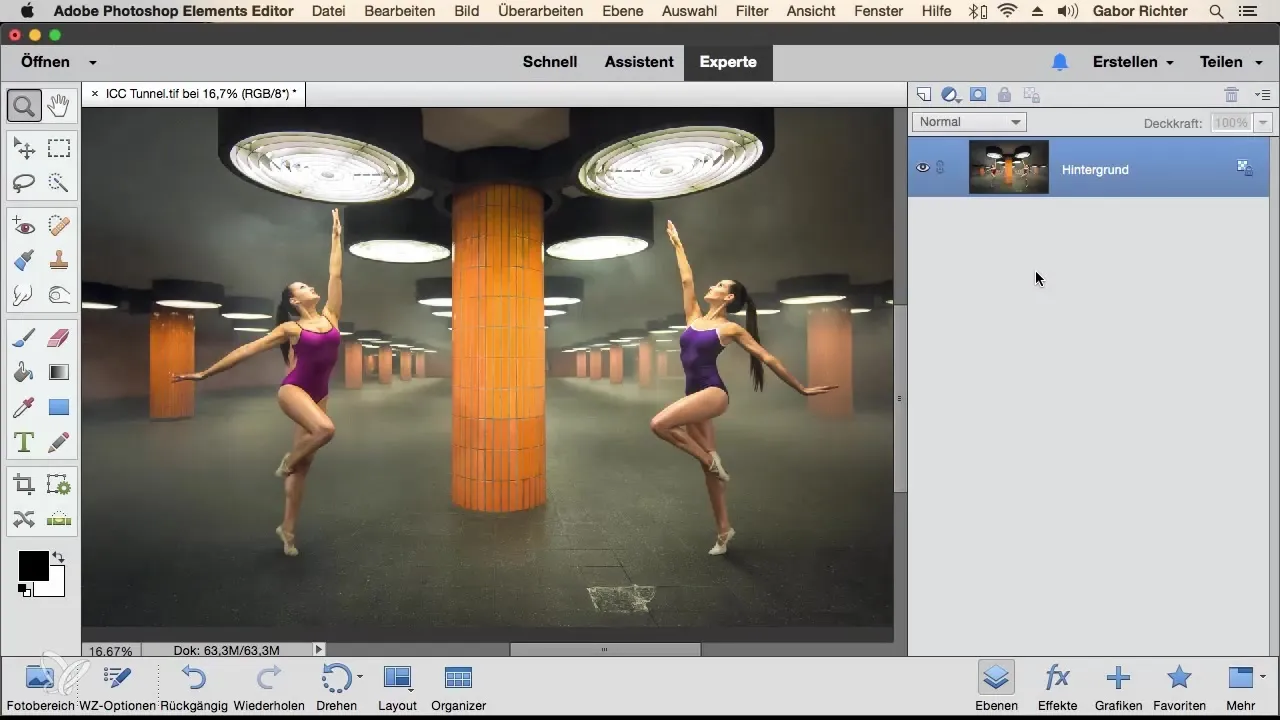
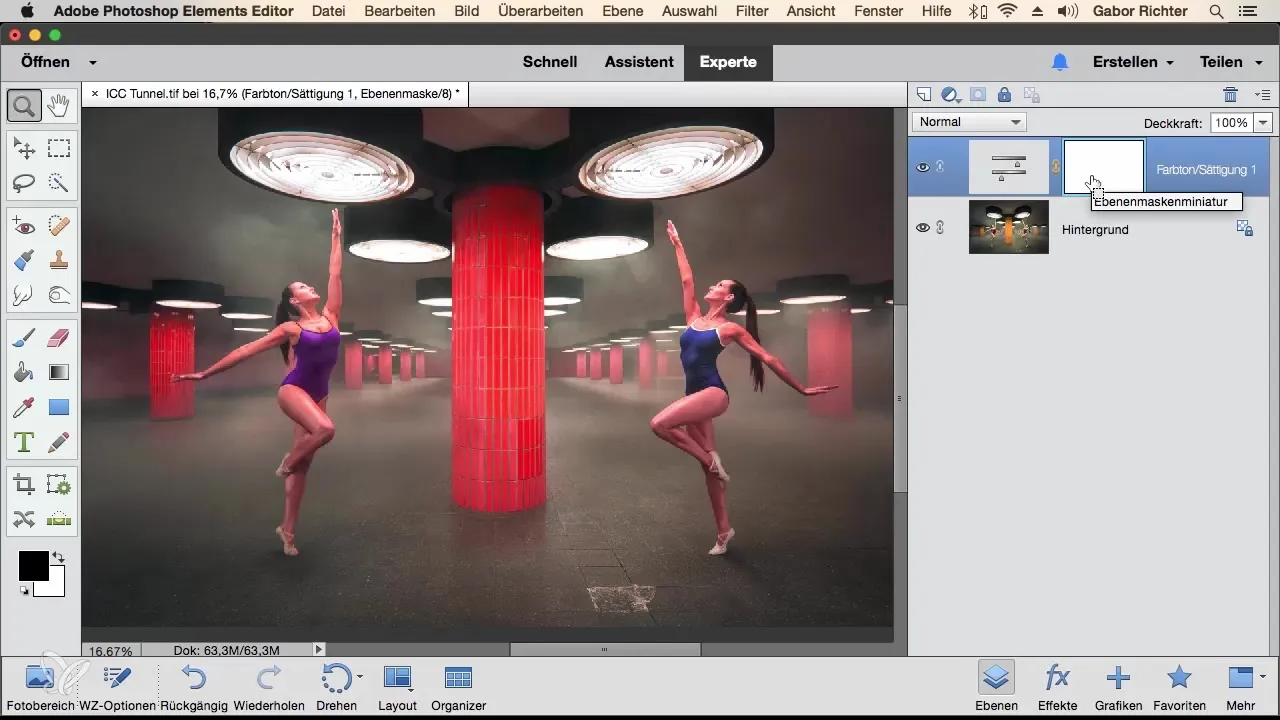
The goal here is to change the color of the column in the middle of the image. You have the option between different colors, such as green, yellow, or red. Let's change the column to a vibrant red for this example.
Currently, the adjustment layer is applied to the entire image. To limit this effect only to the column, go to the mask of the adjustment layer. Press "Command + I" on Mac or "Ctrl + I" on Windows to invert the mask. Now the change is invisible. This means the adjustment layer is effectively disabled.
To bring the desired color back to the column, you need a brush. Consider which color or brightness you want to use to restore the column. In this case, you need the color white since you will be painting with the brush to reveal the mask.
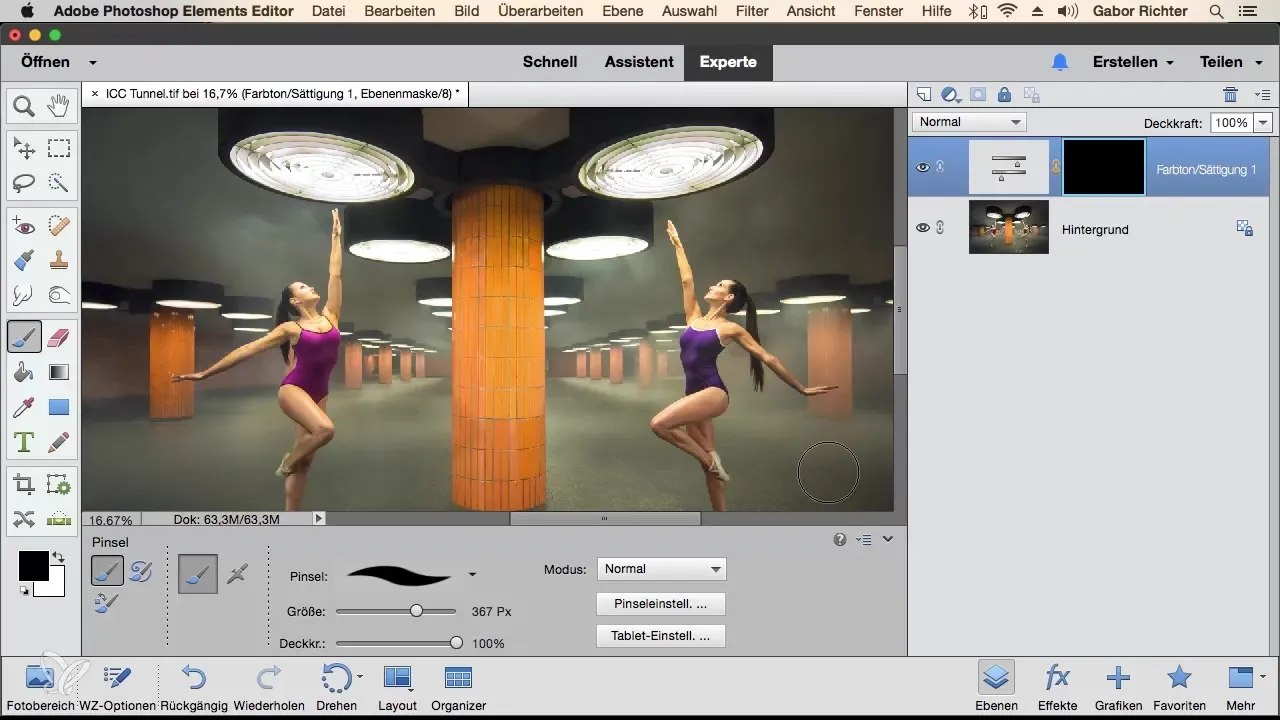
Select a white brush, and make sure you are not working with a red brush; you're not painting with the color itself, but changing the mask. The white brush will help you to make the adjustment layer visible for the column to restore the desired red color.
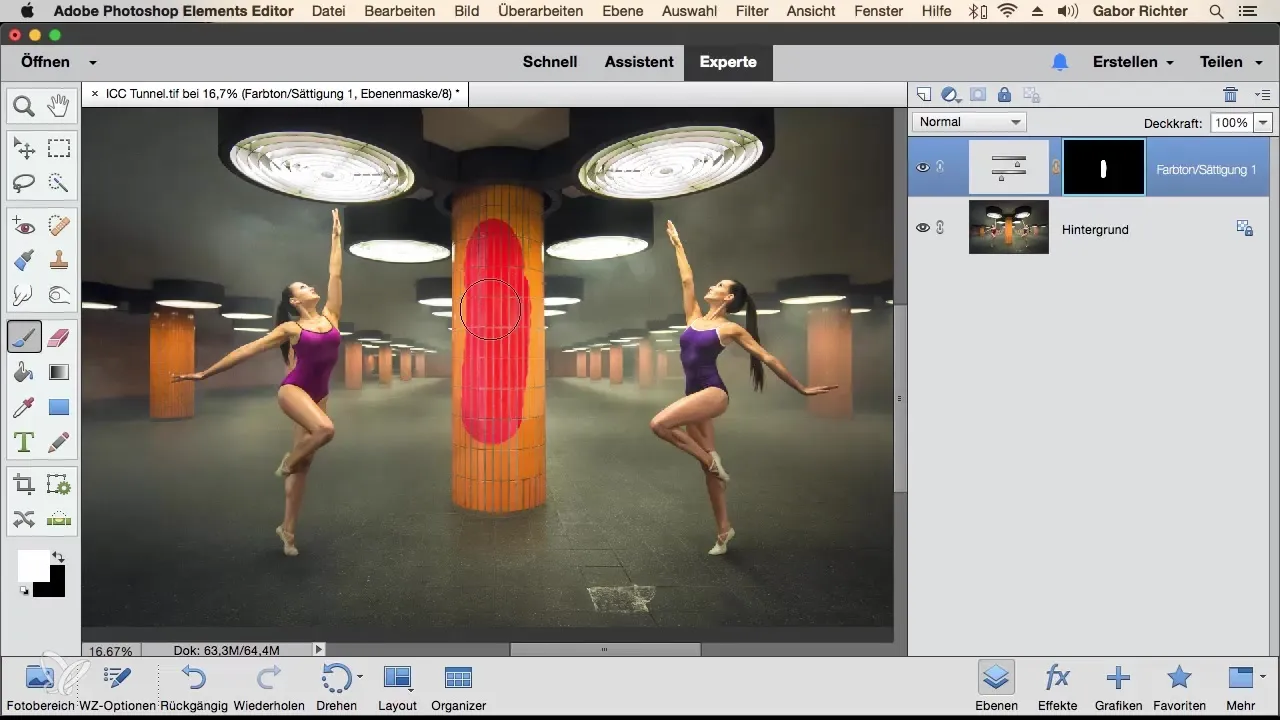
As you paint, you can gradually bring the column to red. Do you notice you also want to color the back columns? This can be easily done with the same technique. You can adjust the size and hardness of the brush to optimize use and carry out precise work.
Look at how the mask appears. Hold down the "Alt" key and click on the mask. This way, you can see exactly which areas are activated or masked. This is especially useful to determine if you have painted too far or certain areas were not masked.
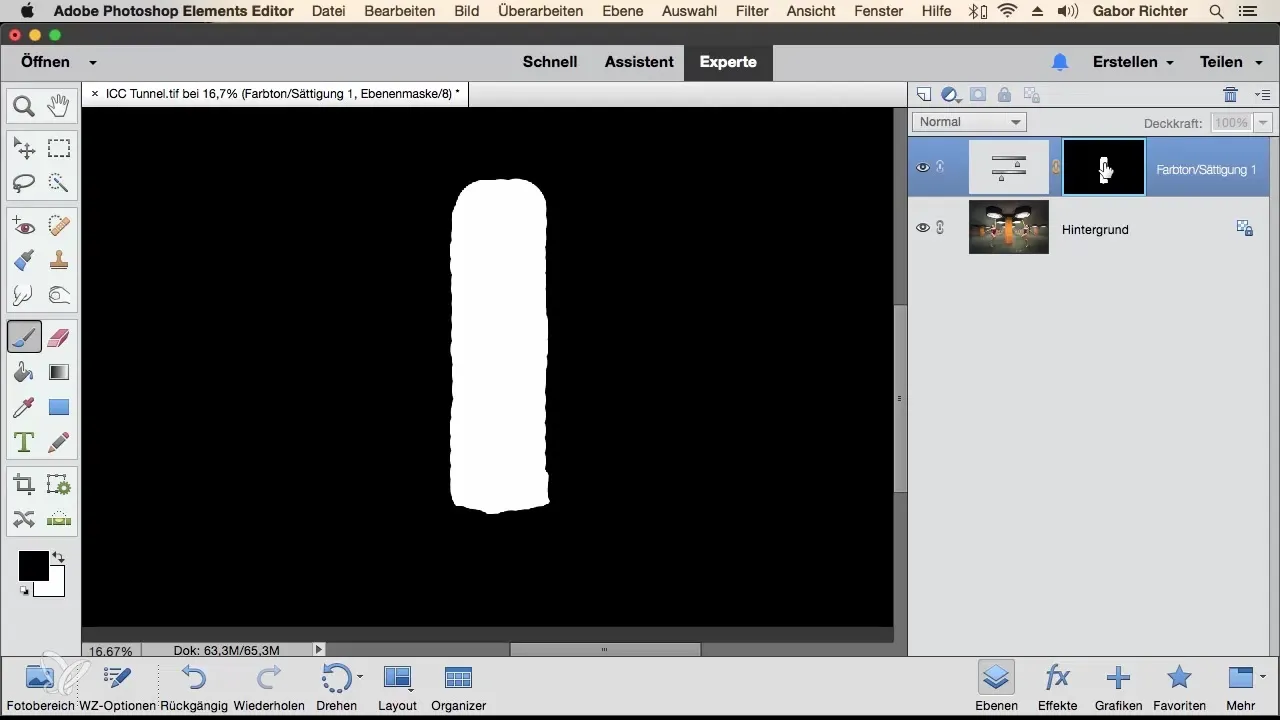
To color the other columns in the image, reduce the brush size and adjust the hardness. Make sure to work precisely. Zoom in if necessary to achieve perfect edges, especially in areas like the hand that you don't want to color.
When you see the changes you have made and you are satisfied with the adjustment, keep in mind that using a mask allows you the flexibility to change the color at any time. However, you can now adjust the color without having to recreate the entire mask. You can transform the column into a yellow or a green.
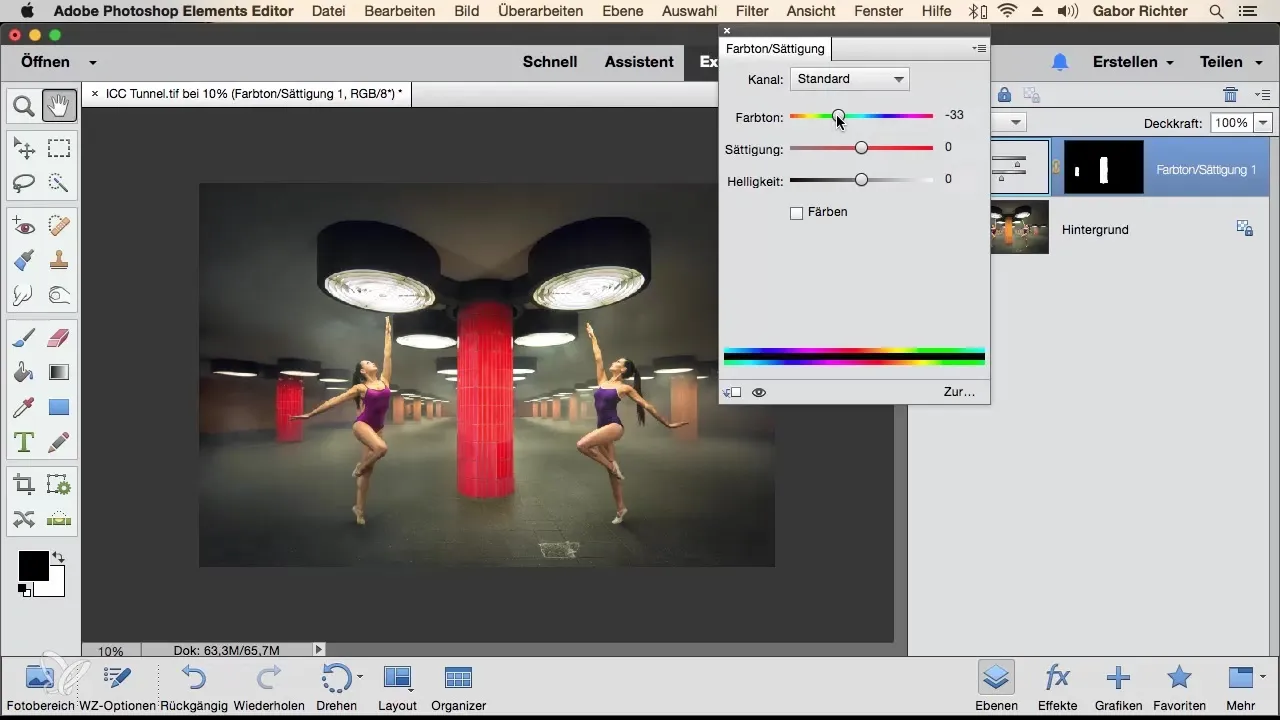
By using the mask, you have selected the desired area and transformed the color into the desired hue.
Summary – Working with Masks and Adjustment Layers in Photoshop Elements
In summary, using masks in combination with adjustment layers significantly facilitates targeted editing and adjustment of images. You can adjust specific areas and have the freedom to make color adjustments at any time, giving you creative control over your projects.
Frequently Asked Questions
How do I create an adjustment layer in Photoshop Elements?Click on "Adjustment Layer" in the menu and select the desired effect option, e.g., "Hue/Saturation".
What can I do if I accidentally paint outside the desired area?If you accidentally painted outside the area, you can change the brush to black and paint back to hide the changes.
Can I adjust the settings of my mask afterwards?Yes, you can change the settings of the mask and the adjustment layer at any time to optimize your desired adjustments.
How can I check which areas of my mask are active?Hold down the "Alt" key and click on the mask to make the current mask visible.


