Colors bring images to life and expression. In Photoshop Elements, using adjustment layers offers you great opportunities to creatively enhance your photos. You don’t need to reach for brushes and colors to give your image a new look. With the right application of adjustment layers, you can make impressive color changes that give your image a new dimension. In this guide, I will show you how to apply effective techniques for color design in Photoshop Elements.
Main insights
- Adjustment layers allow for flexible color design.
- Using photo filters, you can adjust the color temperature of your image.
- Gradient mapping can achieve a creative look.
- Color saturation helps you control the vibrant or neutral tones in your image.
Step-by-Step Guide
1. Activate Photo Filters
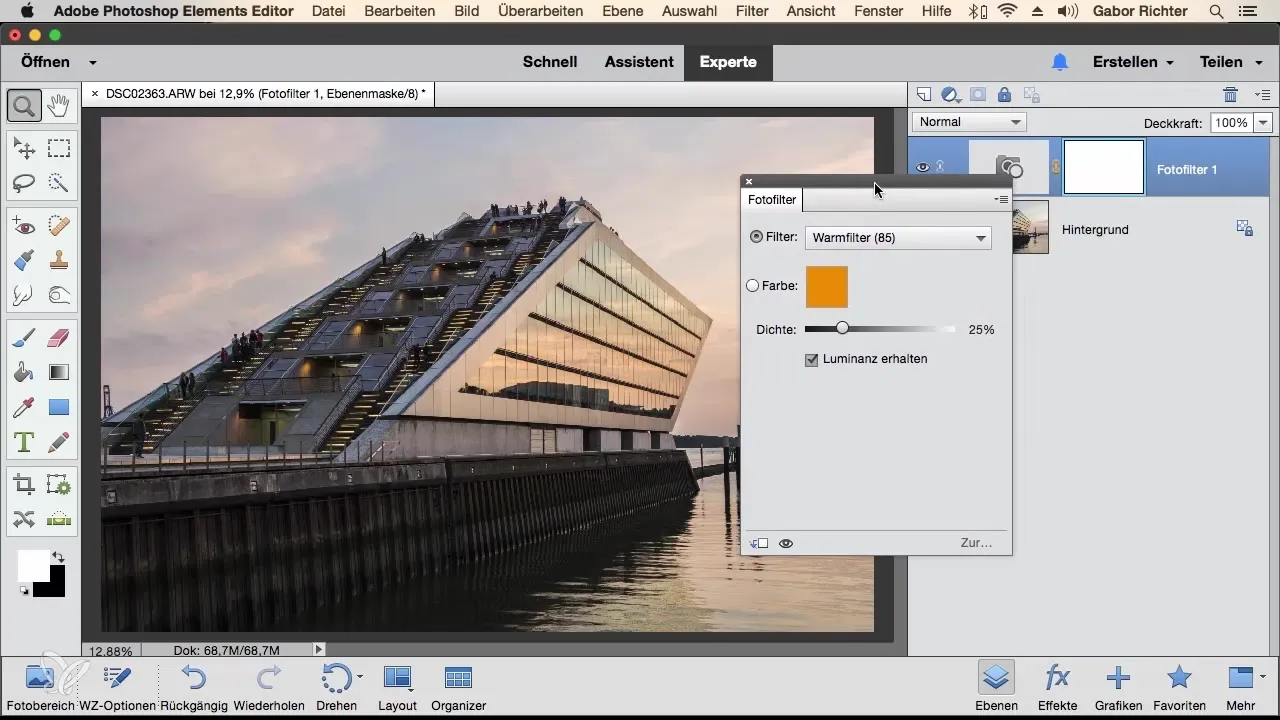
To optimize an image, start by activating a photo filter. When you select one, a new dialog box opens where you can adjust the color temperature of the image. Here you can choose whether you want to create a warmer or cooler atmosphere. A warm filter, for example, makes the image appear somewhat warmer overall. If you choose a cool filter, the coloring becomes cooler. Try different presets to achieve the desired effect.
2. Adjust Density and Luminance
In addition to the presets, you have the option to adjust the density of the filter. Increasing the density makes the filter more intense and can strongly affect the colors. I recommend keeping the luminance active so that the brightness in the image does not completely drown out. It is important to keep an eye on the brightness as it gives the image structure. Depending on your needs, you can adjust the value here to achieve the desired effect.

3. Add More Color Variations
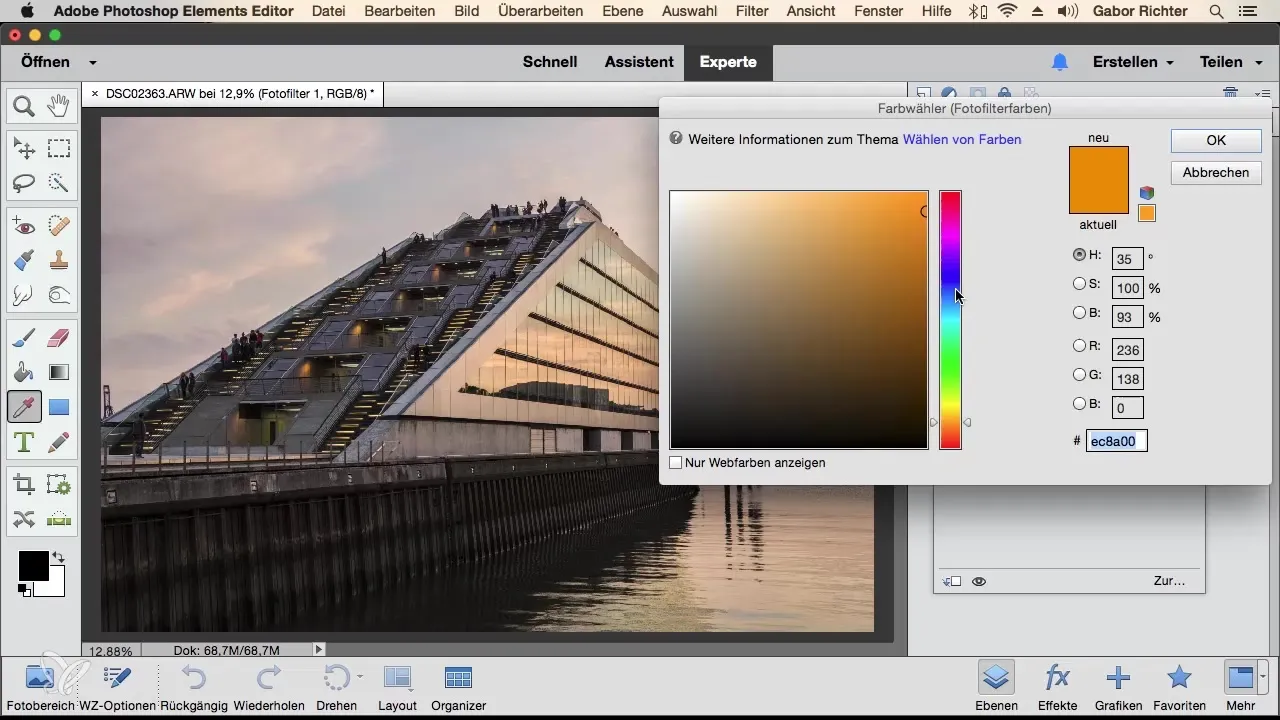
If you are satisfied with the base color of the filter, it is up to you whether you want to continue working with specific colors. You can pick a custom color using the color picker. This gives you the freedom to make the image more bluish or greenish. You can also change the saturation to make the look more dynamic. This opens the door to many creative possibilities.
4. Activate Gradient Mapping
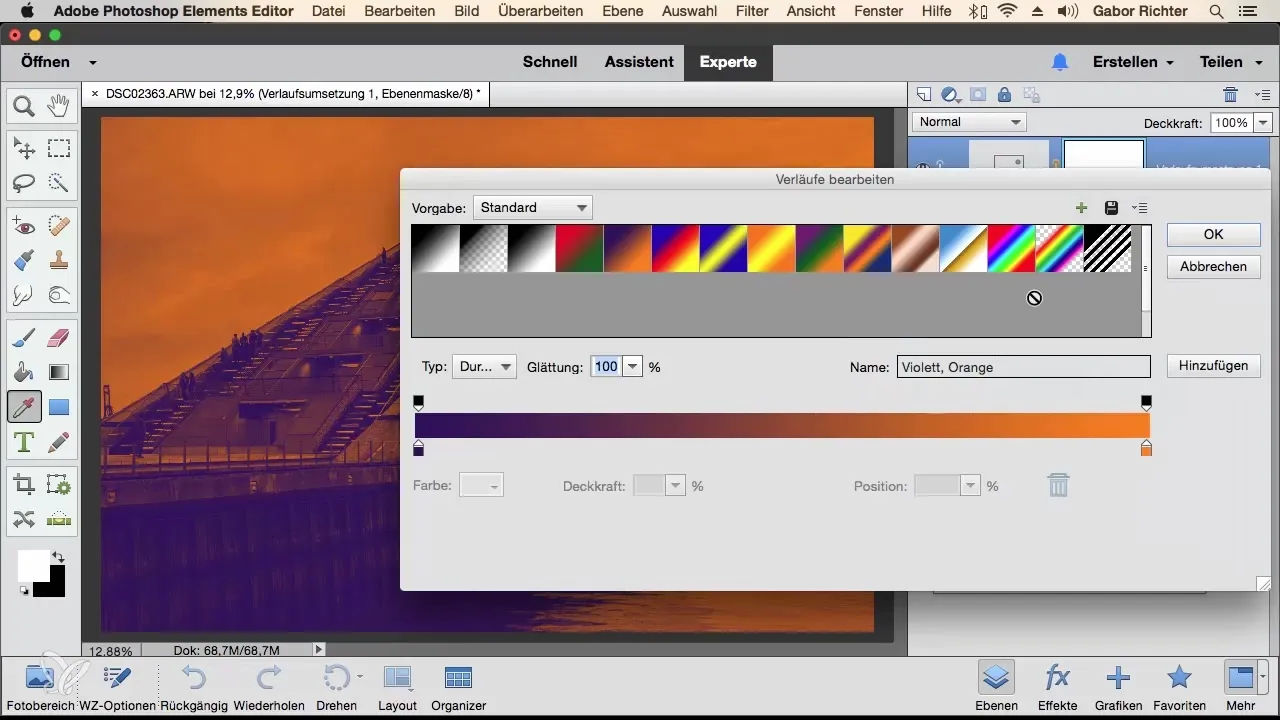
Now we come to gradient mapping, another creative adjustment layer. This gives your image a completely new character. First, it is converted to black and white. Don’t let that intimidate you; it's just the starting point. When you open the settings, you can discover interesting color gradients. There are several color combinations available that can make your image look very different. Experiment with different colors and keep clicking to get the required results.

5. Manually Adjust Colors
If you are not satisfied with the default colors, you can also choose colors manually. You can determine the color proportions and achieve the blending of colors you like best. An interesting example could be a combination of orange and blue or violet and gray. The ability to go back at any step and adjust colors makes it easier for you to experiment and develop new looks.
6. Adjust Color Saturation
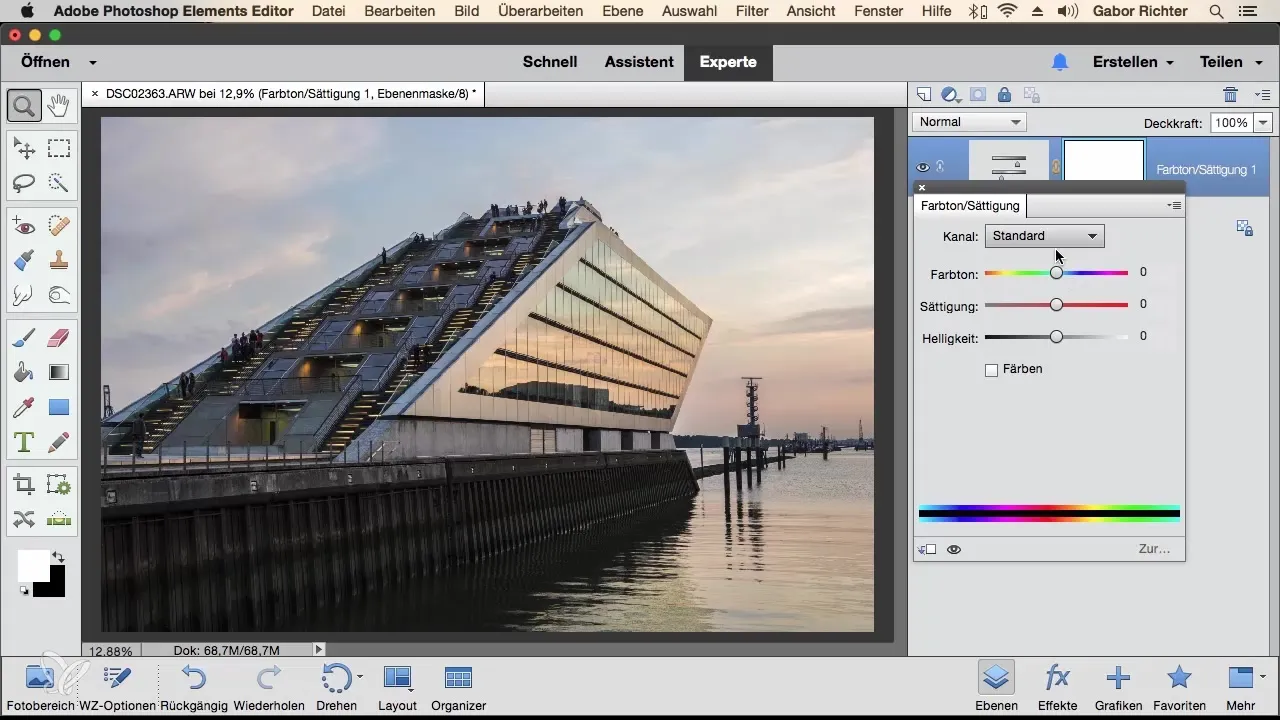
Next comes the adjustment of color saturation. This allows you to change the hue of your image. You can decrease or increase the saturation – thereby controlling the vibrancy of the colors. This function is particularly helpful when you want to achieve a subtler look or a stronger variety of colors. Use the sliders flexibly to achieve the desired effect without making the image look too exaggerated.
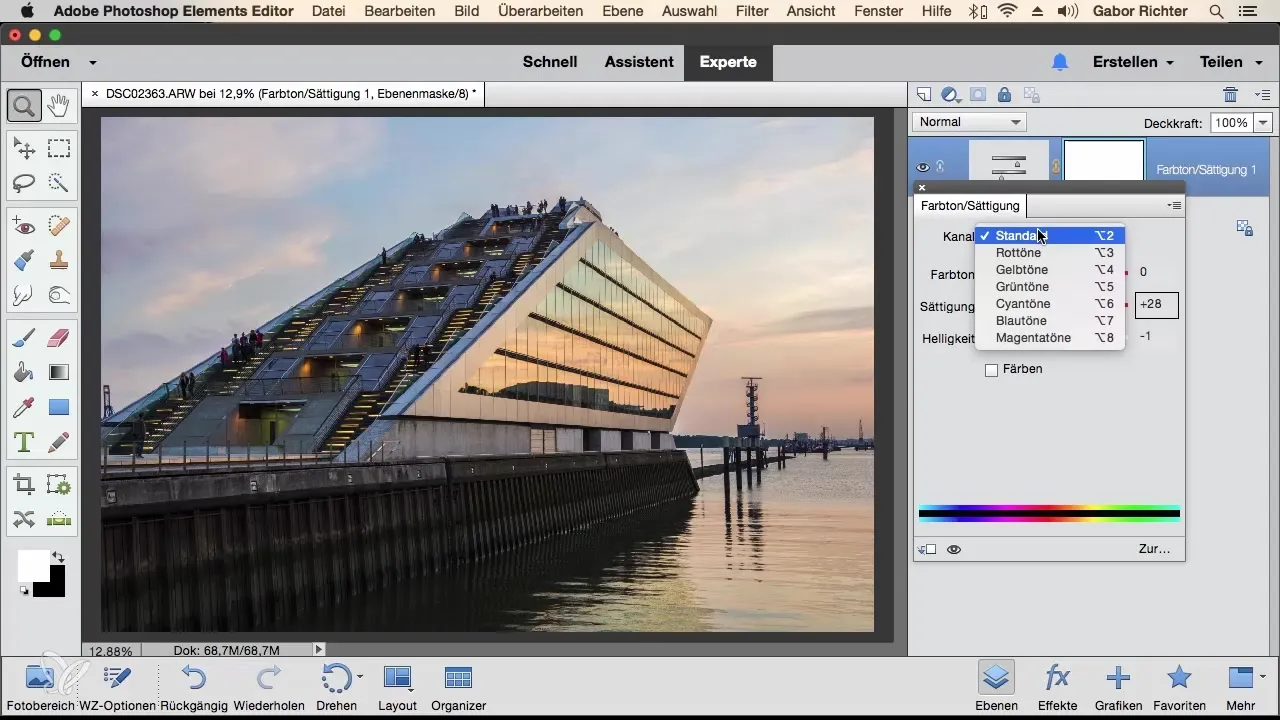
7. Adjust Individual Colors
You also have the option to selectively intervene in specific areas of the image. For example, if the red tones are too prominent, you can adjust them directly. This may be a bit of play and requires experimental work, but it is worth customizing your images in such a way. Here, you can also adjust the brightness of individual areas within the color channels if a part of the image appears too dark or bright.
Summary – Colors in Photoshop Elements: Creative Color Design through Adjustment Layers
In this guide, you learned how to creatively implement color designs in Photoshop Elements using adjustment layers. From photo filters to gradient mapping to adjusting color saturation – the possibilities are diverse. Experiment with the settings to give your images the desired atmosphere and create interesting visual effects.
Frequently Asked Questions
How do I activate adjustment layers in Photoshop Elements?To activate adjustment layers, go to the layers window and select the desired adjustment from the menu.
Can I change the effects of my adjustment layers at any time?Yes, adjustment layers are flexible. You can change or adjust the settings at any time.
How can I change the colors in a black-and-white image?With gradient mapping, you can convert a black-and-white image into a colored representation.
How does the adjustment of color saturation work?You can use the saturation slider in the color saturation setting to increase or decrease the color intensity.
Can I specifically adjust the colors of individual areas?Yes, this is possible by using the color channels and directly adjusting specific tones.


