Masks in Photoshop Elements are not only practical tools for masking in or out areas of an image but also offer many additional possibilities. In this guide, I will show you how to effectively edit and move masks to achieve impressive results. Get to know the various functions of masks and discover how you can optimize your image editing with simple steps.
Key Insights
- Masks can be activated and deactivated without being deleted.
- Processing color and black-and-white layers offers creative possibilities.
- Masks can be easily moved and inverted to bring different areas to the forefront.
Step 1: Deactivate Mask
To see how your image looks without the mask, you can deactivate the mask. Right-click on the mask and select "Deactivate Mask." This will make the mask appear red and strikethrough but it will not be deleted. You can reactivate the mask at any time by right-clicking and selecting "Activate Mask."

Step 2: Delete Mask
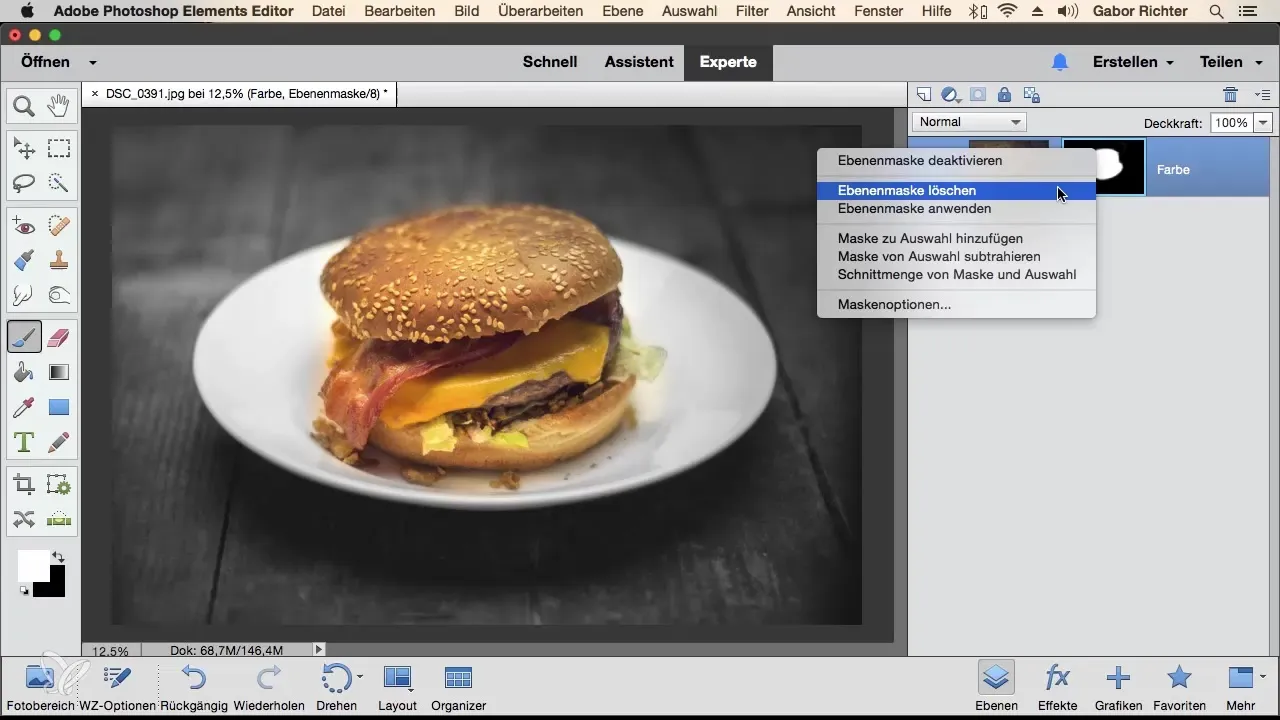
If you no longer need the mask and want to completely remove it, you can delete it as well. Right-click on the mask and select "Delete Layer Mask." Keep in mind that after deleting the mask, you will have to start over if you want to create a new mask.

Step 3: Move Layers
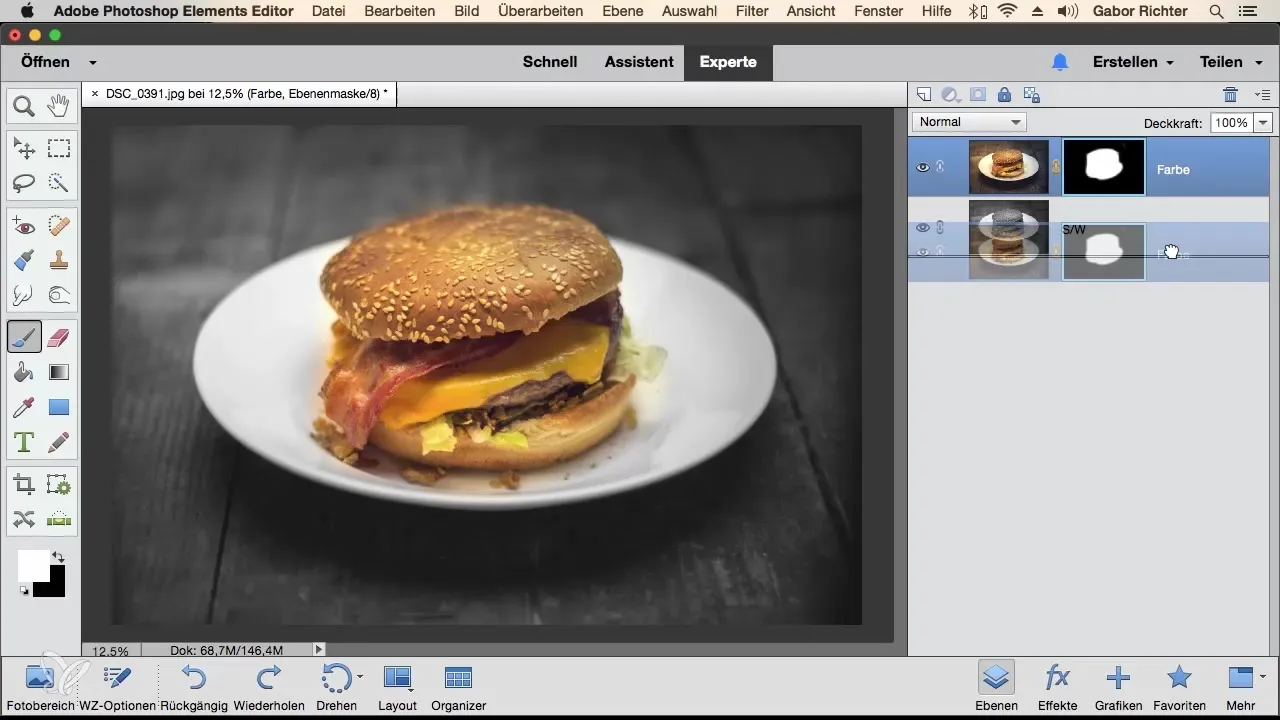
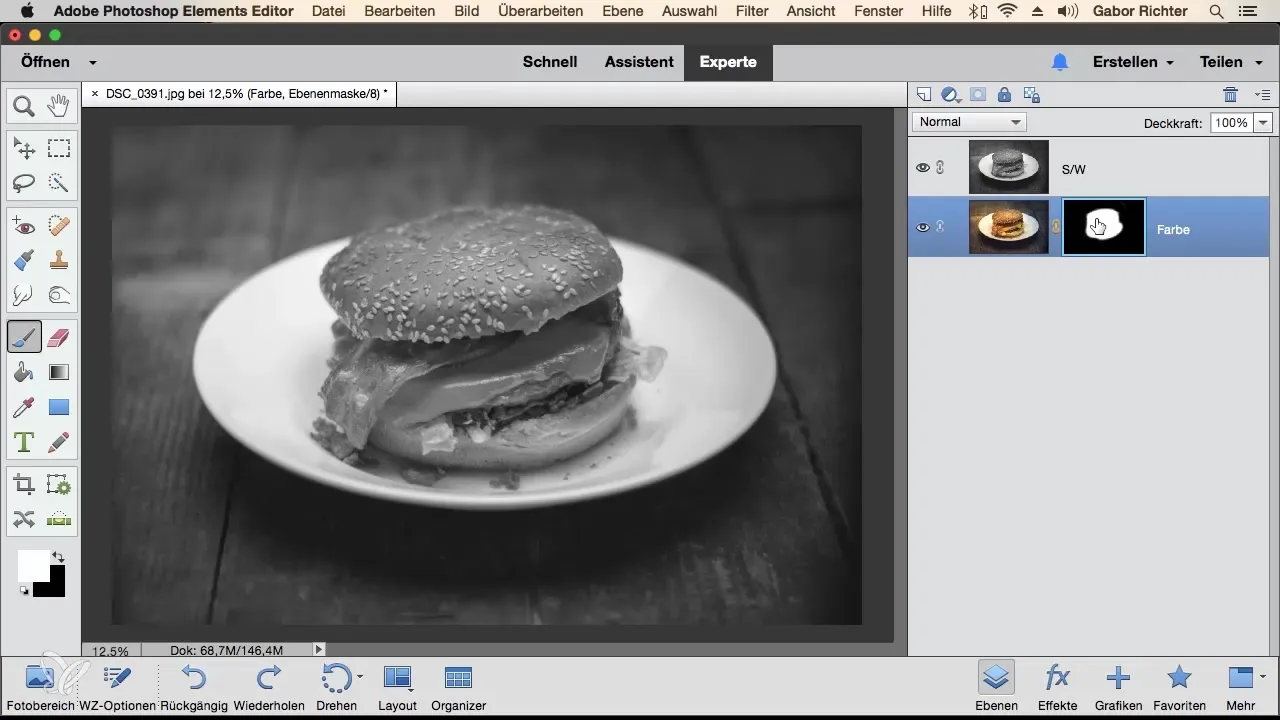
When using a color layer and a black-and-white layer, you can move the color layer down. Consider what happens: The main subject will then show that only the black-and-white image remains visible. Together with the background, you'll learn how the hamburger can be presented in color while the background remains in black and white.

Step 4: Move Mask
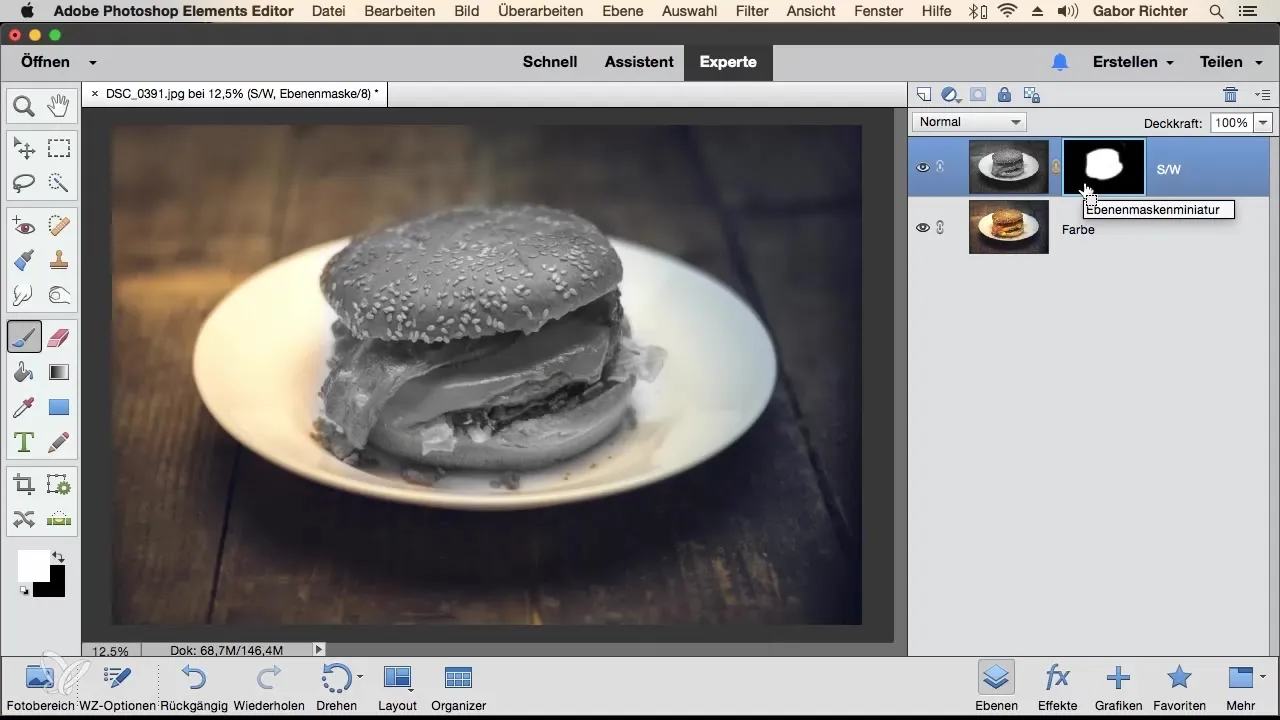
Individually, you can not only activate or deactivate masks but also move them. Click on the mask, drag it upwards to the layer where it should go, and release it. Now the hamburger will be displayed in black and white while everything else remains in color.

Step 5: Invert Mask
To invert the masks again, all red areas (black) will turn white and all white areas will turn black. You can quickly do this with the combination "Command + I" on Mac or "Ctrl + I" on Windows. You will notice that the hamburger is now in color while the background appears in black and white.

Step 6: Invert Masks Anytime
Remember that you can invert and move masks at any time. This opens up diverse design possibilities in image editing. Switching between the colors can help you achieve the desired result more effectively.
Summary - Optimally Utilizing Masks in Photoshop Elements
In this guide, you have learned how to effectively use masks in Photoshop Elements. You can deactivate, delete, move, and invert them to achieve amazing effects. The possibilities are endless, and the more you work with masks, the more creatively you can design your images.
Frequently Asked Questions
How can I deactivate a mask?You can deactivate a mask by right-clicking on it and selecting "Deactivate Mask."
What happens if I delete a mask?If you delete a mask, you will have to start over if you want to create a new mask.
Can I move masks?Yes, masks can easily be moved by clicking on them and dragging them to the desired layer.
How can I invert a mask?To invert a mask, press "Command + I" on Mac or "Ctrl + I" on Windows.
Can I invert masks anytime?Yes, masks can be inverted at any time, which opens up many creative possibilities for you.


